Imagine you're a construction manager overseeing a large-scale project, and you're constantly on the move. You need to be able to access your drawings, collaborate with team members, and manage punch lists, RFIs, and submittals no matter where you are. With Bluebeam Cloud, you can do all of this and more, right from your web browser or iOS device.
Bluebeam Cloud is a suite of web and mobile solutions that seamlessly connects with your documents and tool sets in Revu. With no setup or installation required, you can work from anywhere and easily access your tool sets and Studio Project files from Revu. You can also invite team members to mark up and collaborate in real time with the Markup Editor, making it easier than ever to stay on top of changes and keep everyone on the same page.
But that's not all. With Bluebeam Cloud's Field Tools, you can effortlessly manage punch, RFIs, and submittals on the go, so you can stay on top of your project even when you're not in the office. And with the ability to assign permission levels (Admin, Member, or Viewer) when inviting users to a project, you can be sure that everyone has the right level of access and control.
This blog post will help you discover how to add drawings and invite team members to collaborate on projects in Bluebeam Cloud.
Creating Project in Bluebeam Cloud
To collaborate on drawings
Step 1 - Select “Projects” in the left sidebar. Then, click the “New Project” button at the top right corner of the window.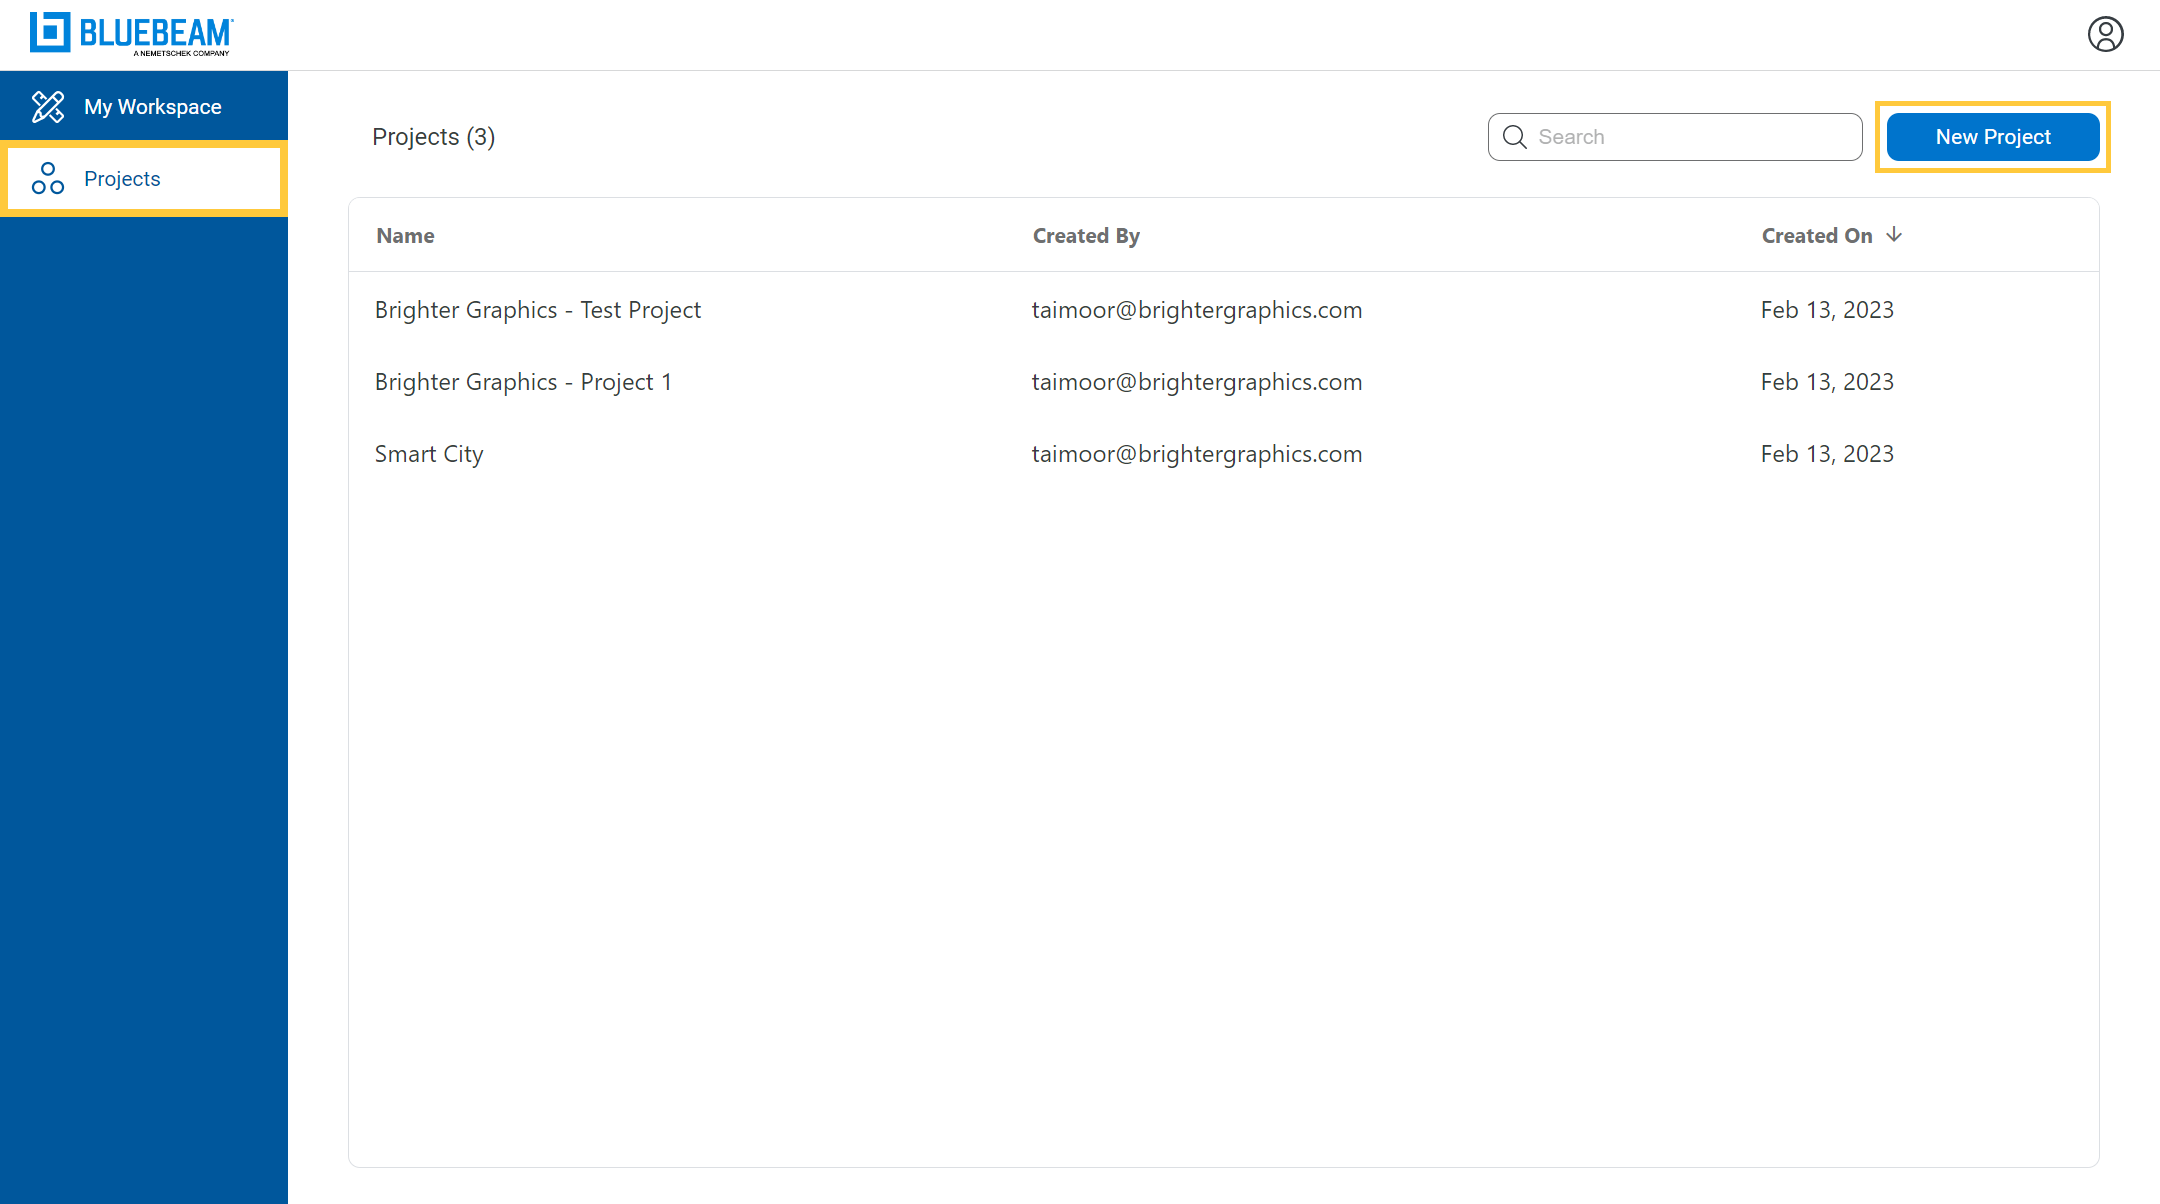
You require an active Bluebeam Revu Core or Complete subscription plan to start a new project in Bluebeam Cloud.
Step 2 – In the pop-up window, enter your project name and click “Create.”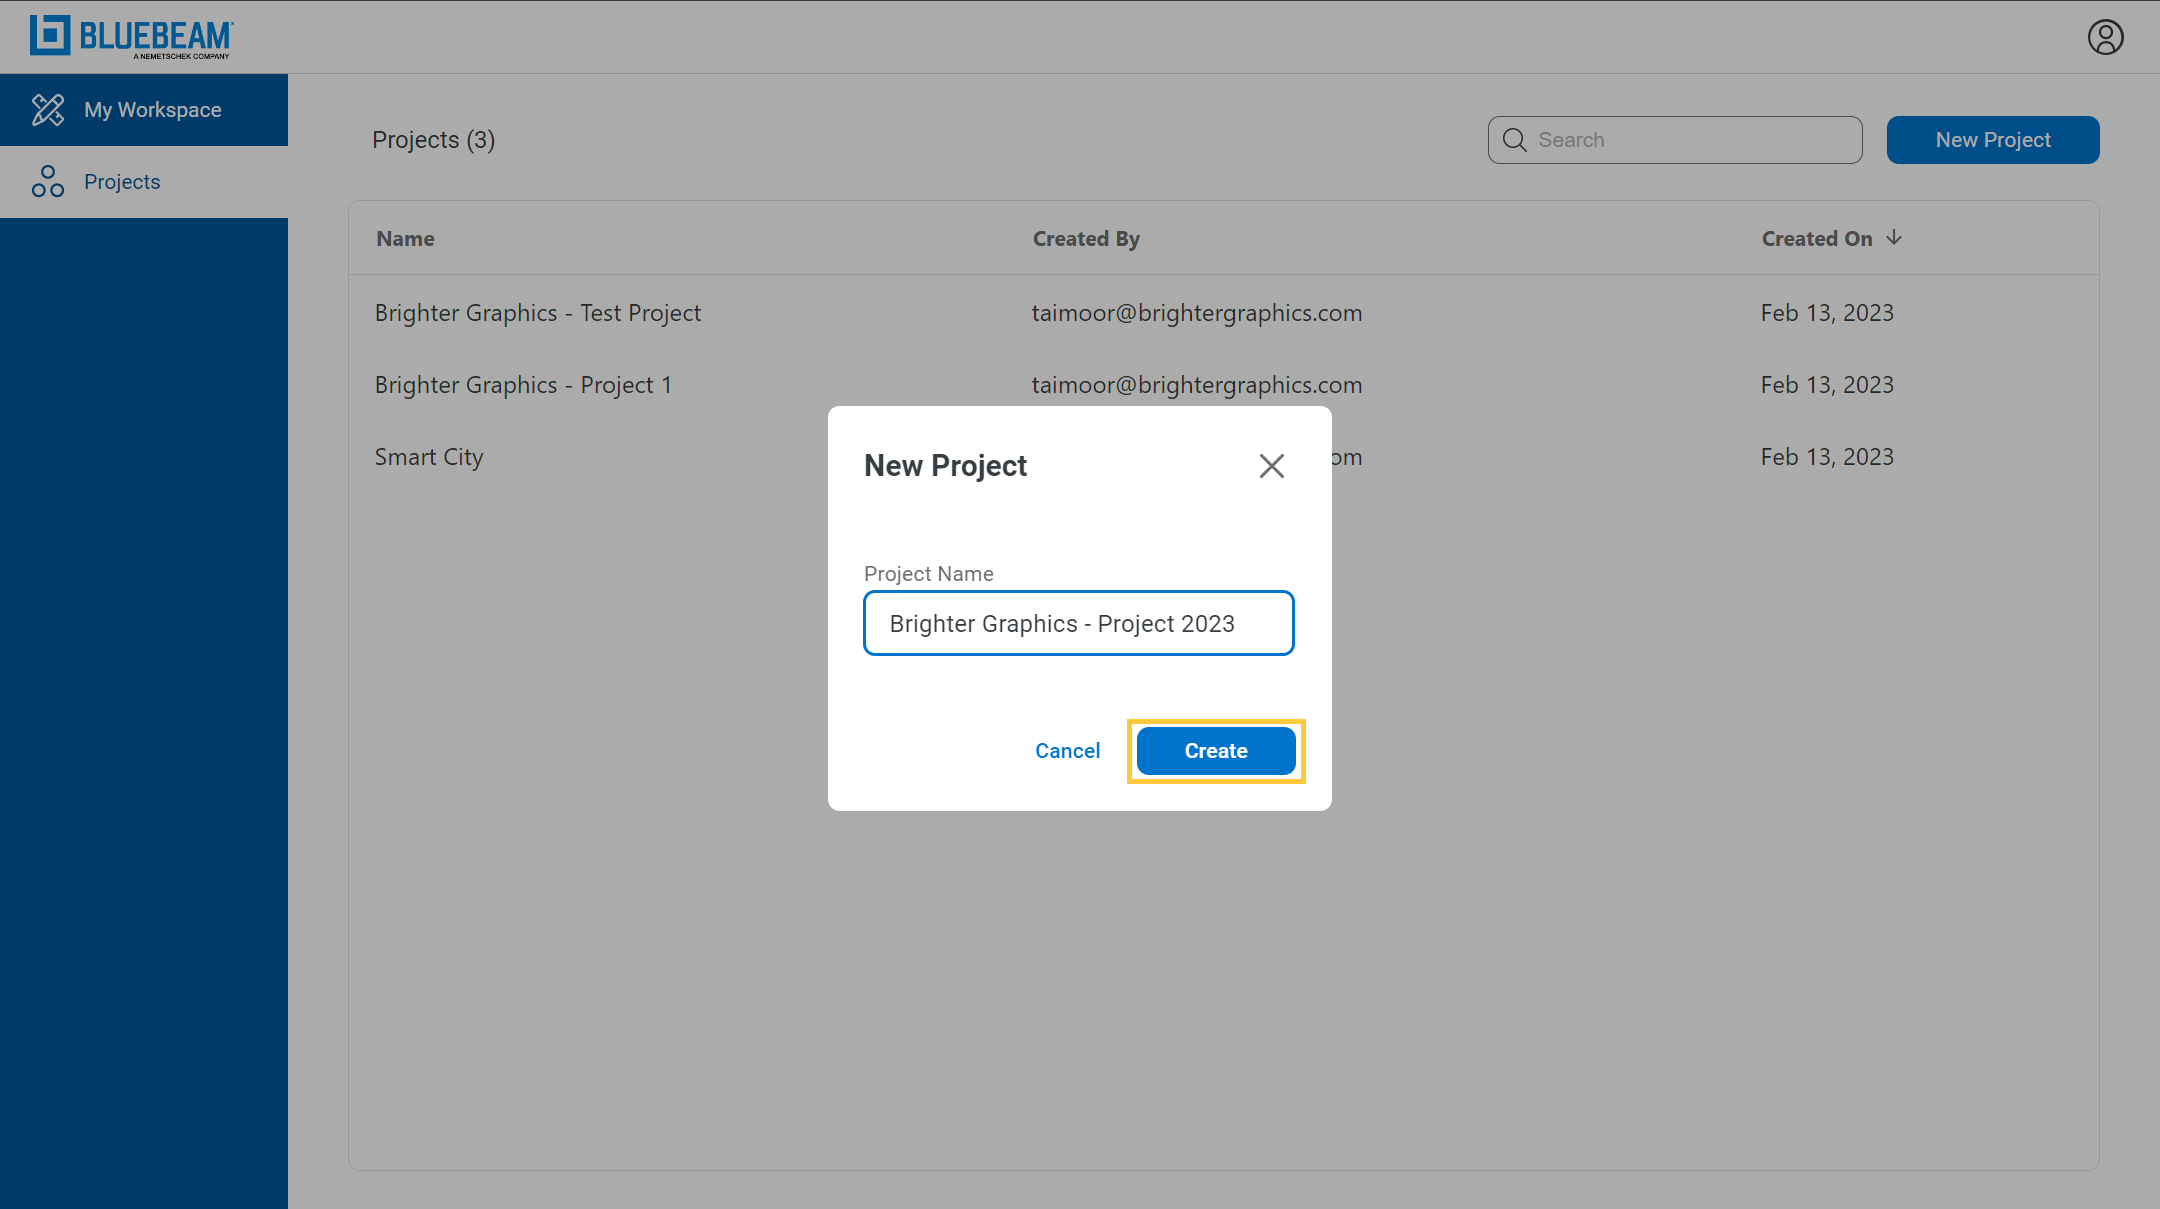
Your project will be created and appear in the Projects profile in Bluebeam Cloud.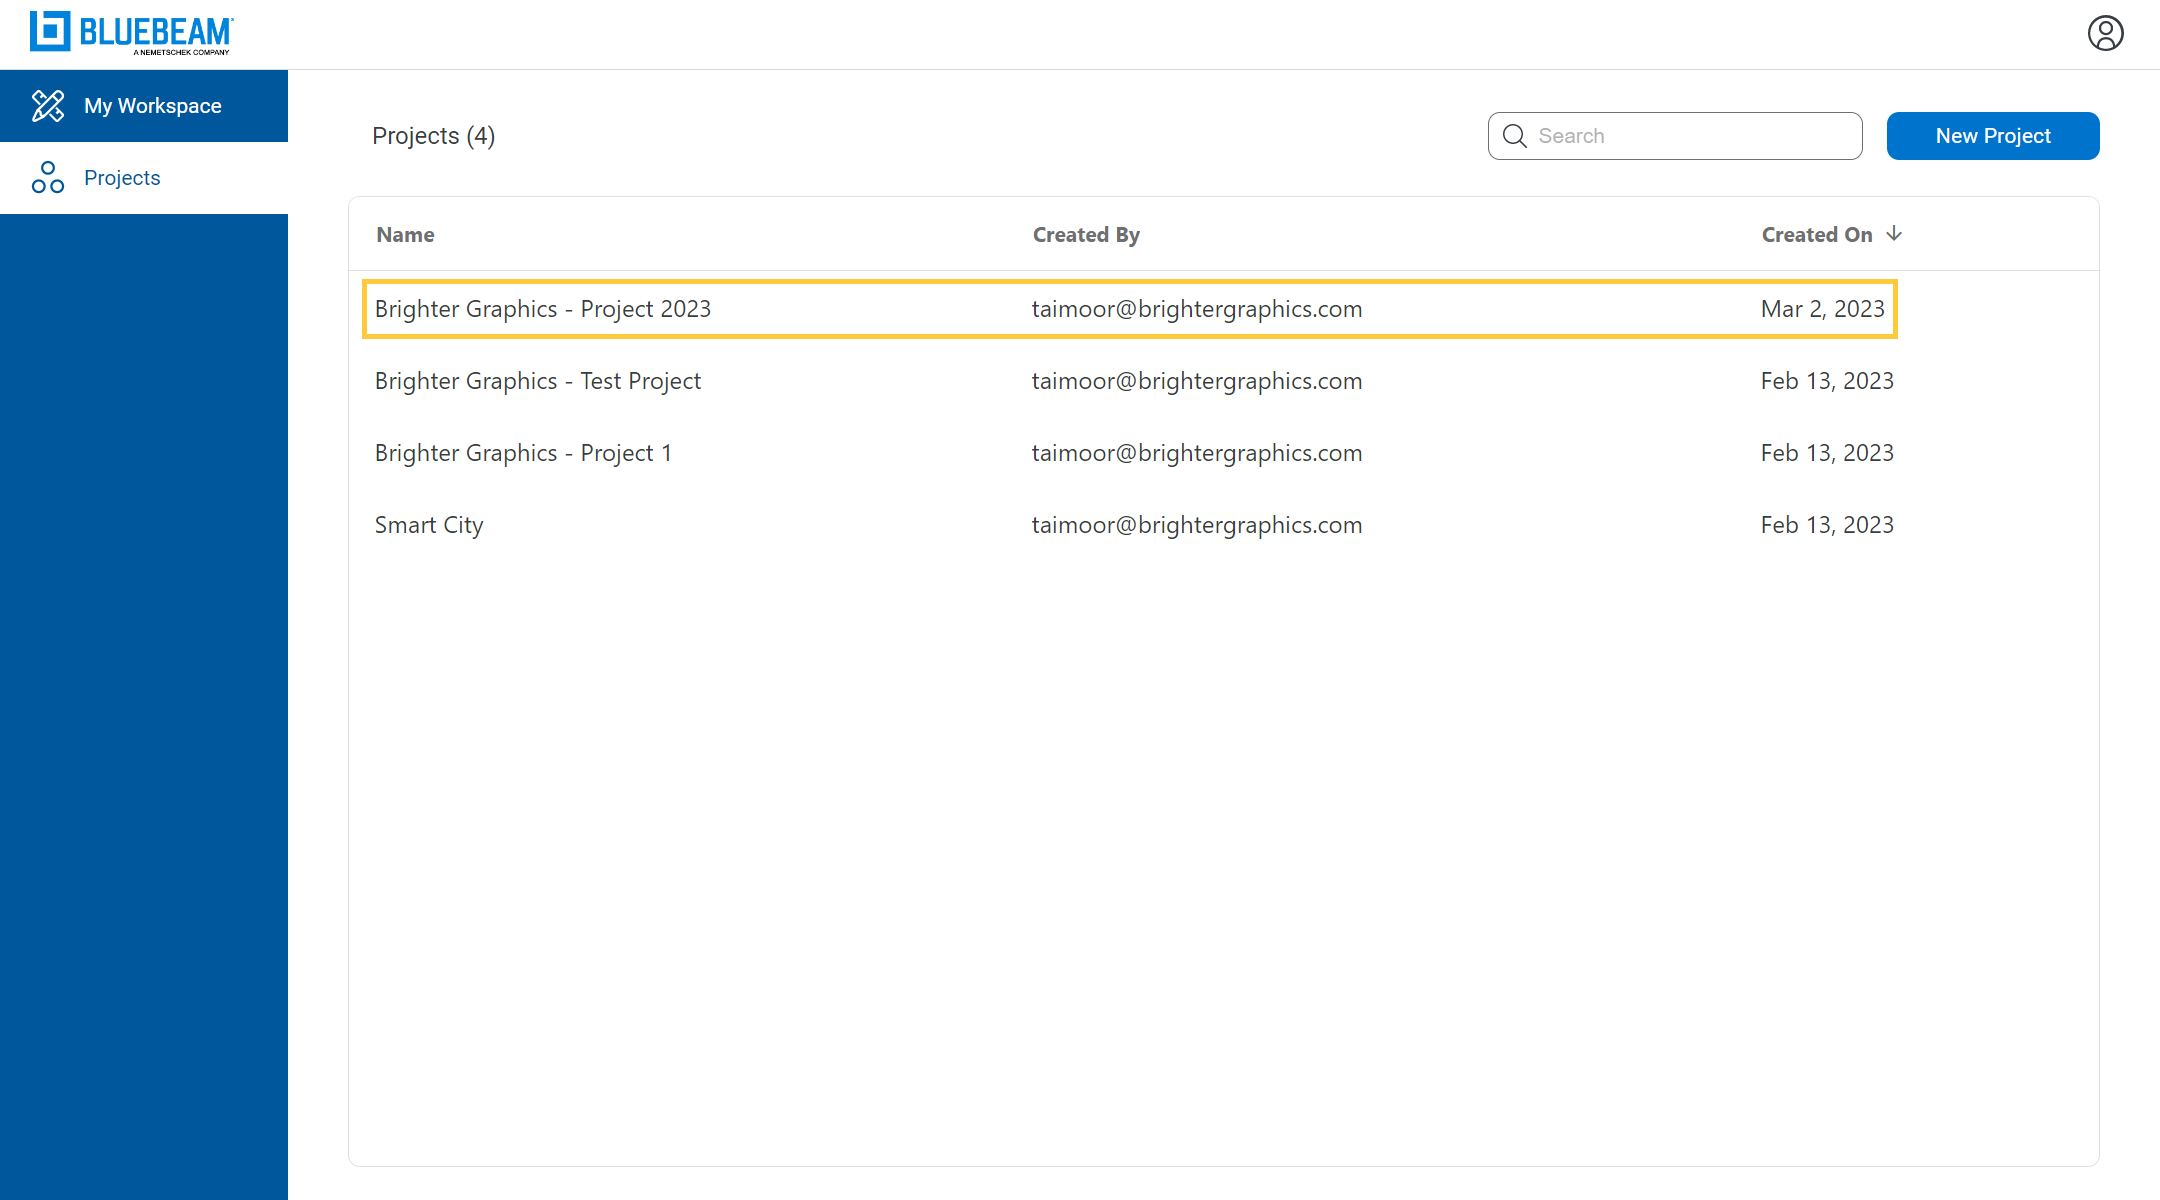
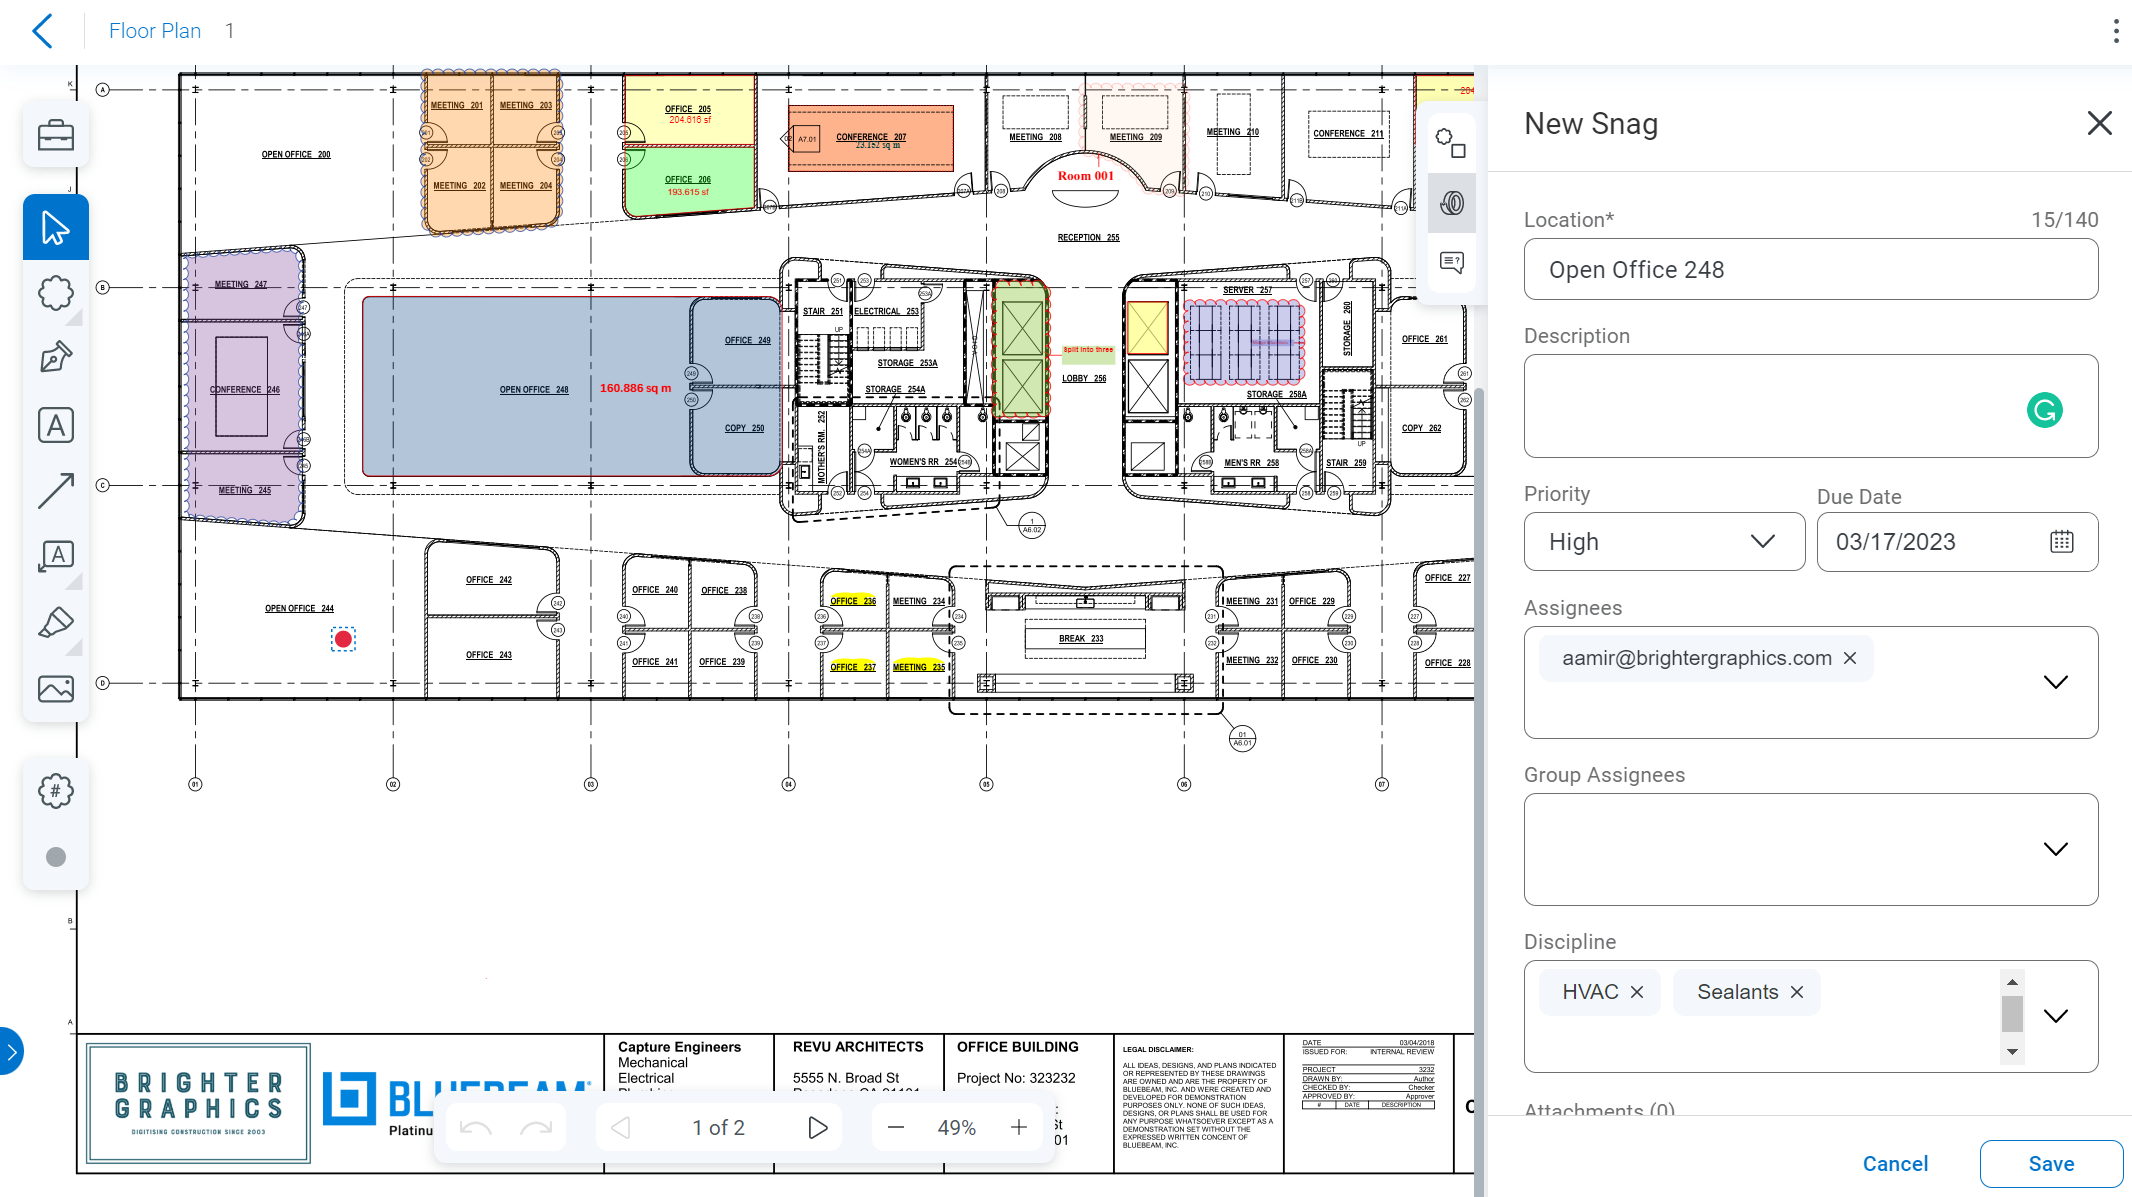
Step 3 – To access your project, double-click your project and you will reach the Project dashboard from where you can Add Location, Invite or View Team, Upload Drawings, Create Snag Item, and Create RFI.
Admin Panel
To invite team members to your Cloud Projects:
Step 1 – Click on the “Invite” button under Admin panel.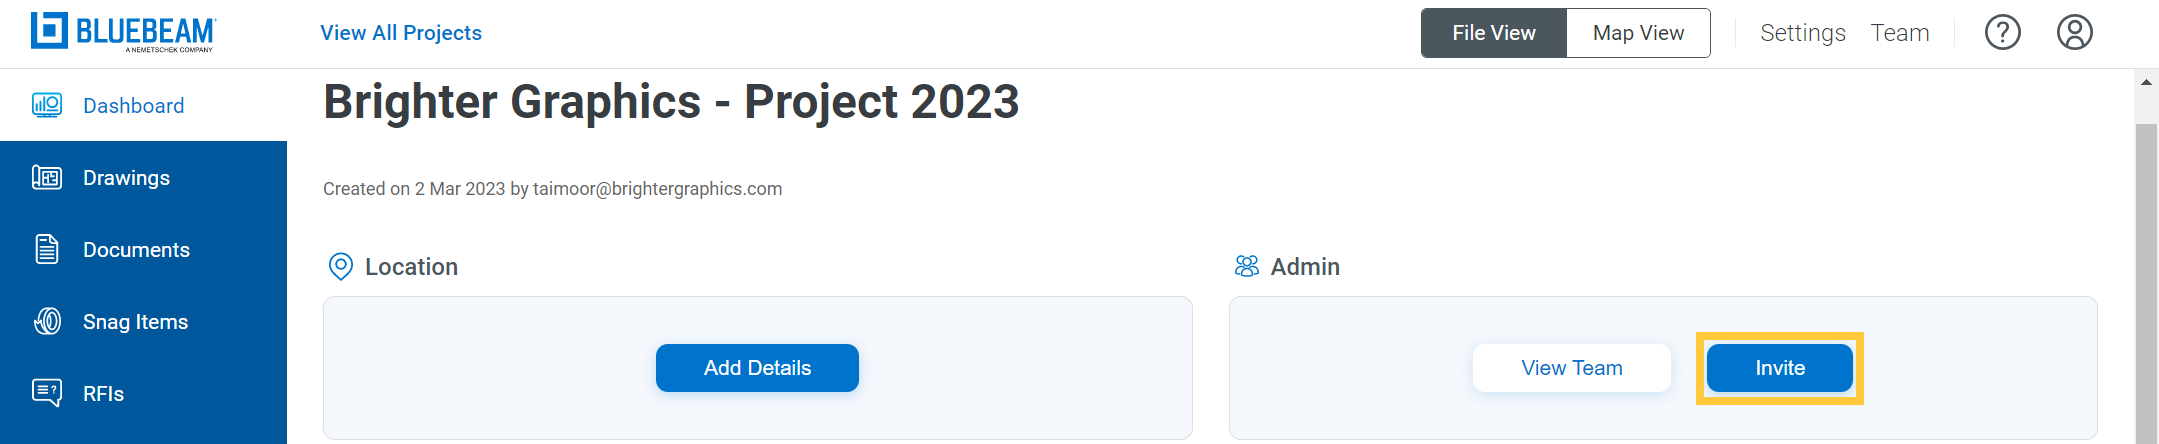
Step 2 – In the pop-up window, enter the user email for whom you want to invite. Set Permission level. In Bluebeam Cloud, Permission level (Admin, Member, or Viewer) must be assigned when inviting users to a project. You can also assign Group to your user. Grouping users can help you assign Submittals or RFIs to multiple team members by assigning the task to their designated group instead of individual assignments. Then, click “Invite.”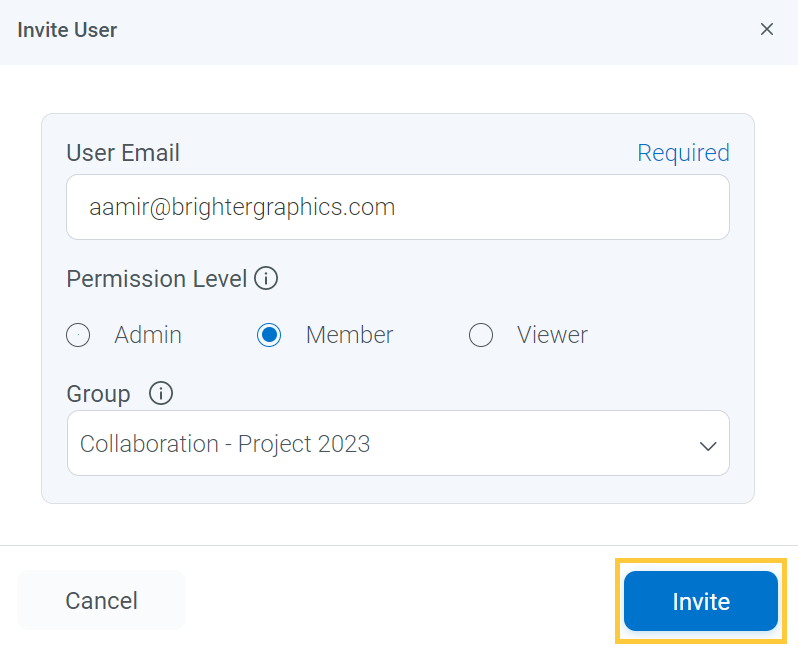
You can also “+Create New Group” directly from the Group Drop-down menu incase you don’t have predefined groups or edit your existing groups.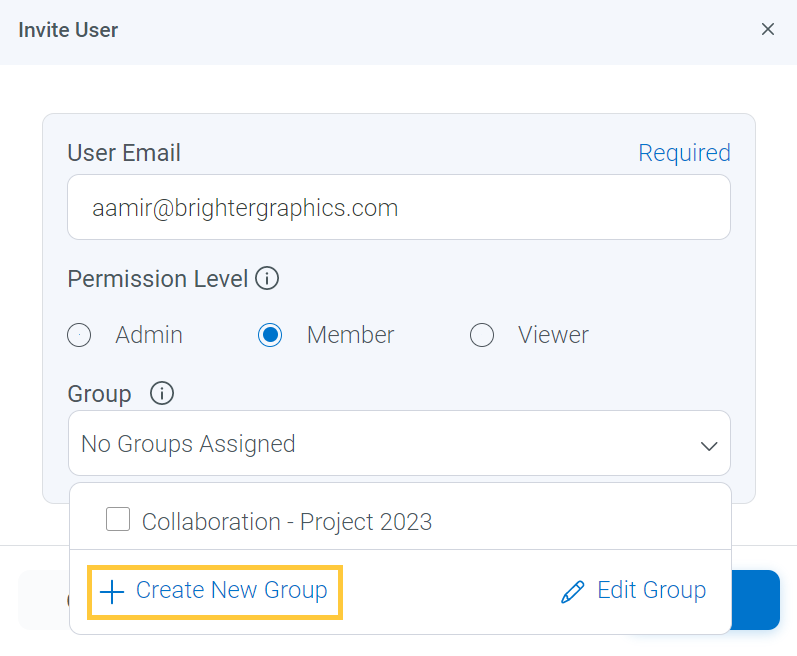
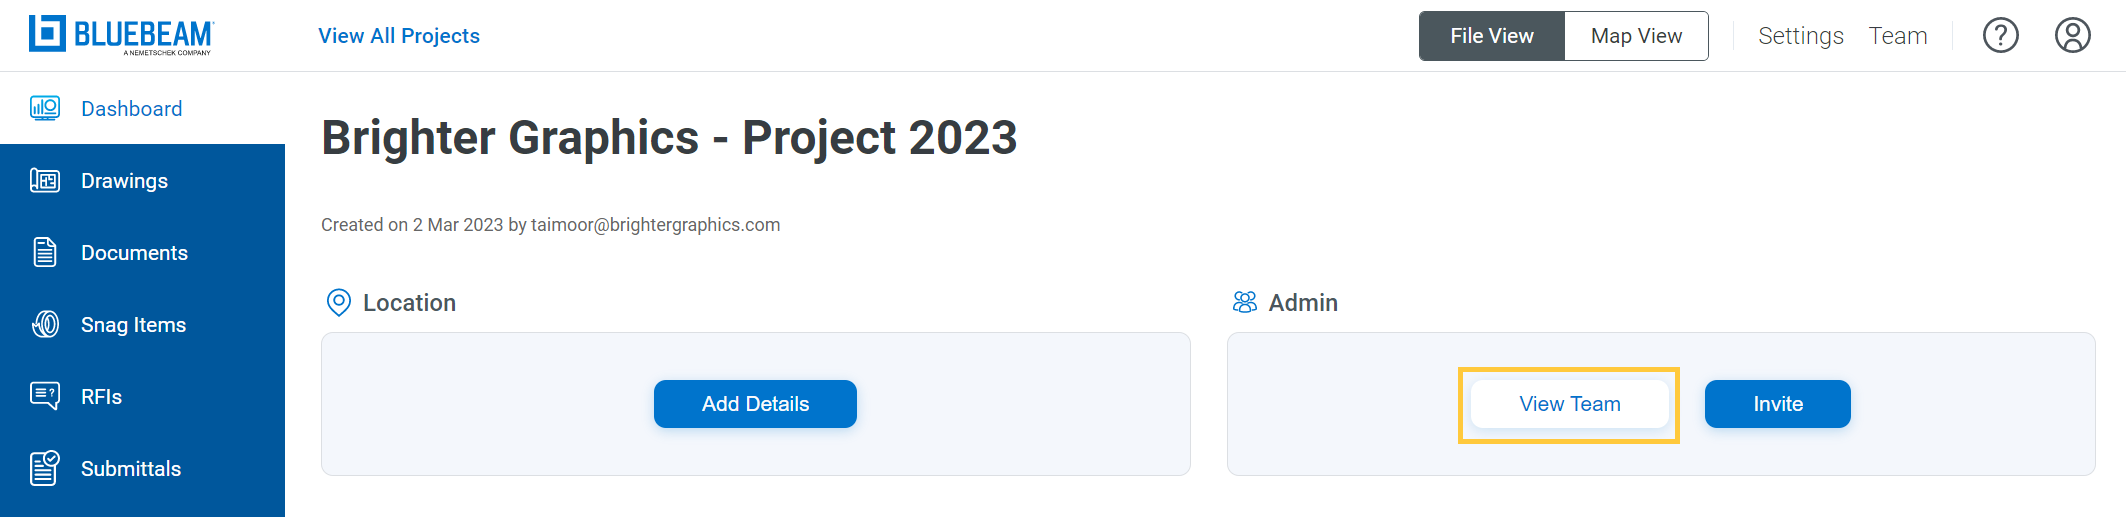
- Once done you can view your team members by clicking on the “View Team” button under Admin panel from Dashboard.
- From here, you can select your team member(s) to Edit or Remove (Click different users while holding CTRL key to select multiple users).
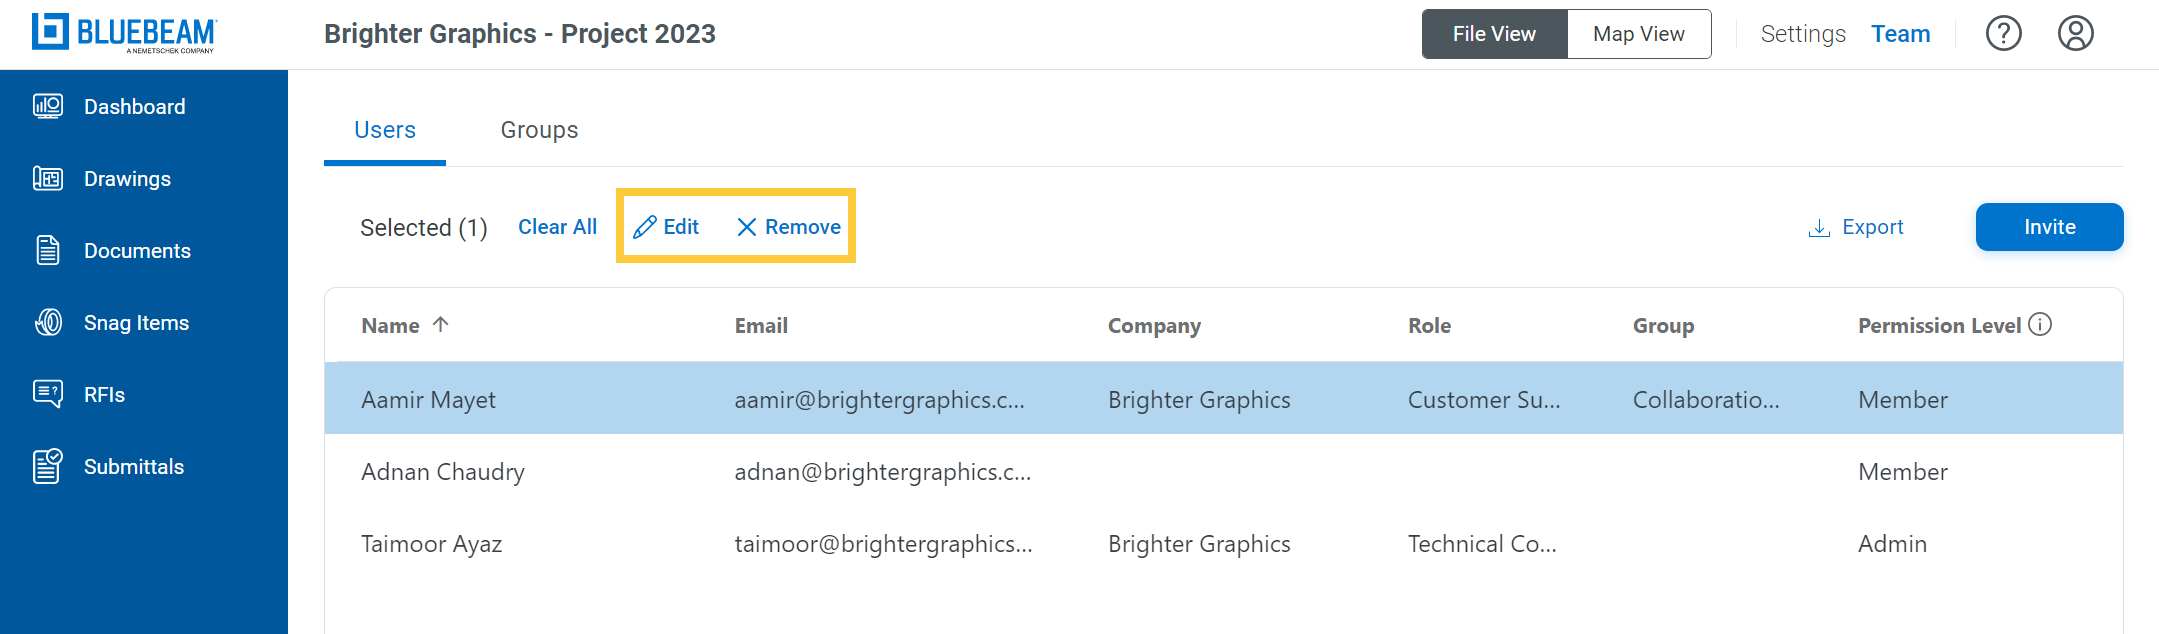
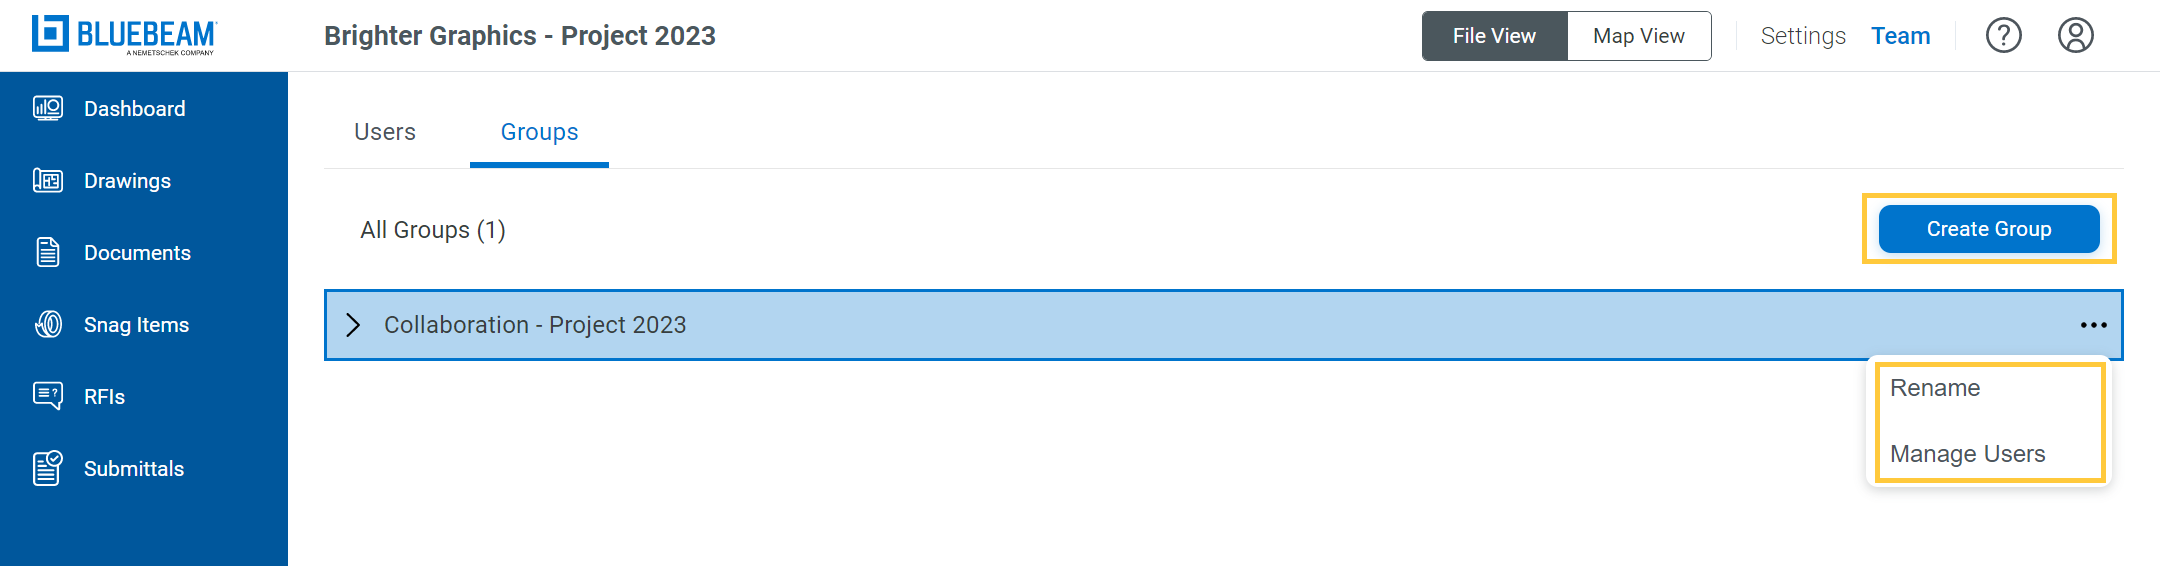
- Click on the Group tab alongside Users to Manage Users, Rename Group, or Create Group.
For users, permission levels define what actions they can perform. While all users in a project with View permission can access & view published drawings, certain actions are limited to Admin and Member permissions. To compare permissions, read our separate guide about User Permission in Bluebeam Cloud
Drawings Panel
To upload drawings to your Project.
Step 1 – Go to your Projects Dashboard and click the “Upload Drawings” button under the Drawings Panel.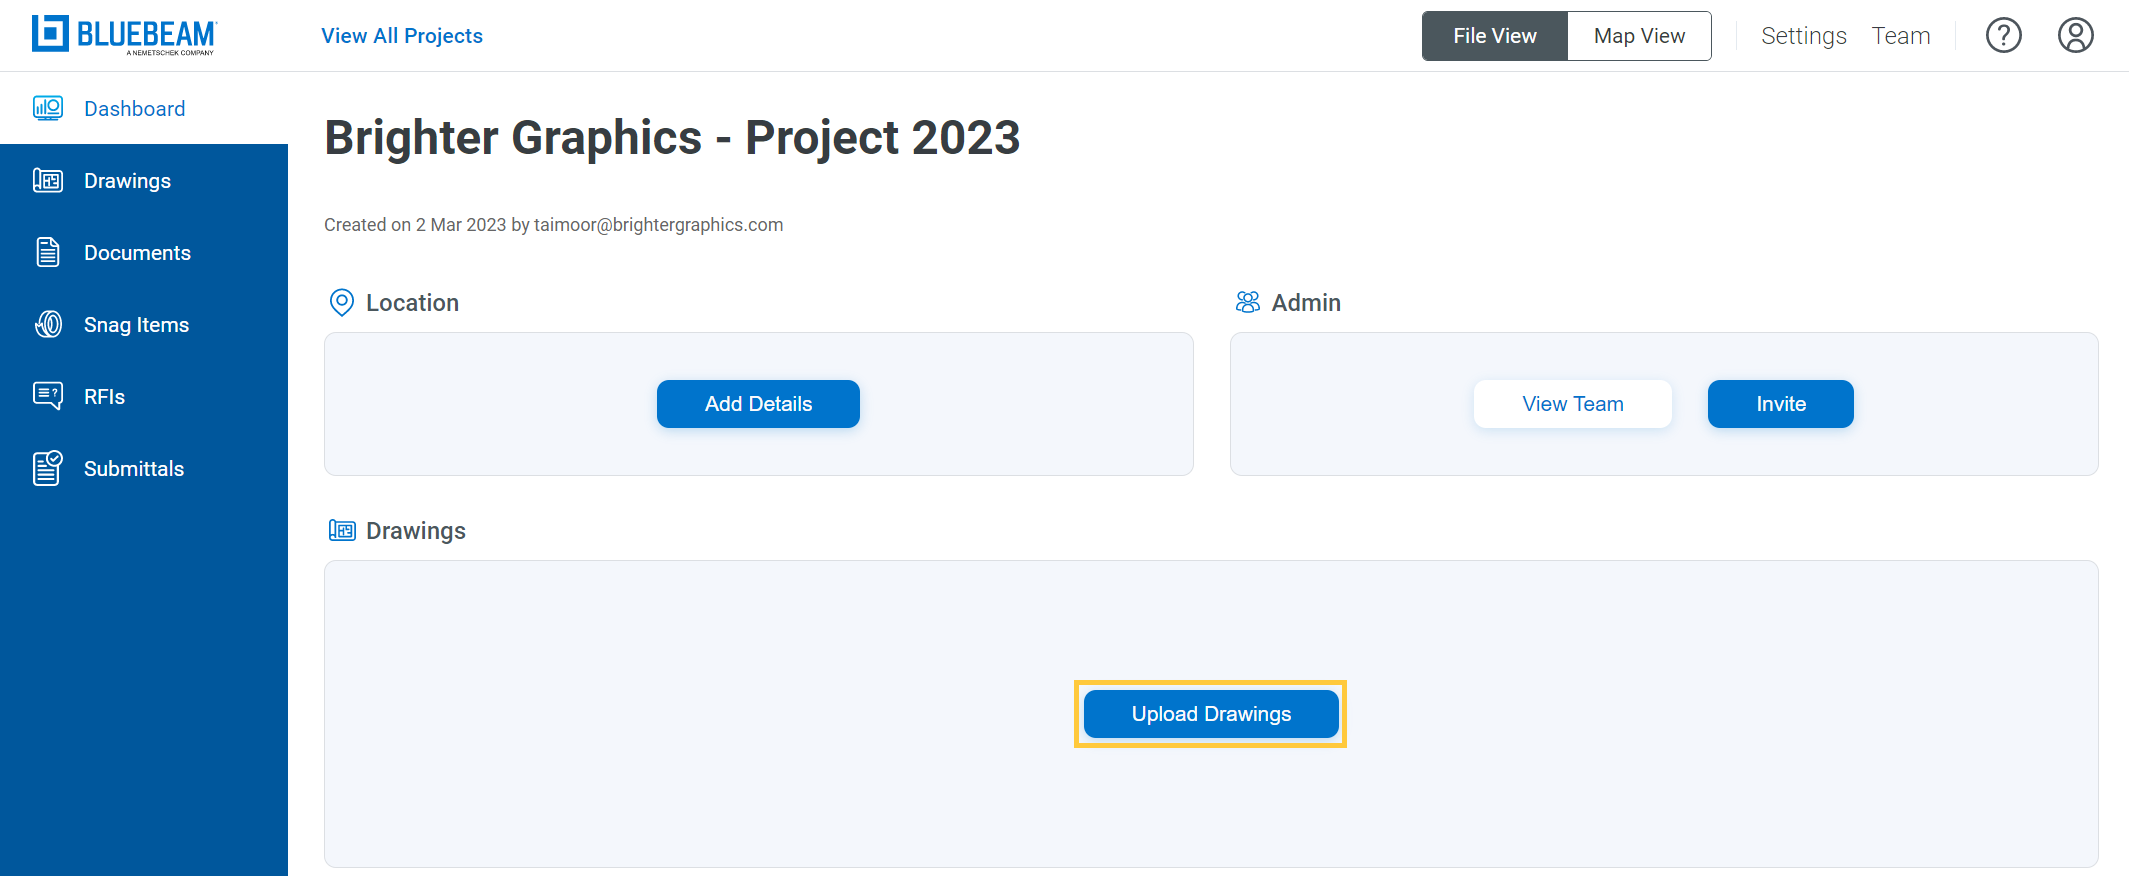
Step 2 – In the next session, click on the “Upload Drawings” button.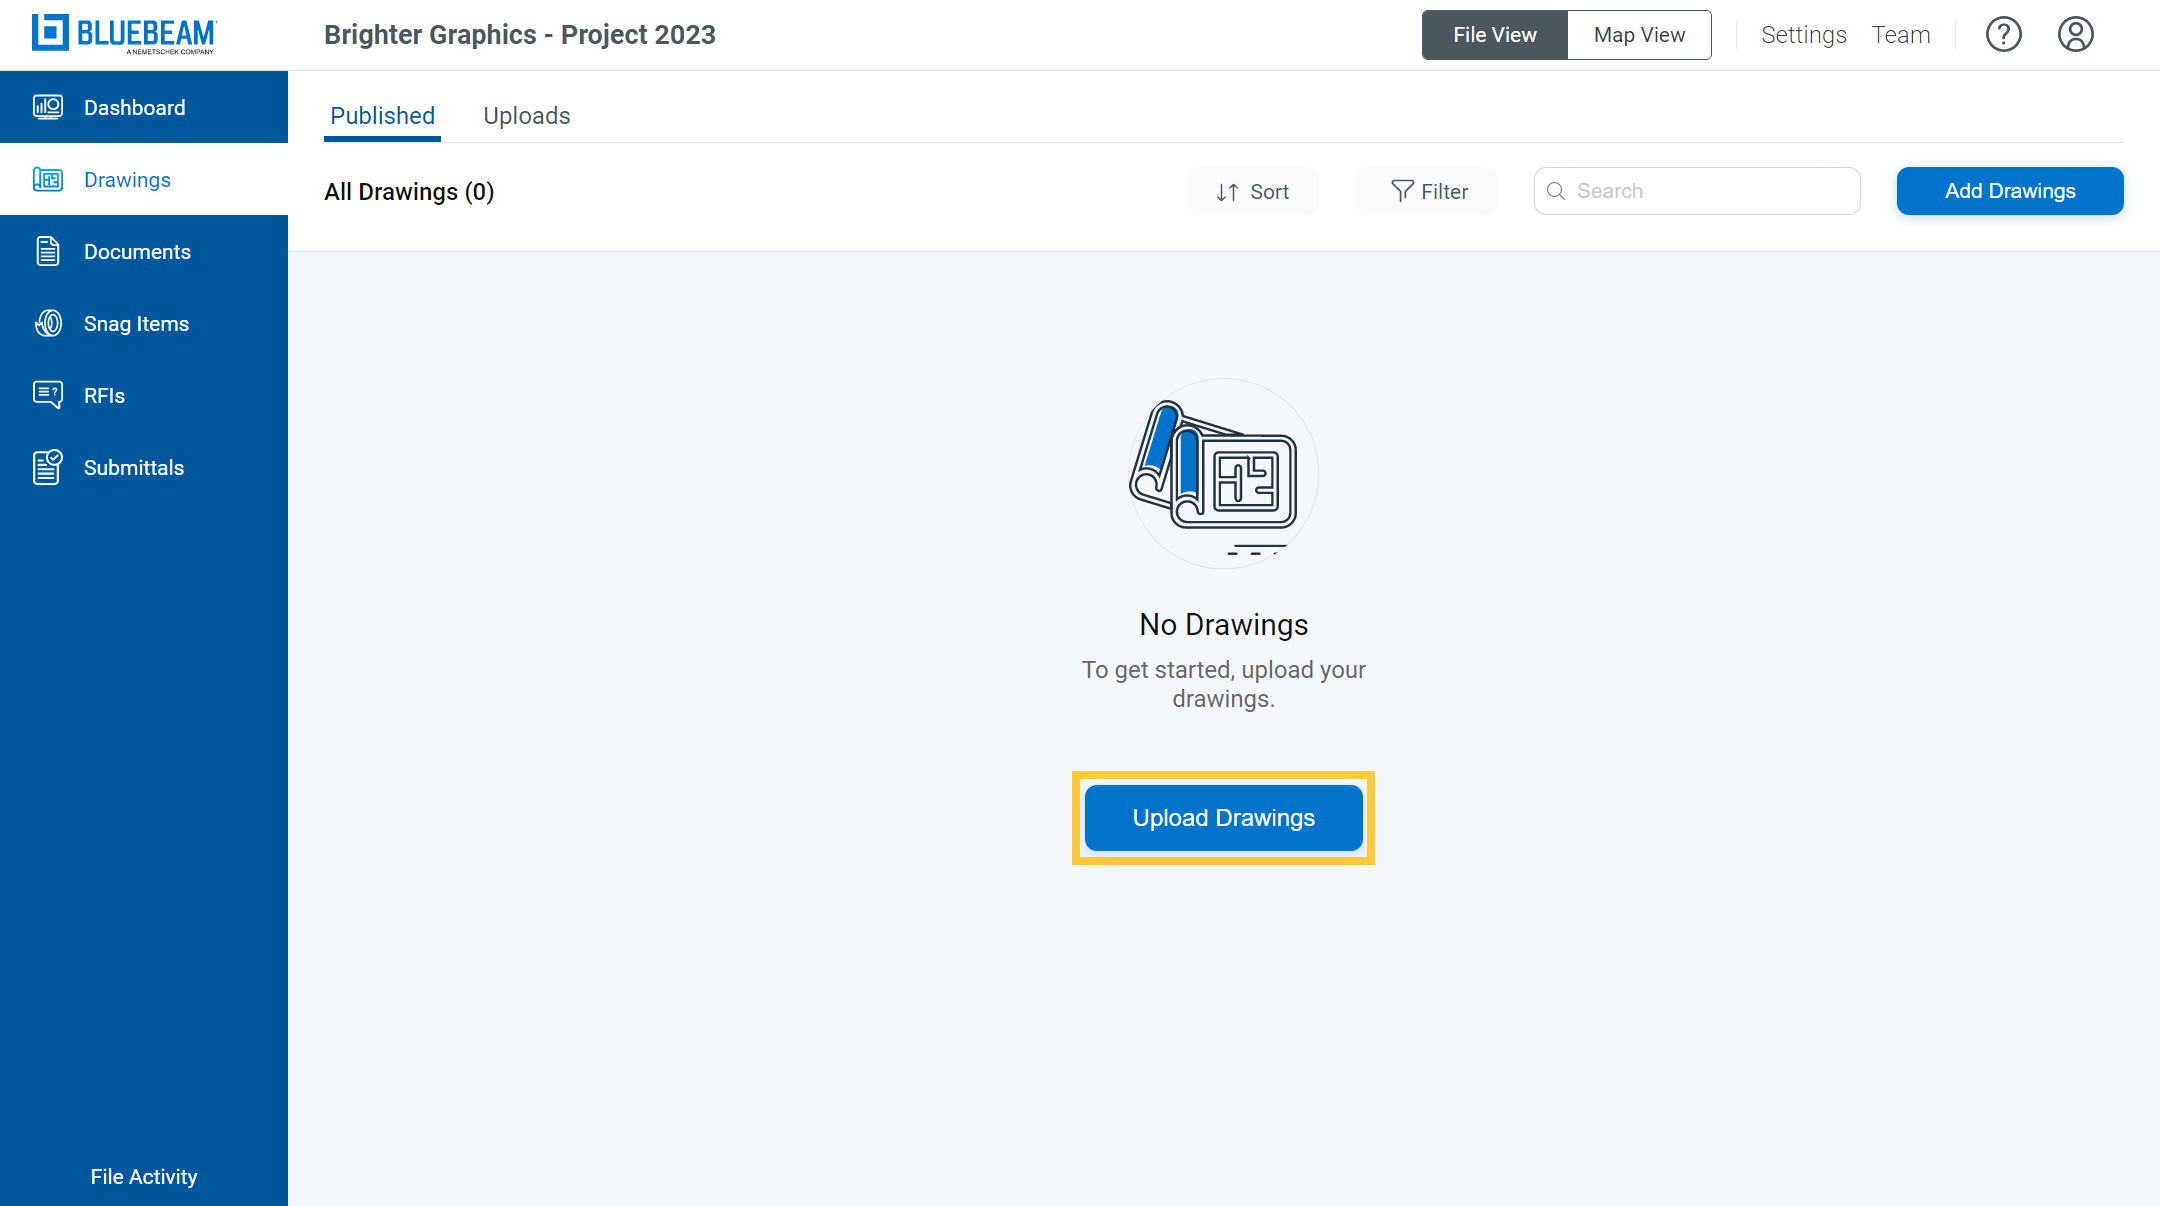
Step 3 – “Browse Files” or Drag and Drop your PDF file(s) to upload.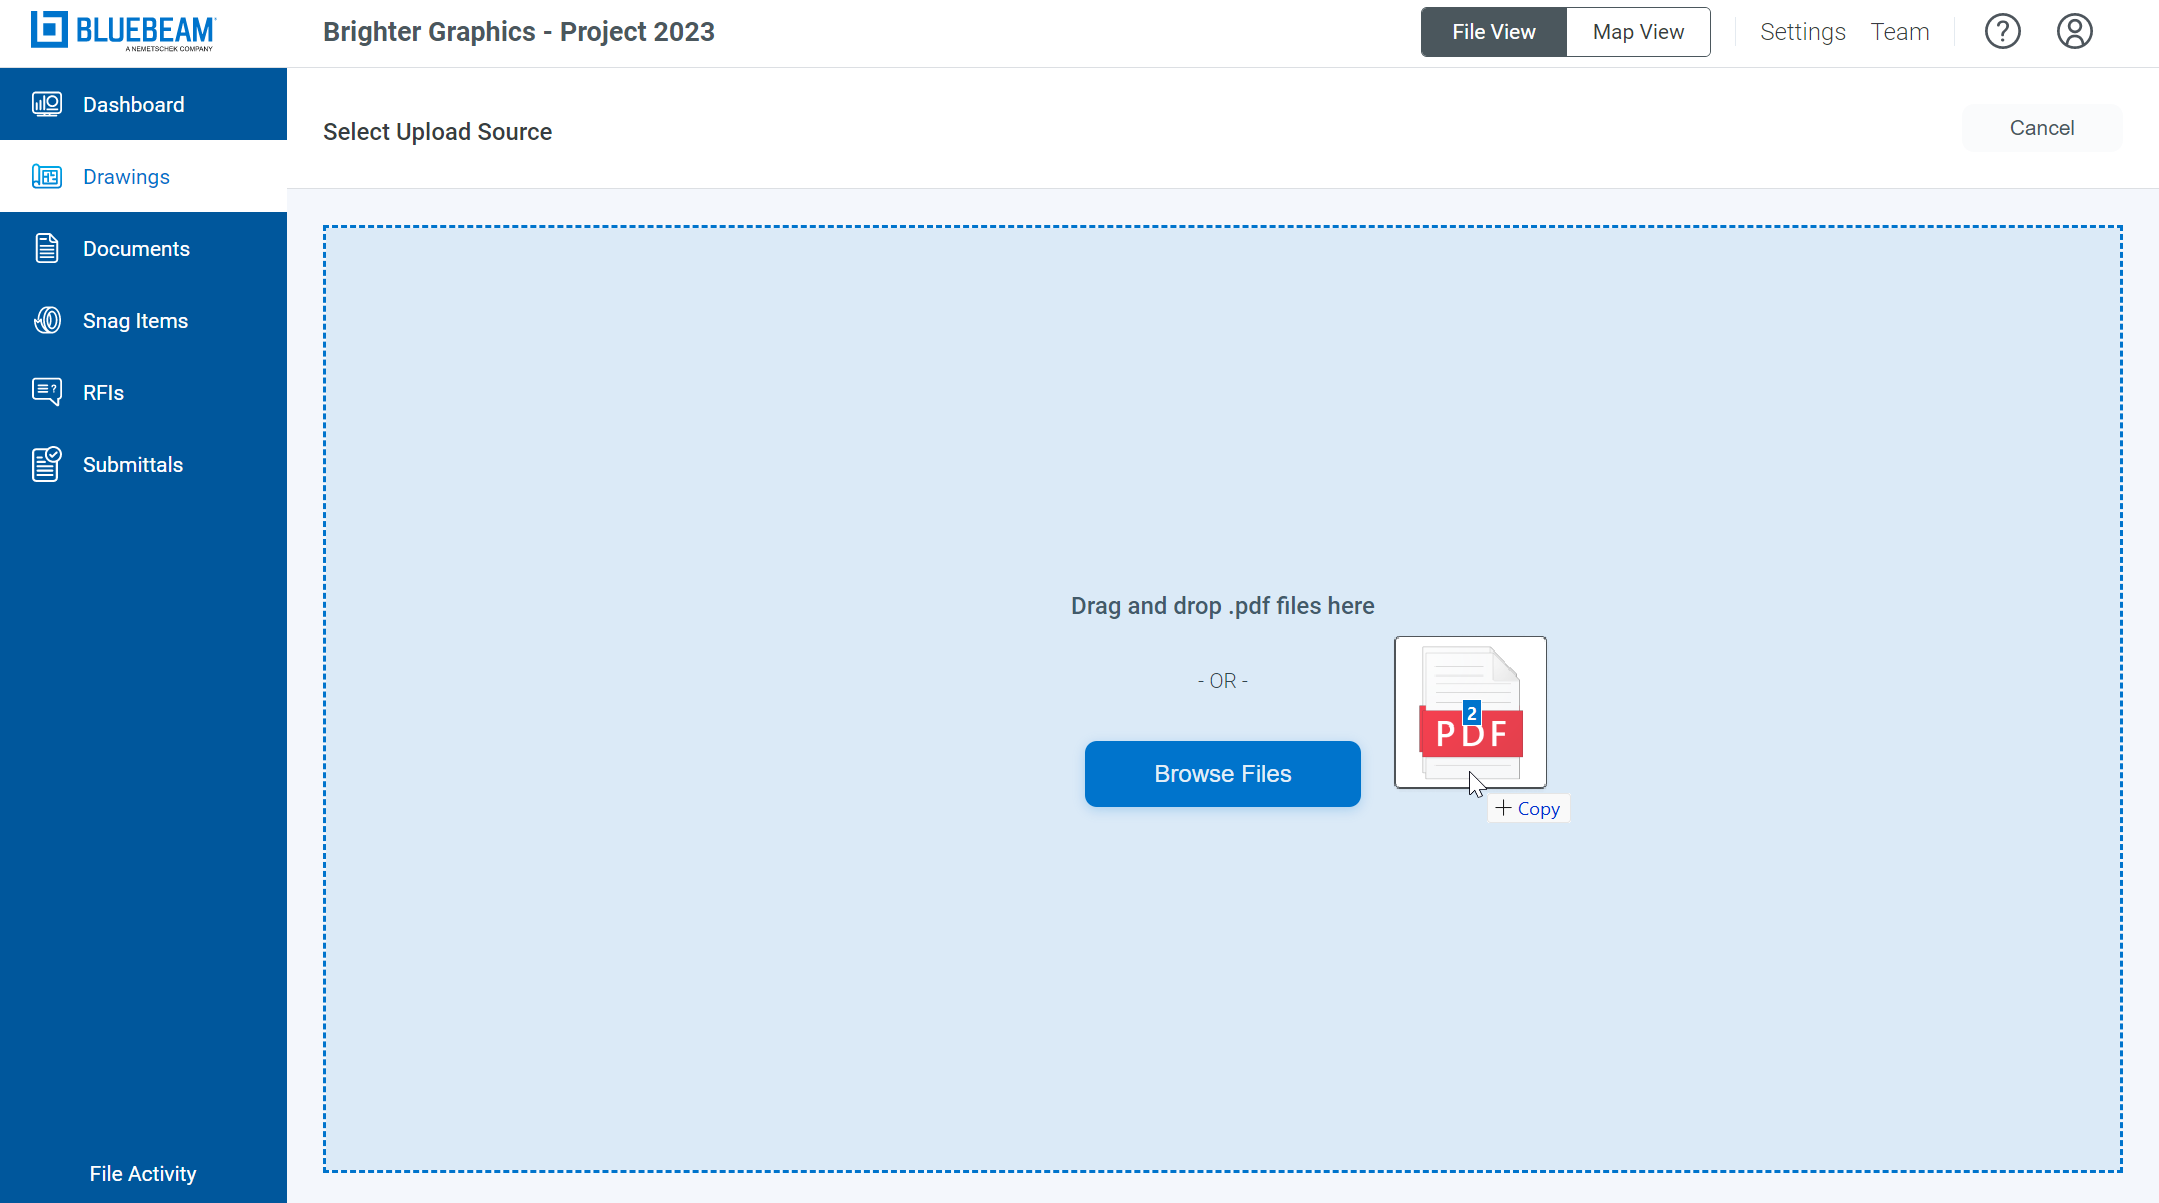
Step 4 – Select the file(s) you want to upload and click the “Confirm Upload” button from the top right corner of the Drawings panel.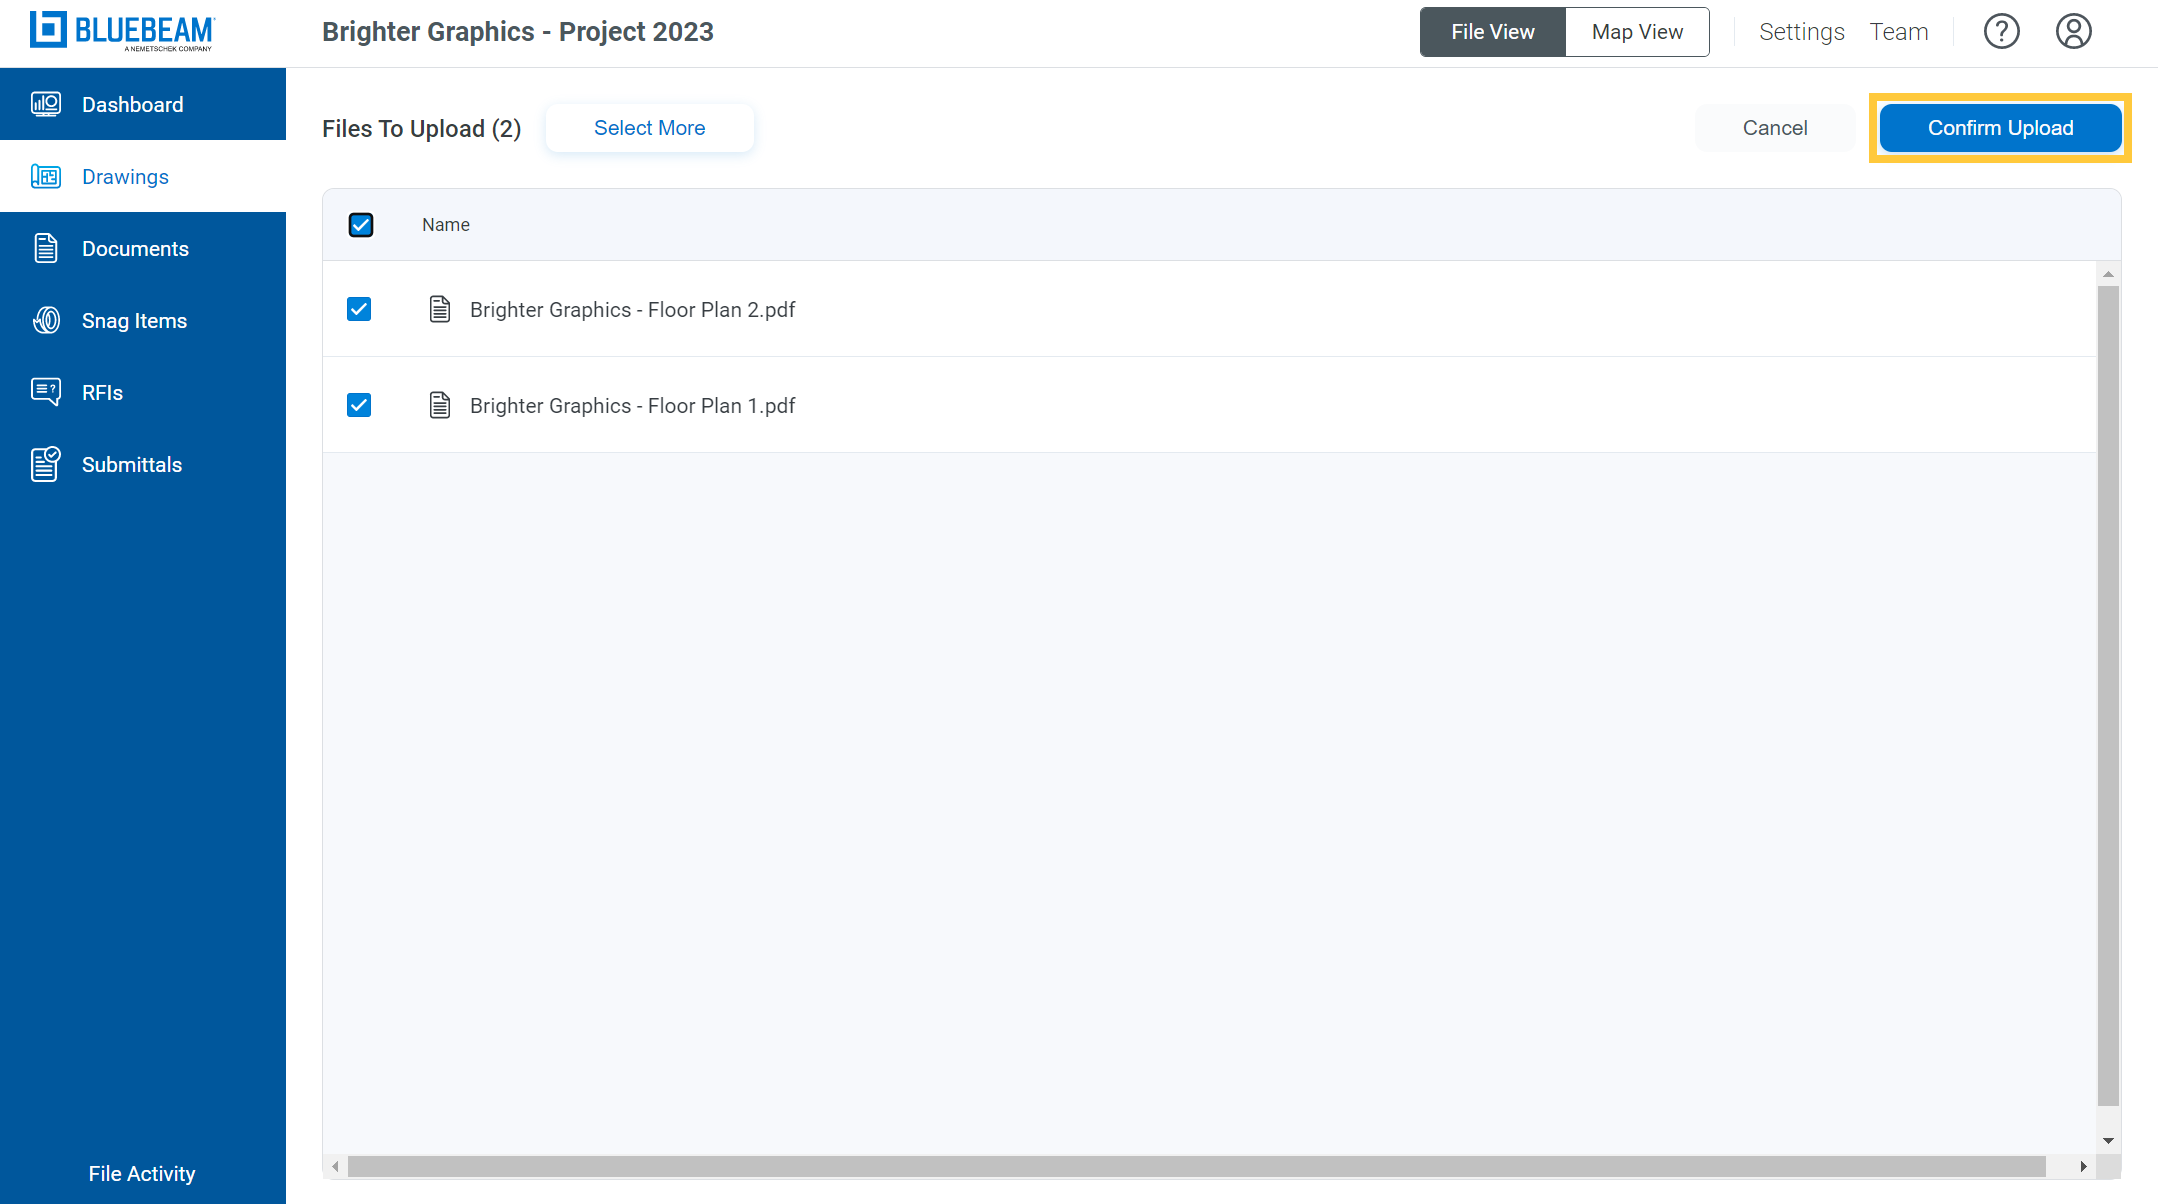
Step 5 – Once your files are uploaded, click on the “Ready for Review” button alongside your selection.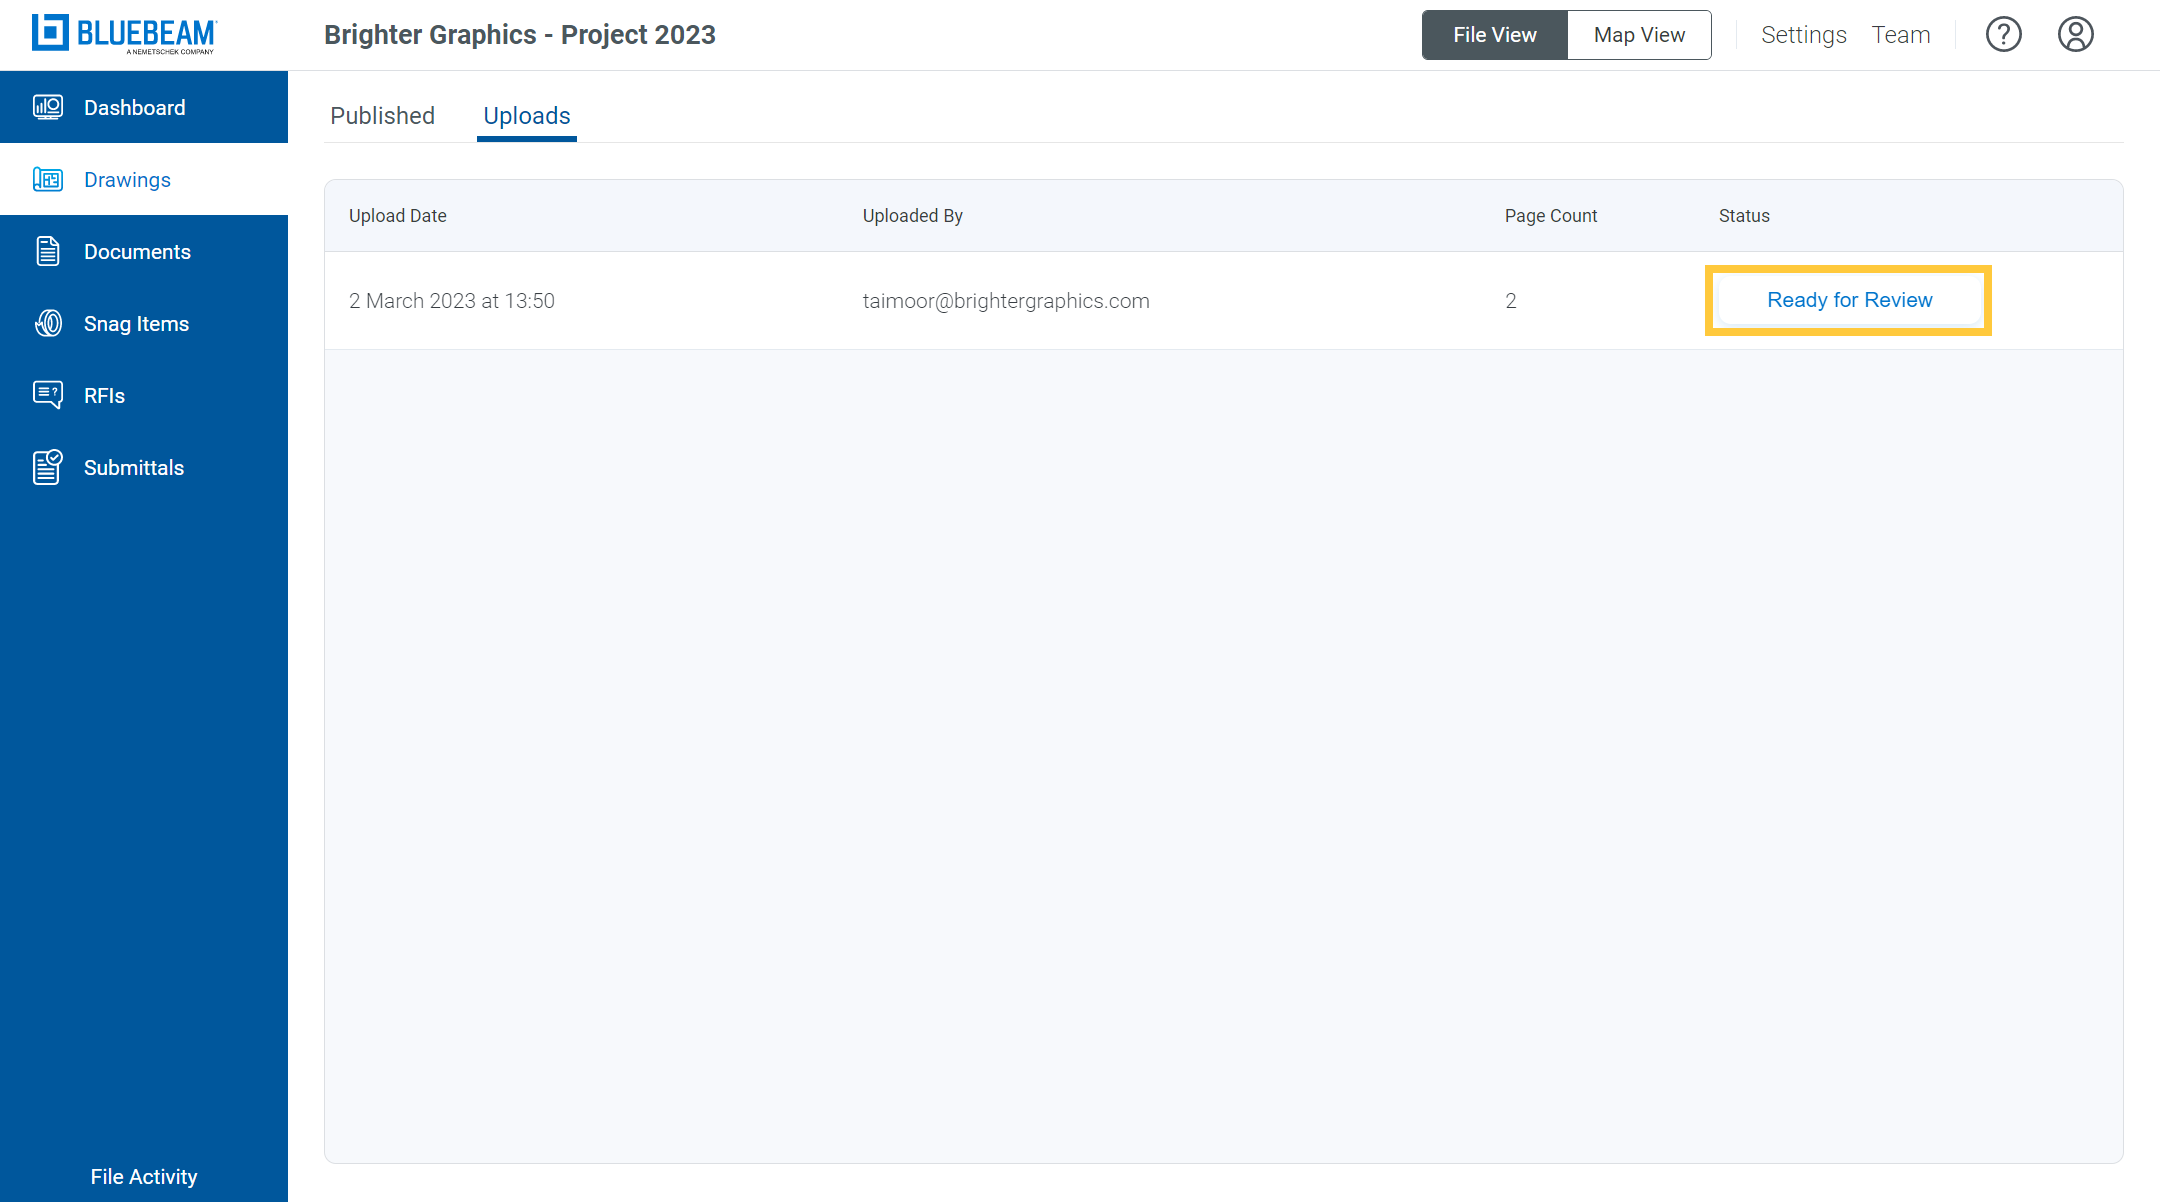
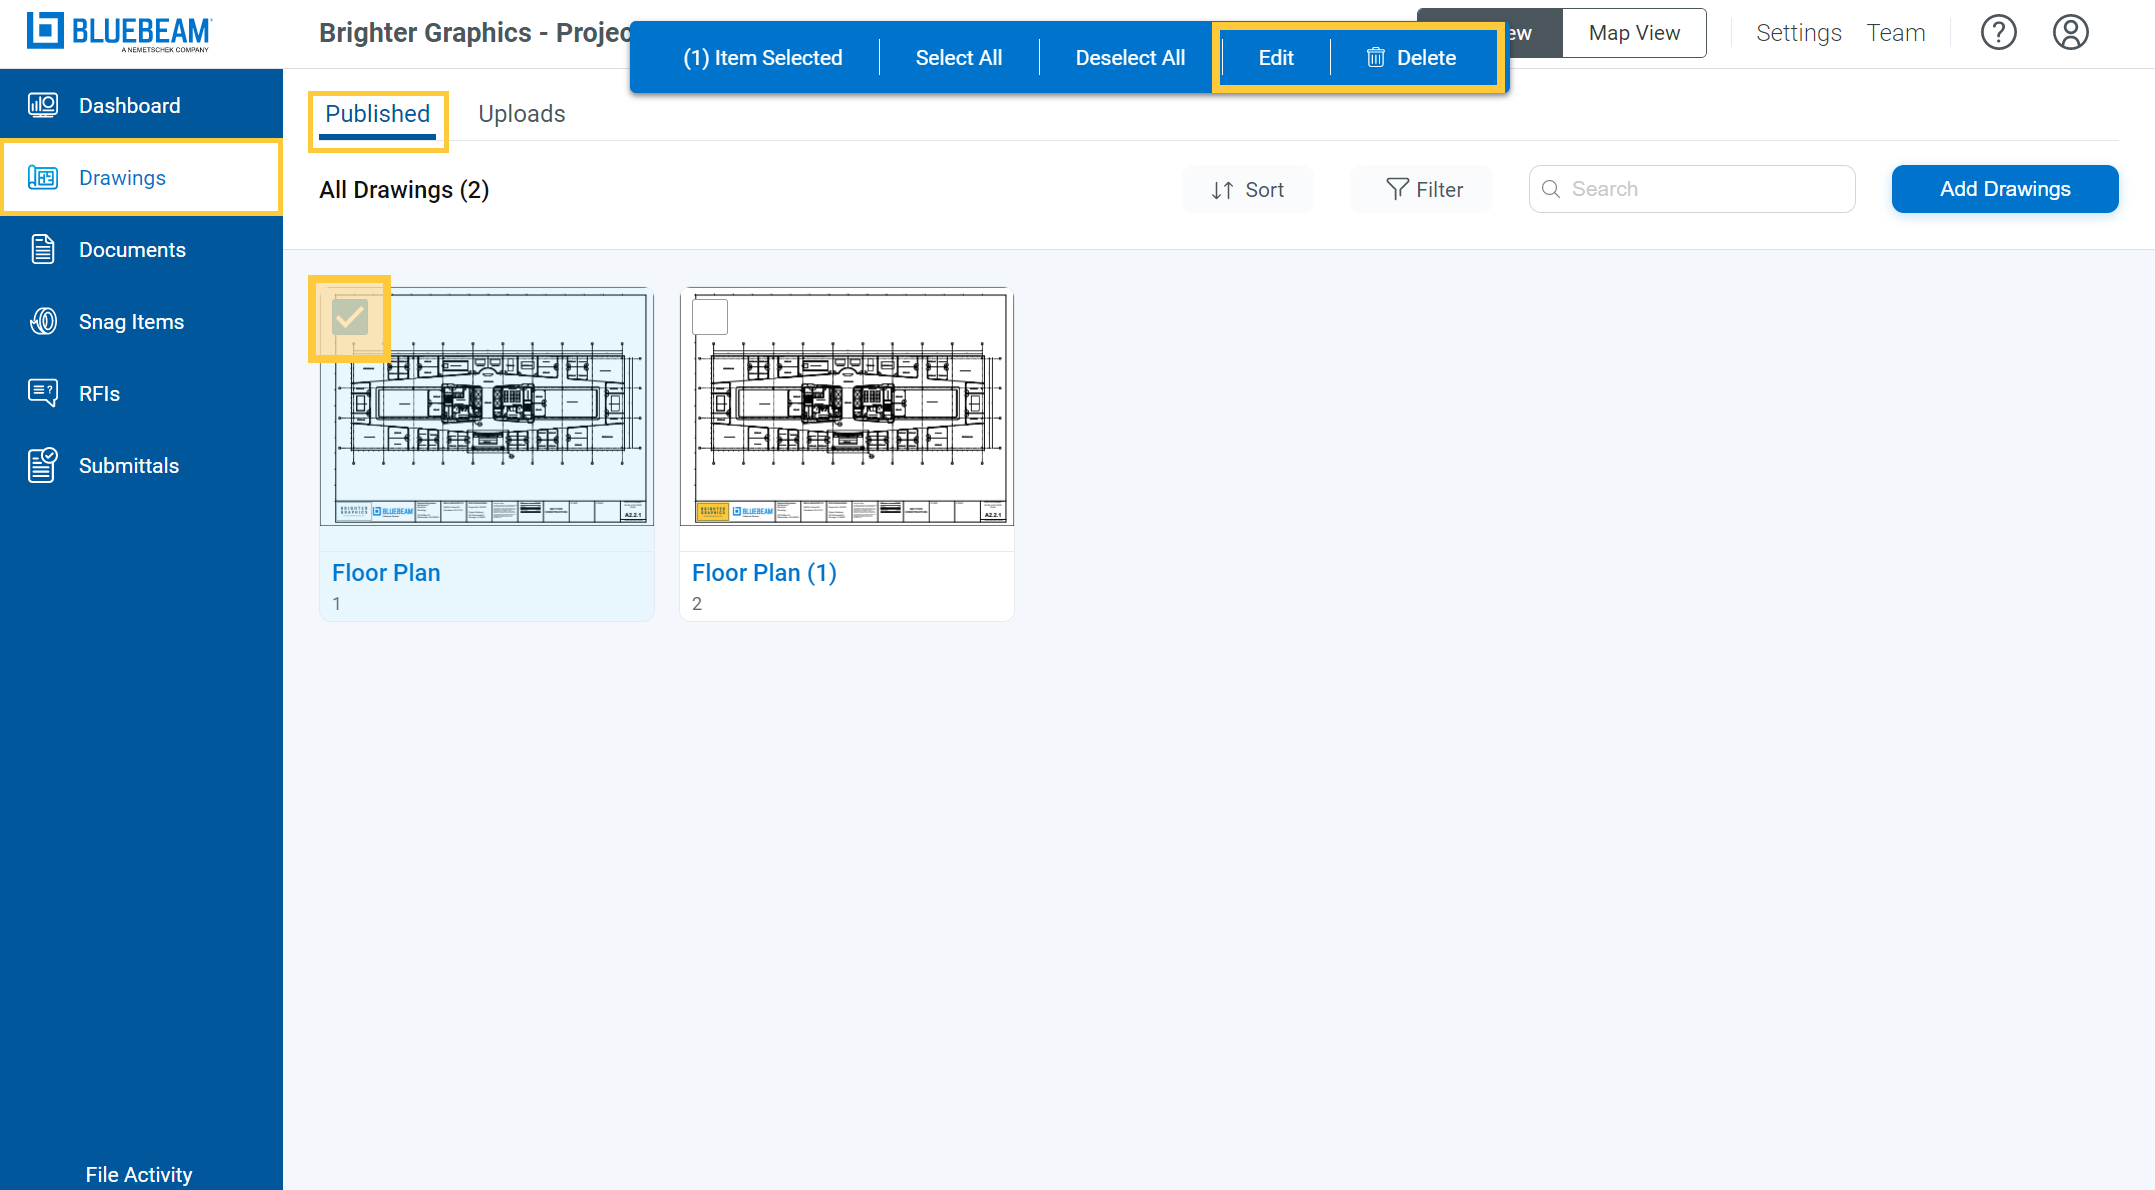
Step 6 – Select the file(s) you want to Publish. Then, click the “Publish” button at the top-right corner of the window.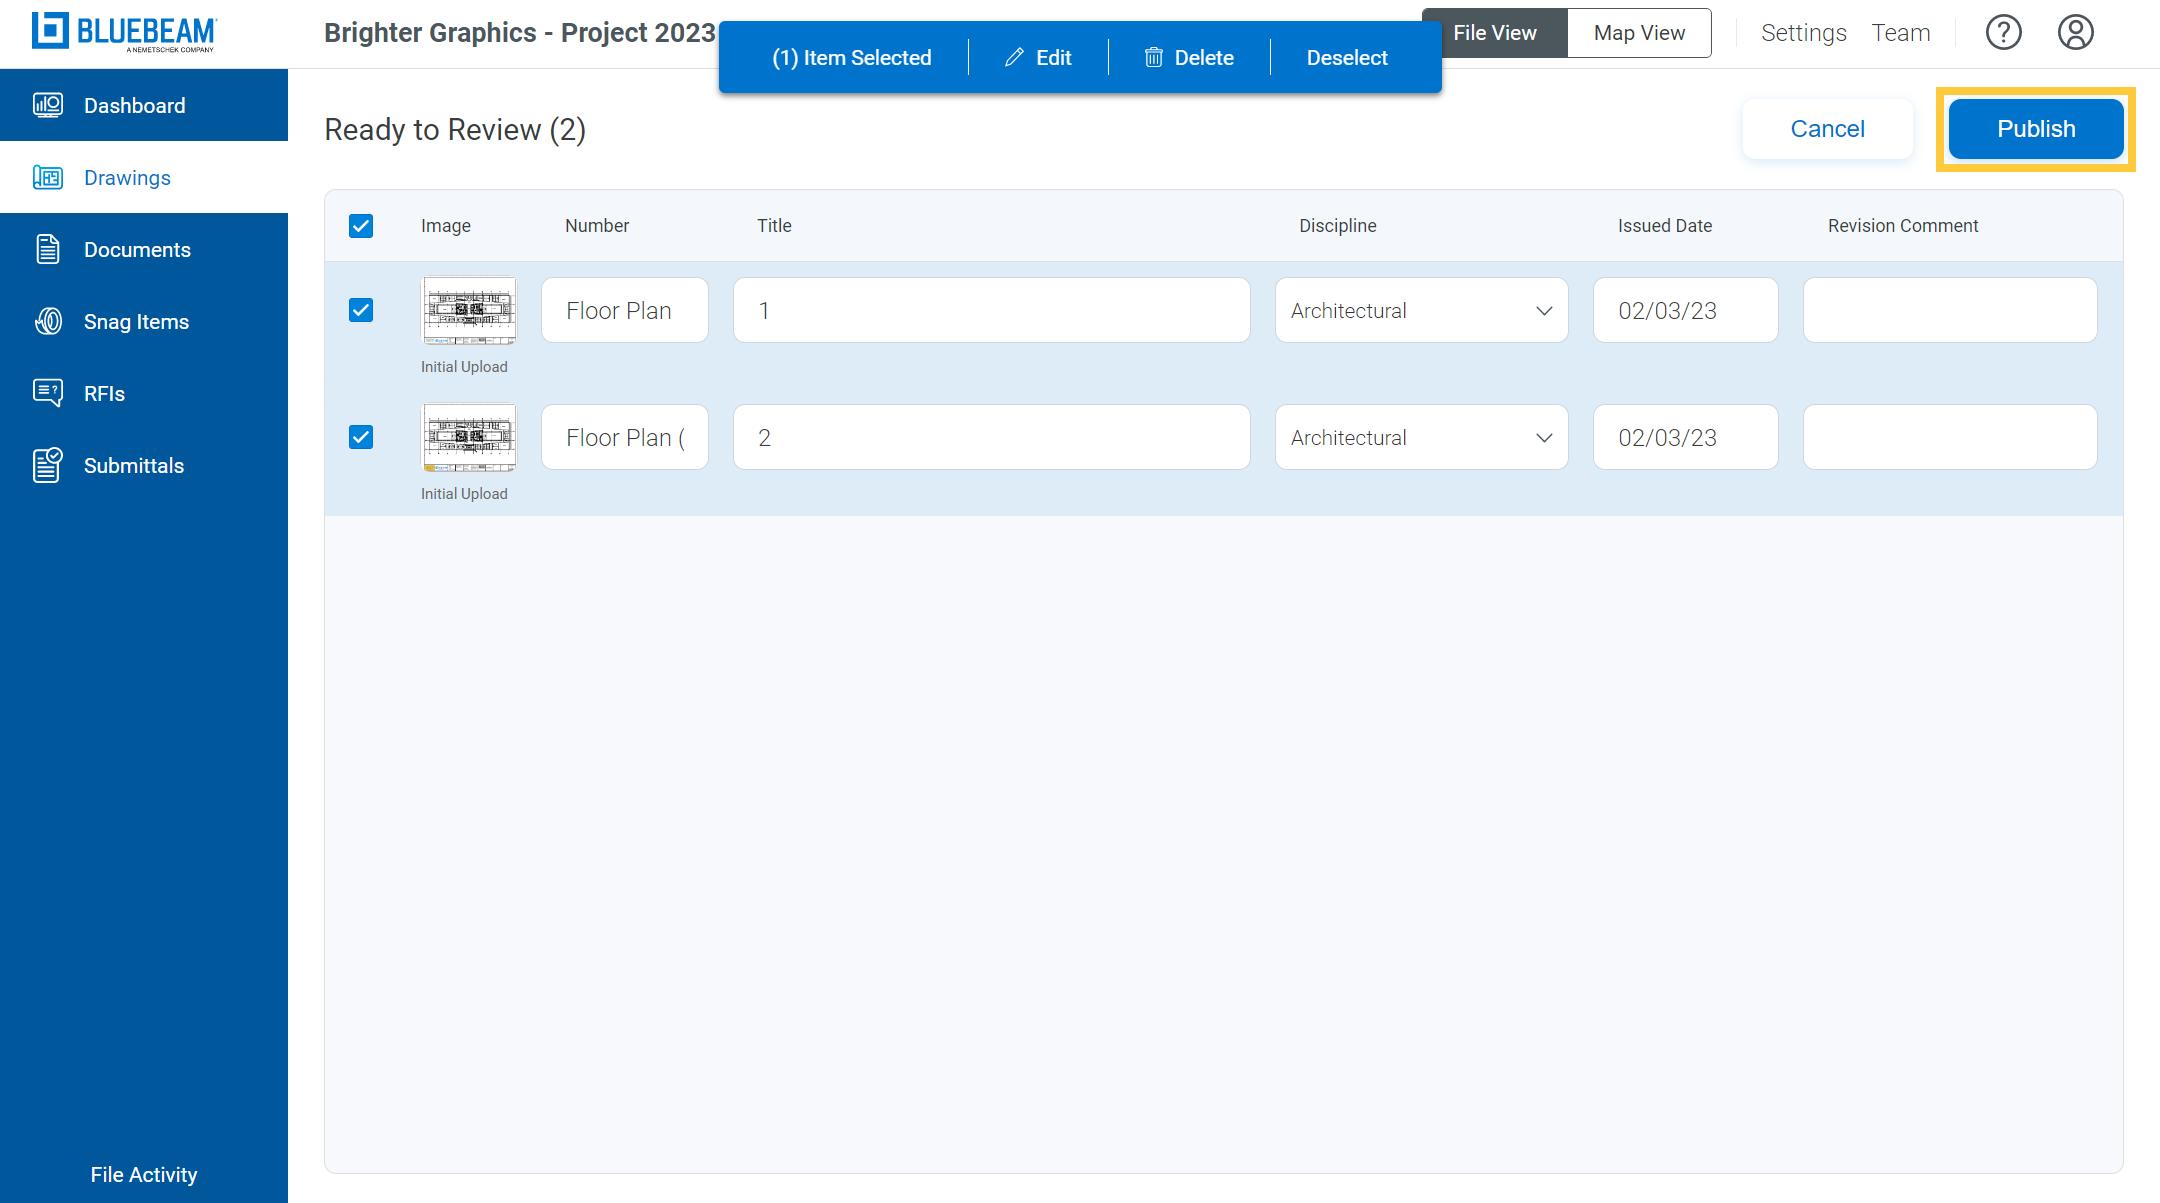
You can also Edit, Delete, or Deselect the combination you are going to Publish from the blue colored toolbar at the top.
Your files will be published and become accessible from the Drawings panel.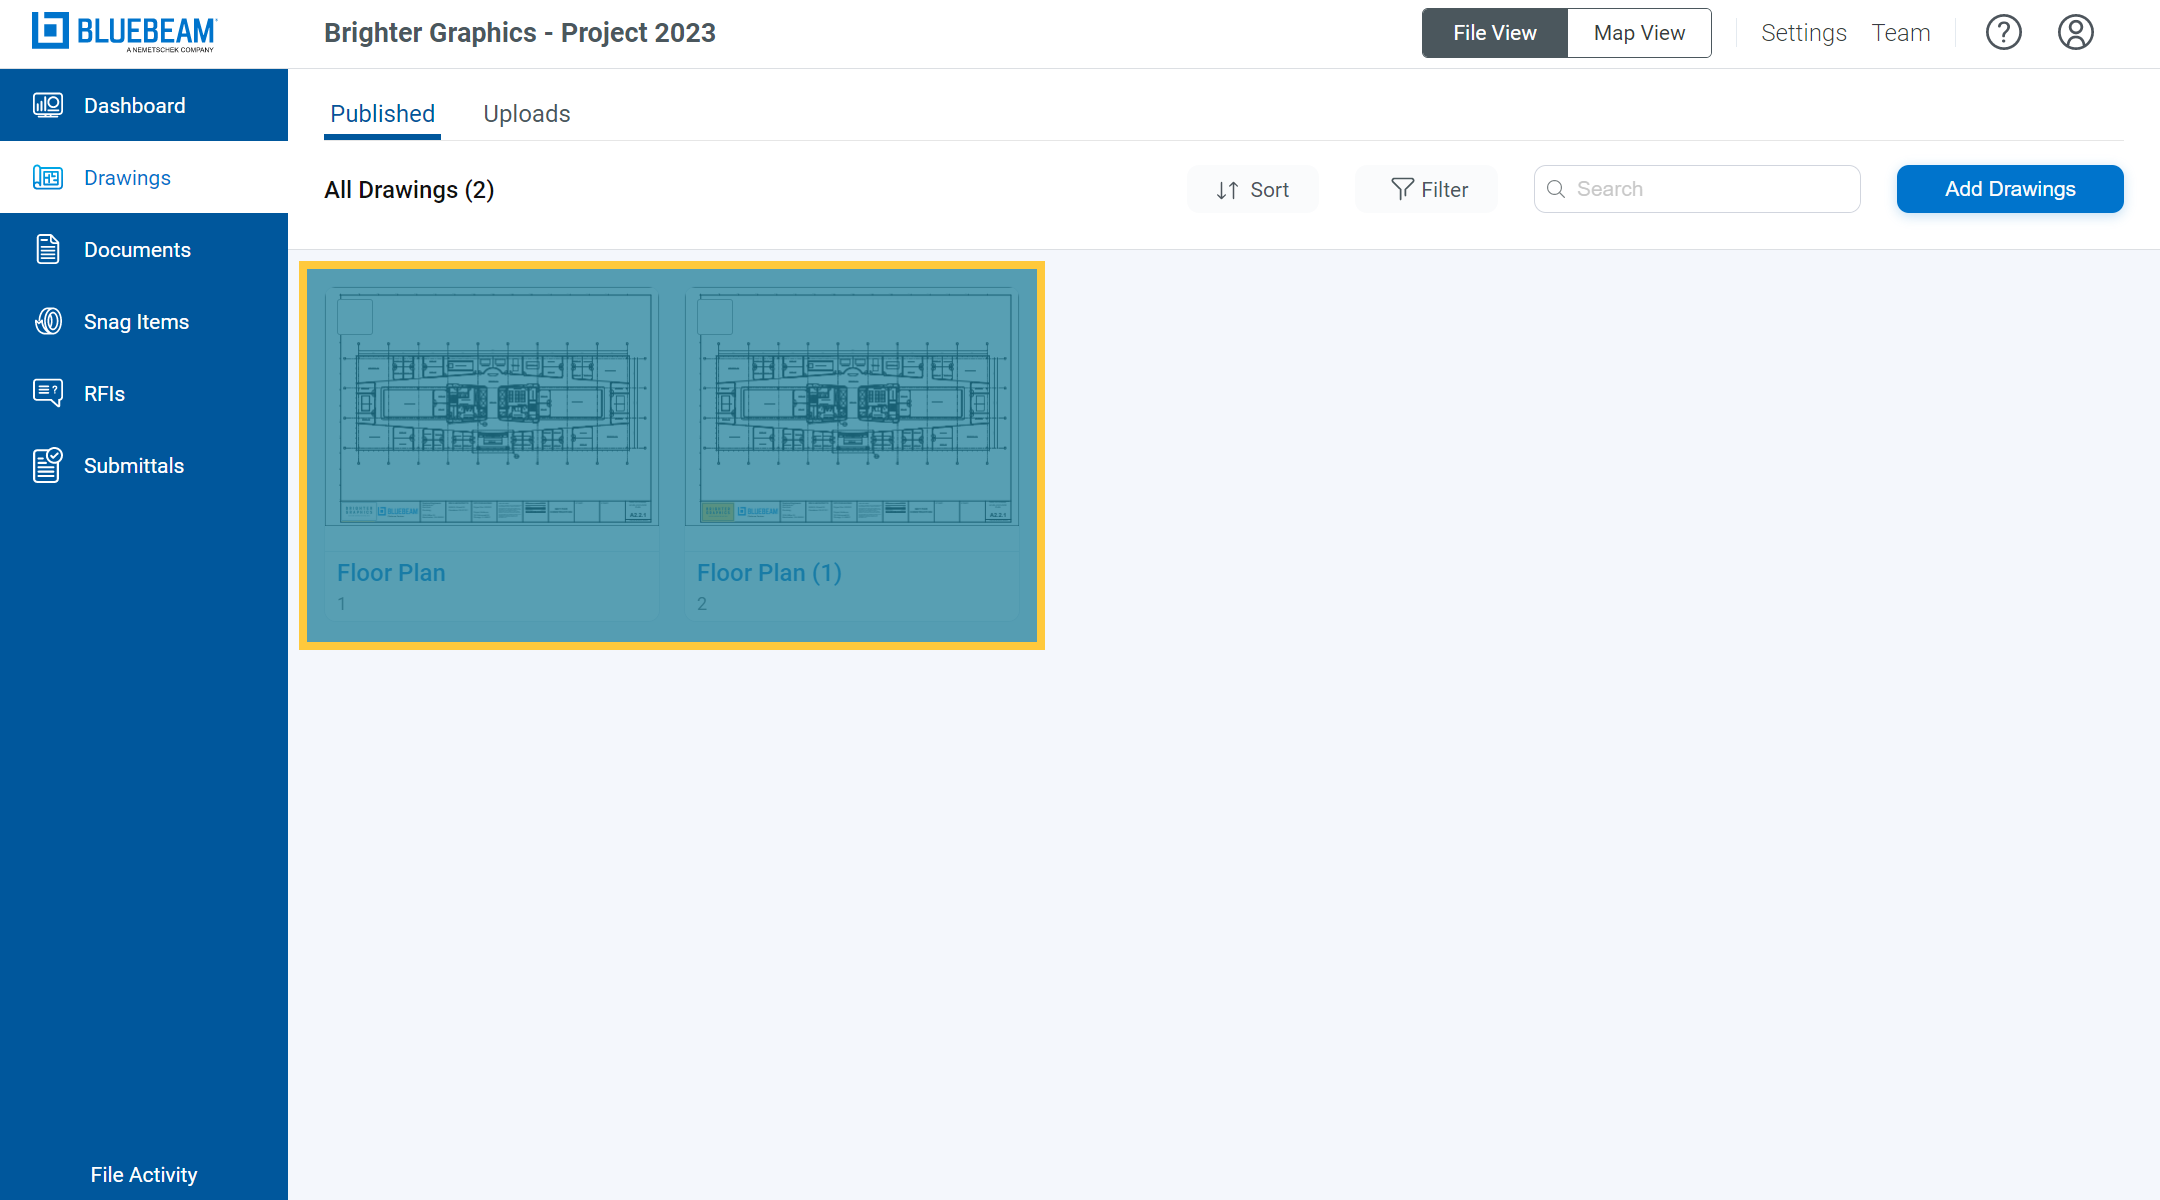
- To Edit or Delete your files later, go to the Published tab in the Drawings
You can also view and access your files directly from the main dashboard.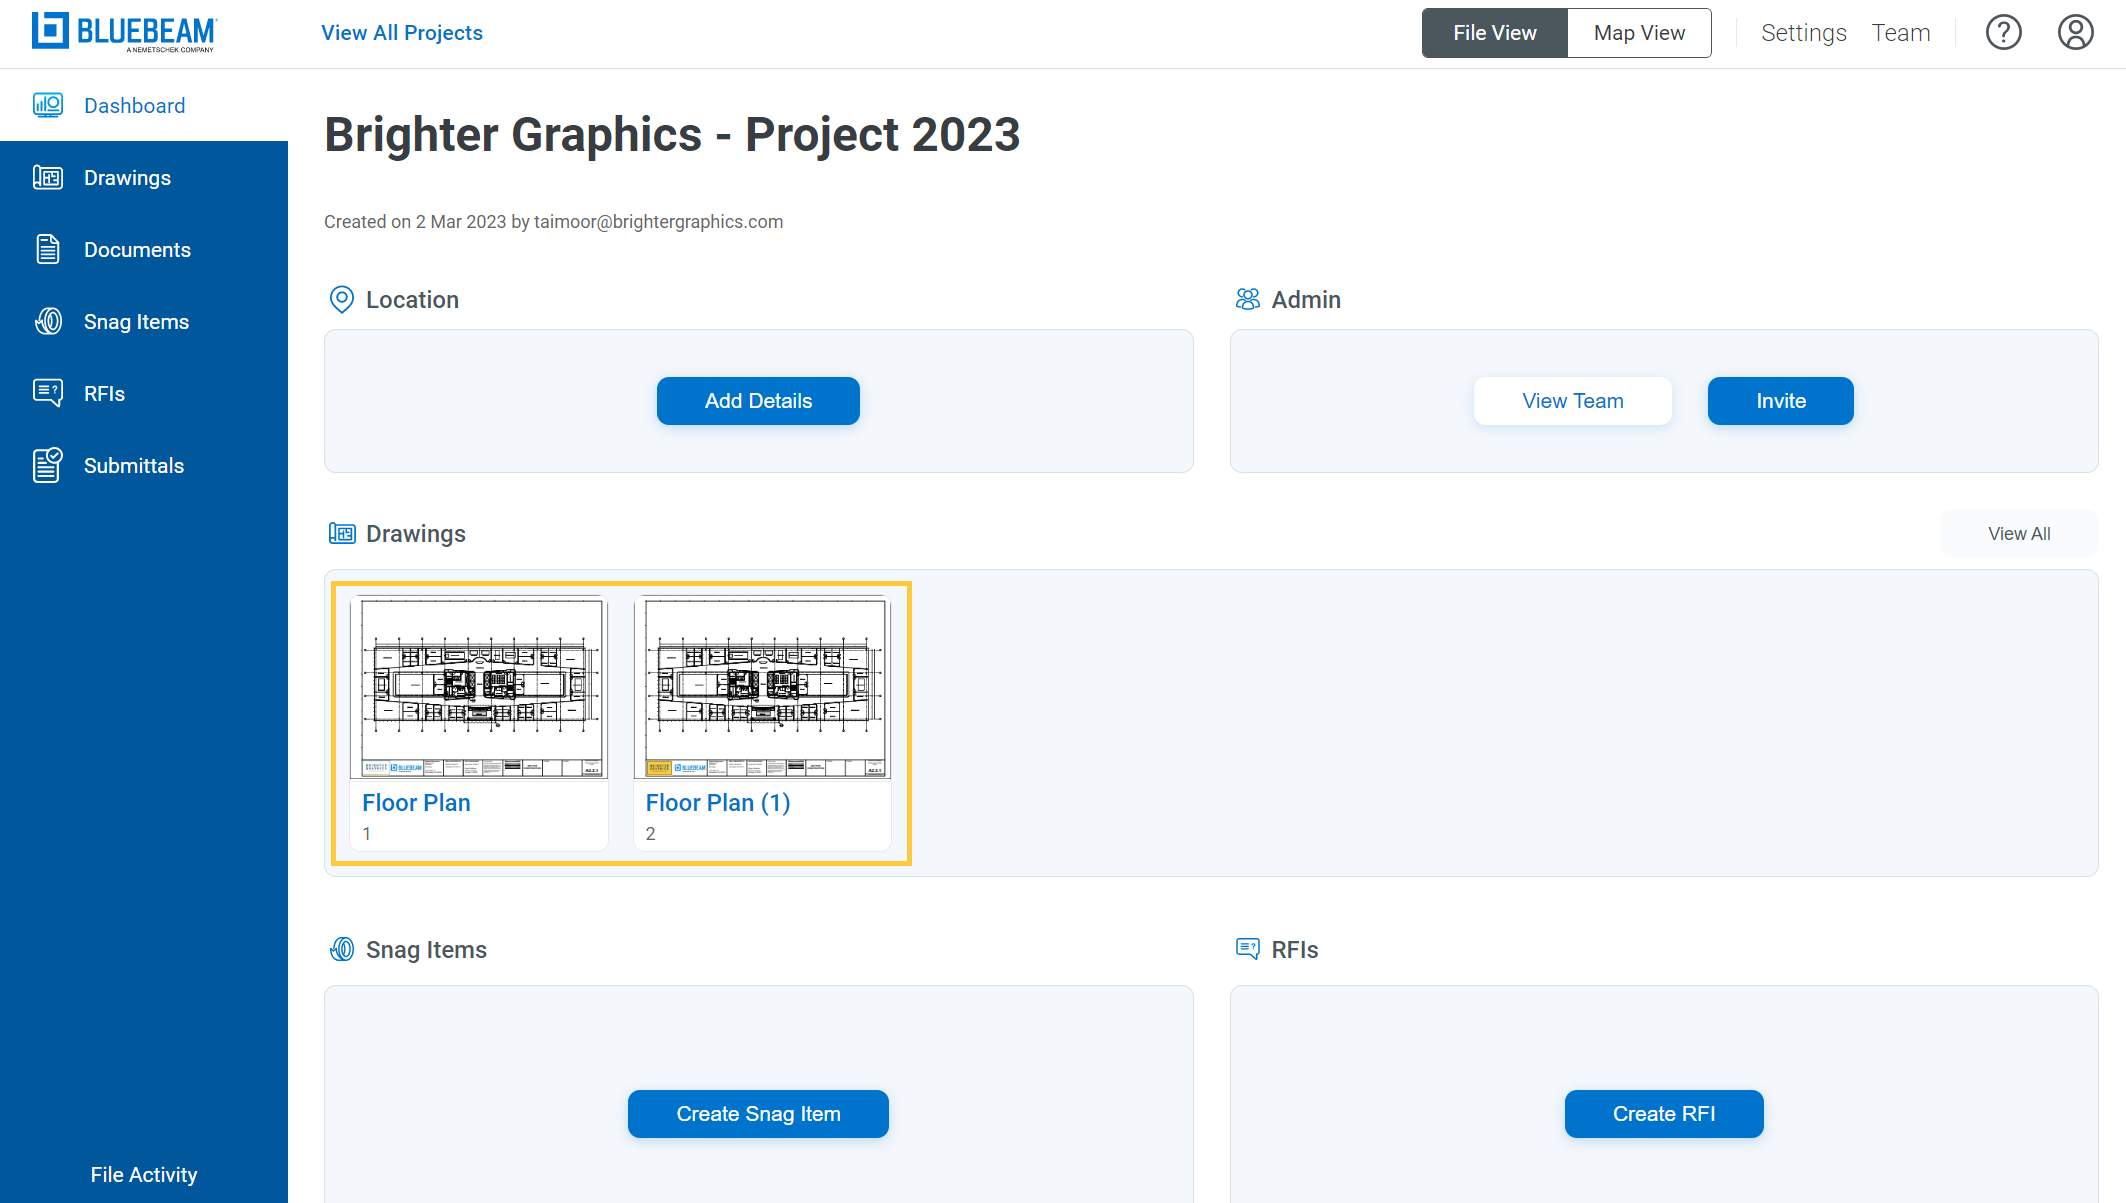
If you double-click your files from the main Dashboard or Drawings panel to open your drawings in Markup Editor in Bluebeam Cloud.