


Revu Profiles - Tutorial
Are you tired of navigating through Revu's features-rich & crowded interface? Do not hassle. You can customise your profile in Bluebeam Revu to streamline your workflow and boost productivity. Revu offers powerful customization features that allow you to tailor the interface to your needs. By setting up a personalized profile, you can save your preferred toolbars, keyboard shortcuts, and menus.
This dedicated guide will help you discover how to customise and use profiles in Bluebeam Revu. Let’s discuss this in detail.
To create your custom profile in Revu:
Step 1 - Click “Revu” in the Menu Bar > hover your cursor to the “Profiles” option > Click “Manage Profiles”.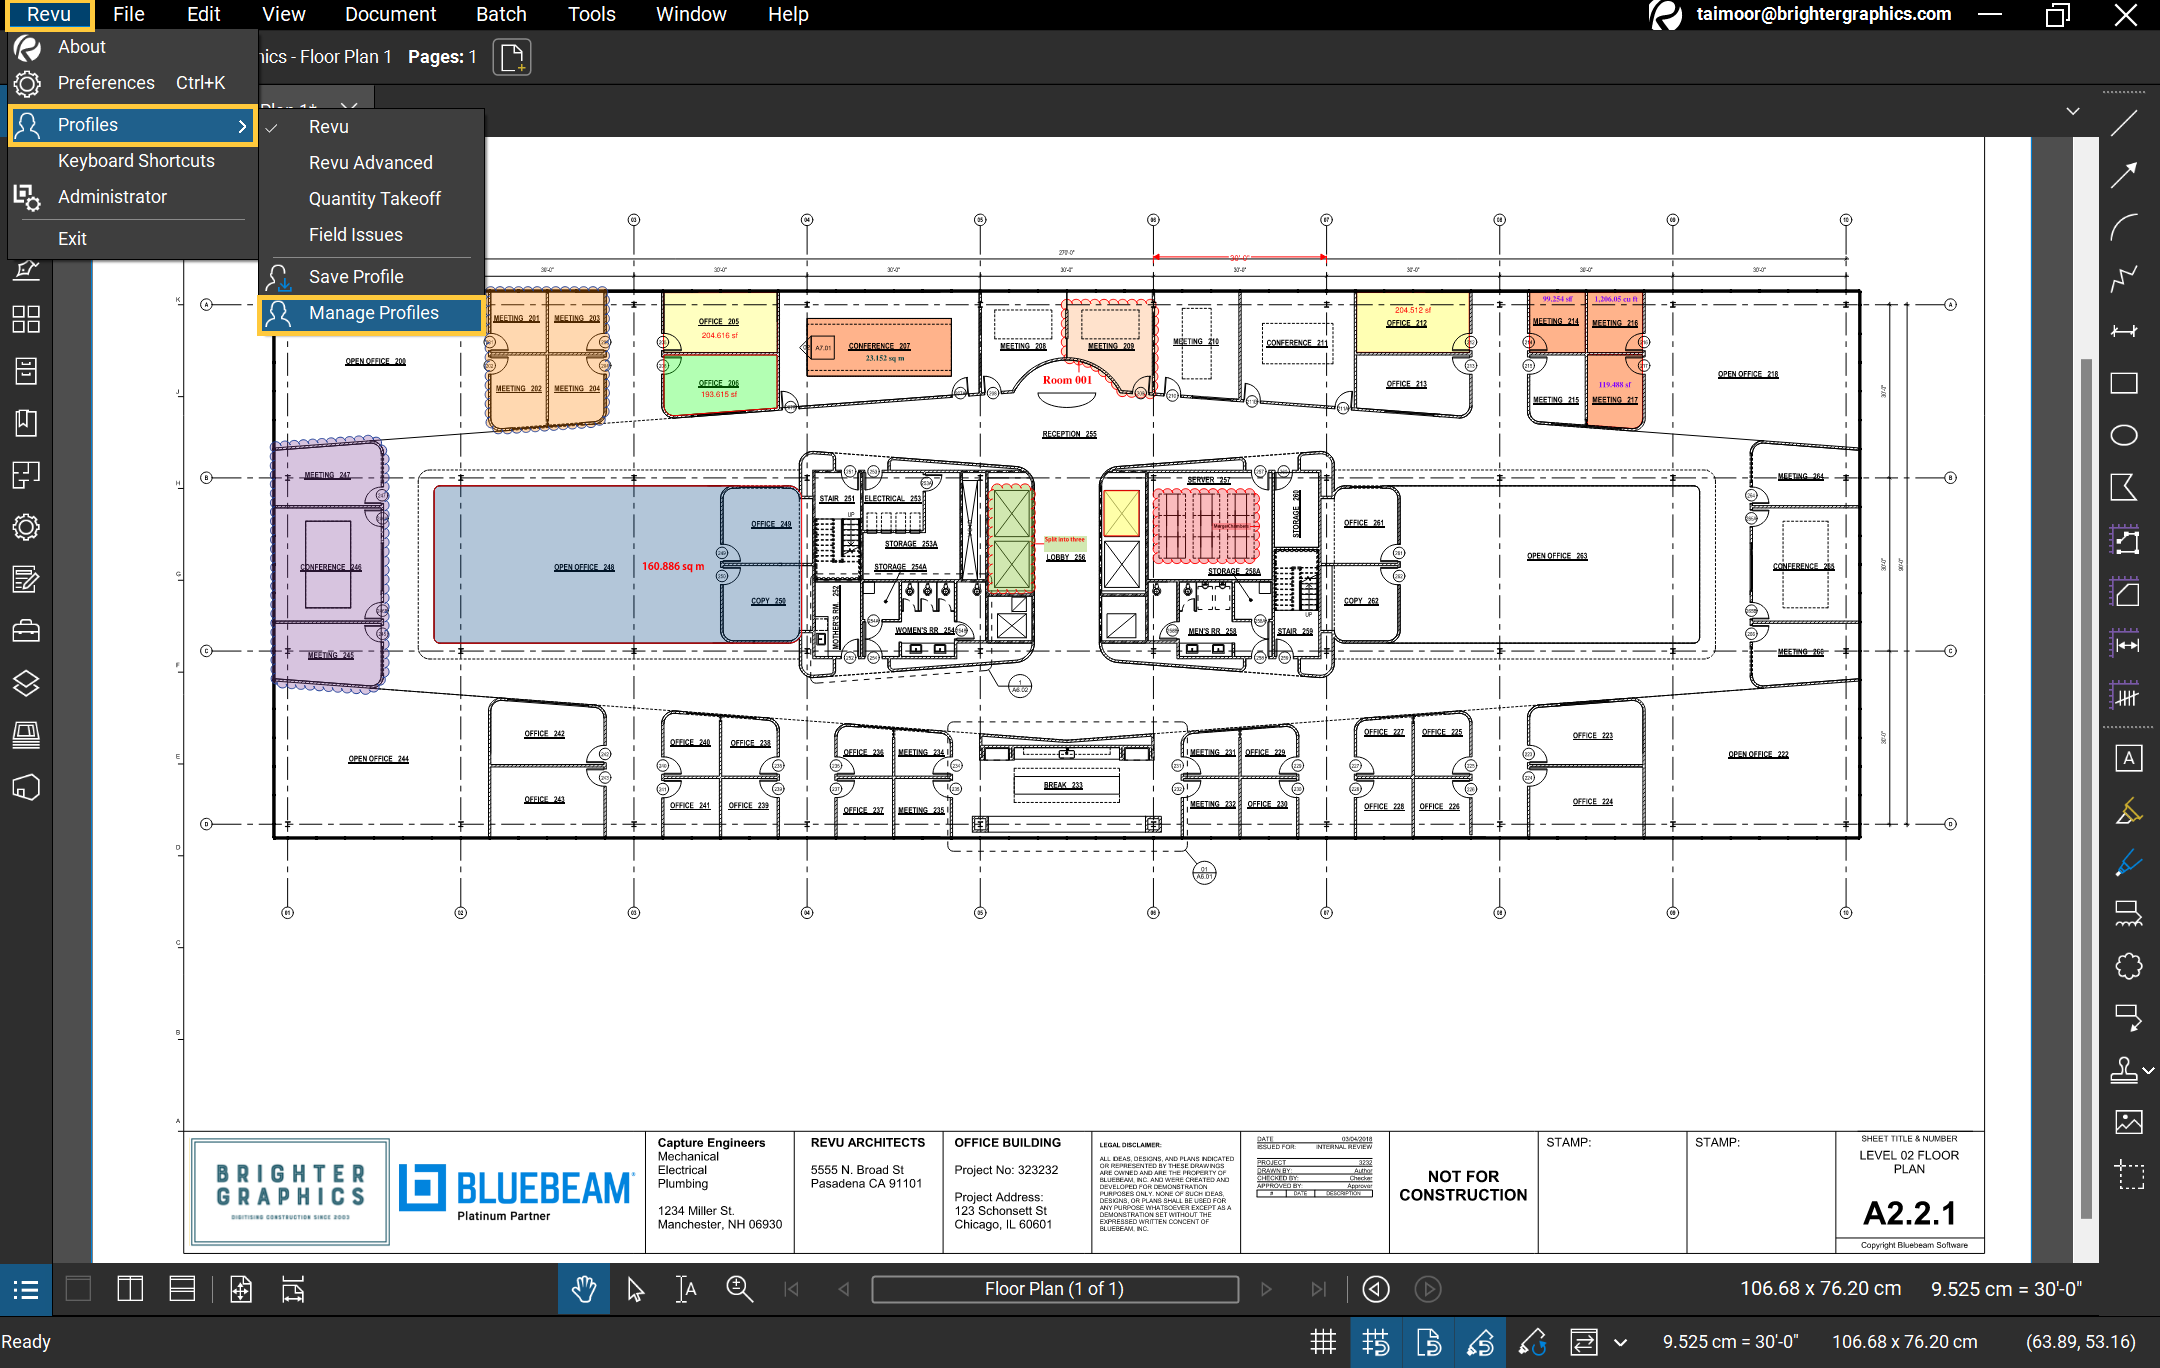
Step 2 - In the Manage Profiles dialog box, click “Add”.
Step 3 - In the Add Profile dialog box, name your profile and Click “OK”.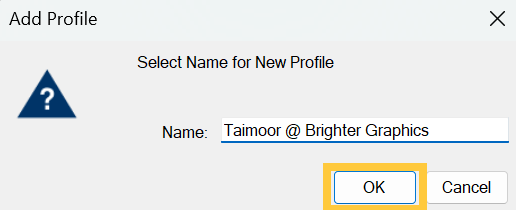
Your new profile will be created and listed in the Manage Profiles section from where you can select different profiles to Import, Export, Modify, or Delete it. Now click “Ok” to save the profile.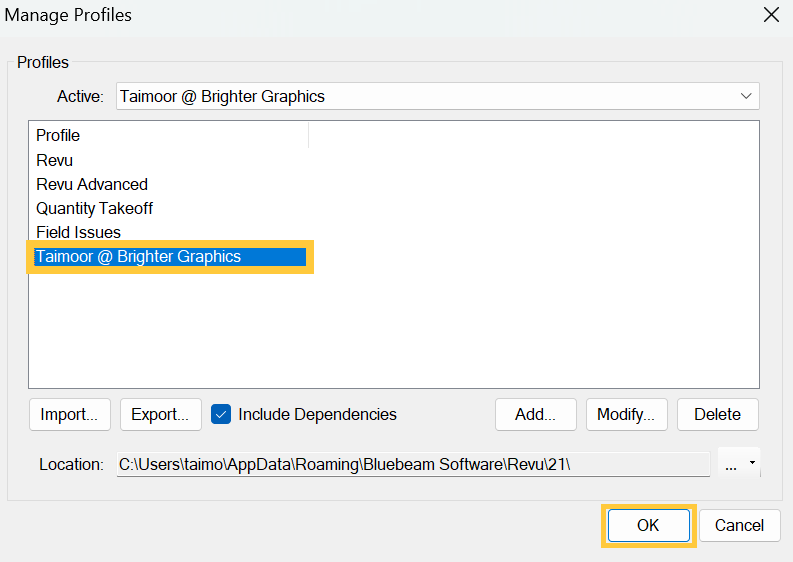
Your new profile will be selected automatically.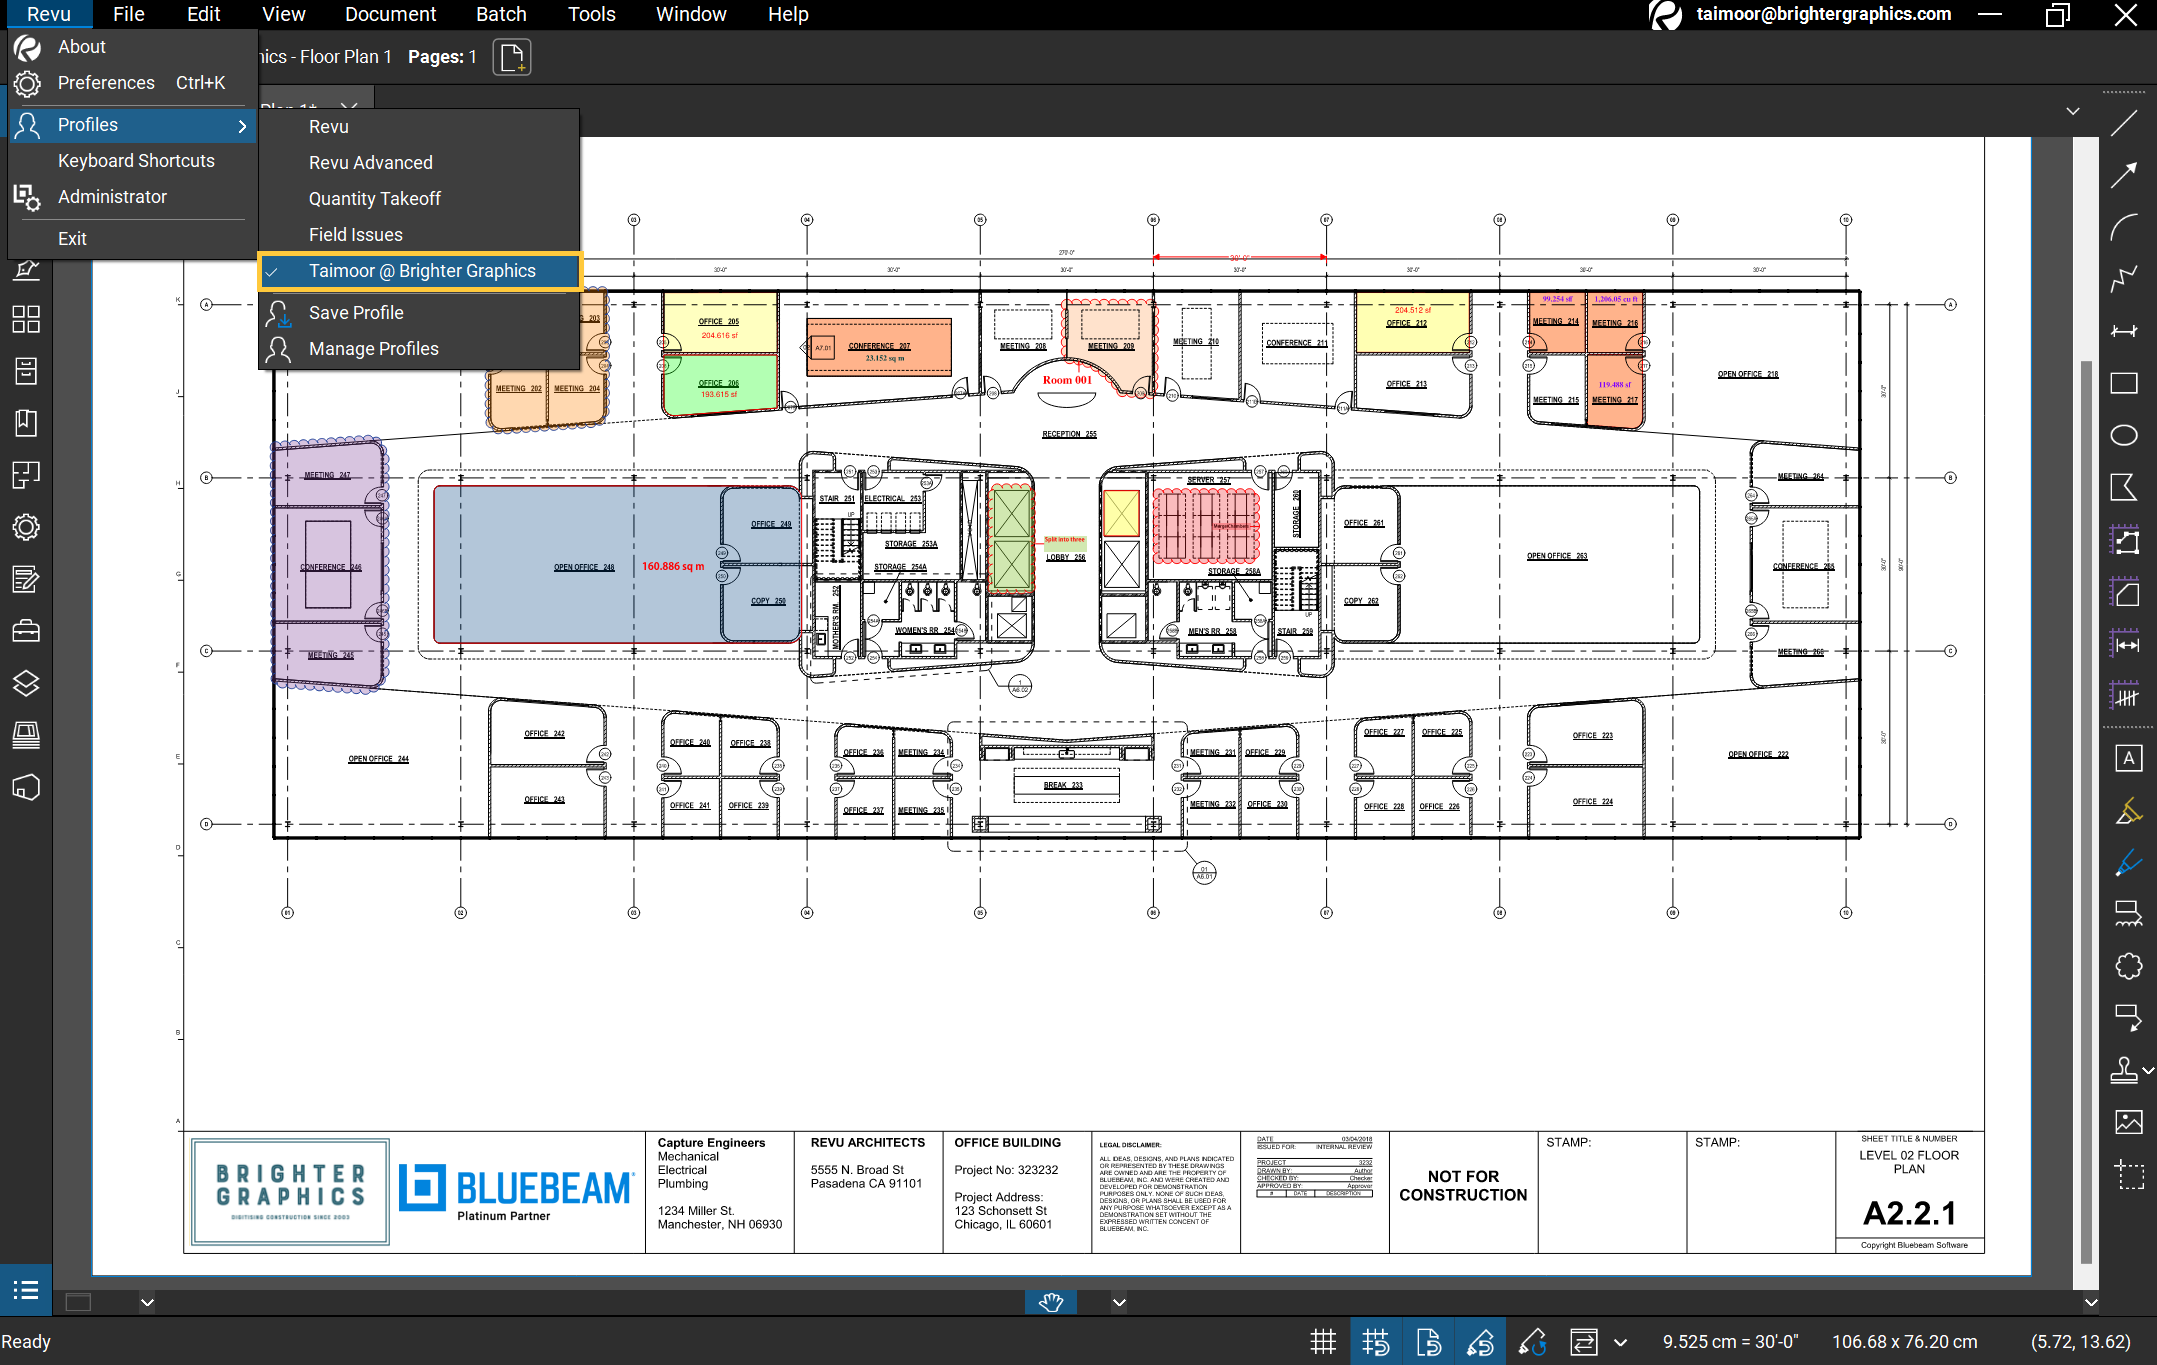
You can go back to your Revu interface and customise your interface according to your preferences. Like, reordering and moving panels around. For instance, dragging the Measurements icon to the bottom of the panel.
You can also turn off unnecessary panels if you will not be using them.
Learn more about how to navigate and use Revu 21 Interface. .