


Customising Panels in Revu 21 - Tutorial
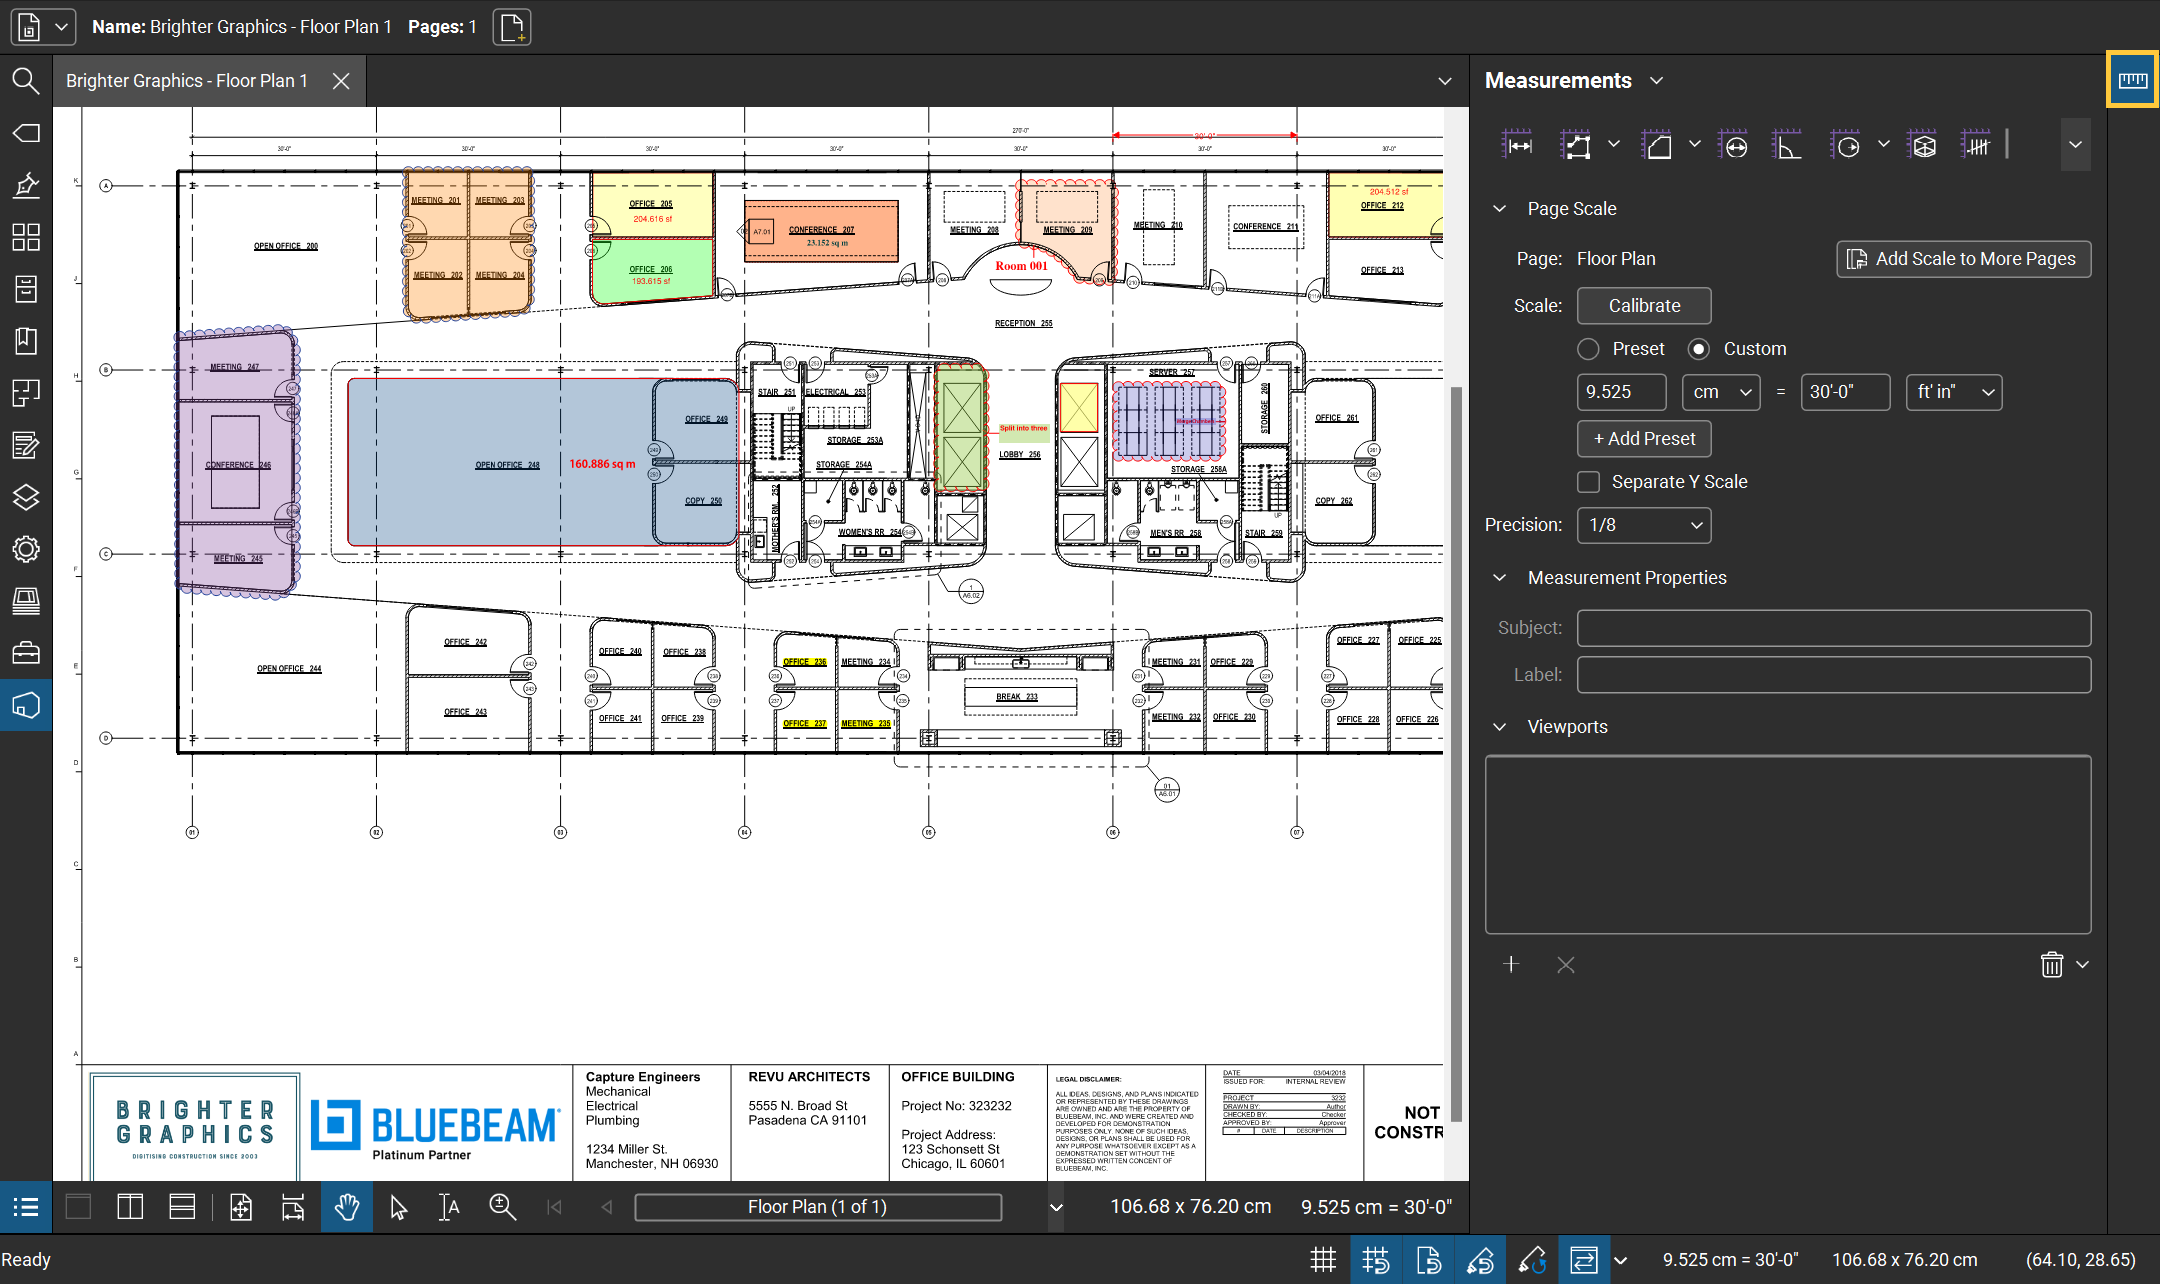
Bluebeam Revu allows you to customise, relocate, or split your panels. They're located on the left side of your main workspace in Revu, but you can relocate or split Panels per your preferences. But why bother customizing panels when the default ones work just fine? By customizing your panels, you can streamline your workflow and increase your productivity. Imagine having all the tools you need for a specific task right at your fingertips with a preferable access point, without having to hunt around for them.
Keep in mind that certain panels are visible by default, depending on the profile you're using. But by customizing your panels, you can create a workspace that's tailored to your specific needs and preferences.
This detailed guide will let you explore how to customise panels in Bluebeam Revu. Let’s discuss this in detail.
Switching Panels Accessibility
To hide or show a panel:
From the menu bar go to “Window” and hover your cursor over the “Panels” option. You can choose either to hide or show your desired panel.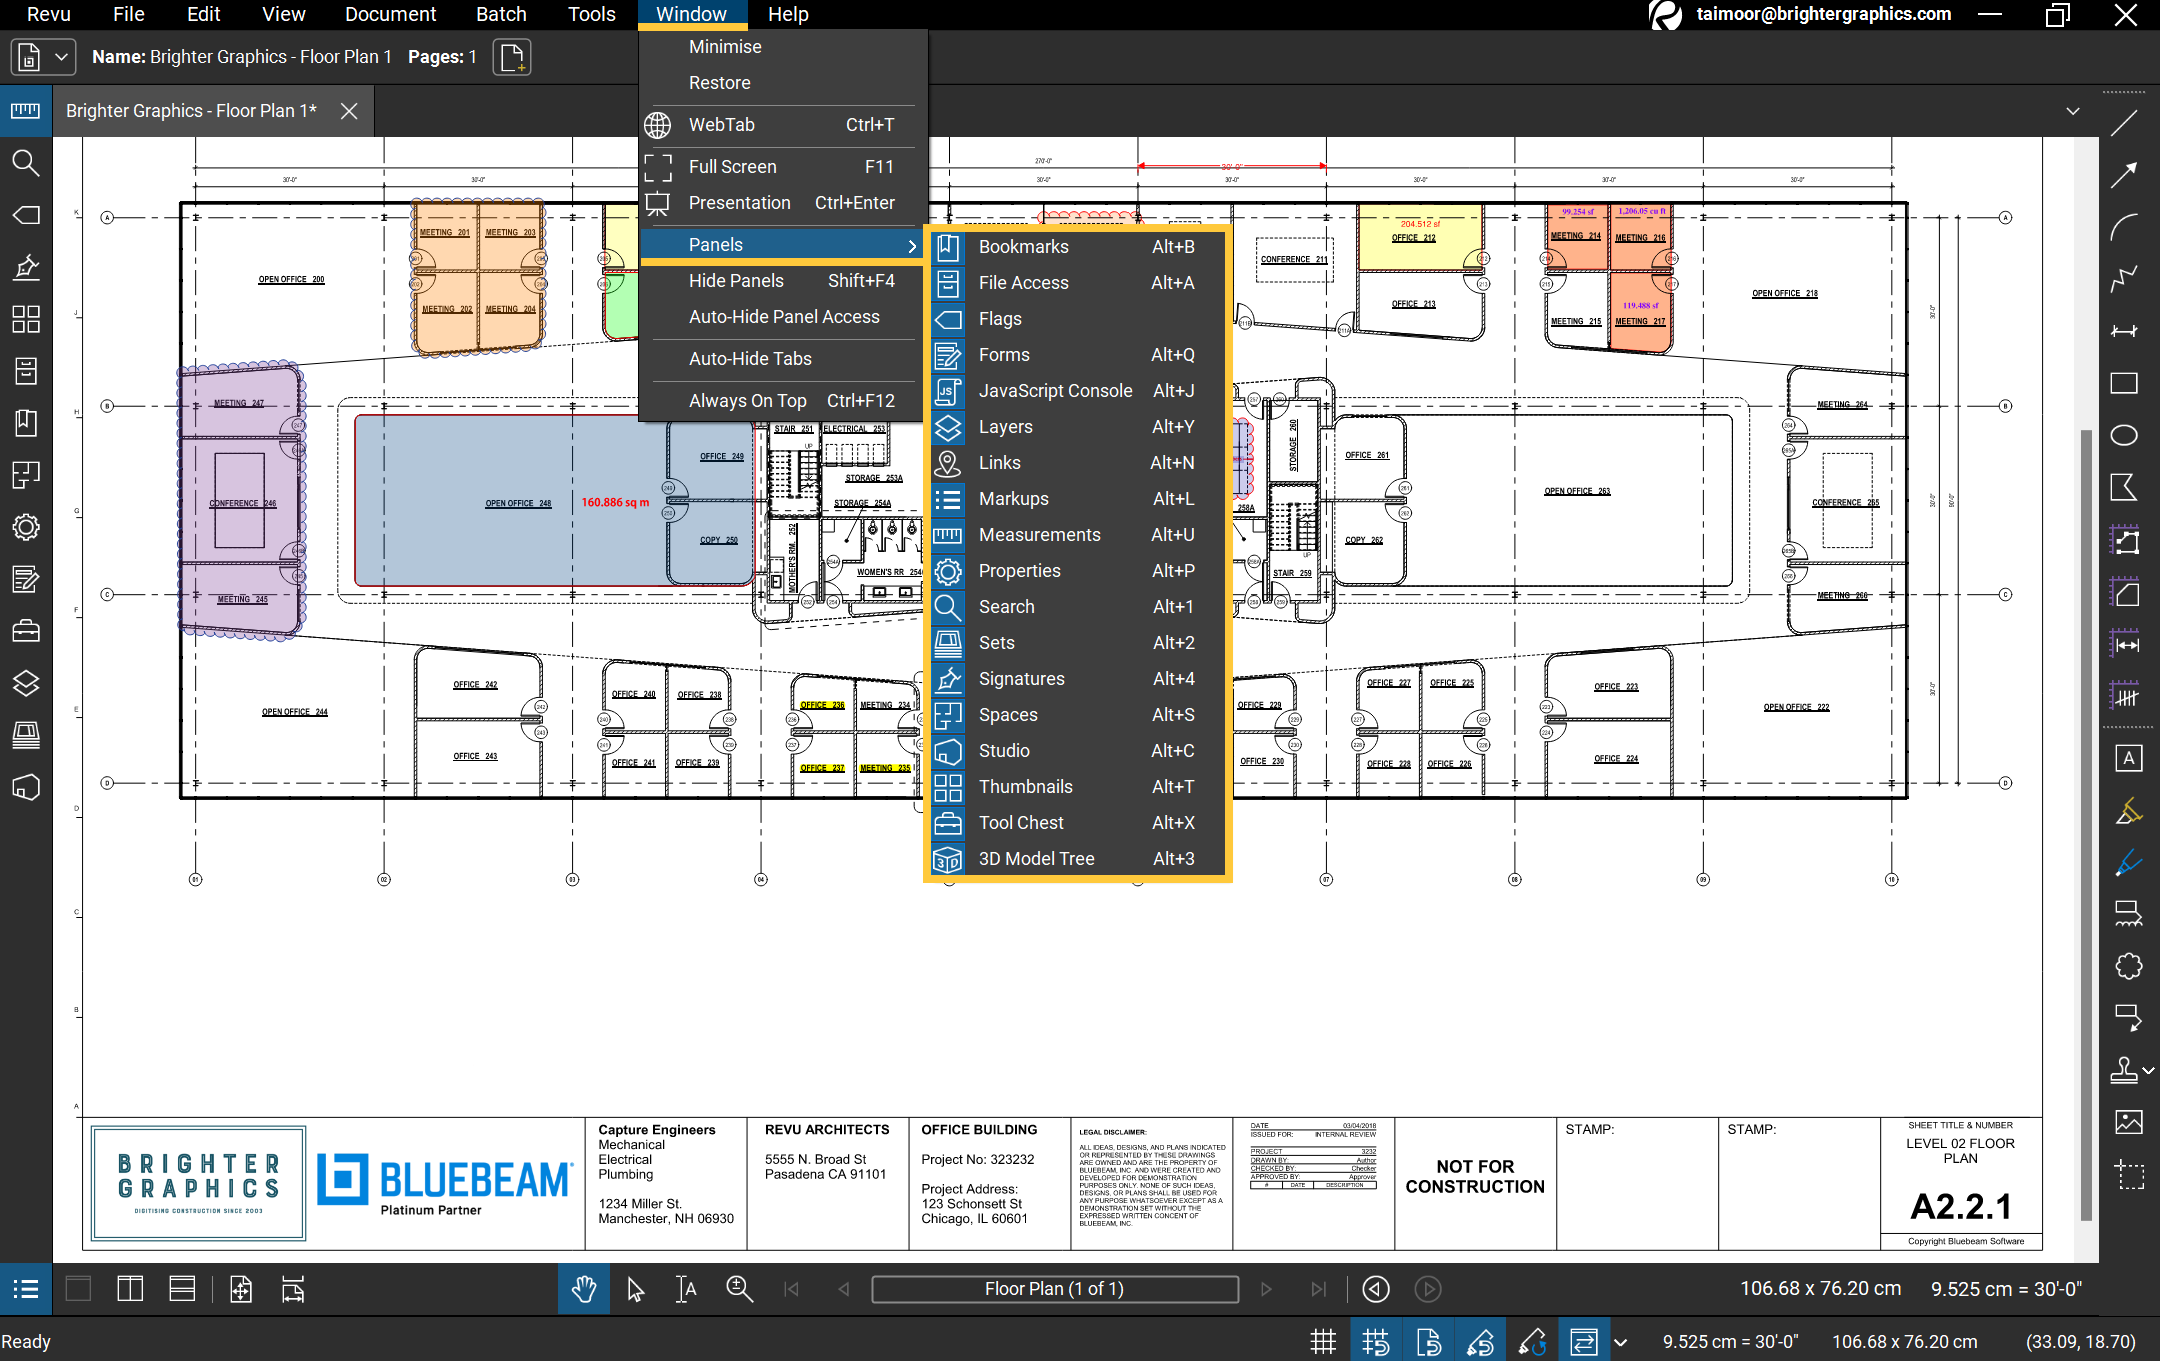
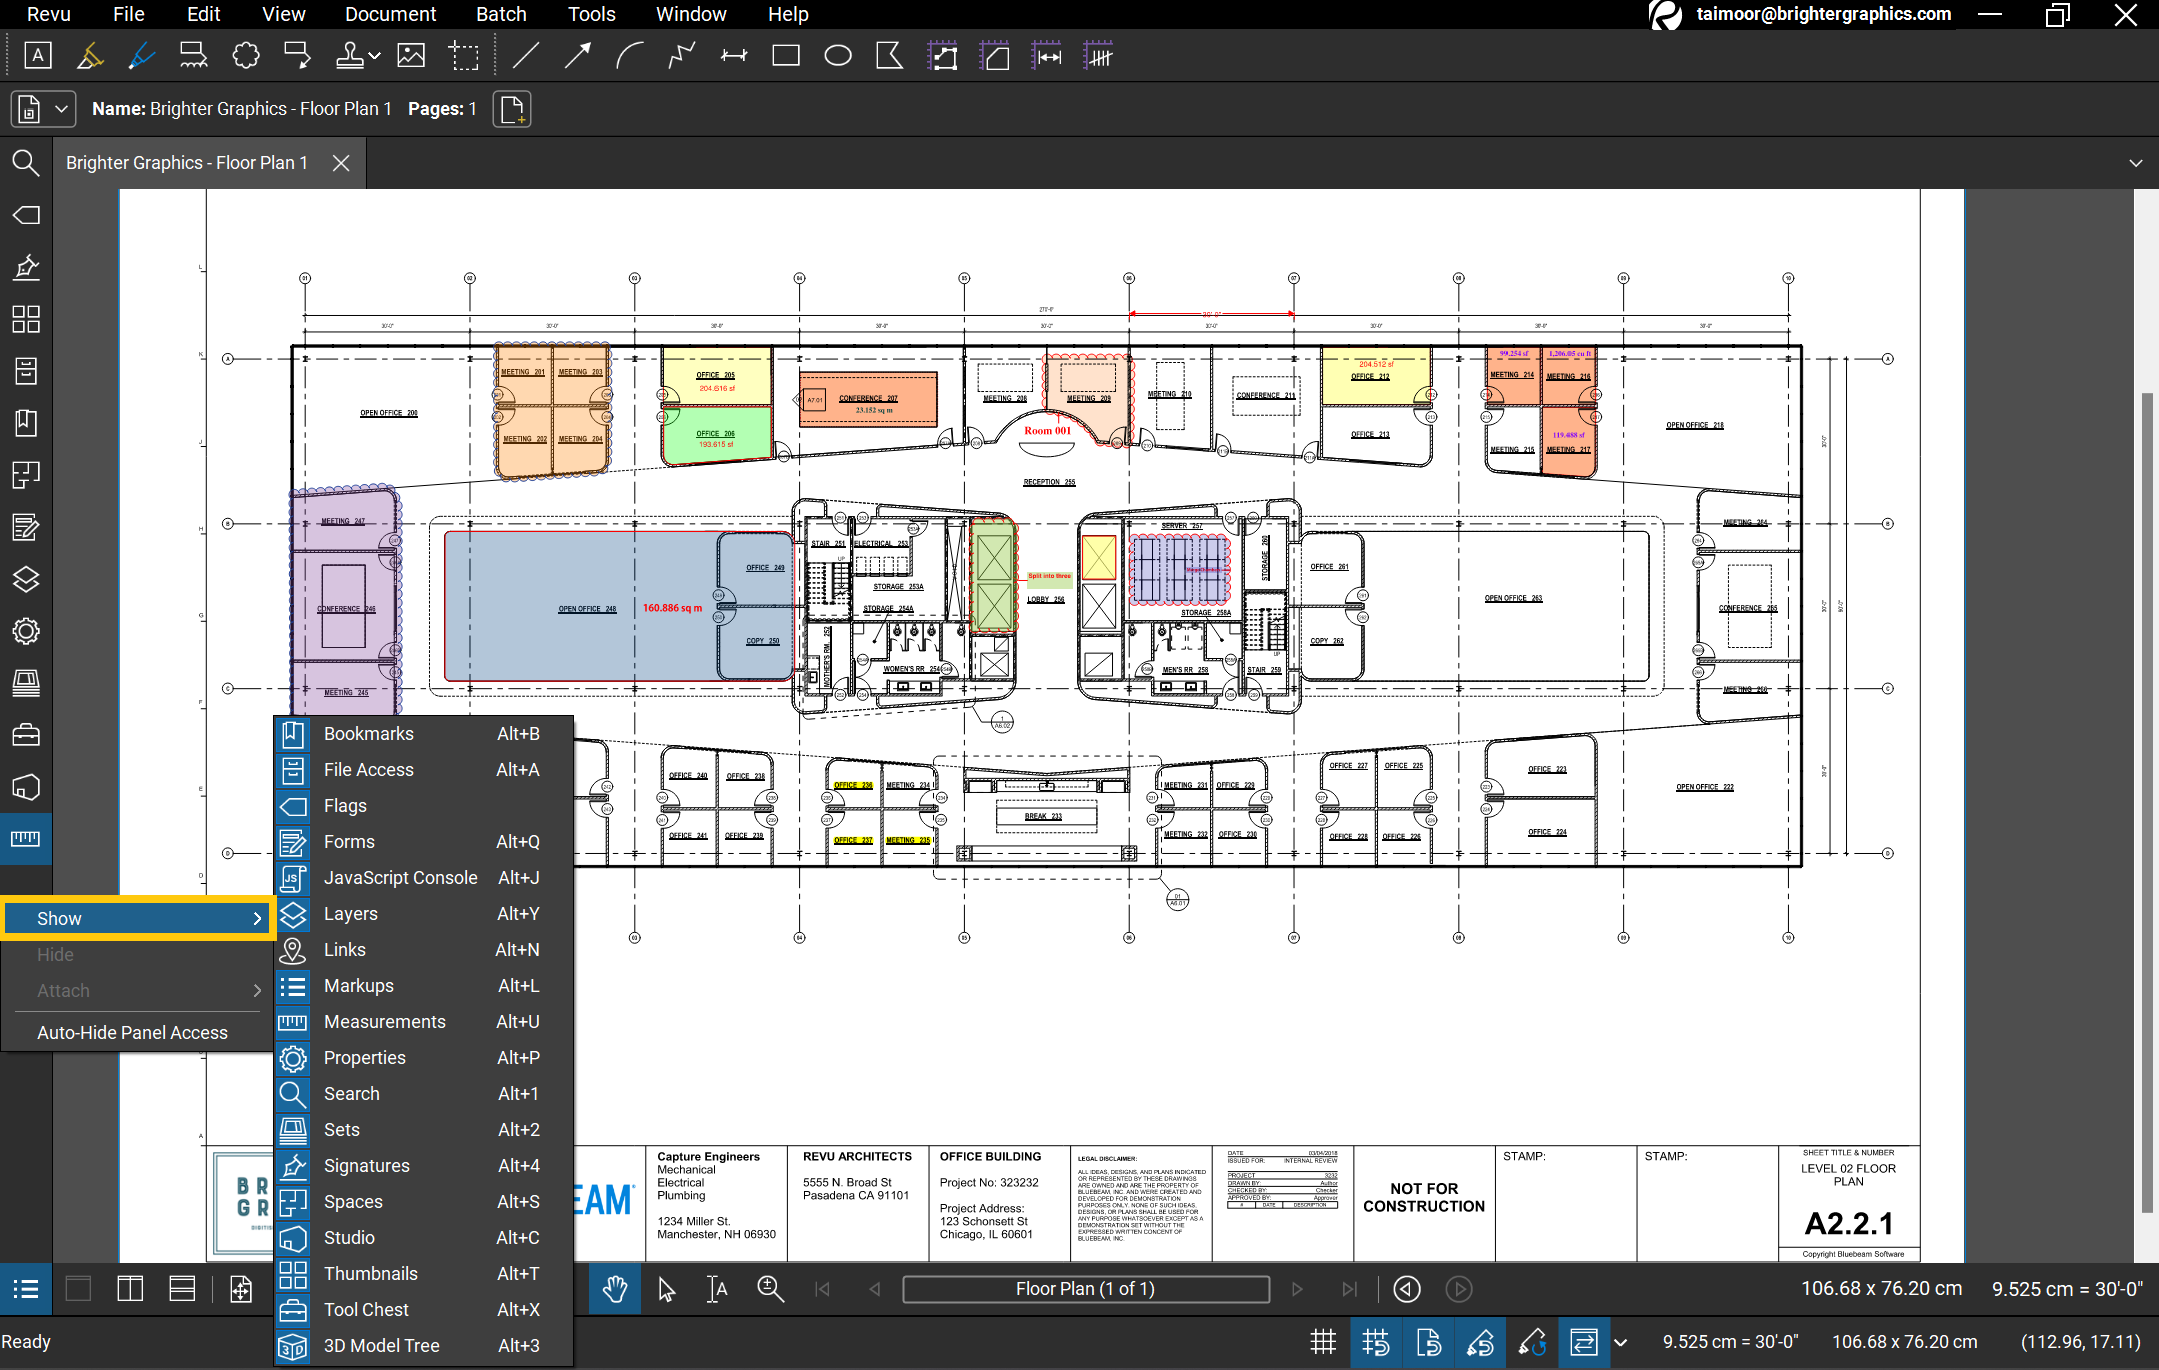
- To Show Panels directly from the Panel bar, right-click on the Panel bar to access the context menu. Hover your cursor over the “Show” option and select the desired panel you want to enable from the Panel
The menu also shows default keyboard shortcuts to show/hide wanted or unwanted panels from Revu Interface.
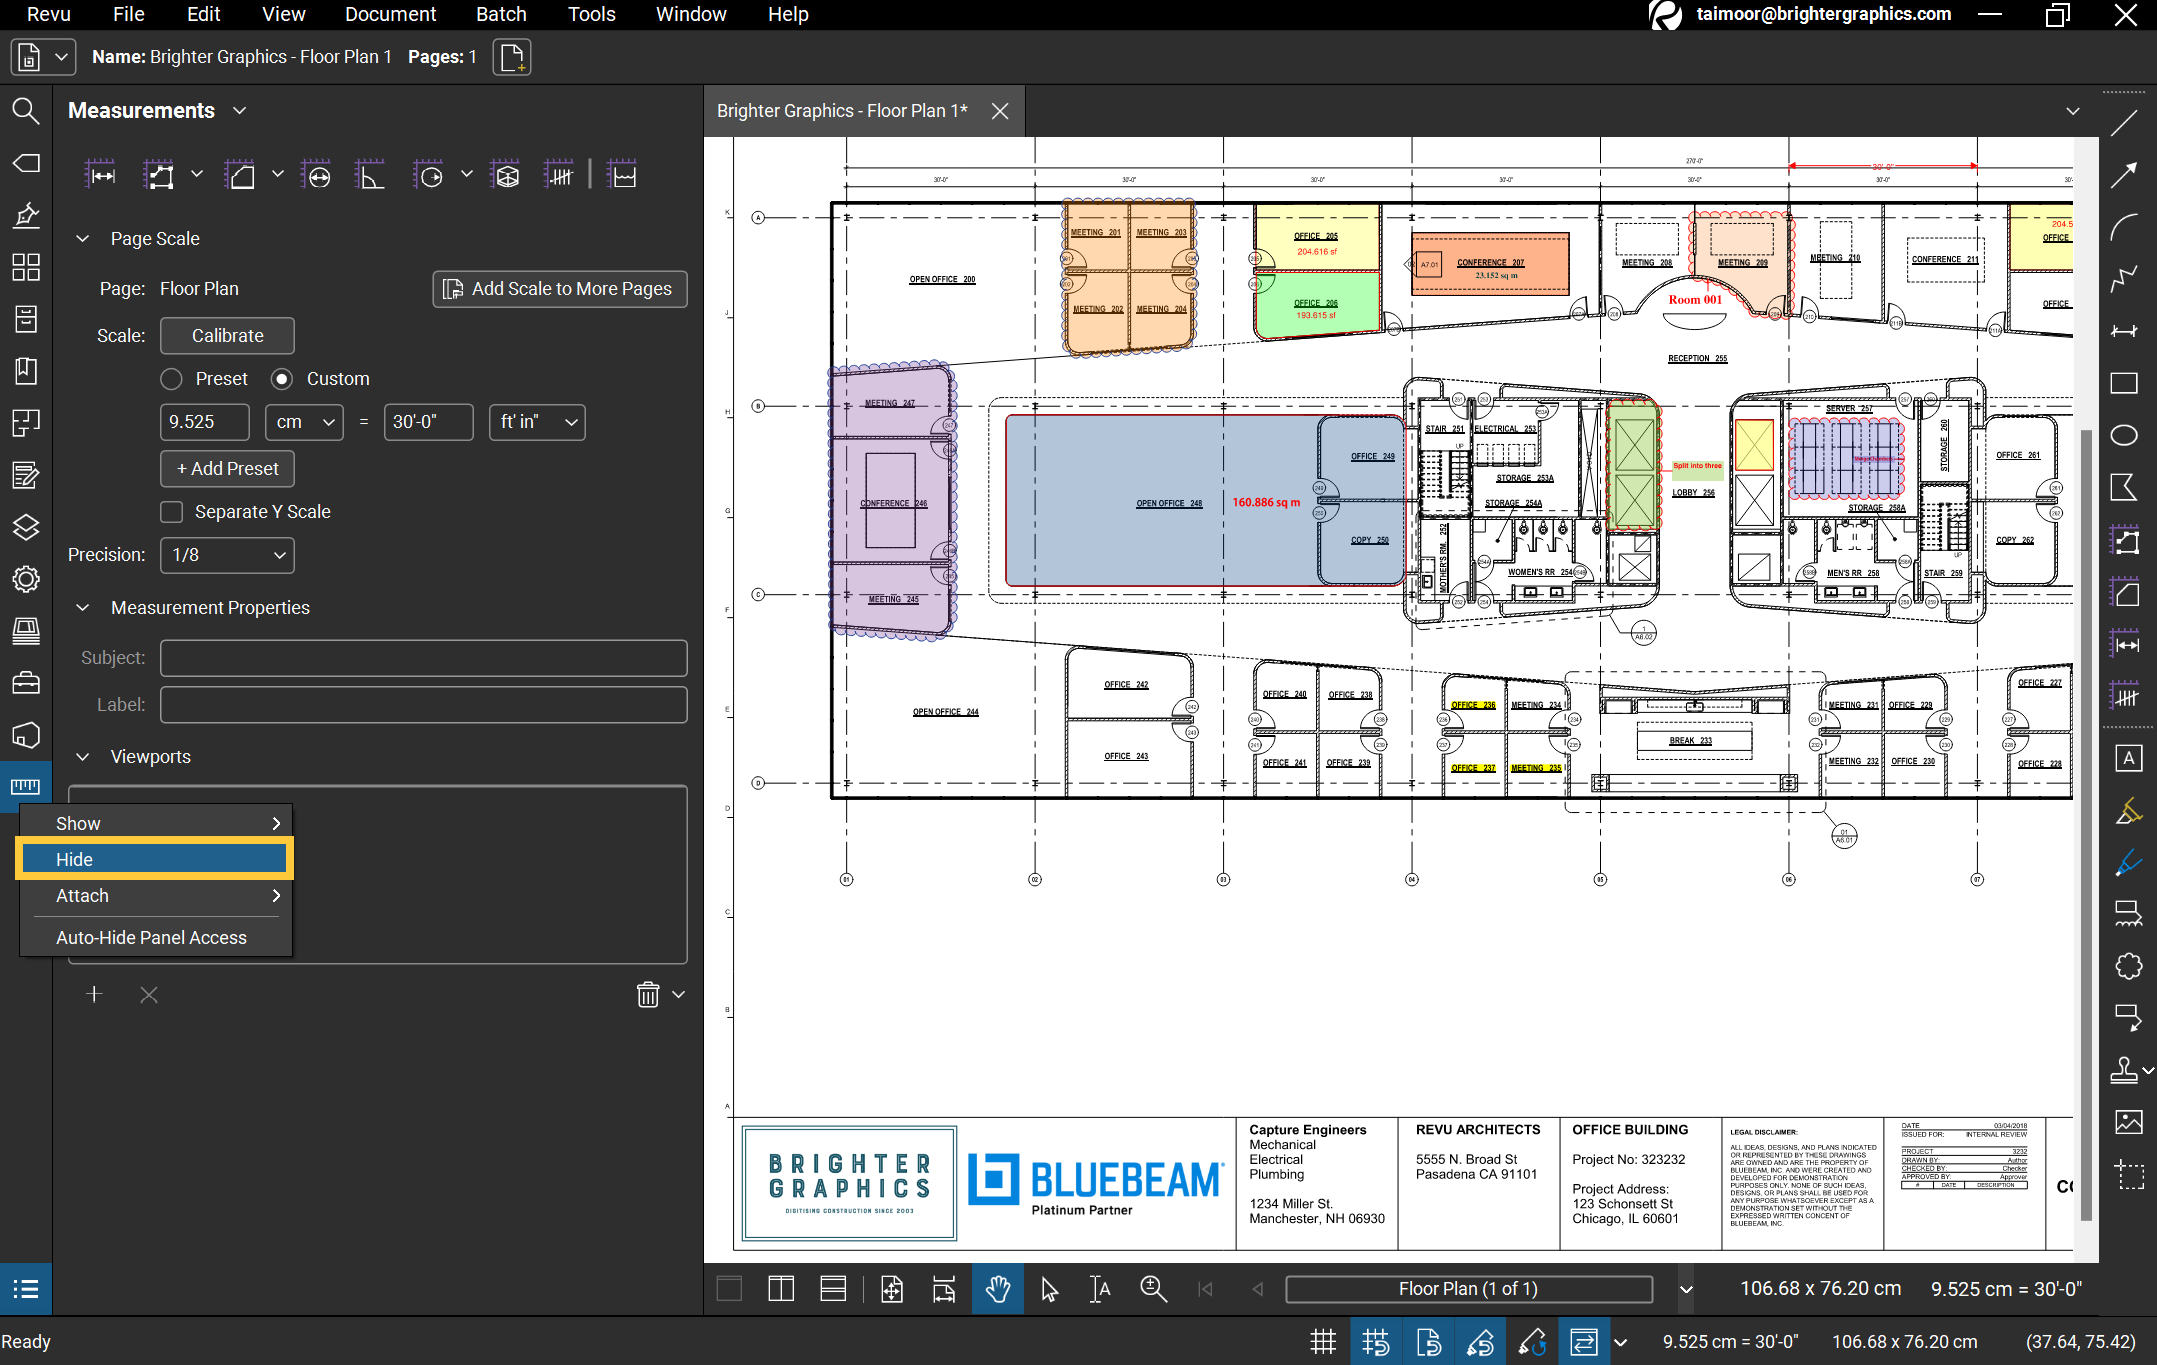
- To Hide Panels directly from the Panel bar, right-click a panel icon to access the context menu. Select “Hide” to disable the desired panel from the Panel
Relocating Panels
For visible panels, you can replace or combine them in different ways. You can reposition panels by dragging any panel icon to the left, right, or bottom of the Main Workspace.
- Dragging a panel icon to the Main Workspace and releasing it create a floating panel like the one below.

Floating panels hover over the Main Workspace and allow you to work while retaining access to the panel.
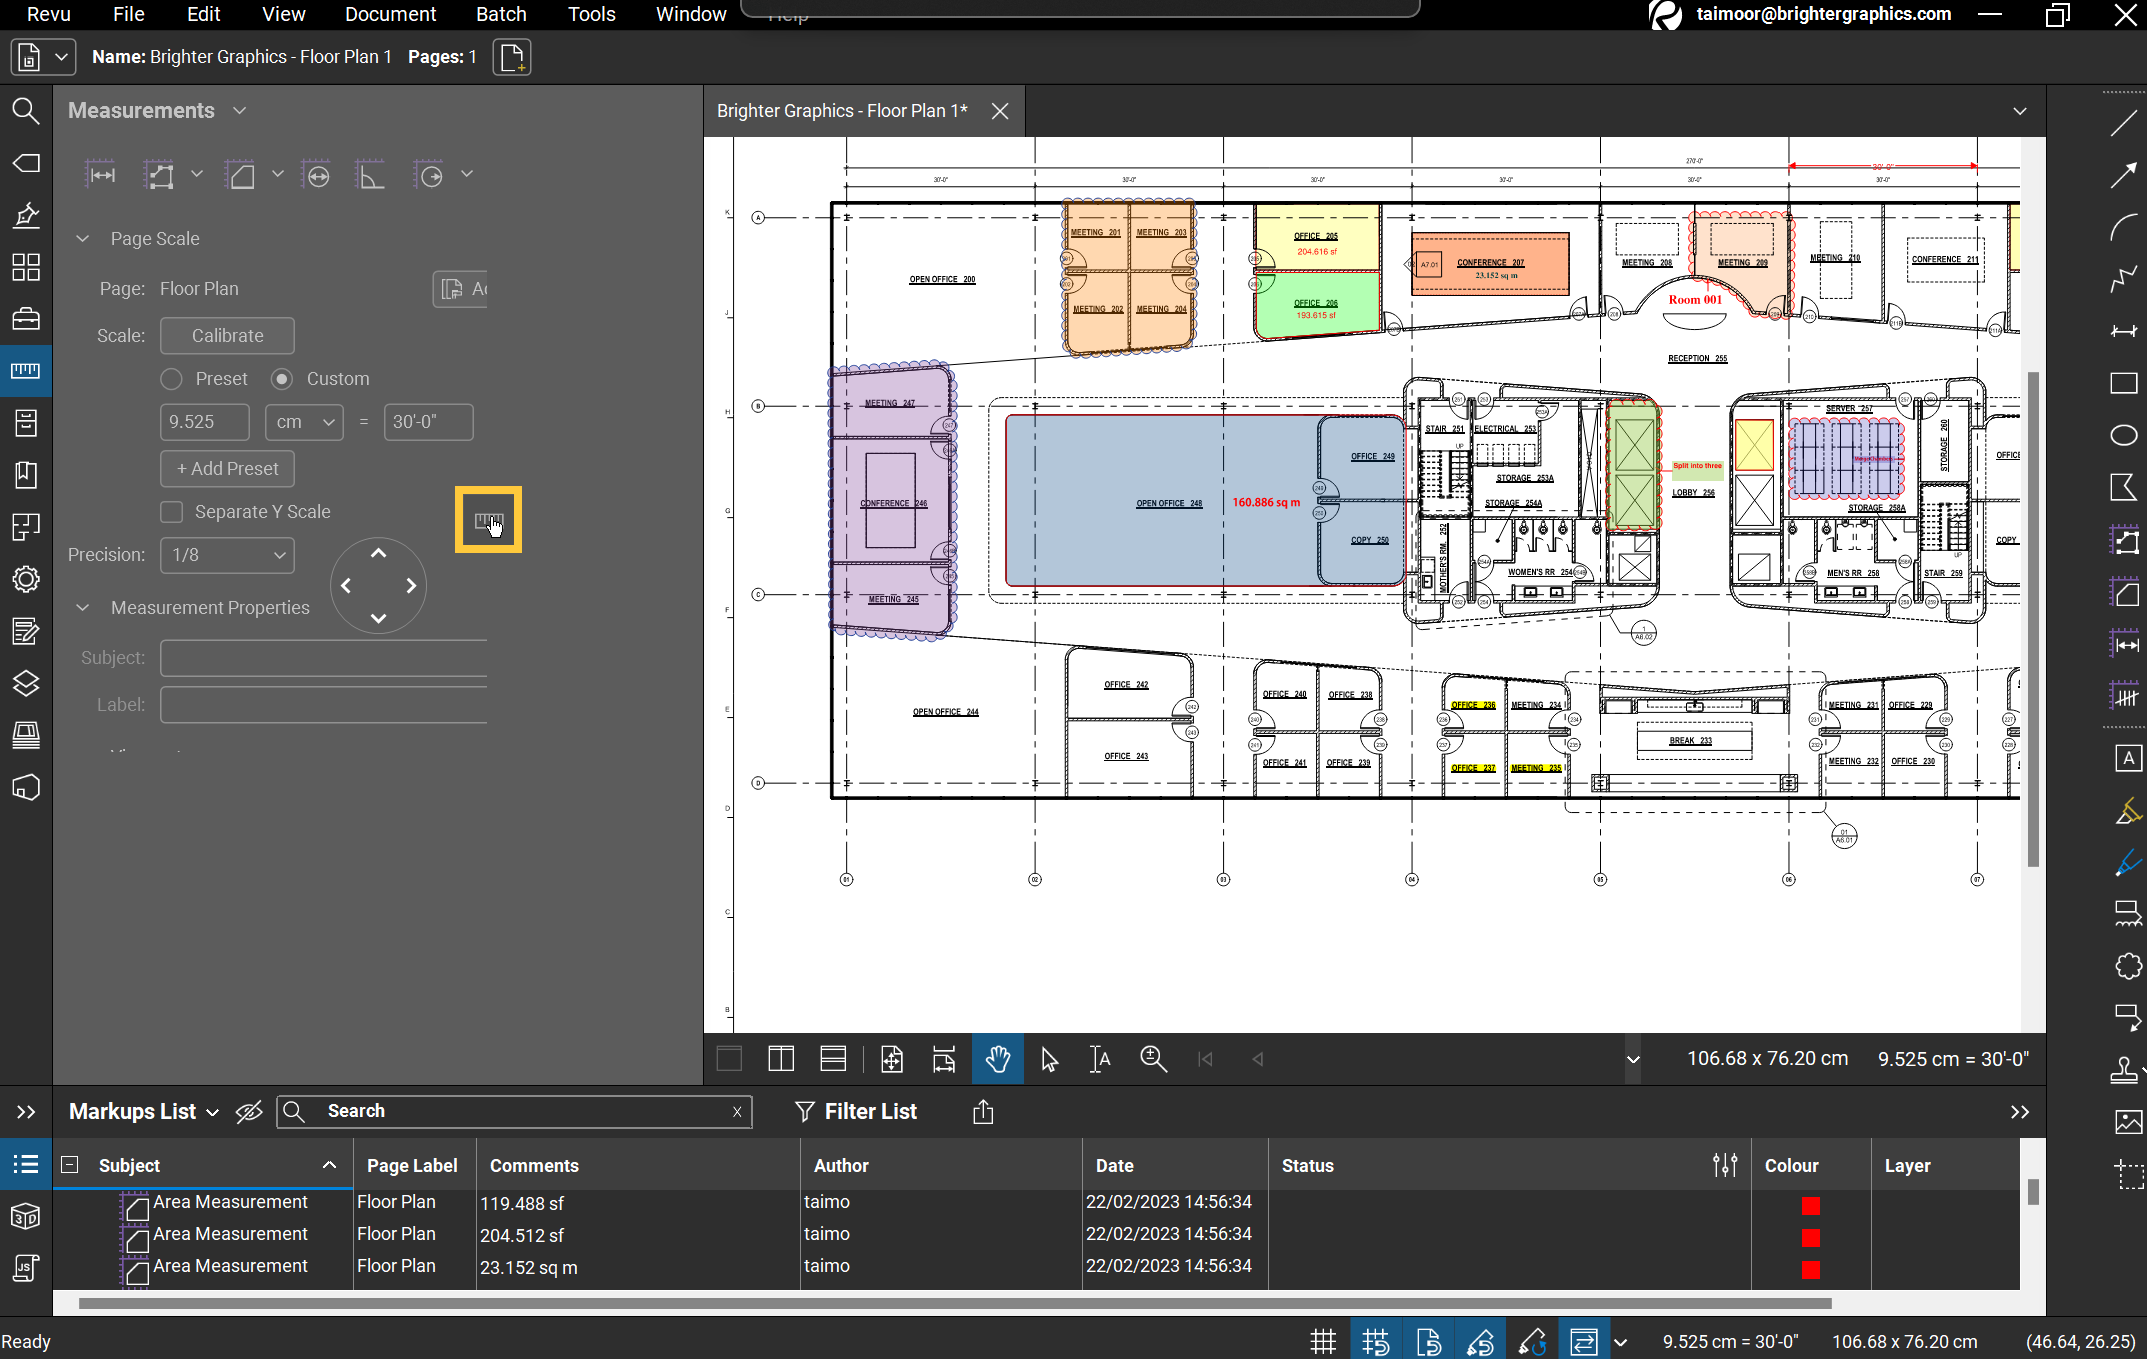
To quickly move a panel to an area of your choice
- Right-click on your desired Panel > Hover your cursor over “Attach” > click “Left”, “Right”, “Bottom”, or “Detach”.
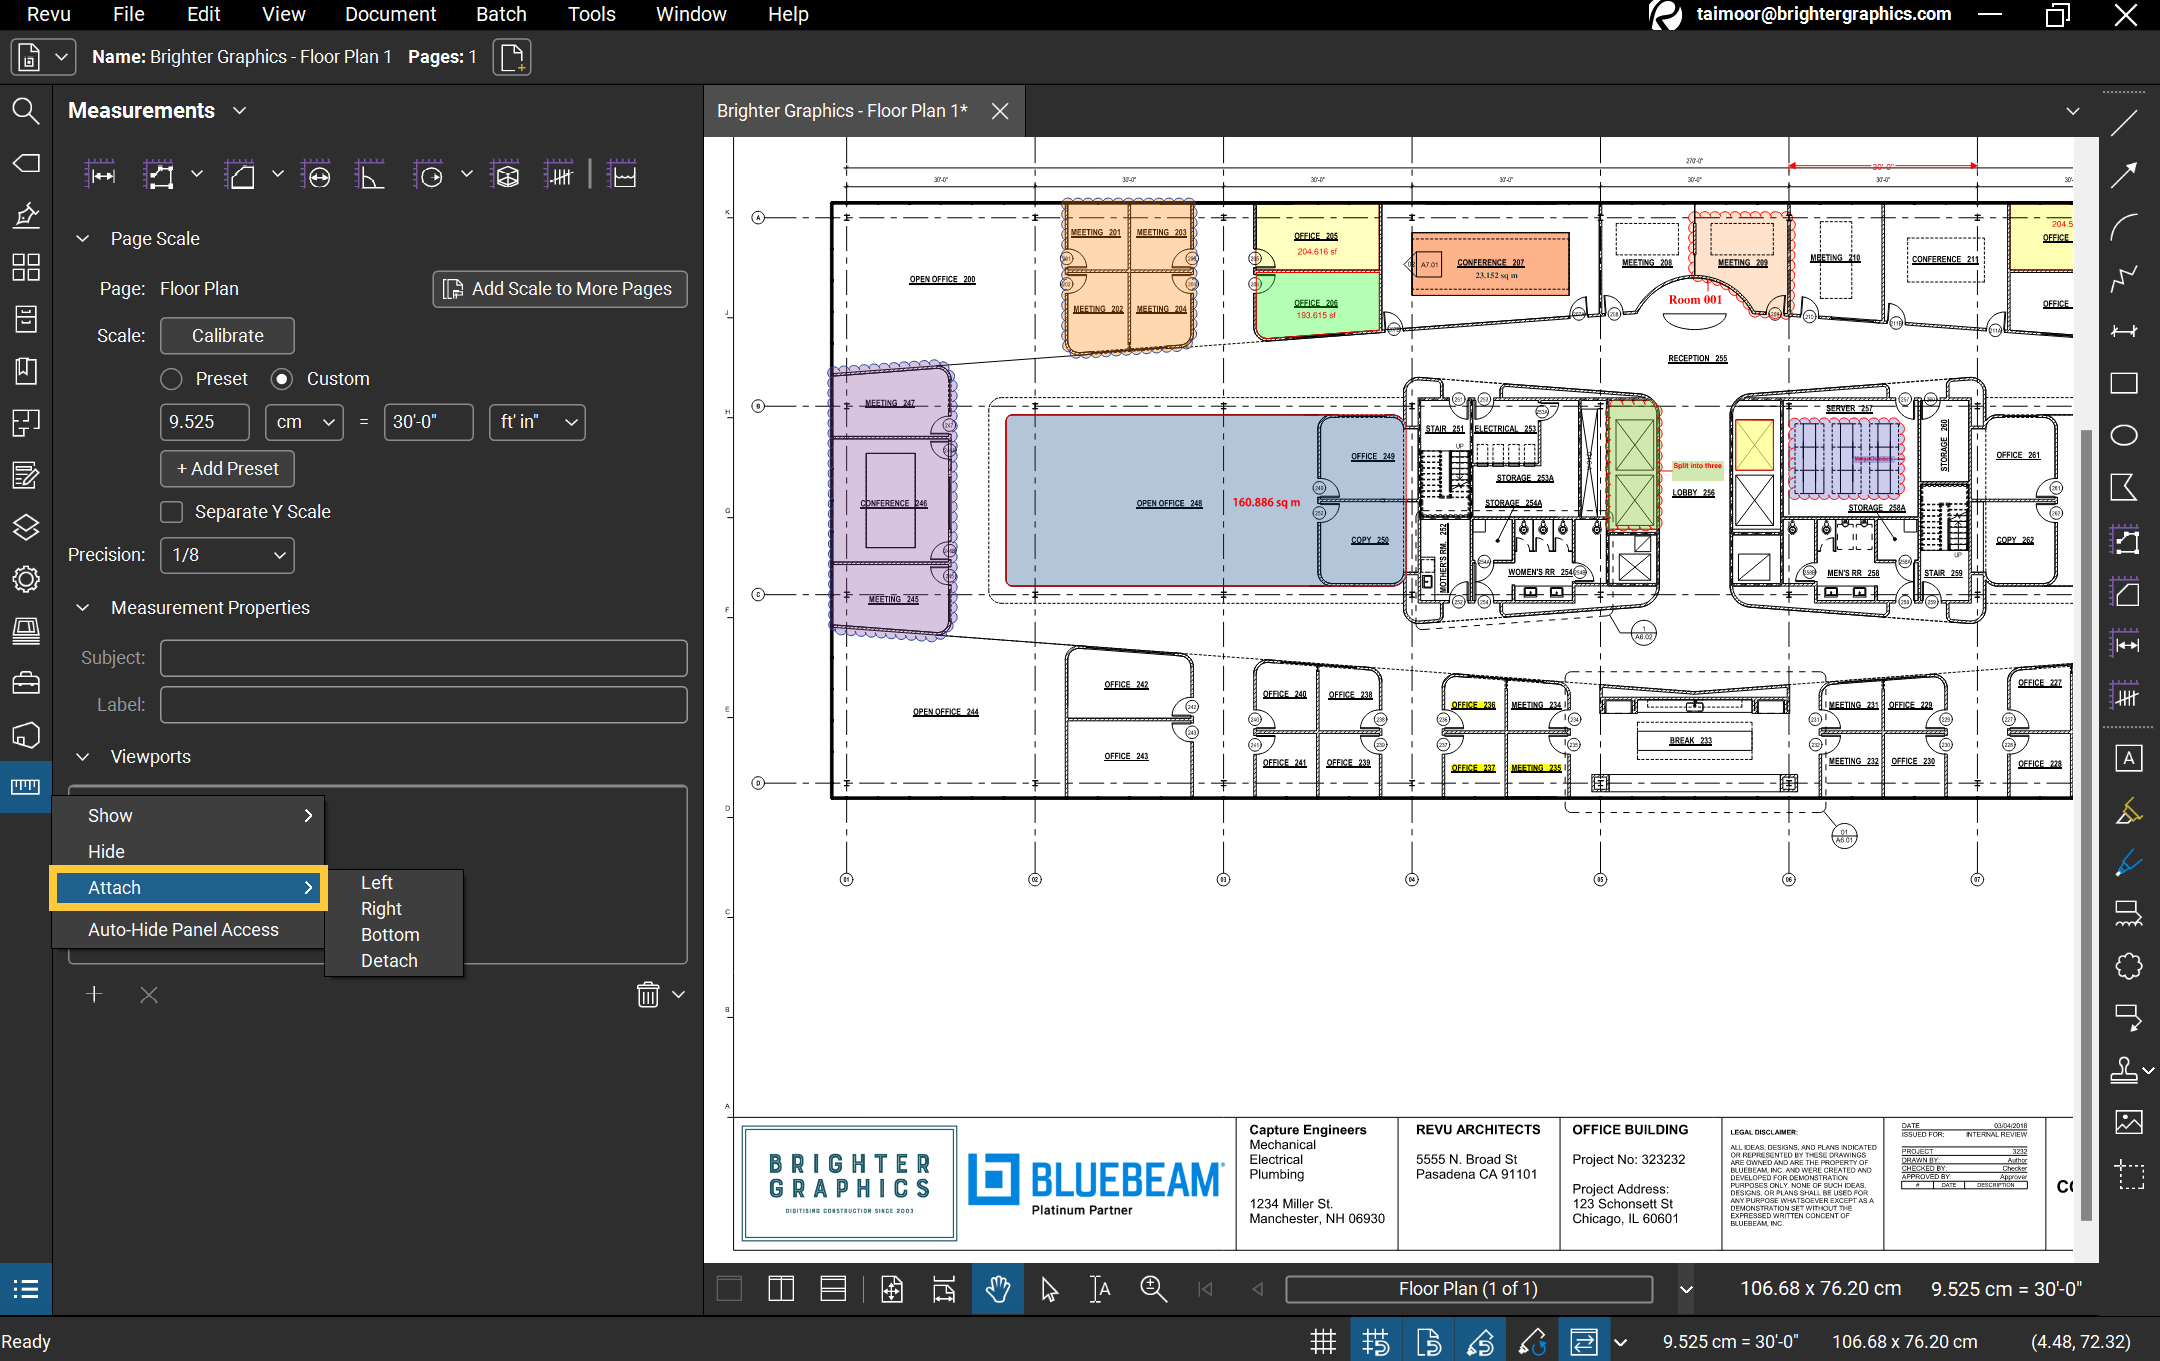
- For instance, Detach the Measurements panel and move it to the left of your main workspace.
Split Panels
To split two or more panels in Bluebeam:
- If you drag a panel icon over any open panel, you’ll see a circle with four arrows.
- Move the panel icon over one of the arrows.
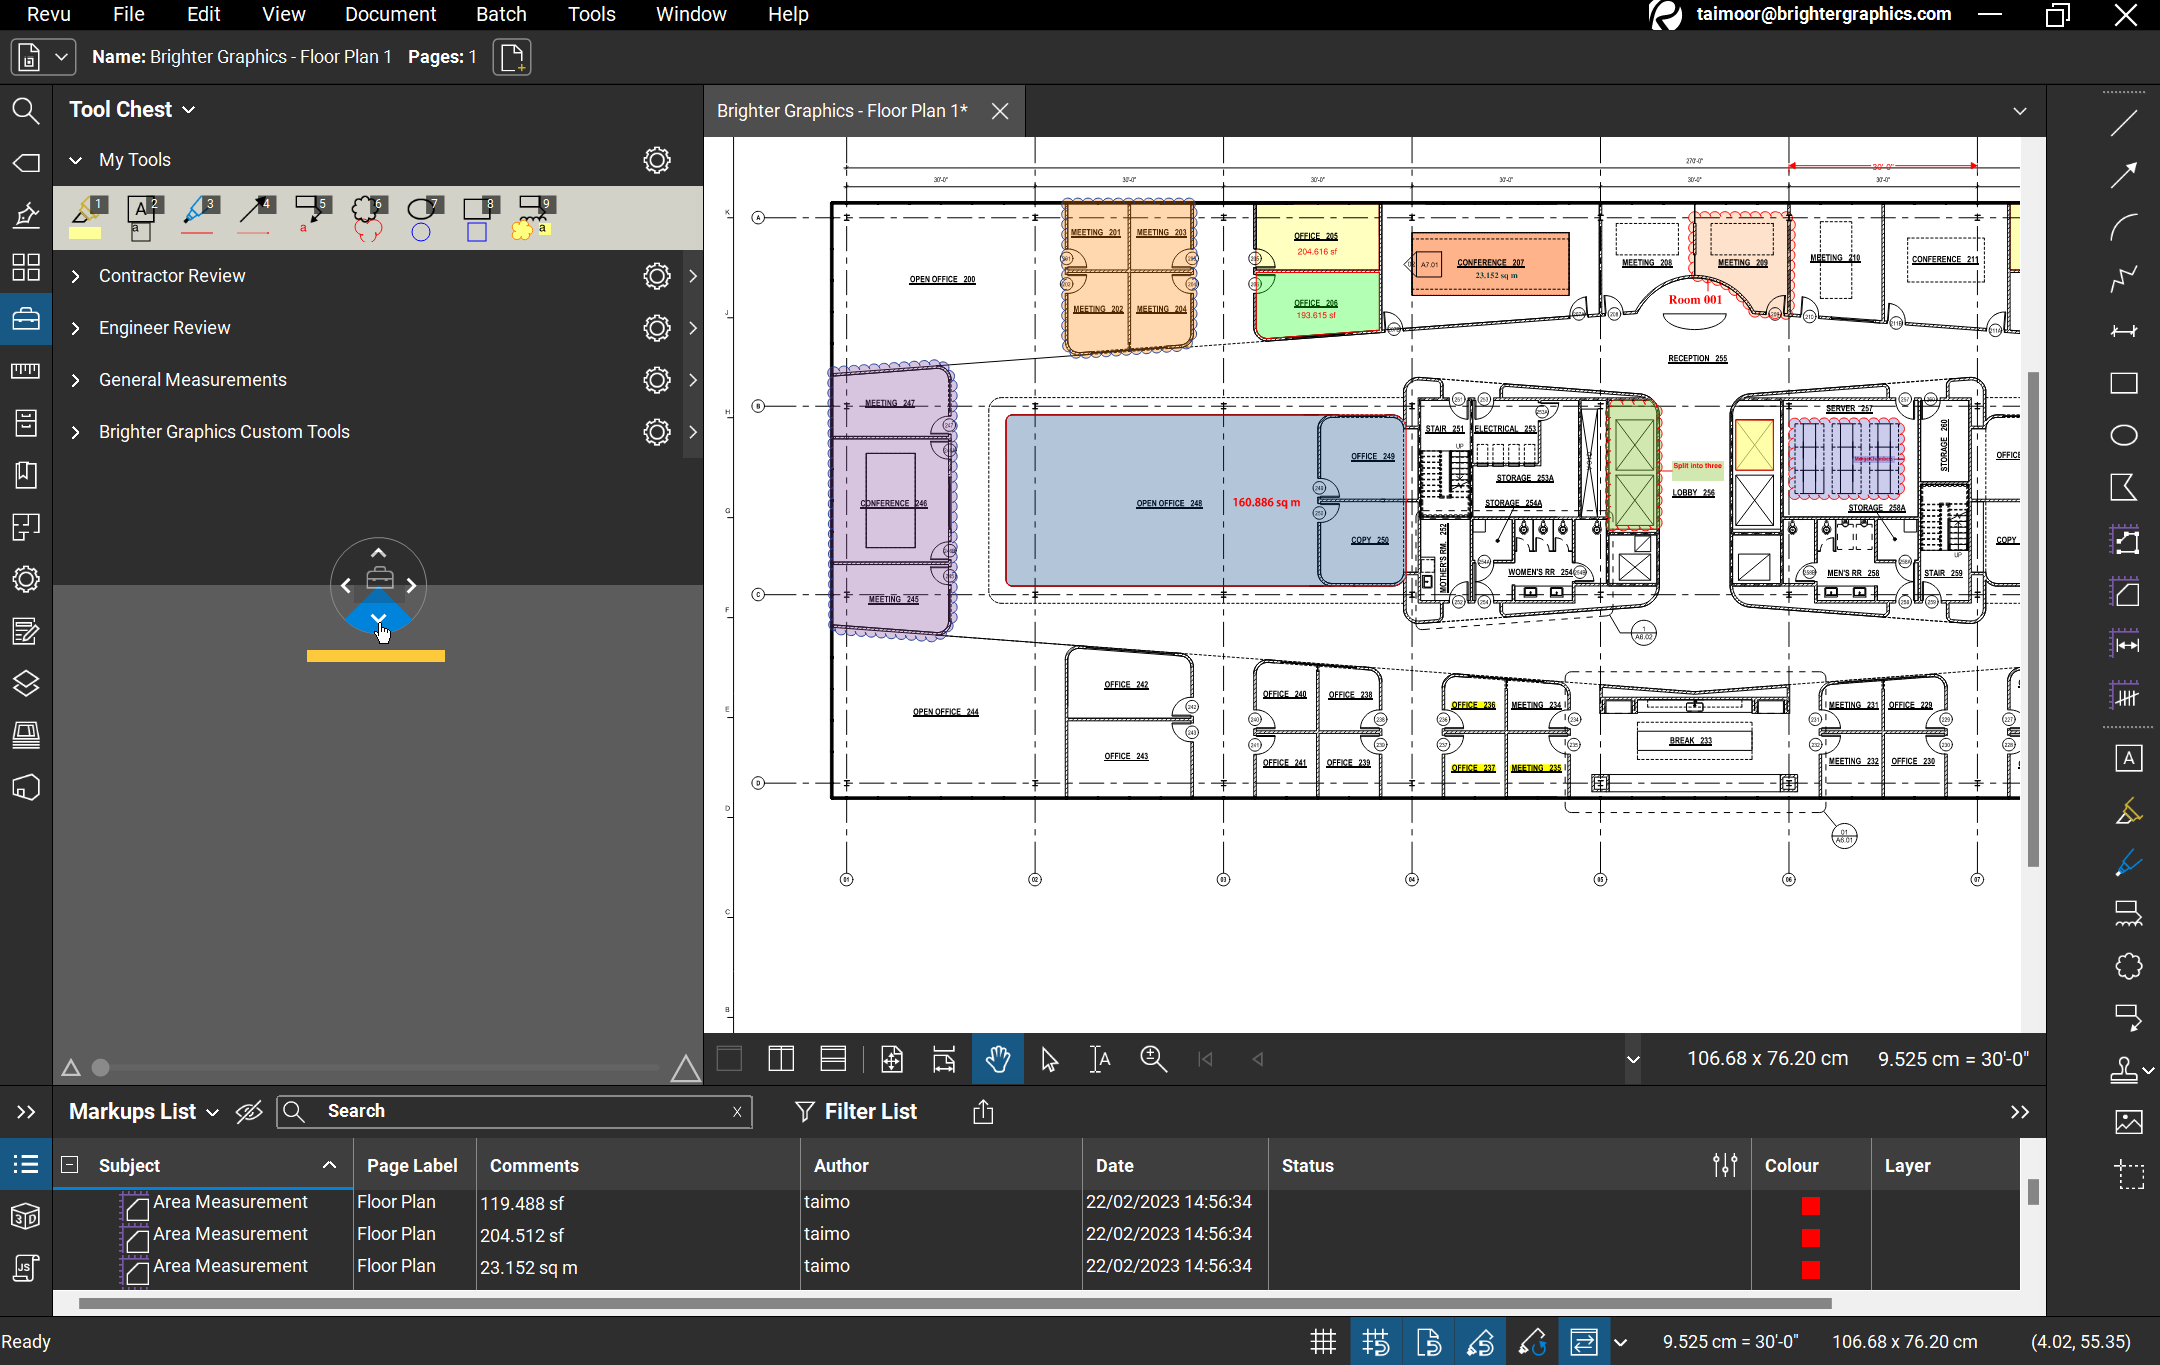
Doing so will split the panel in your chosen direction (Left, Right, Top, or Bottom).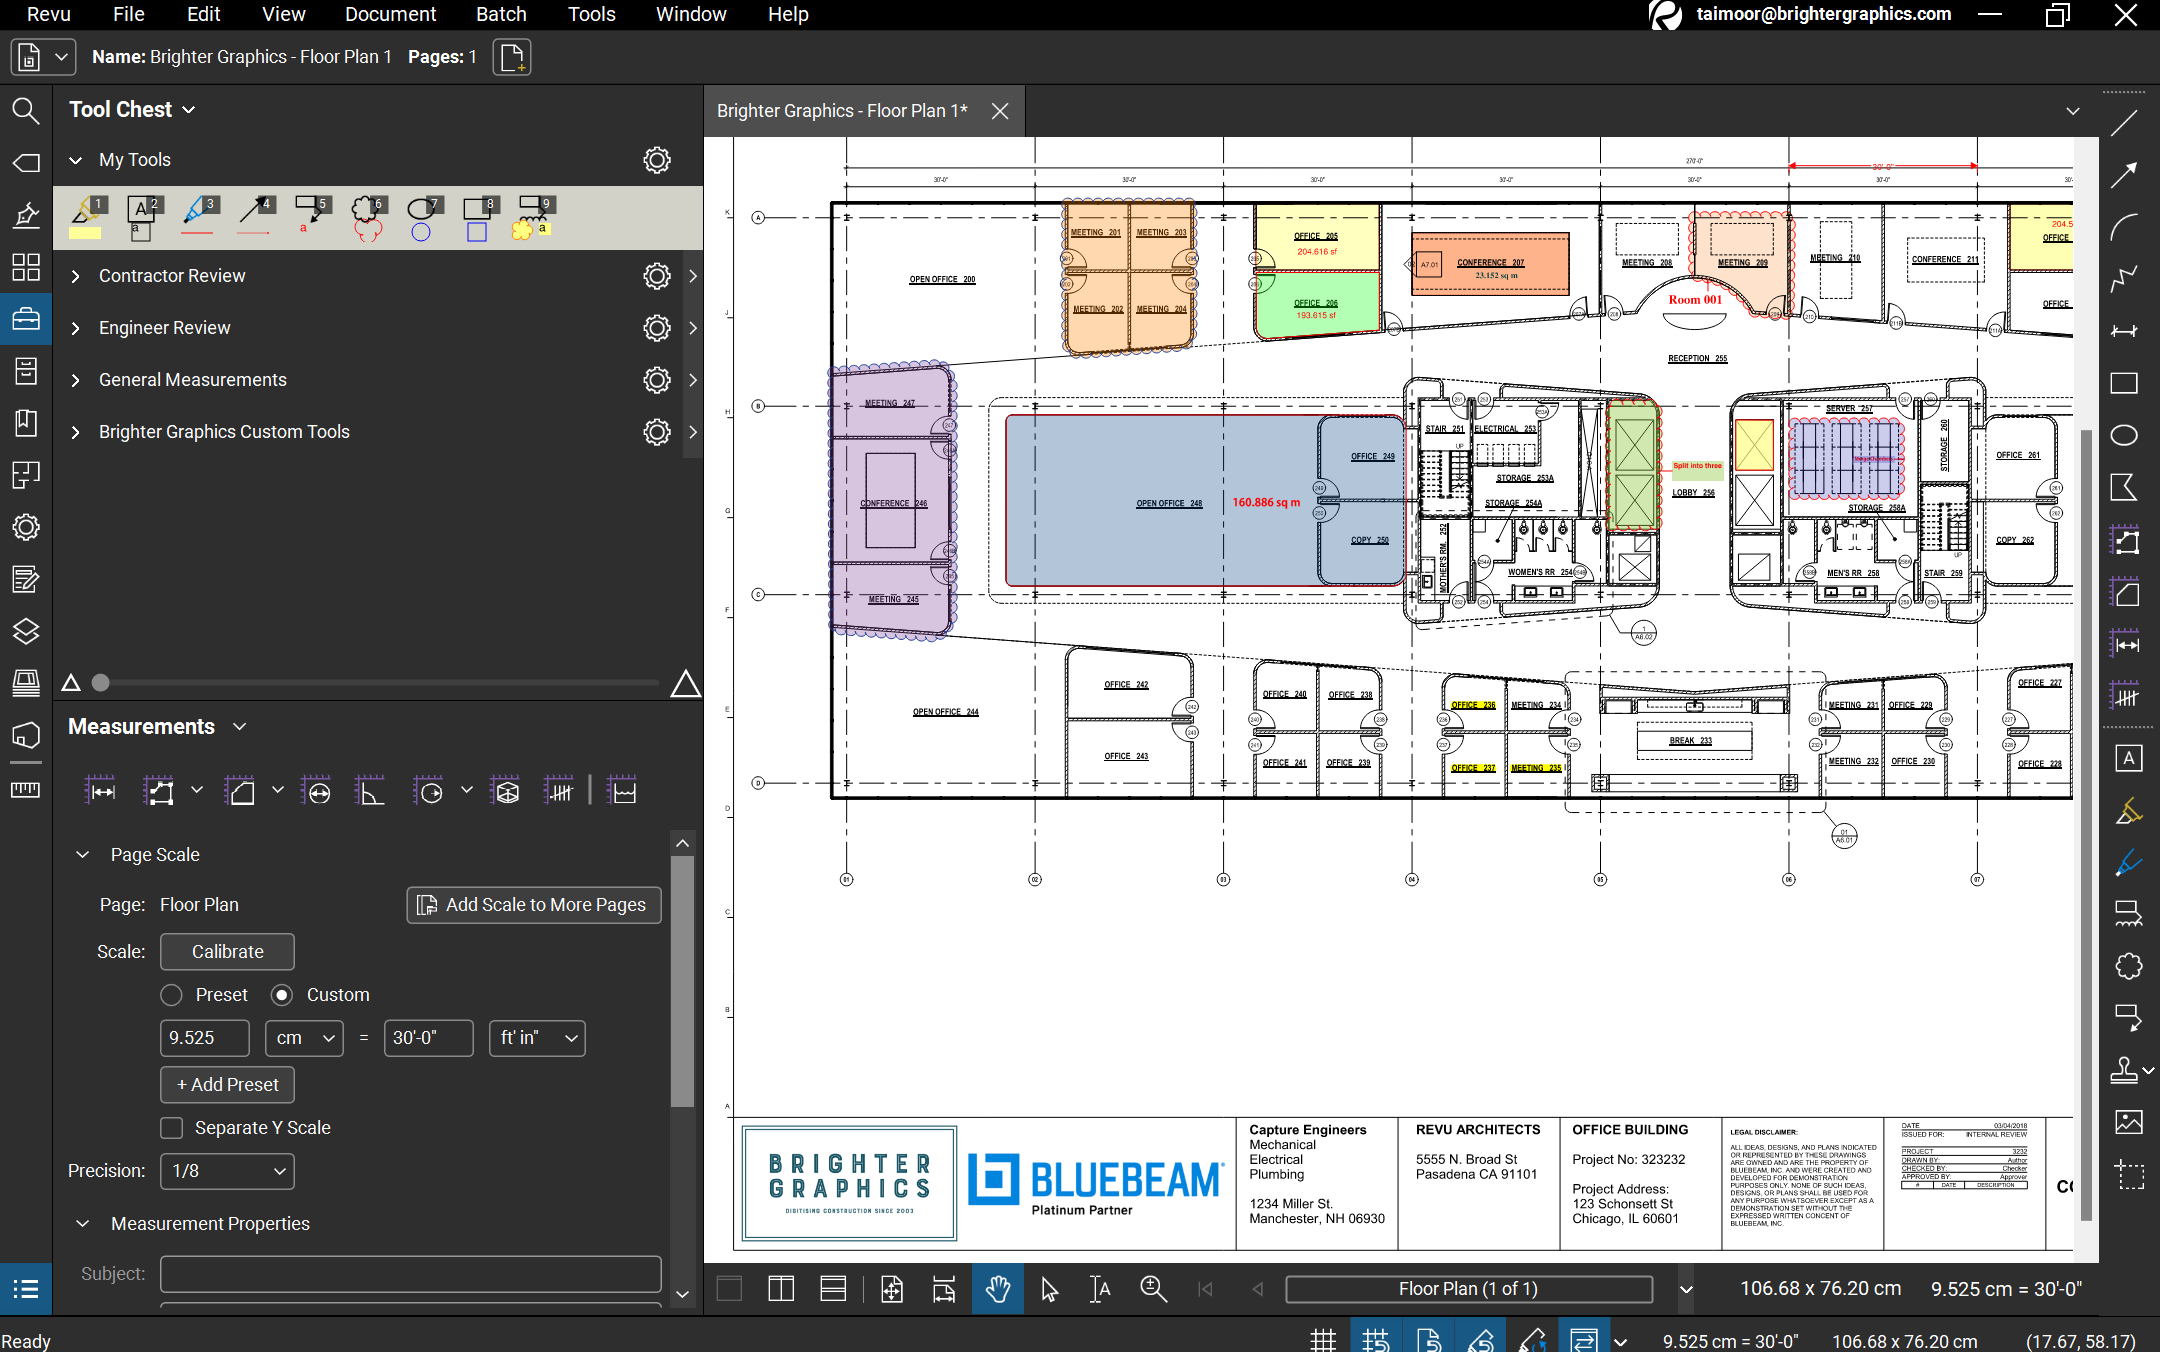
It allows you to have multiple panels opened at the same time. A split panel displays a grey line above its icon. To undo split panel mode, drag the panel icon above the grey line to another panel area.
Saving Custom Settings to Profile
To Save your toolbars and panels arrangement to your current profile:
- From the Menu Bar go to “Revu”, hover your over the “Profiles” option, and click on the “Save Profile”

Explore more about how to use and customise profiles in Bluebeam Revu