


Navigating Markup Tools
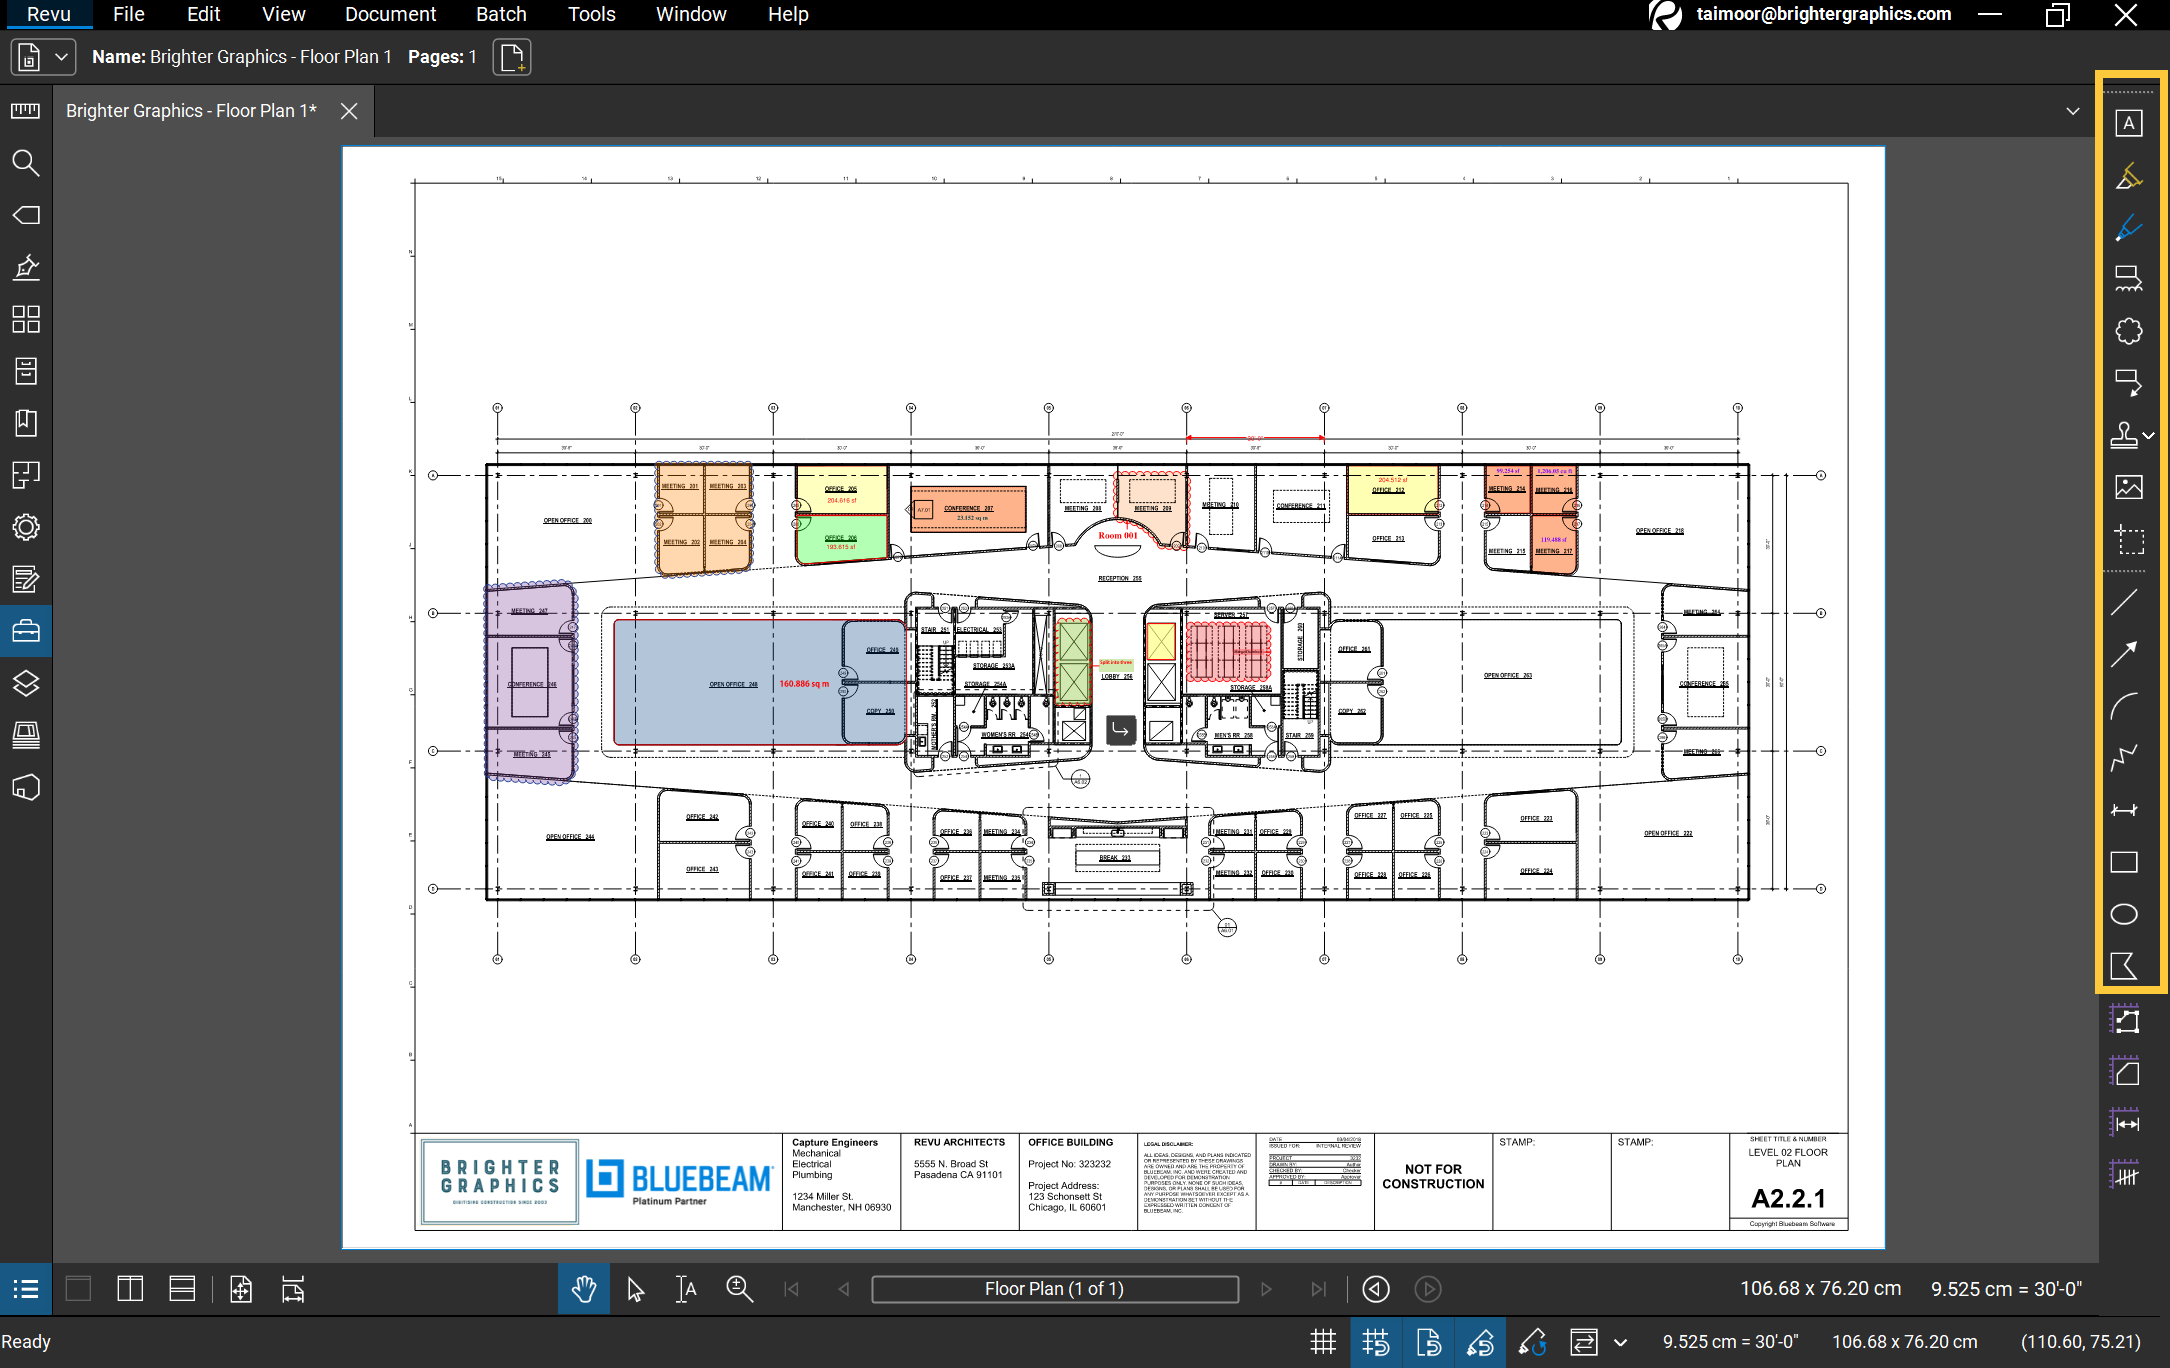
You can apply different markups to annotate drawings in Bluebeam Revu. The Markup Tools are aligned on the left of the Revu window. It includes:
- Text Box
- Highlight
- Pen
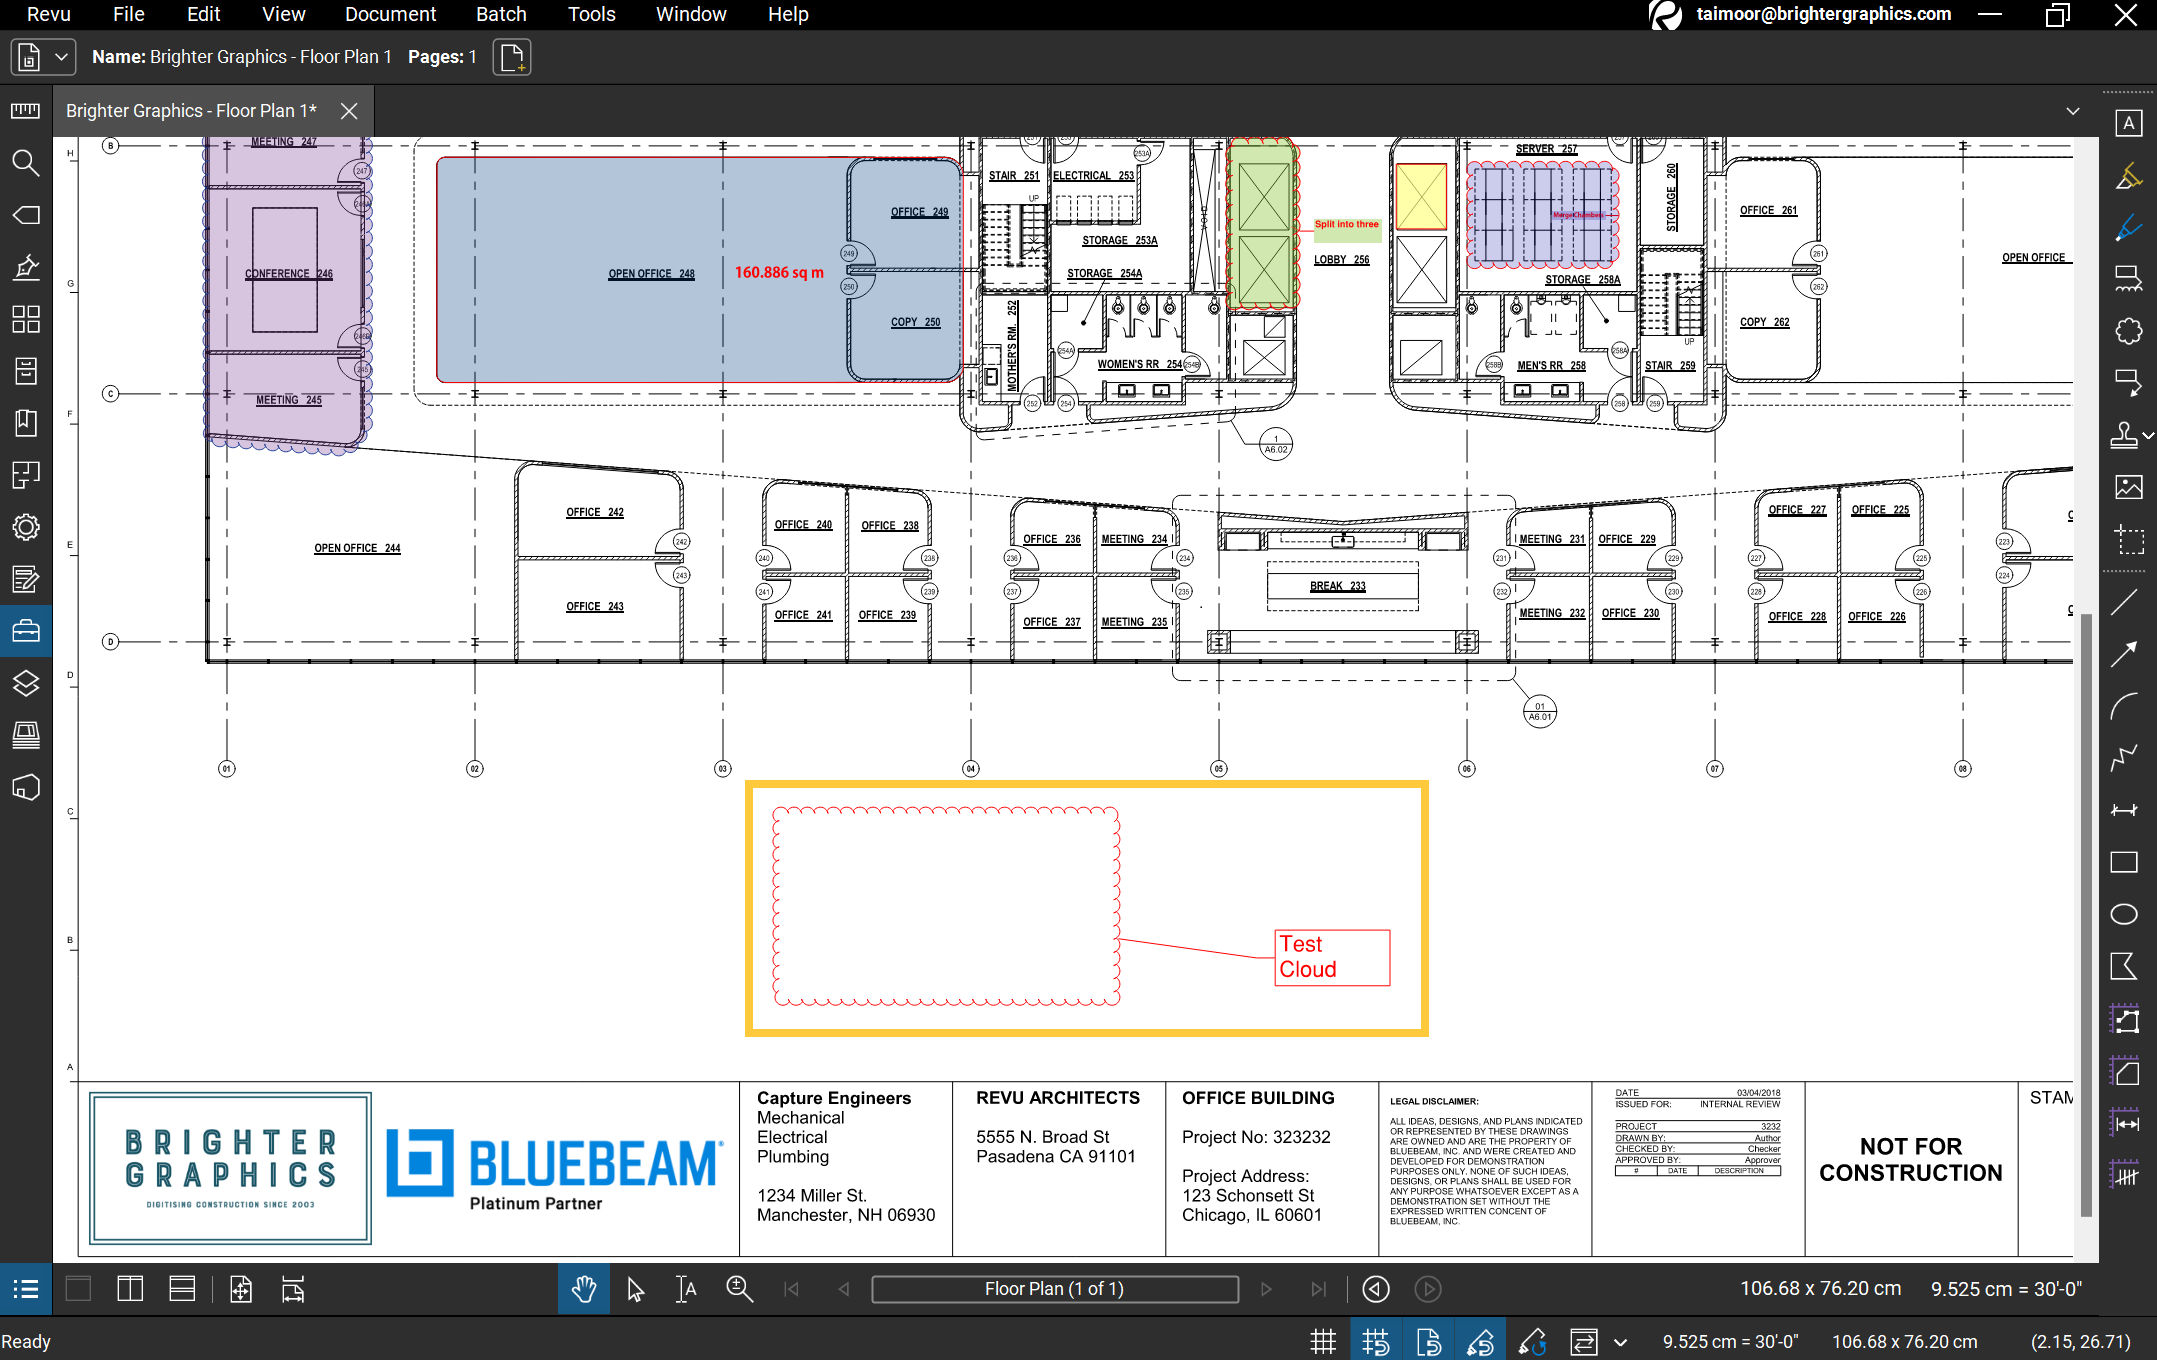
- Cloud +
- Cloud
- Call-out
- Stamps
- Image
- Line
- Arrow
- Curve
- Polyline
- Dimension
- Rectangle
- Ellipse
- Polygon
Uncovering Markups
Select Tool
The Select tool is not a markup tool but discussing it here is important as it allows you to move, select, and edit the markups on your document.
– Click the Select tool on the Navigation bar. 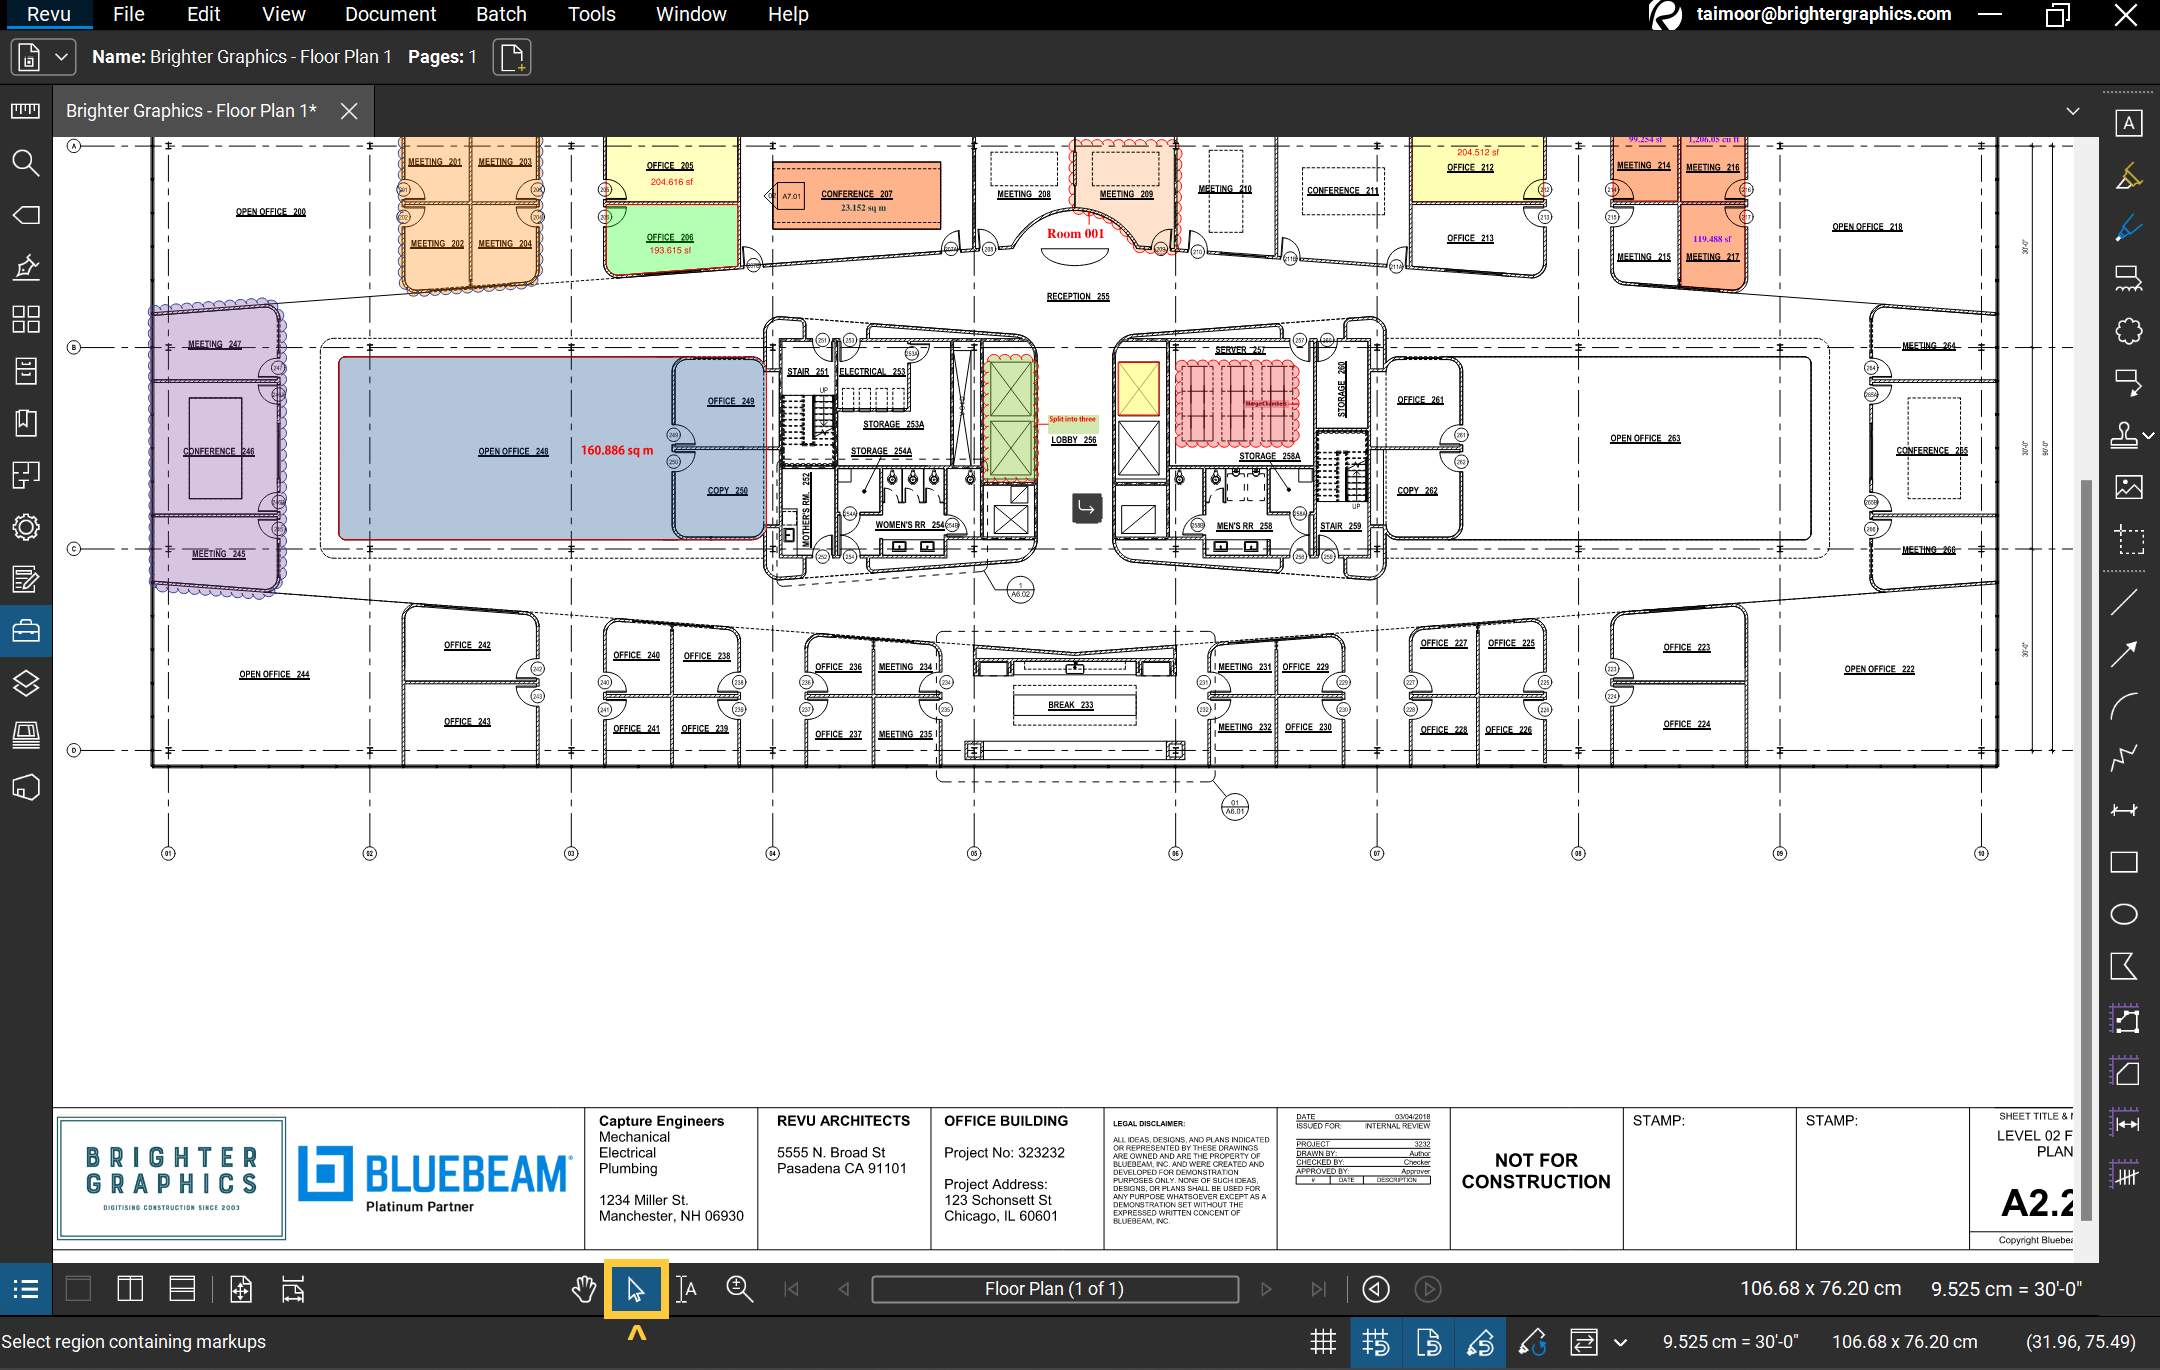
– Click on the required markup to select it.
– Drag the selection to move it to the desired location.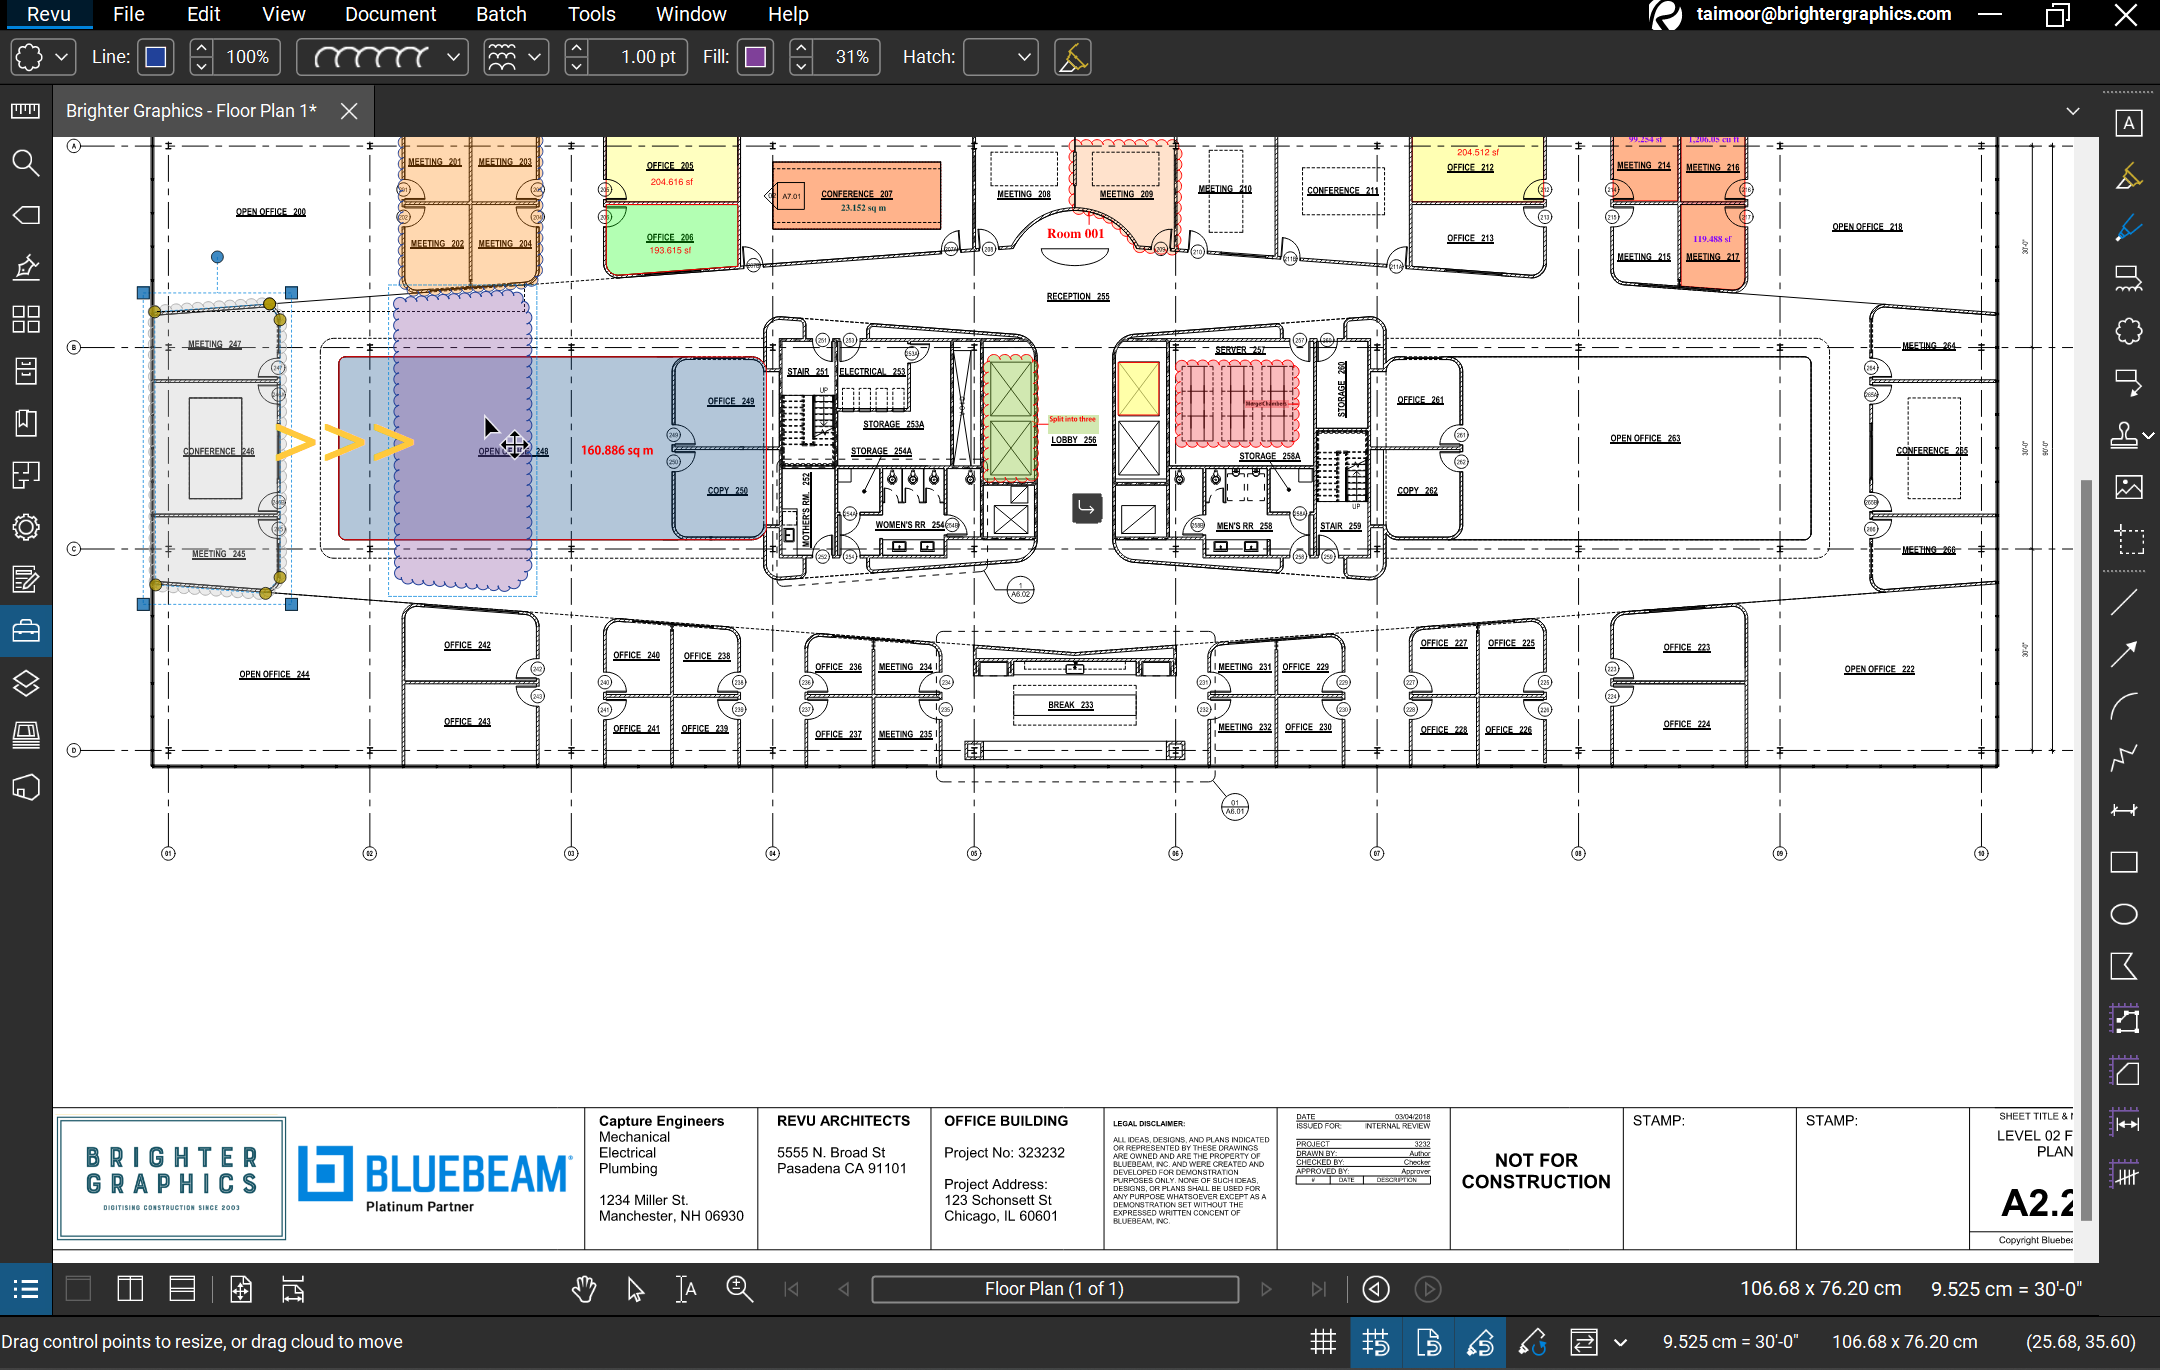
– Drag to draw a selection around desired markups to select multiple ones at once.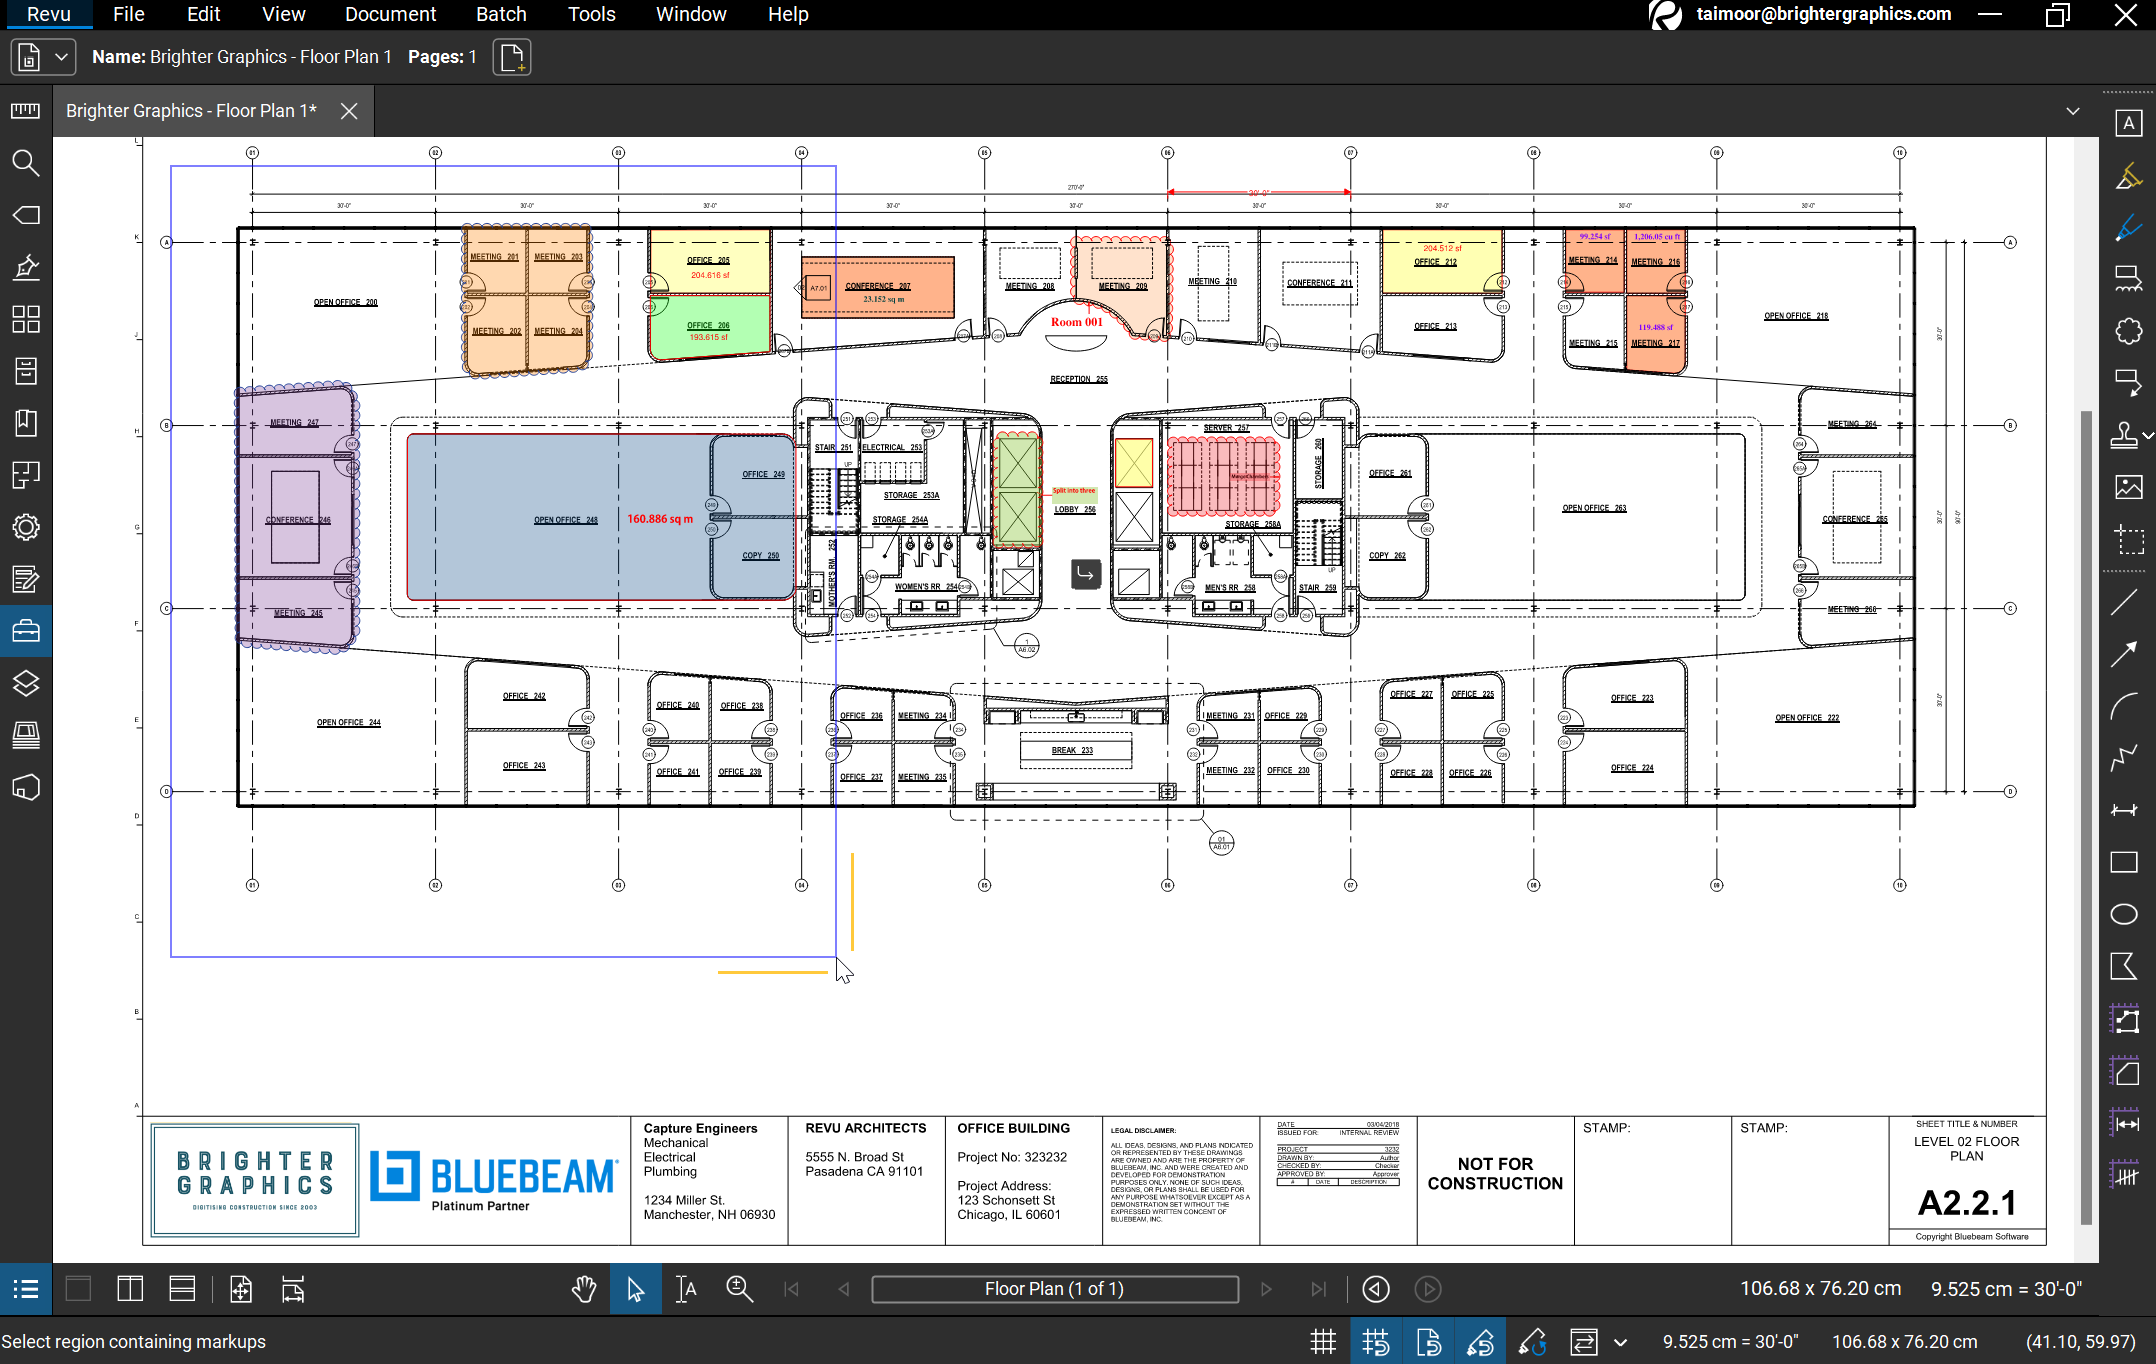
– Or right-click on the selected markup(s) for additional options like
- Cut
- Copy
- Paste
- Delete
- Save to Tool Chest
- Flatten
- Lock
- Properties,etc
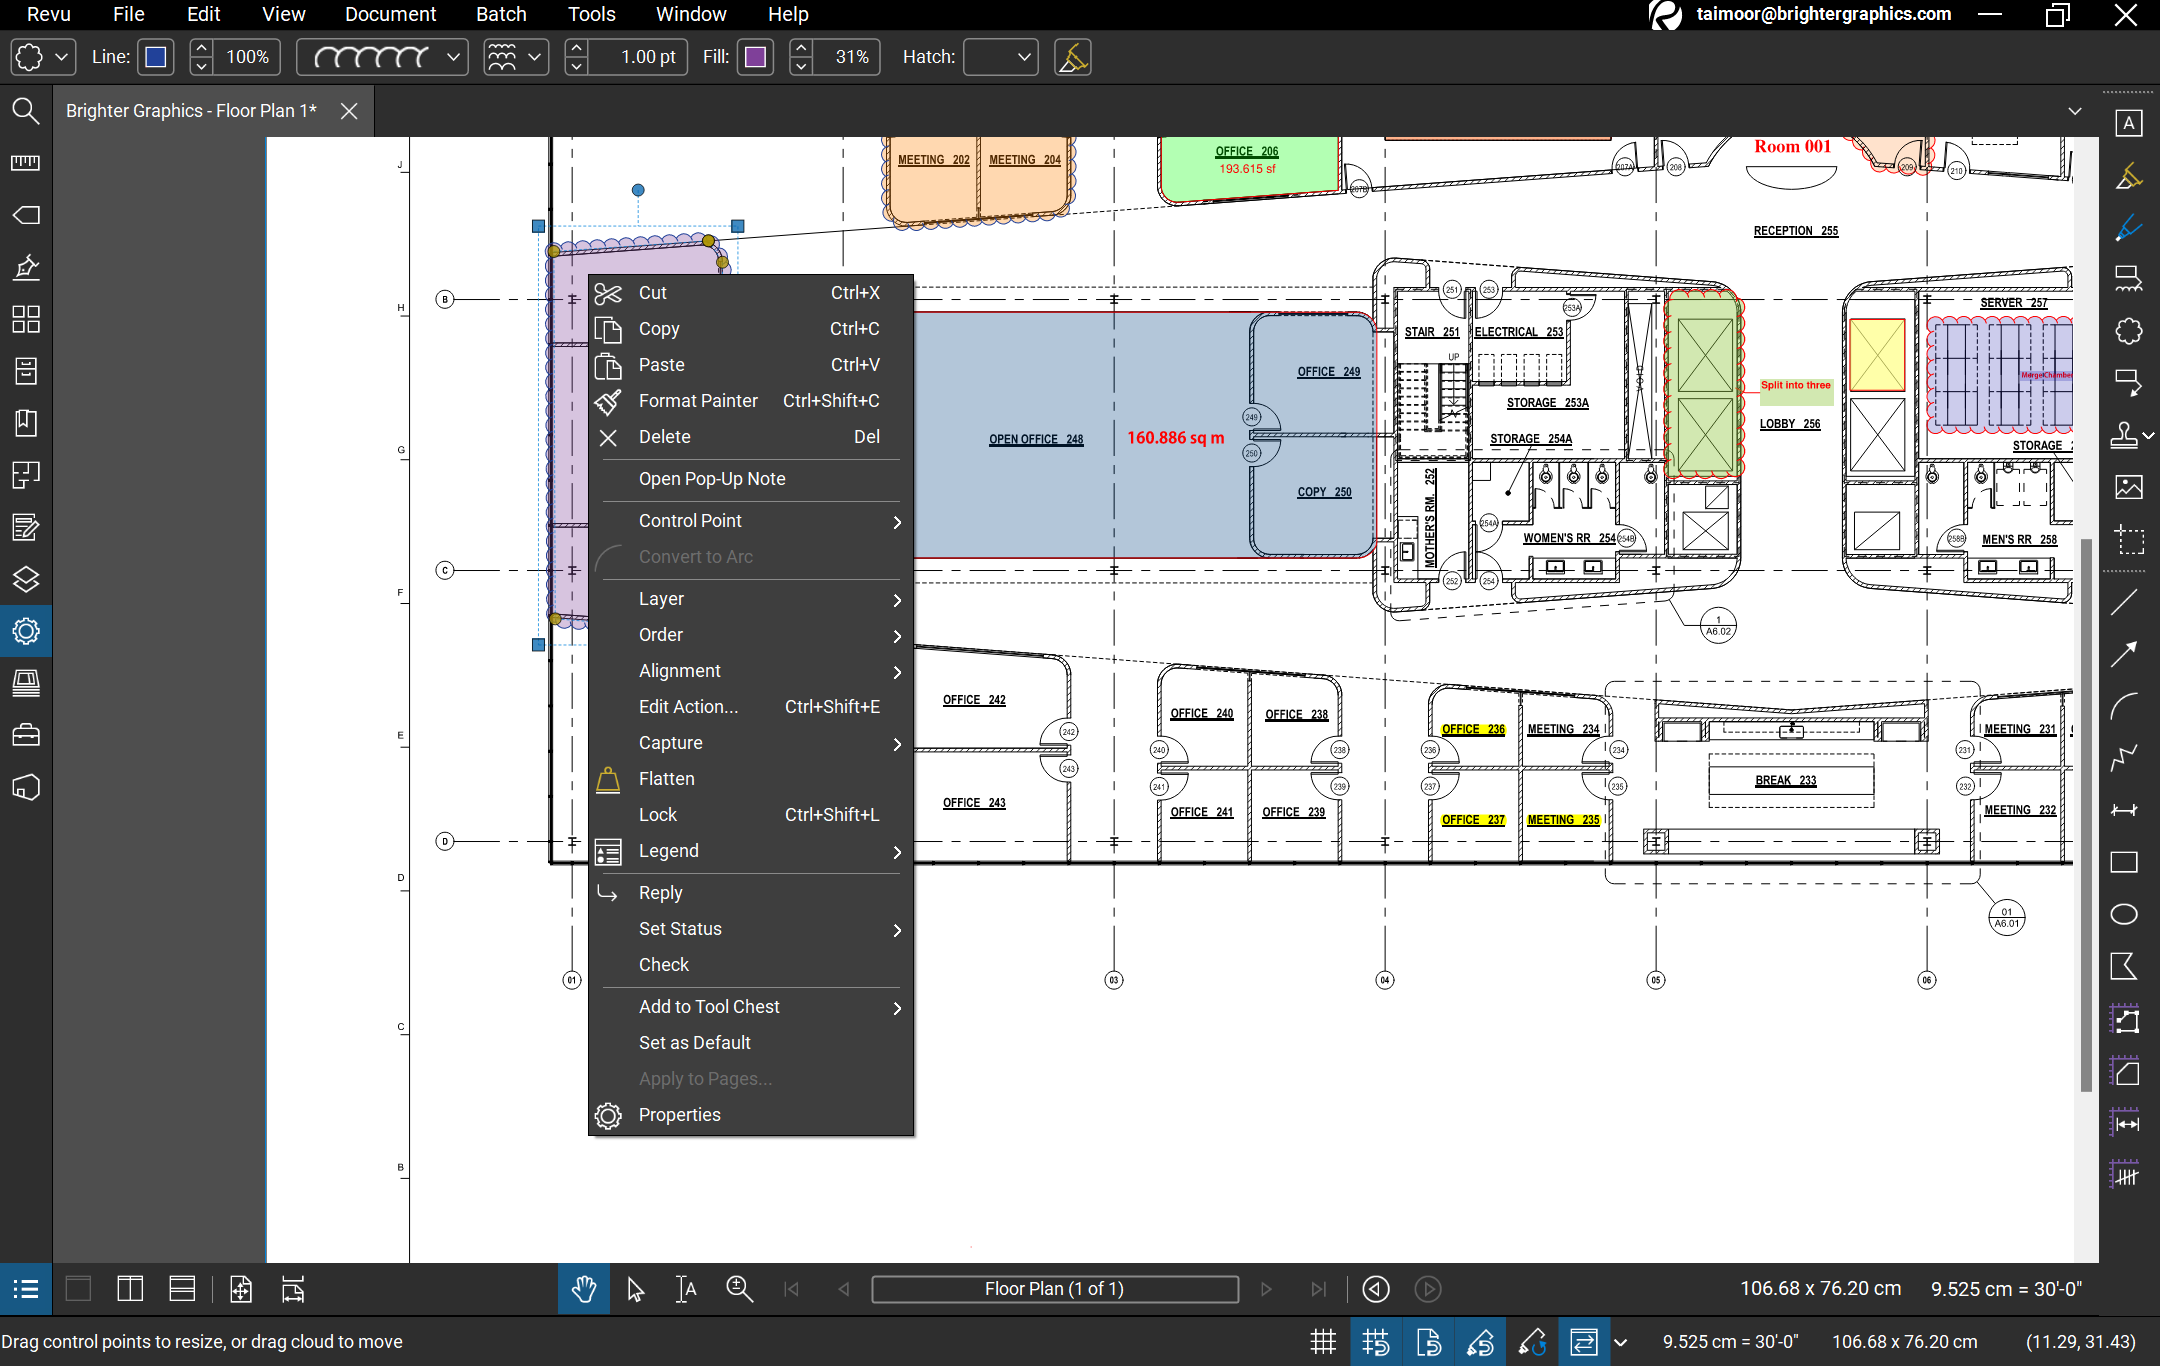
Note: The Convert to Arc option will be available if you click on the markup join (between two specific vertices) to turn it into an arc or curve. Look at the presentation below for further clarity.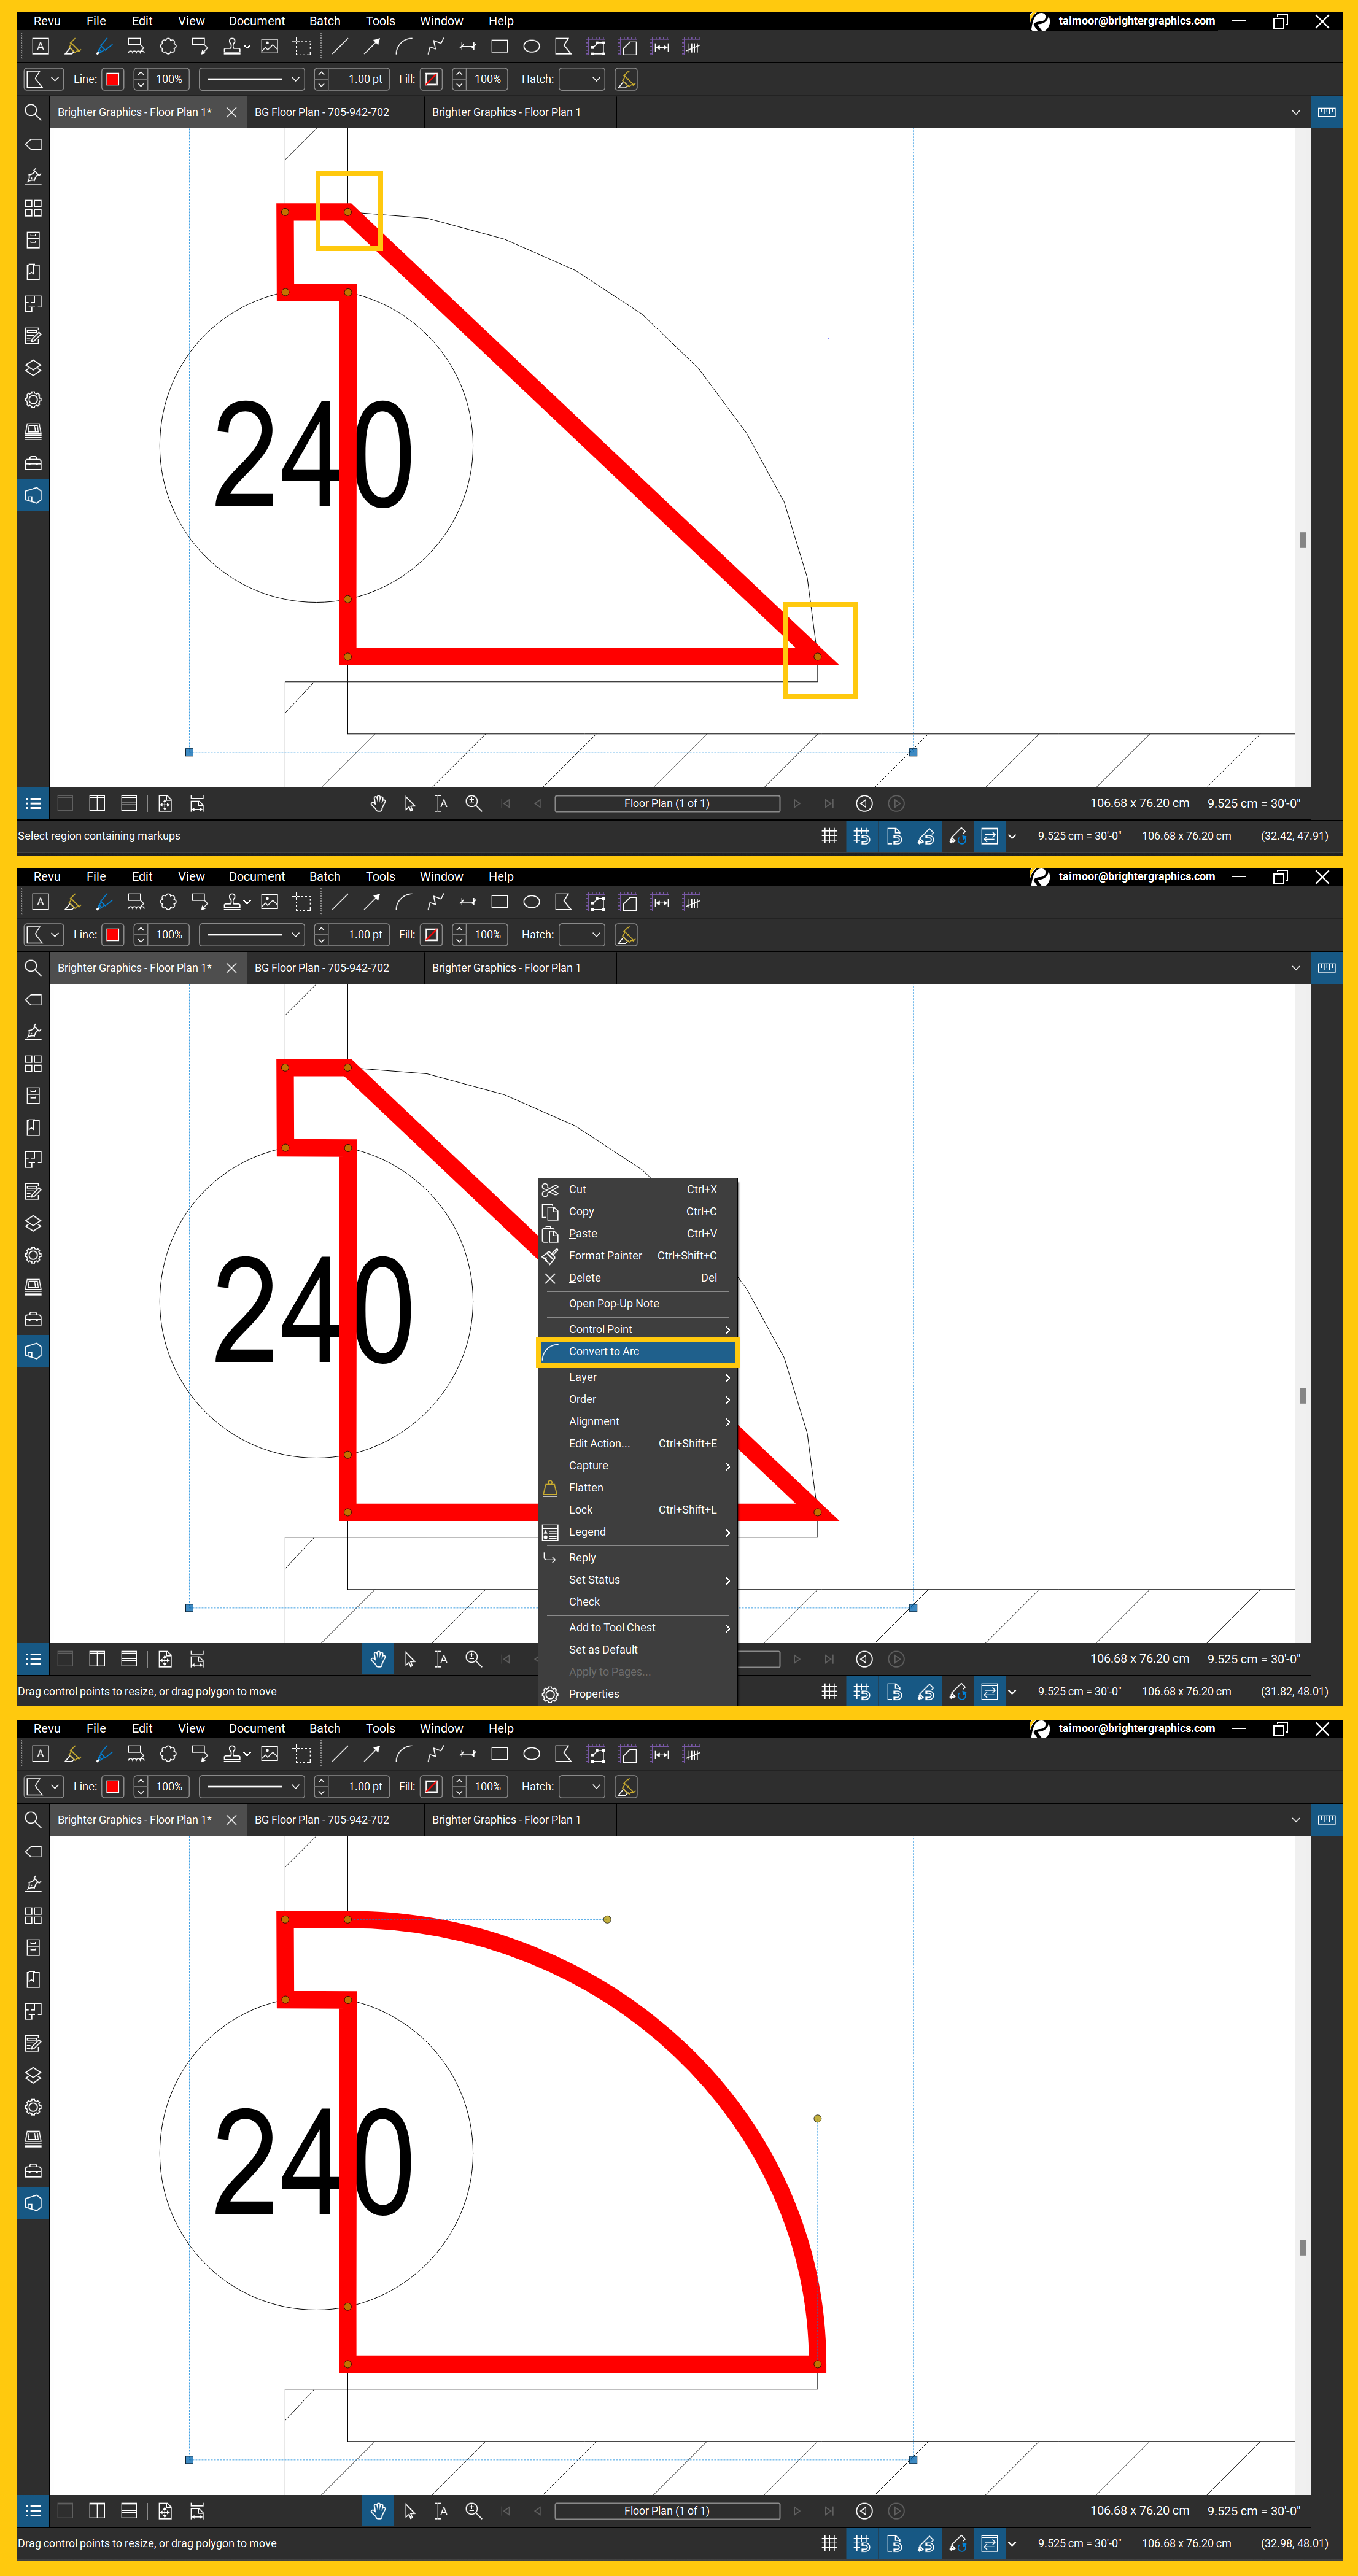
When you simply click to select a markup, the “Markup Toolbar” appears and allows you to customise the appearance of the selected markup, including:
- Line Colour
- Line Width
- Line Opacity
- Line Style
- Fill Colour
- Fill Opacity
- Font Style
- Font Colour
- Font Size
Note: Some options are exclusive to the few markup types (For instance, Line Style is not available for Cloud markups and Font options are only available for text containing markups like Call-out & Cloud+).
For instance,
– Select Cloud + markup with the “Merge Chambers” label, and a markup toolbar will appear at the top.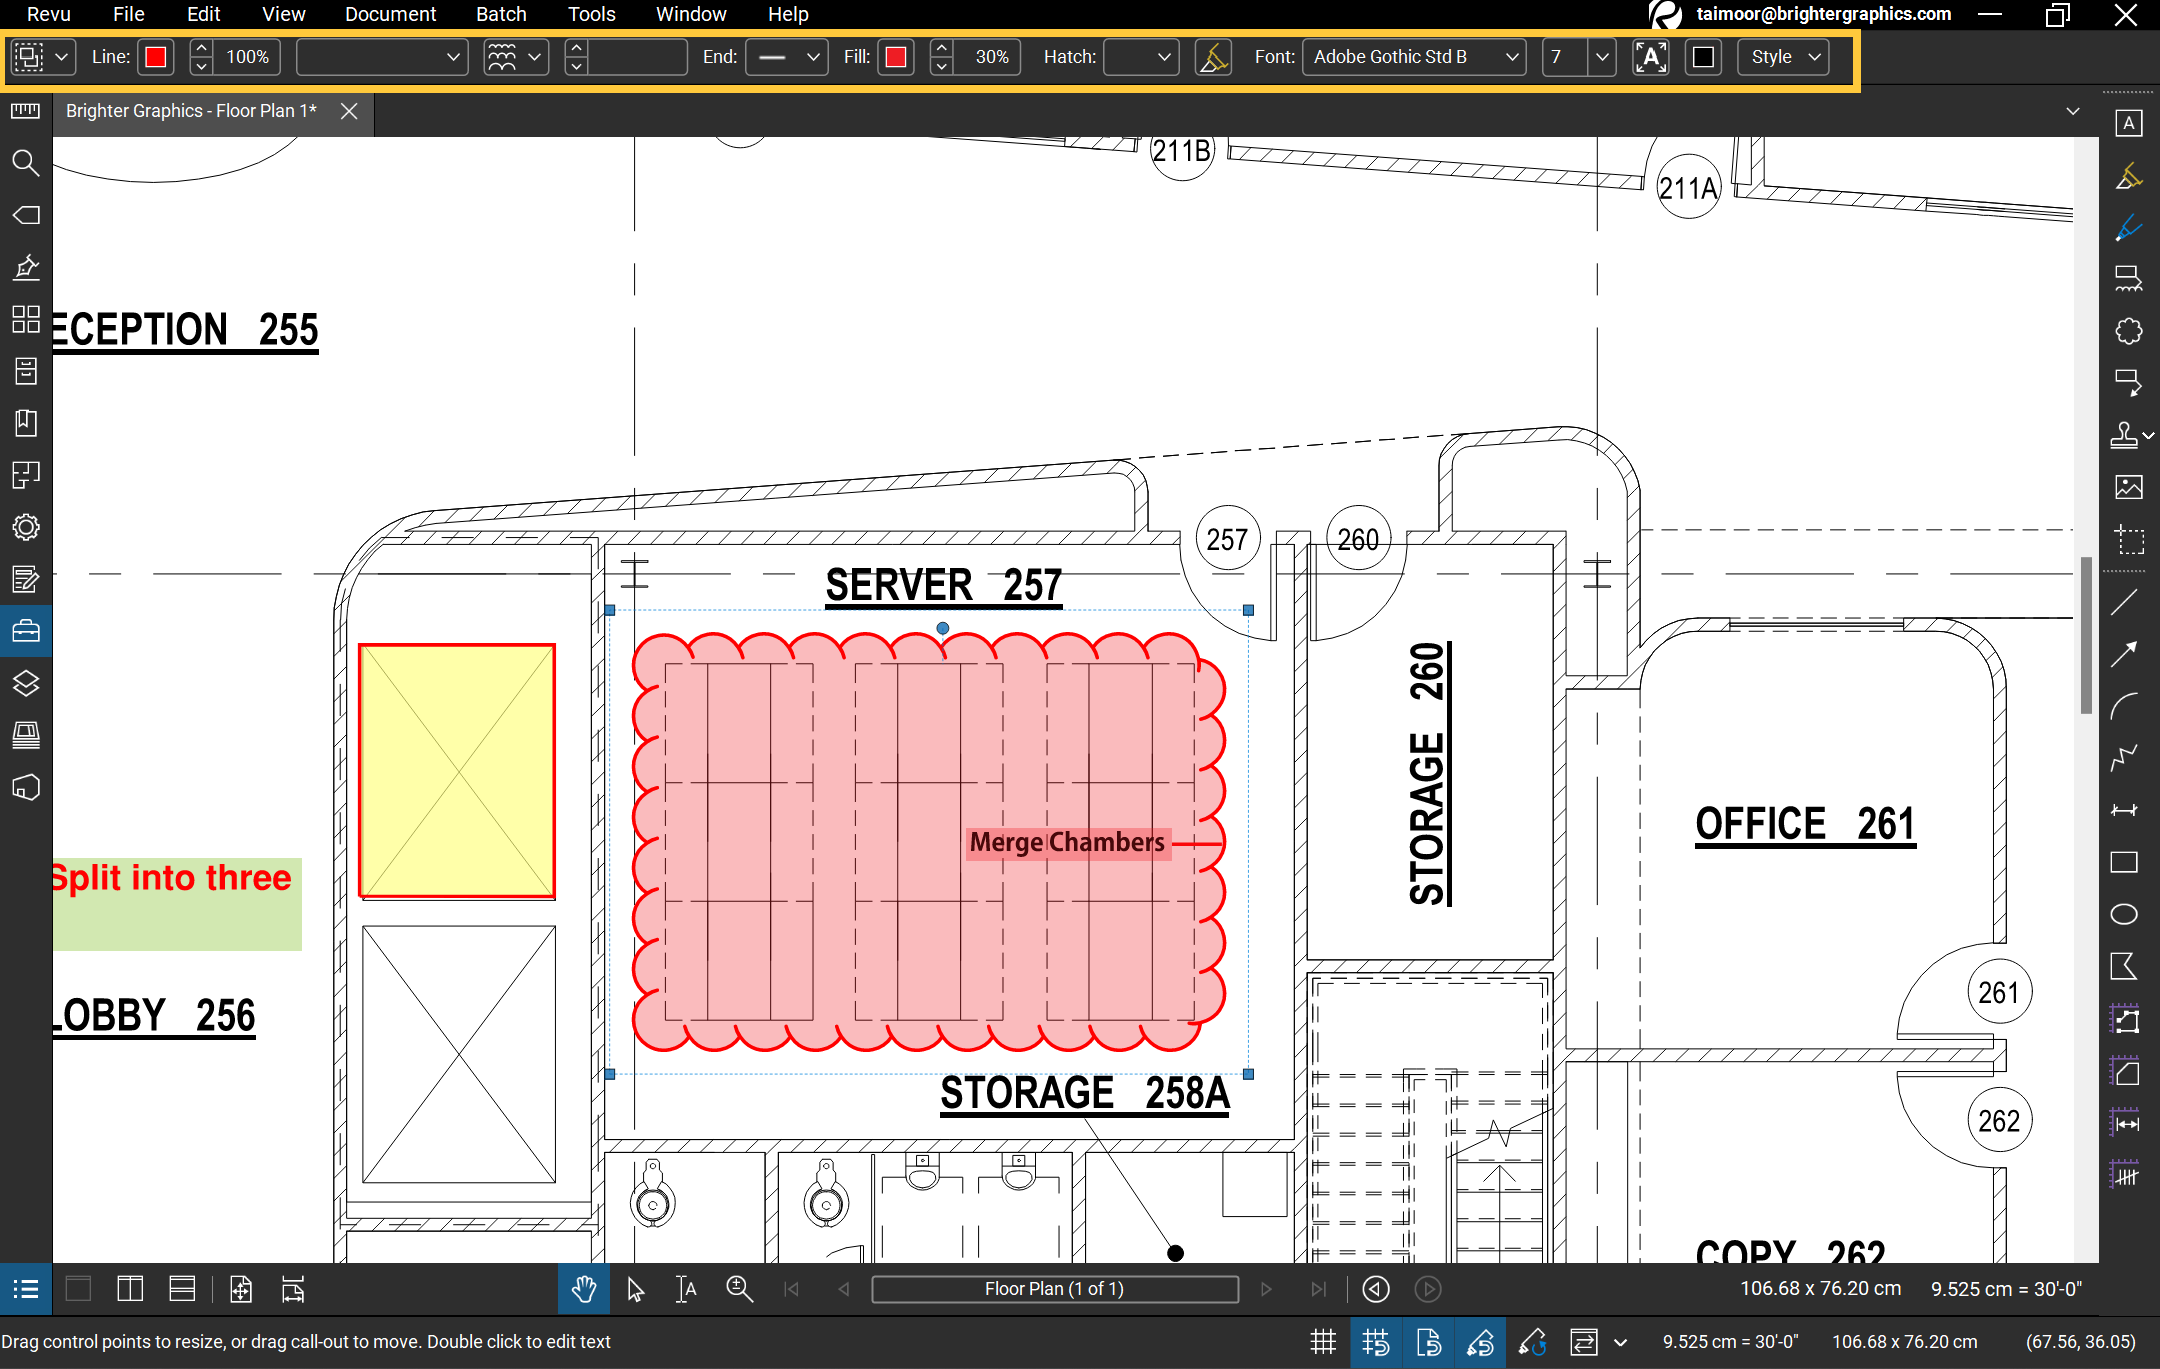
– Change the Fill Colour (Redto Purple), Fill Opacity (40% to 20%), and Font Colour (Black to Red) of the markup, and it will appear like the one below.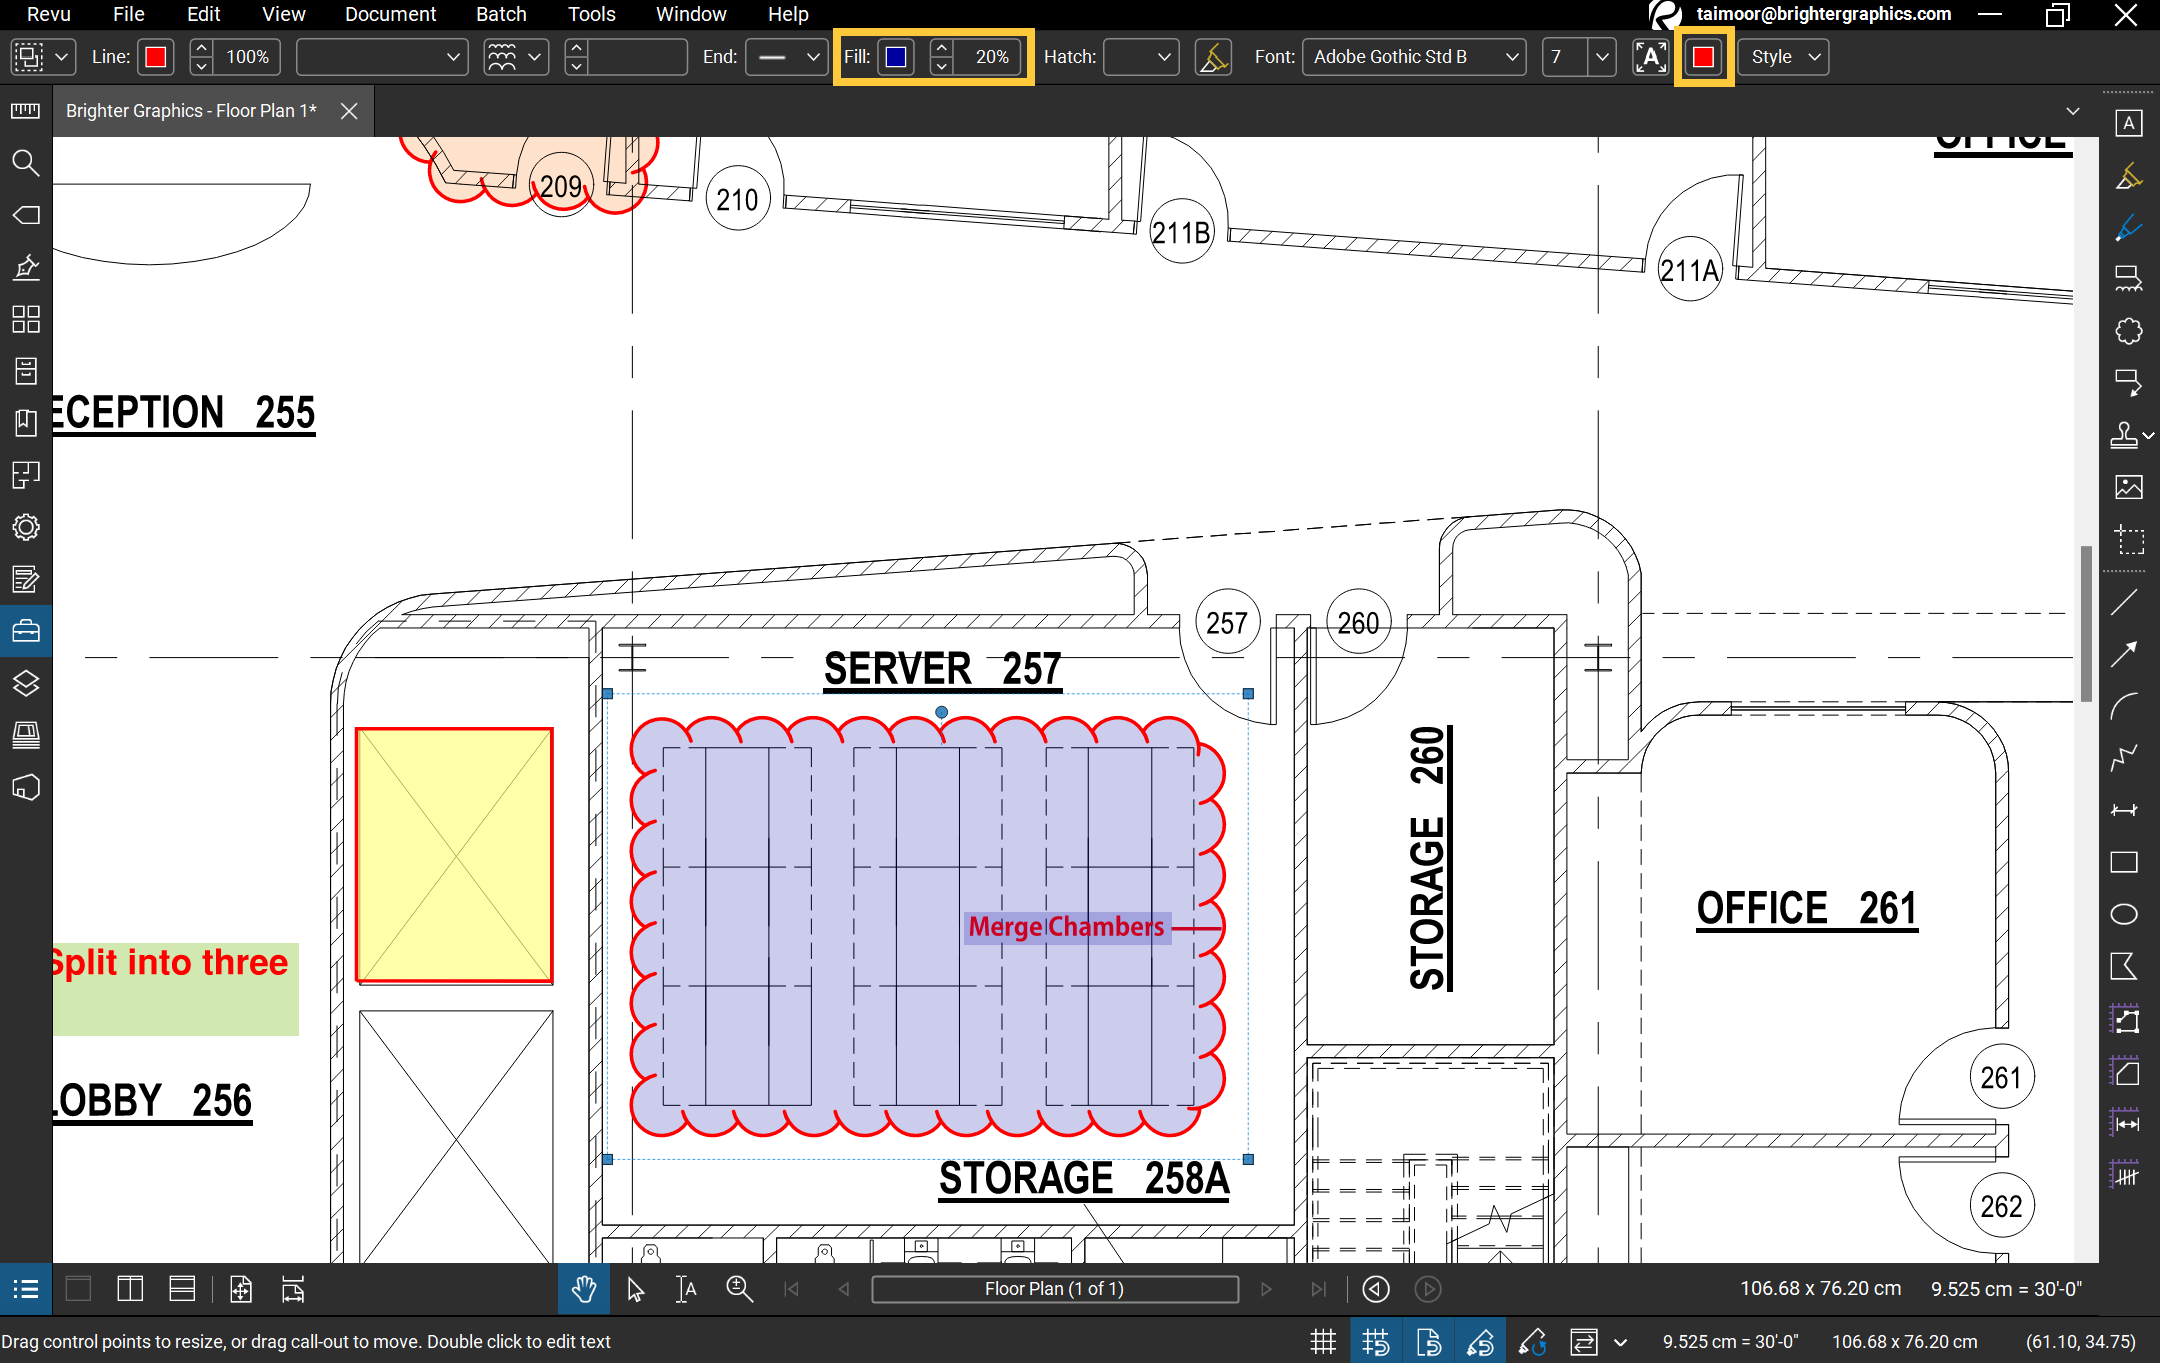
Cloud Markups
There are two types of Cloud markups.
- Cloud
- Cloud +
– You can find the Cloud markup in toolbar on the right.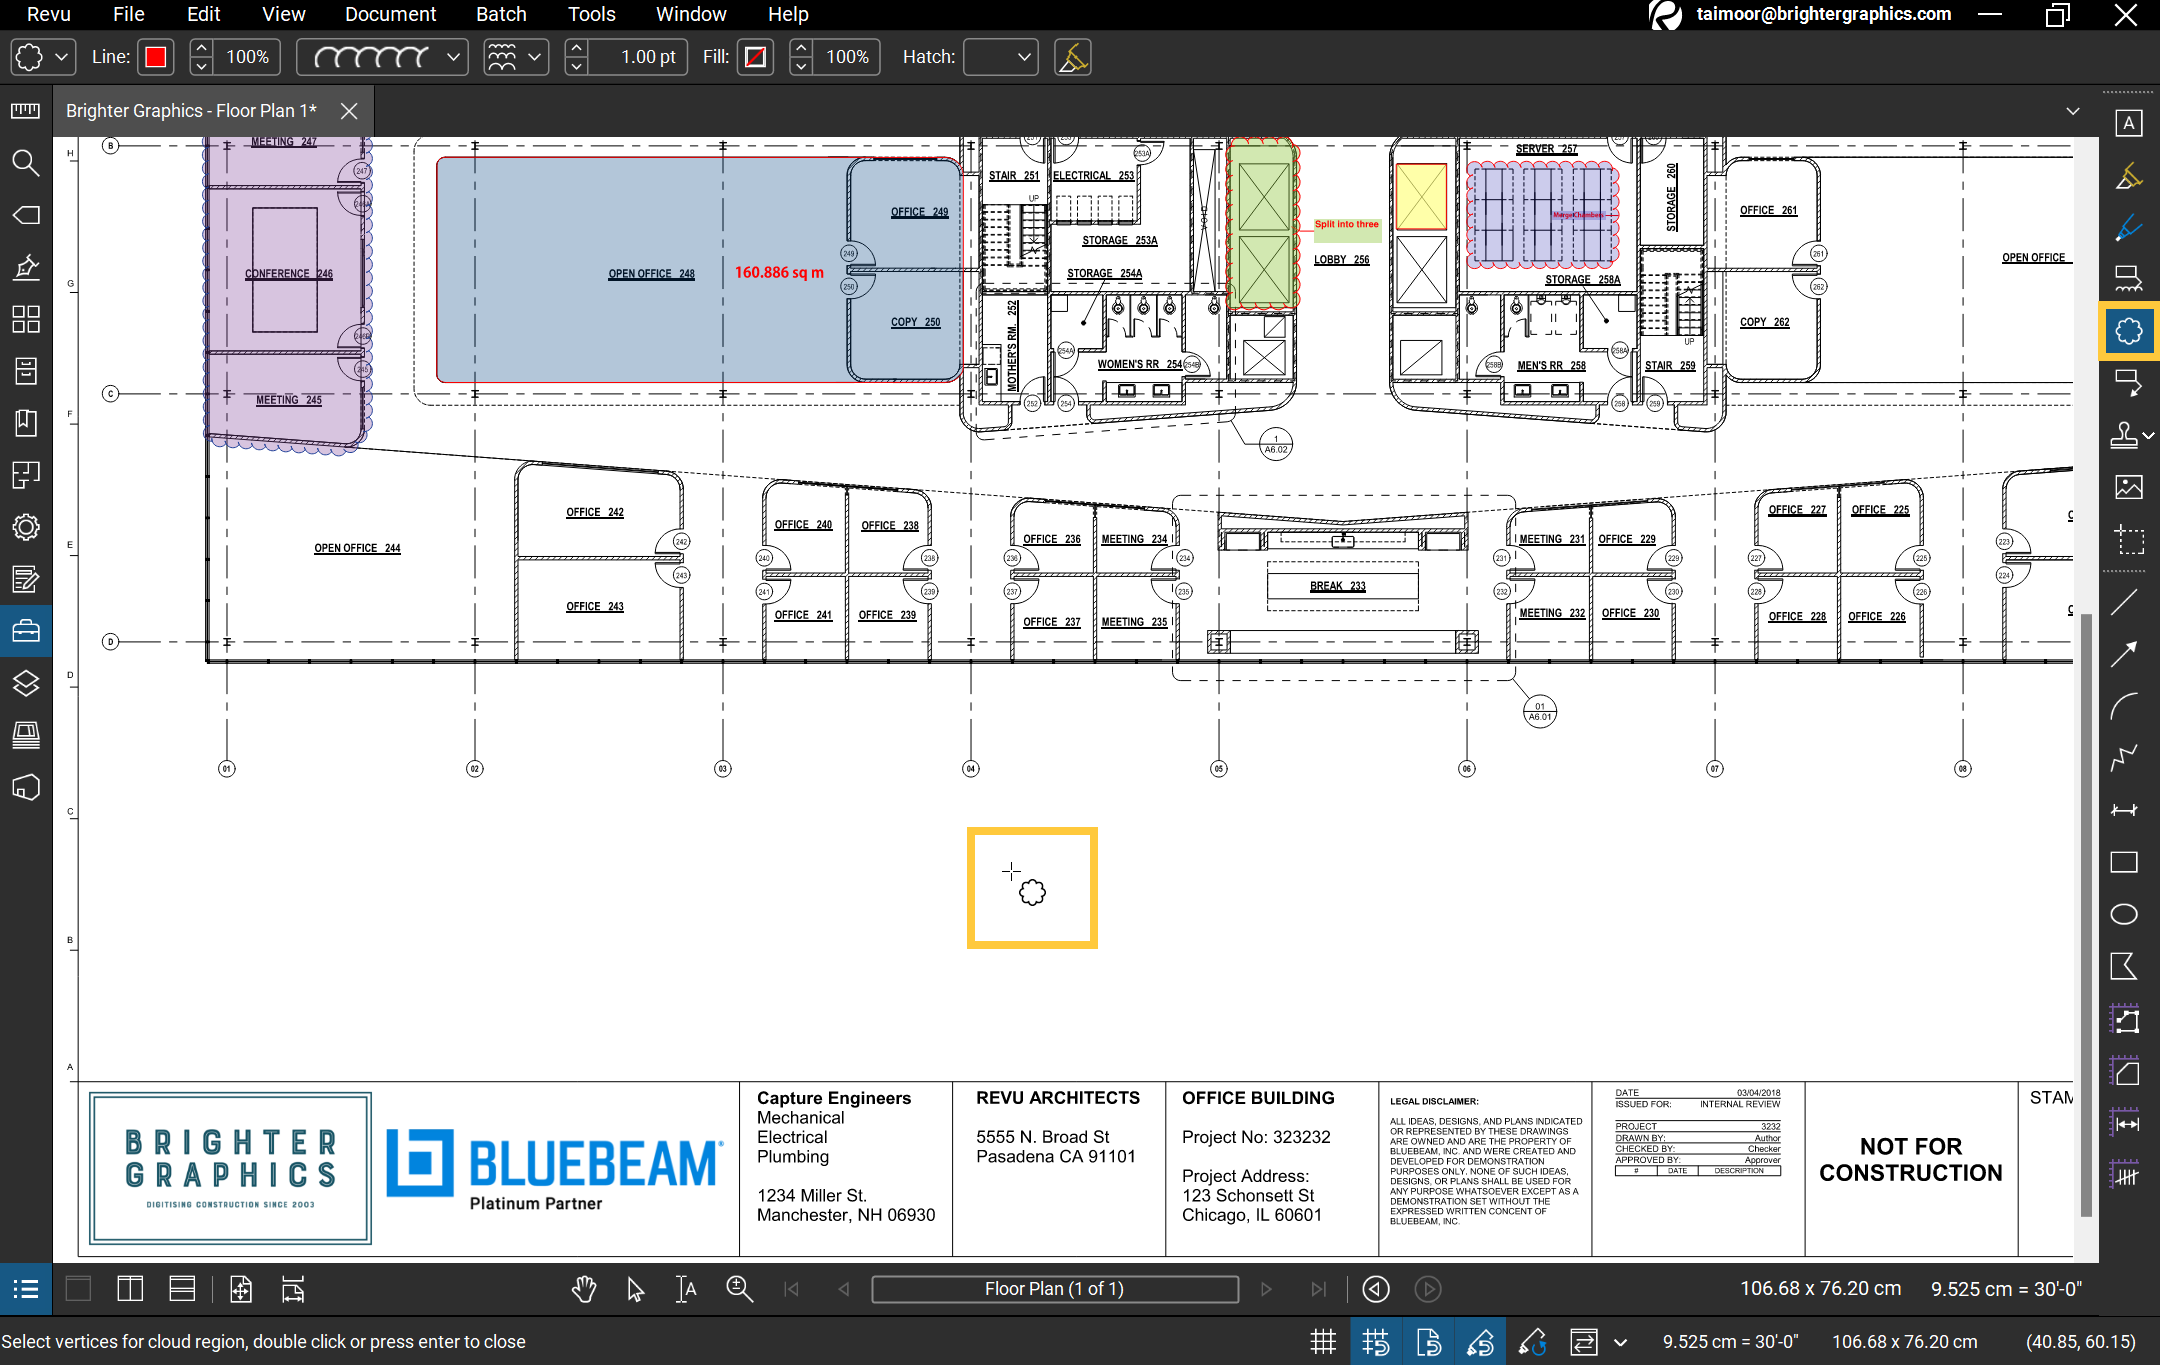
With Cloud markup, you can Click-Drag-&-Release to draw a triangle or Add individual anchor points to draw a polygon (A 2D figure with at least 3 anchor points or vertices). In the latter case double-click anywhere (after marking the last vertex), and the last point will automatically create a join to the first point.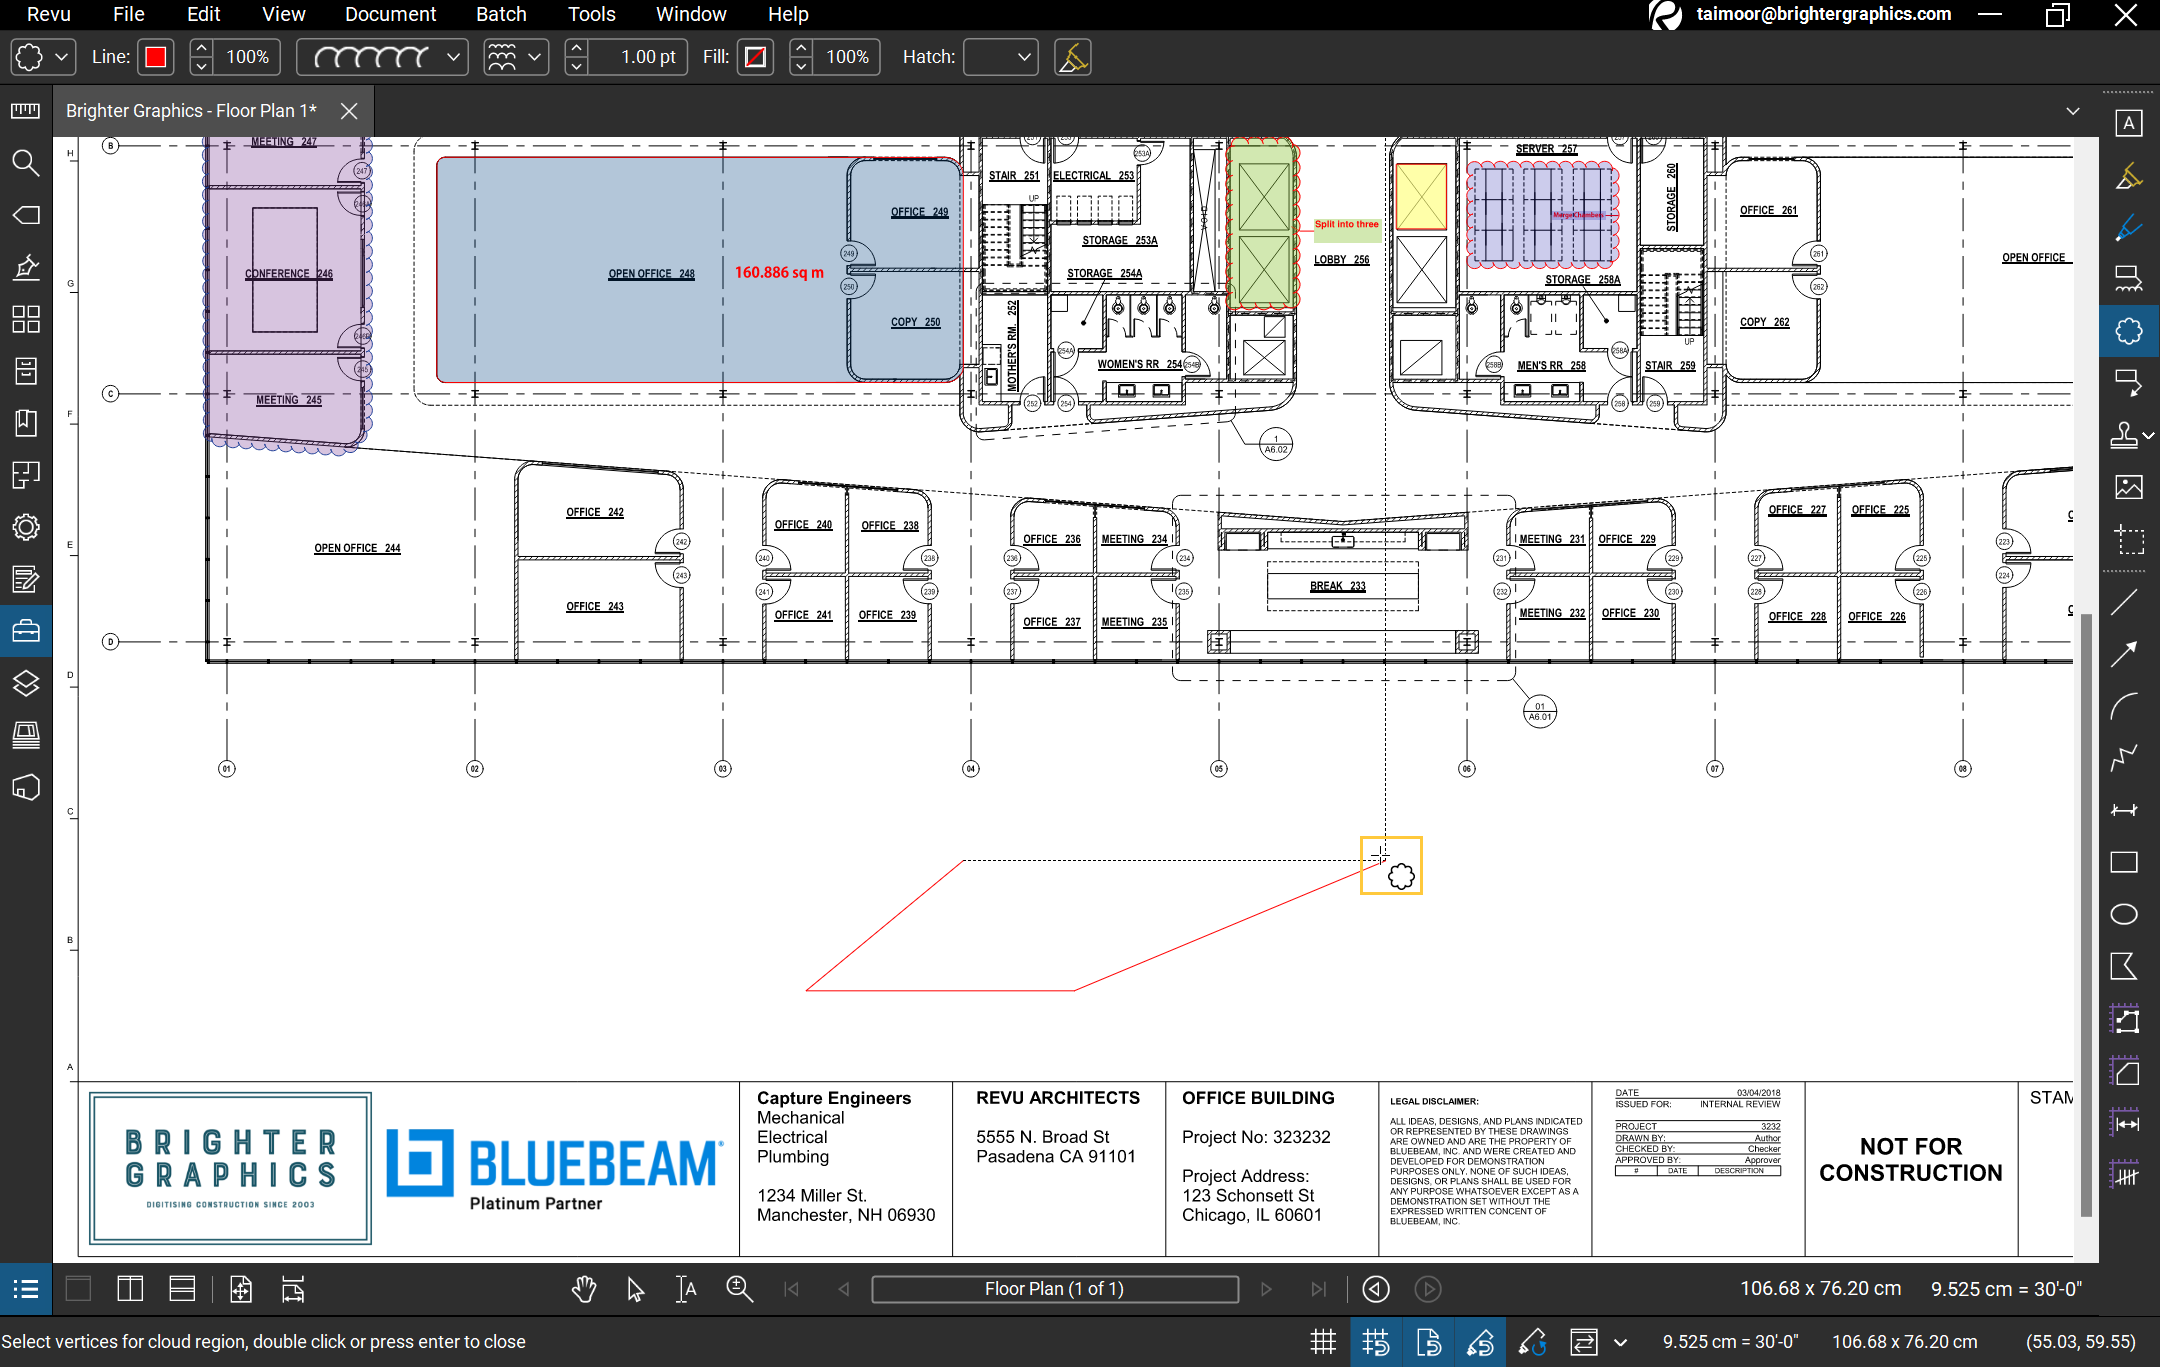
Cloud Markup in Action
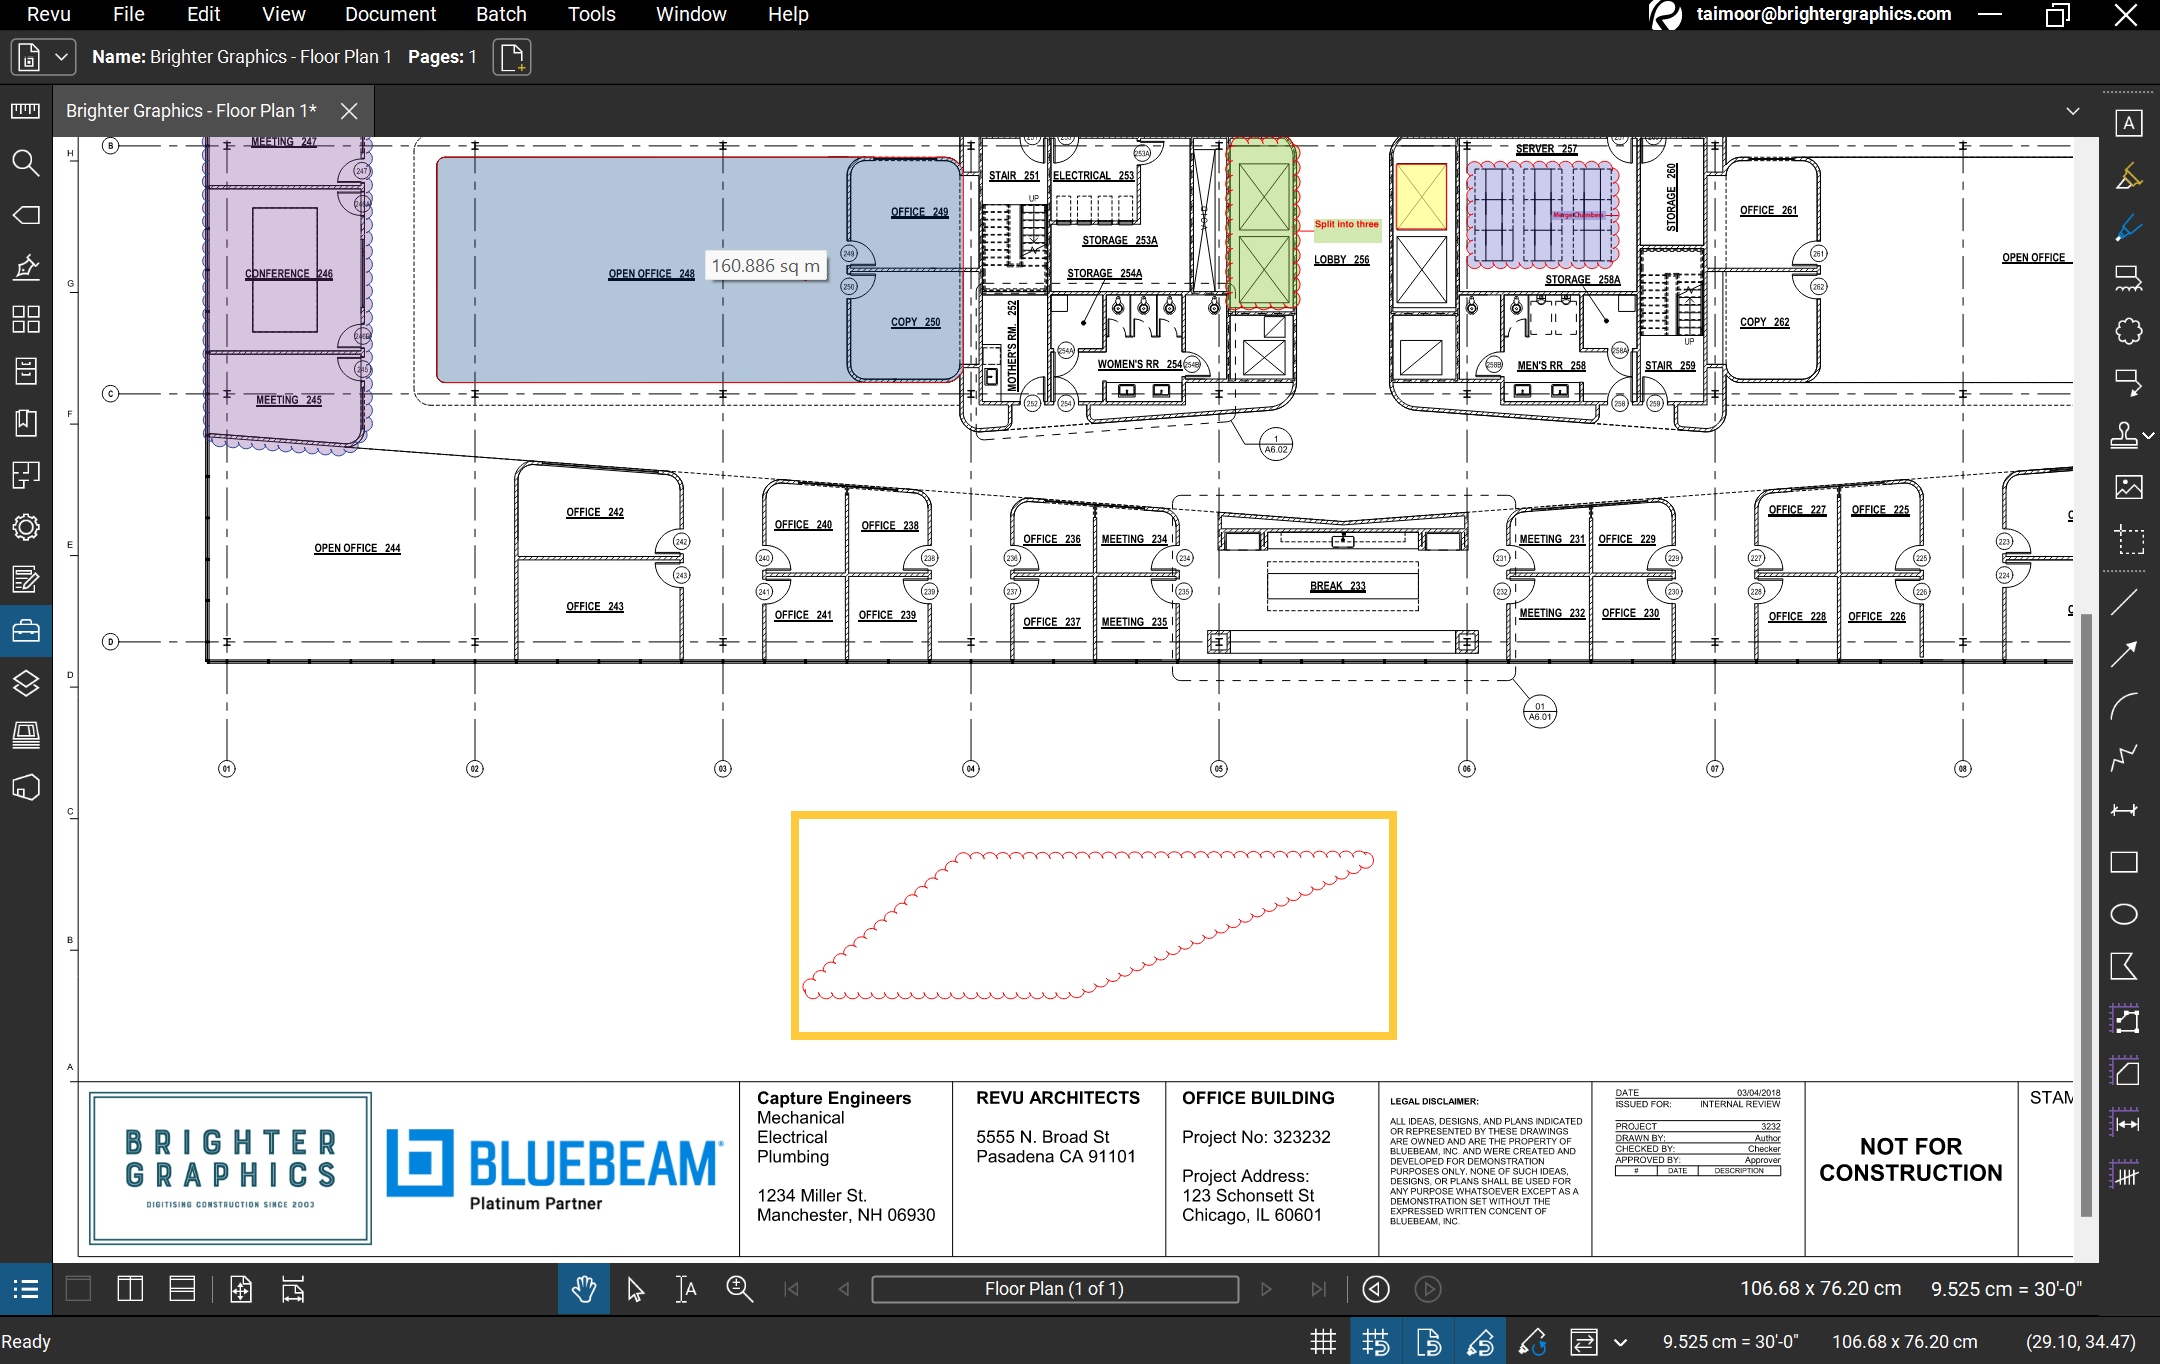
Cloud Markup in Bluebeam Revu
– The navigation and drawing of both cloud and cloud+ markups are same.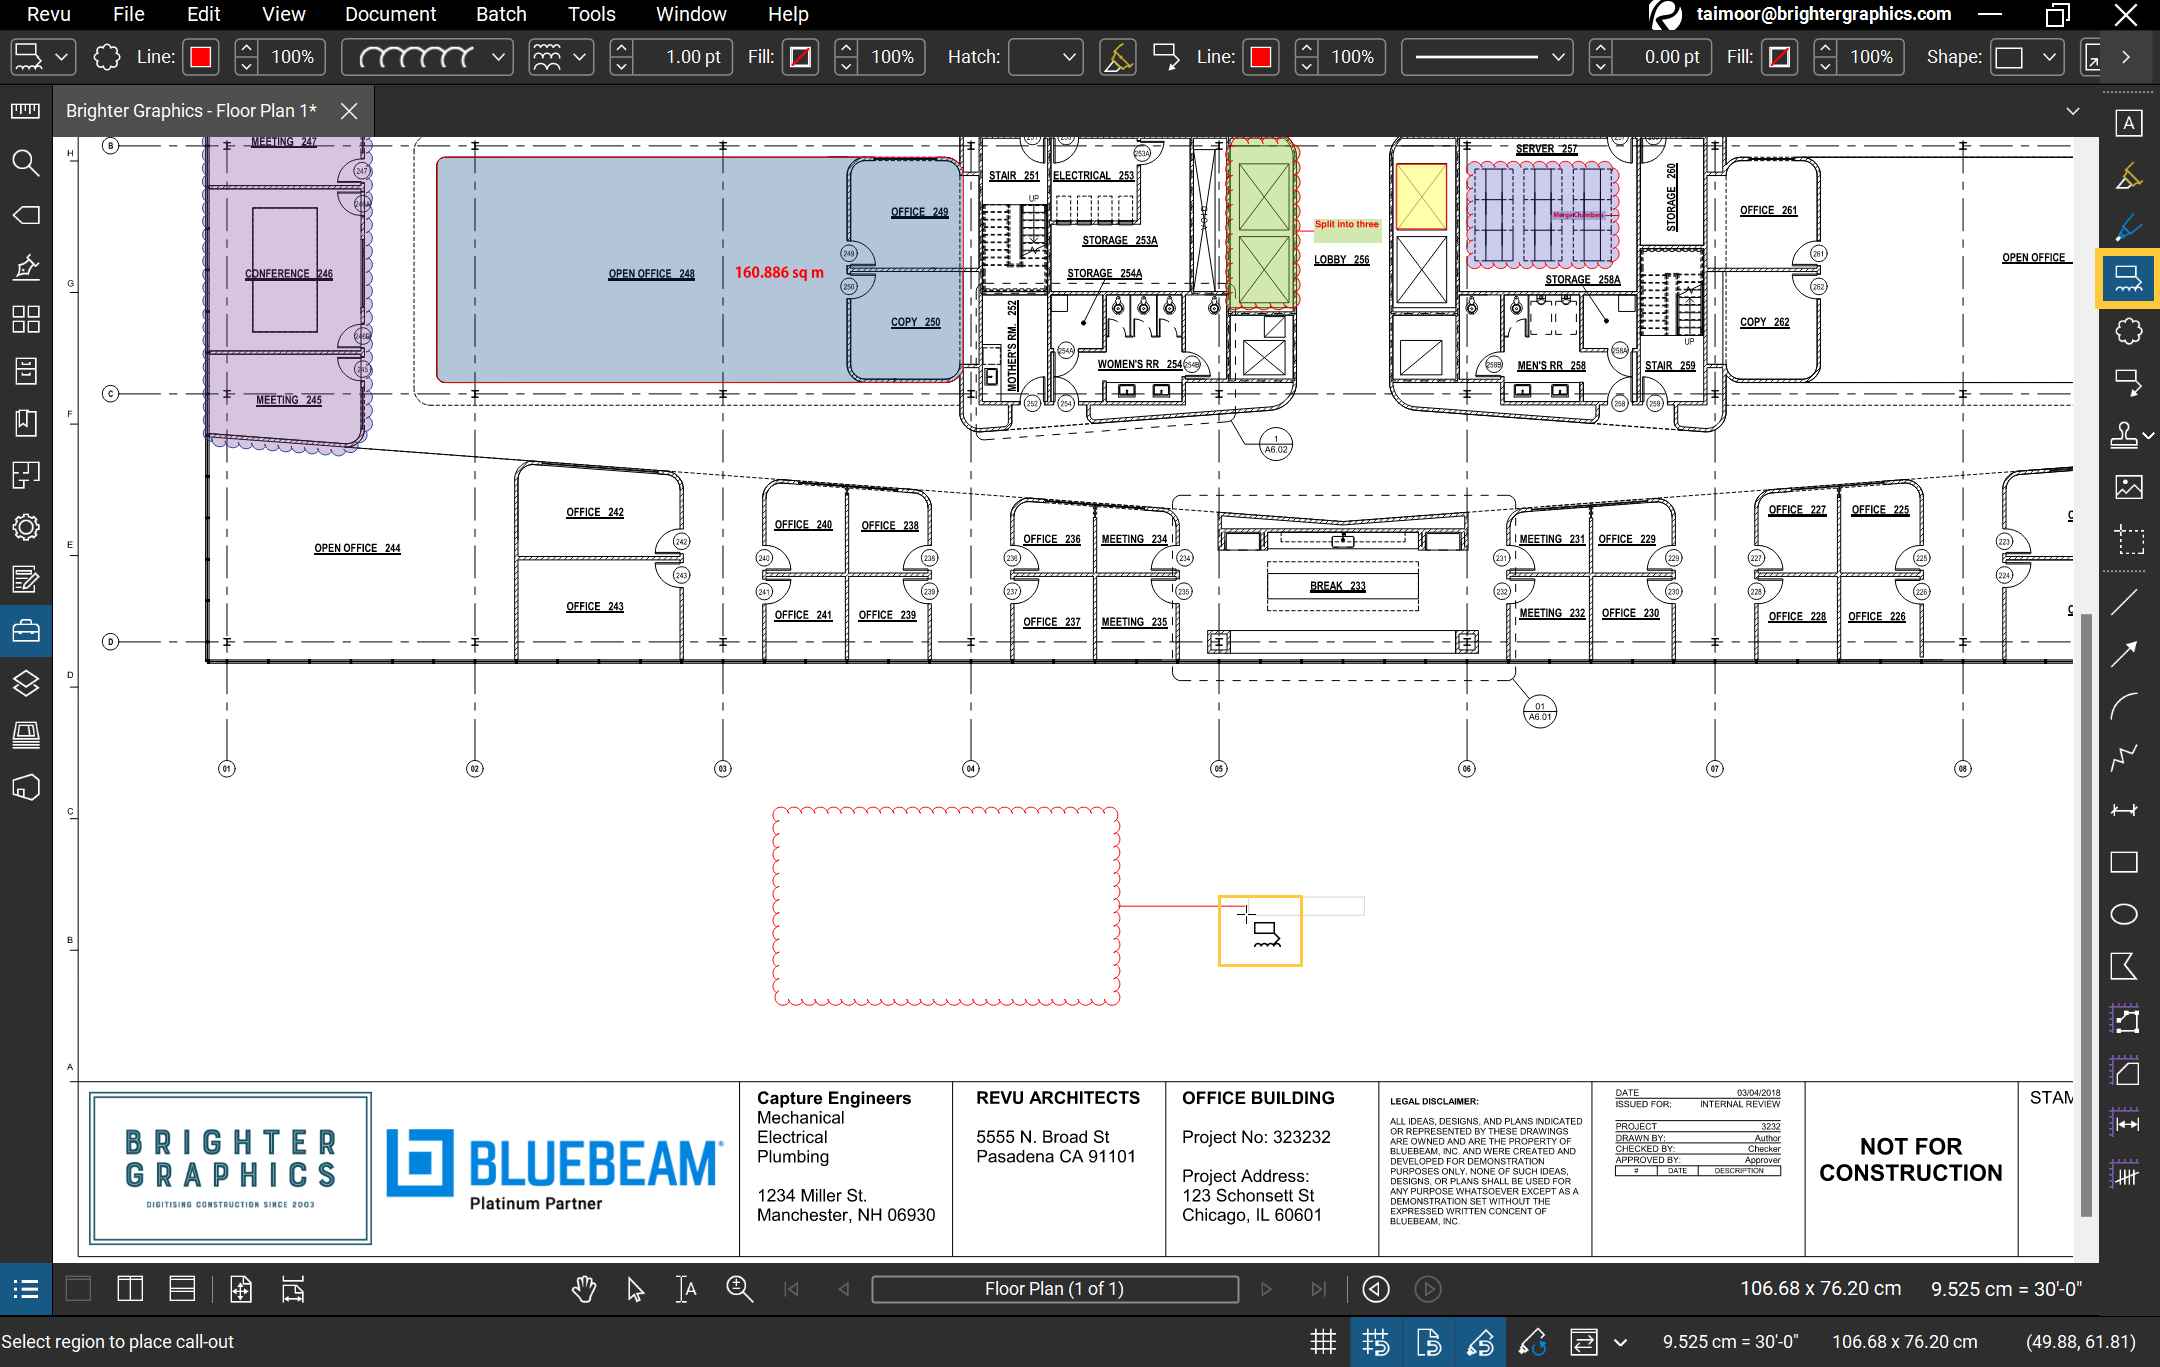
Cloud+ Markup in action
Cloud+ (Cloud with Text Box) Markup in Bluebeam
– Select the markup to transform or move the test box and drawing independently.
Shape Markups
Unlike Cloud Markups (that can be drawn as polygons), Rectangle and Ellipse markups can only draw standard shapes (Rectangle, Square, Circle, or Ellipse) as click and drag. Whereas, a separate Polygon markup is used to draw polygonal geometries.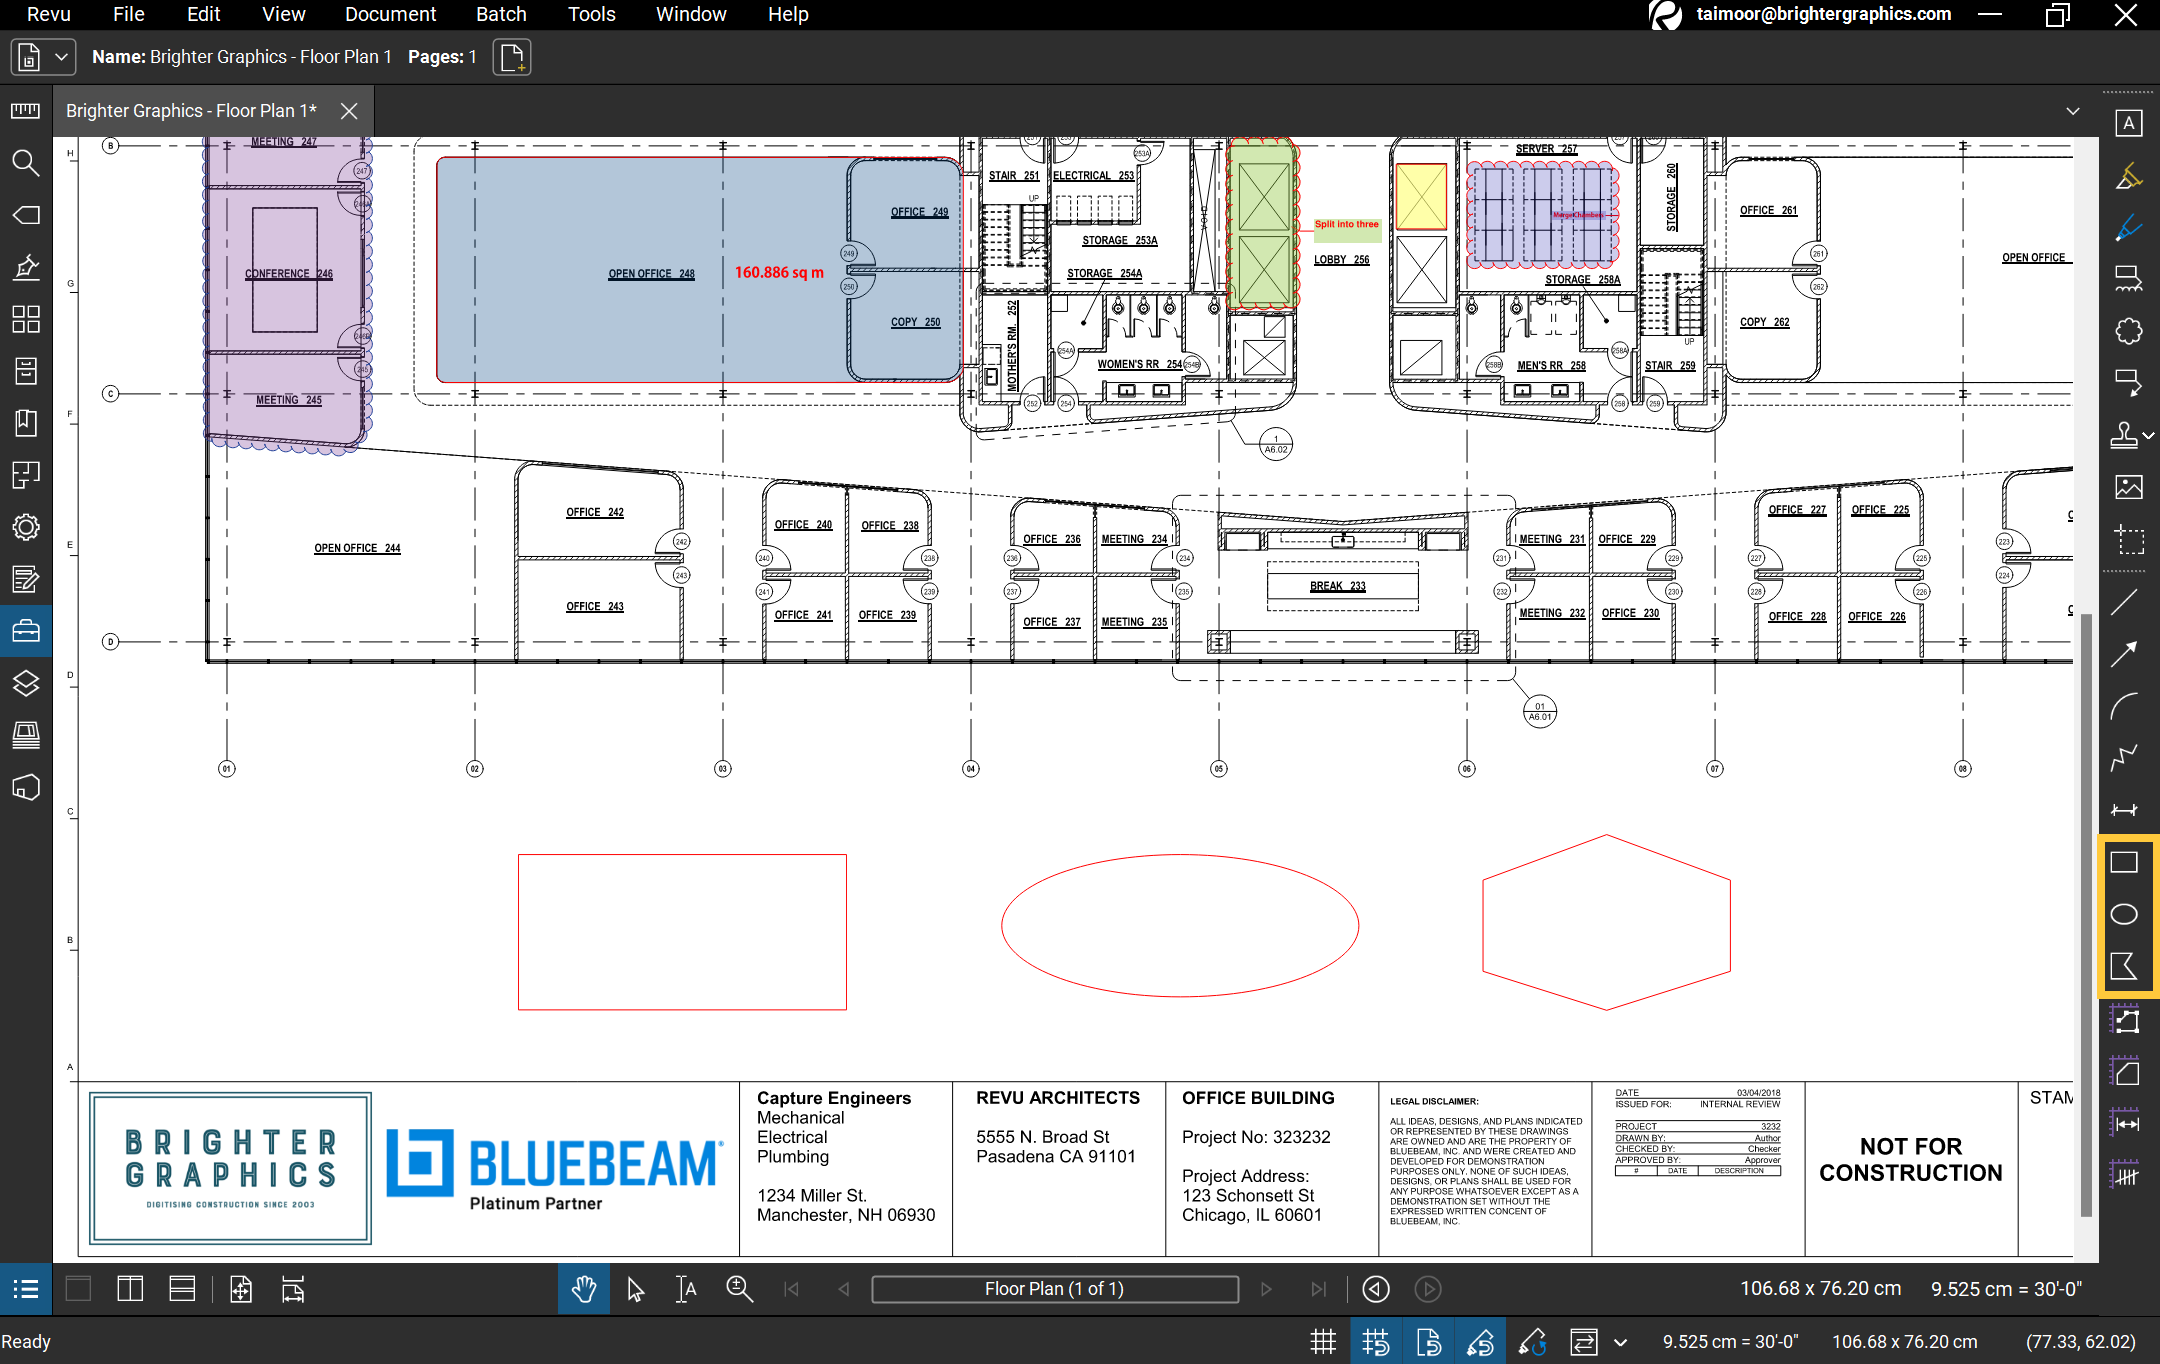
Rectangle, Polygon, and Ellipse Markups in Bluebeam
Tip: Want to draw a circle markup? Yes, you can do it with the help of the Ellipse tool, as a circle is an ellipse with both foci coinciding at the same point and its major and minor axes being equal in length.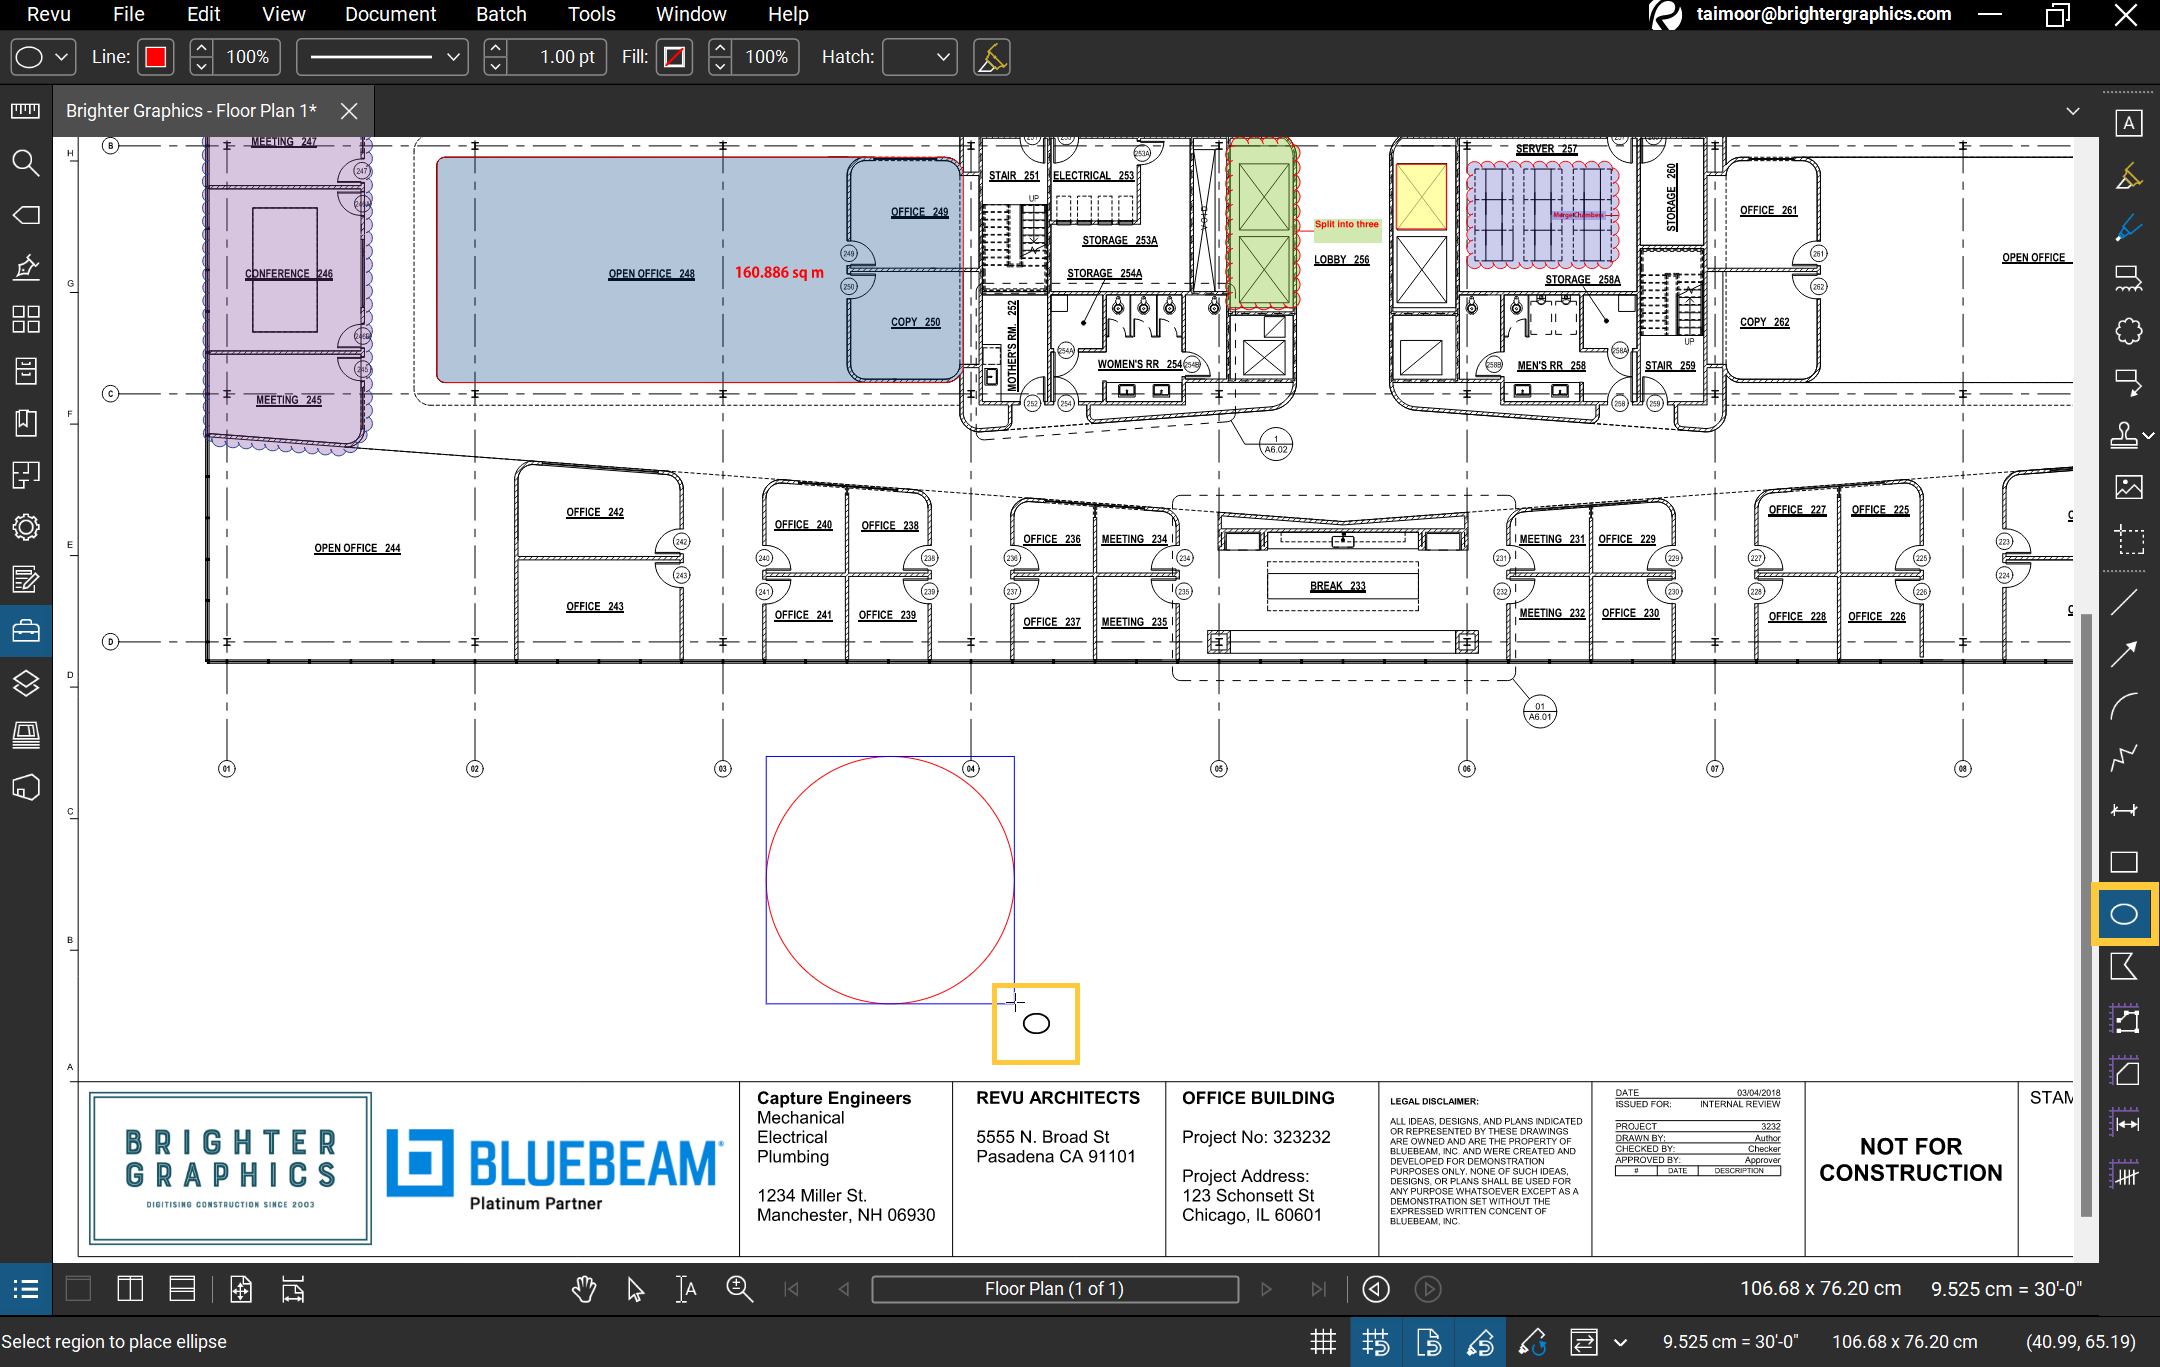
Making a circle with an Ellipse markup
Note: You can change line colour, line width, line style, line opacity, fill colour, fill opacity in the Markup Editor by selecting the markup with the Select tool as mentioned in the Select tool section.
Markup Editor in Revu 21
Vector Pen
Vector Pen can be used to draw any irregular shape or boundary with free-style cursor.
– Select the Vector Pen tool > Draw the shape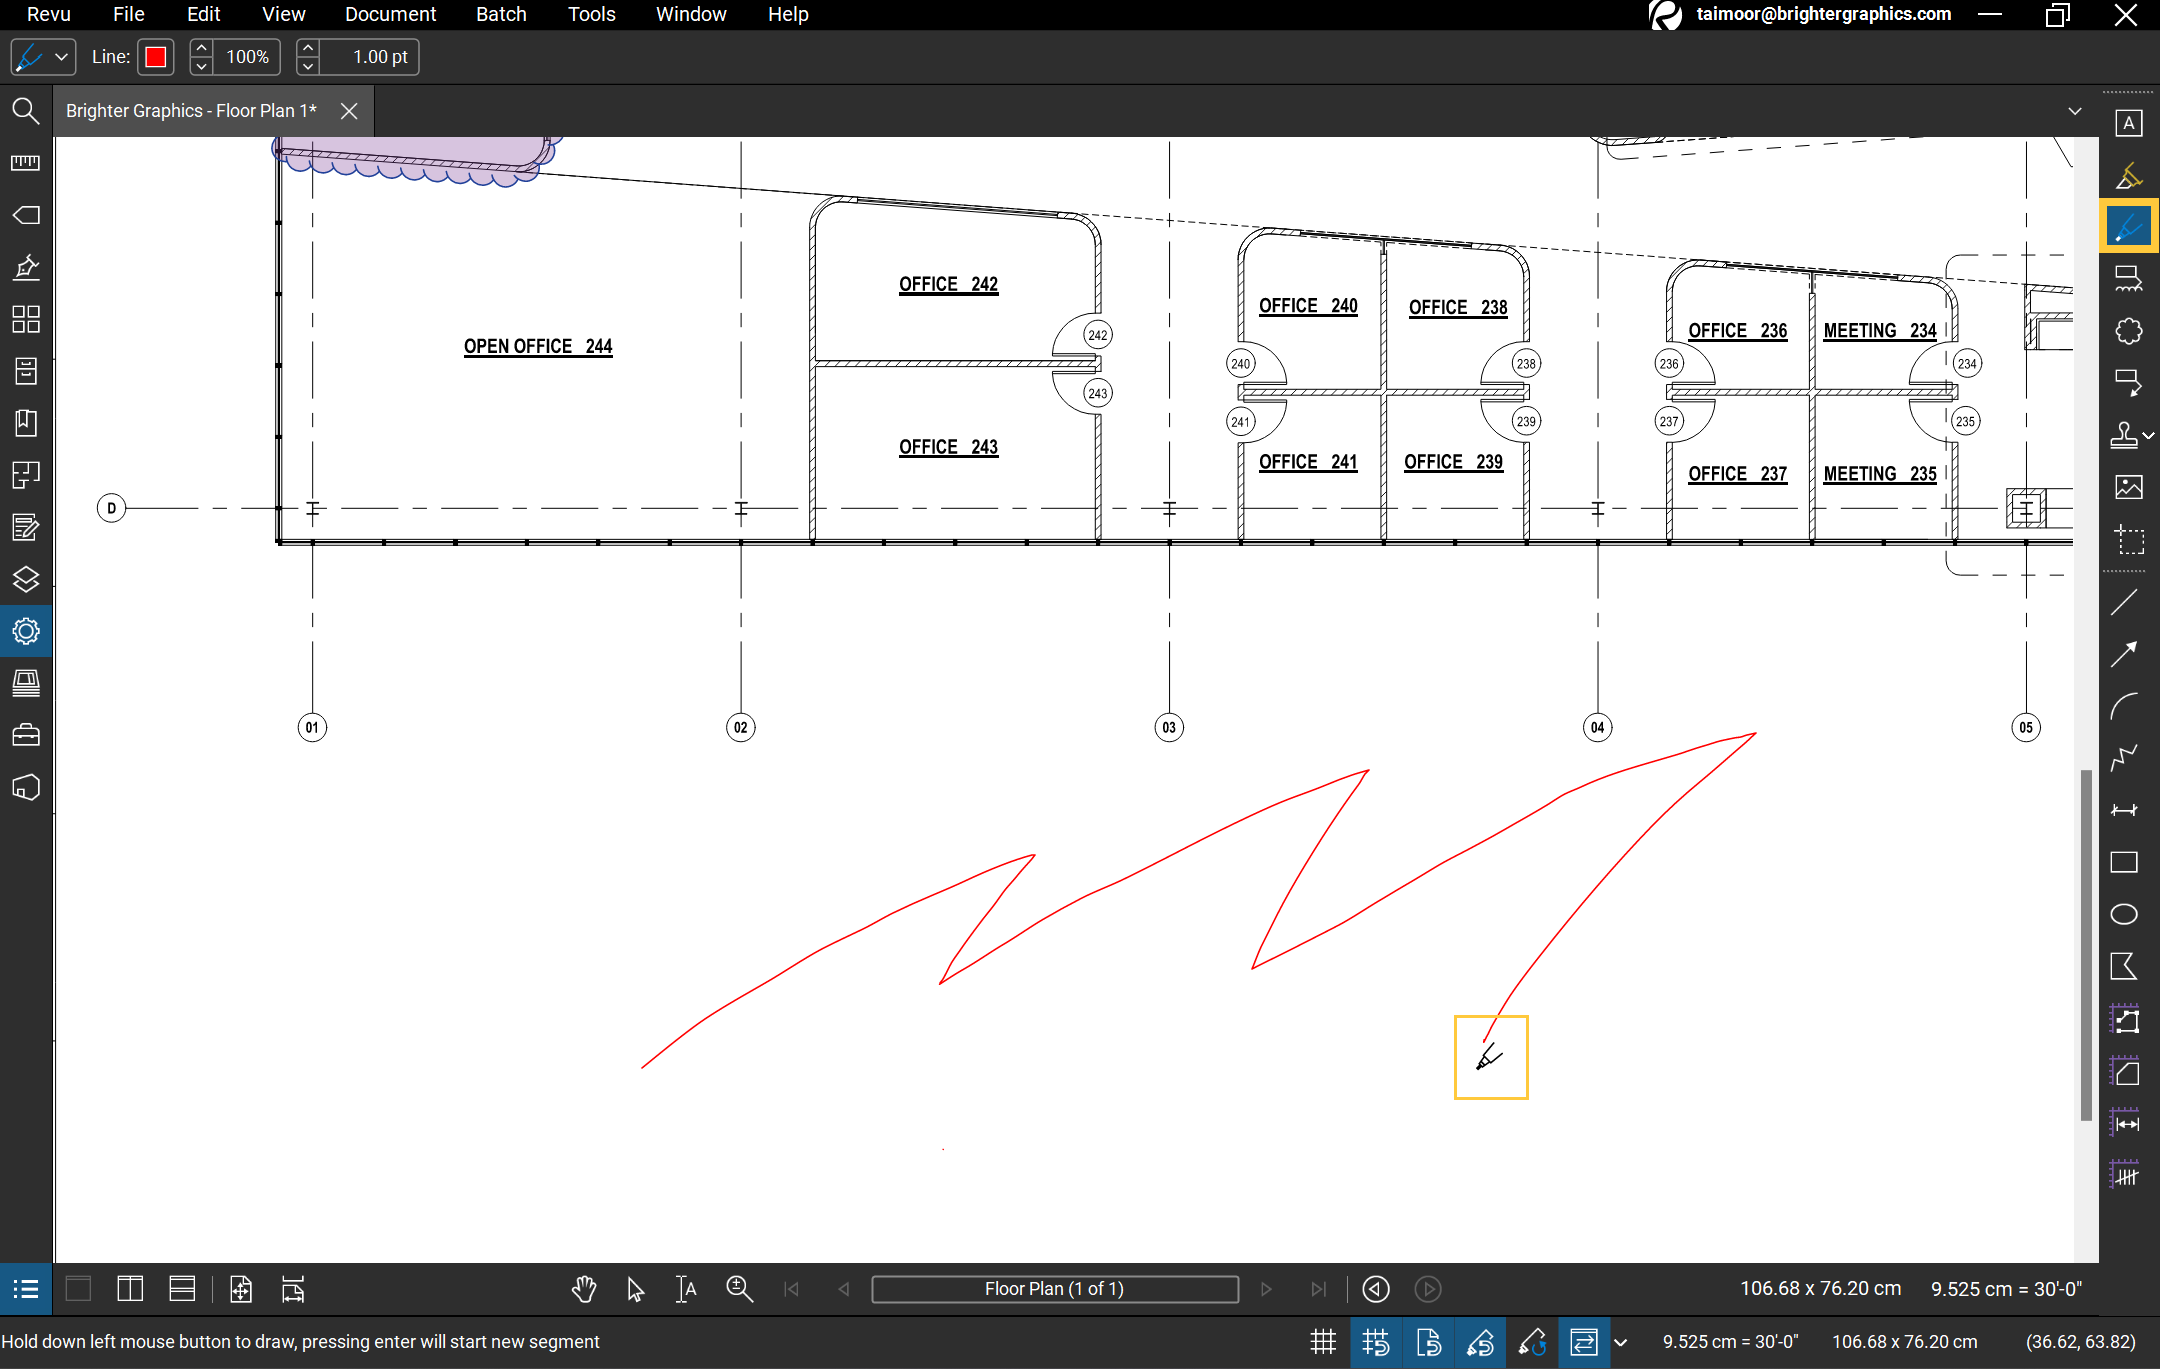
Vector Pen in action
Text Markup
The Text markup is simply used to create a text box.
– Select the Text markup > Draw a rectangular > Type whatever you want to comment, suggest, or recommend.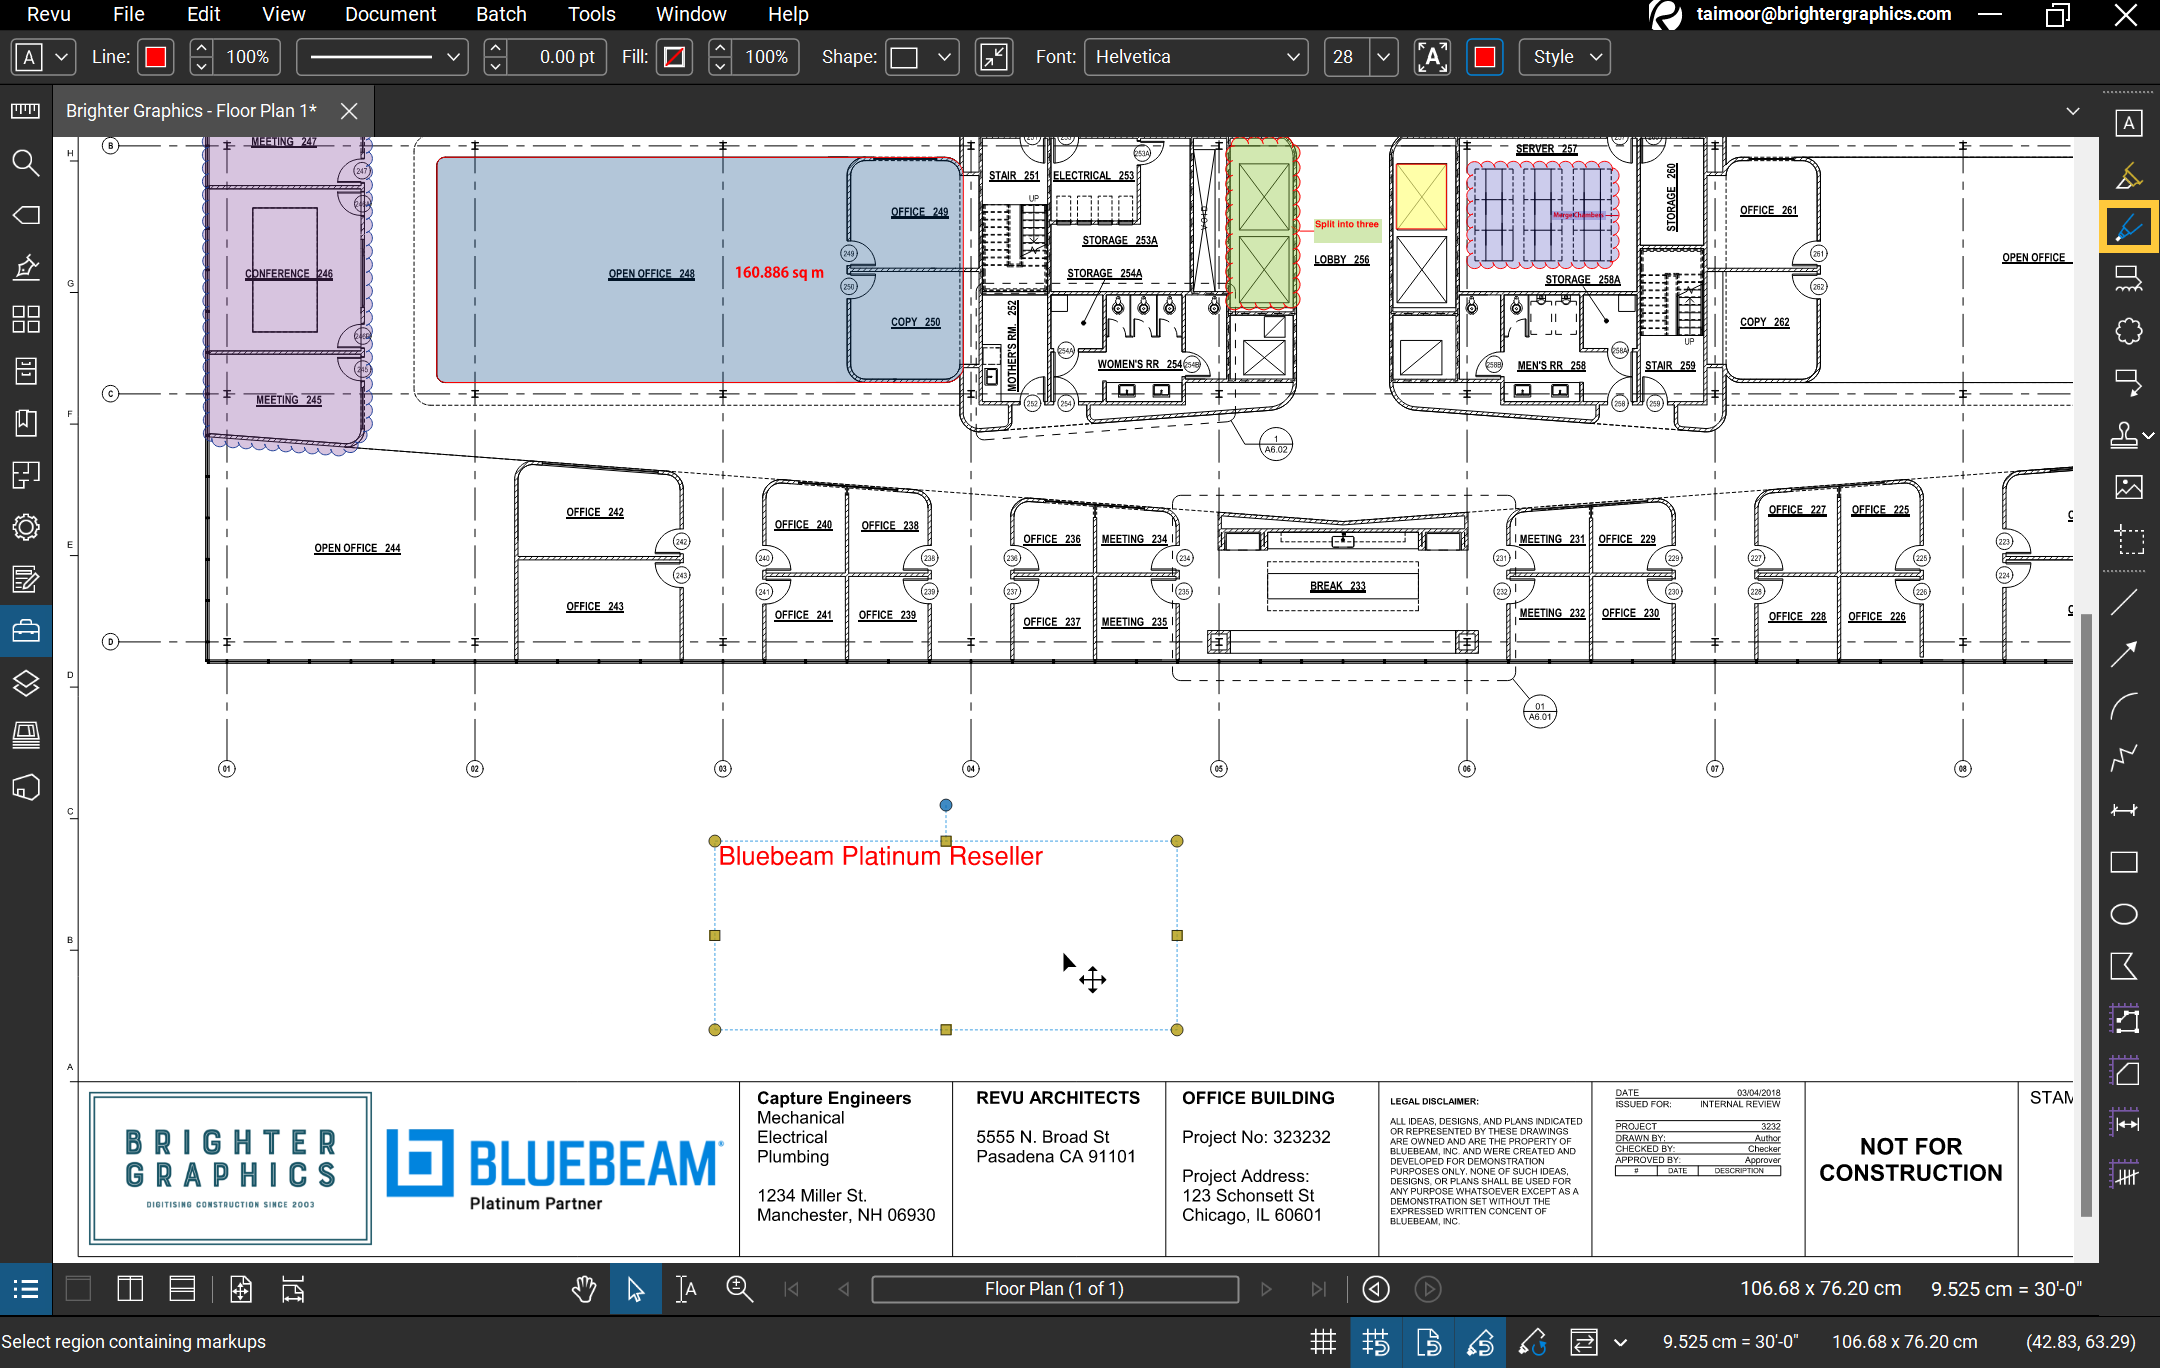
The Text markup in Bluebeam
Arrow Markup
The Arrow markup is used to draw arrows to direct the user's attention towards a specific aspect or area of the drawing. To draw an arrow in Bluebeam Cloud:
– Click on the Arrow markup > Click and Drag (from Tail) to draw the arrow of the required length > Release the markup by making another click at destination (at Head).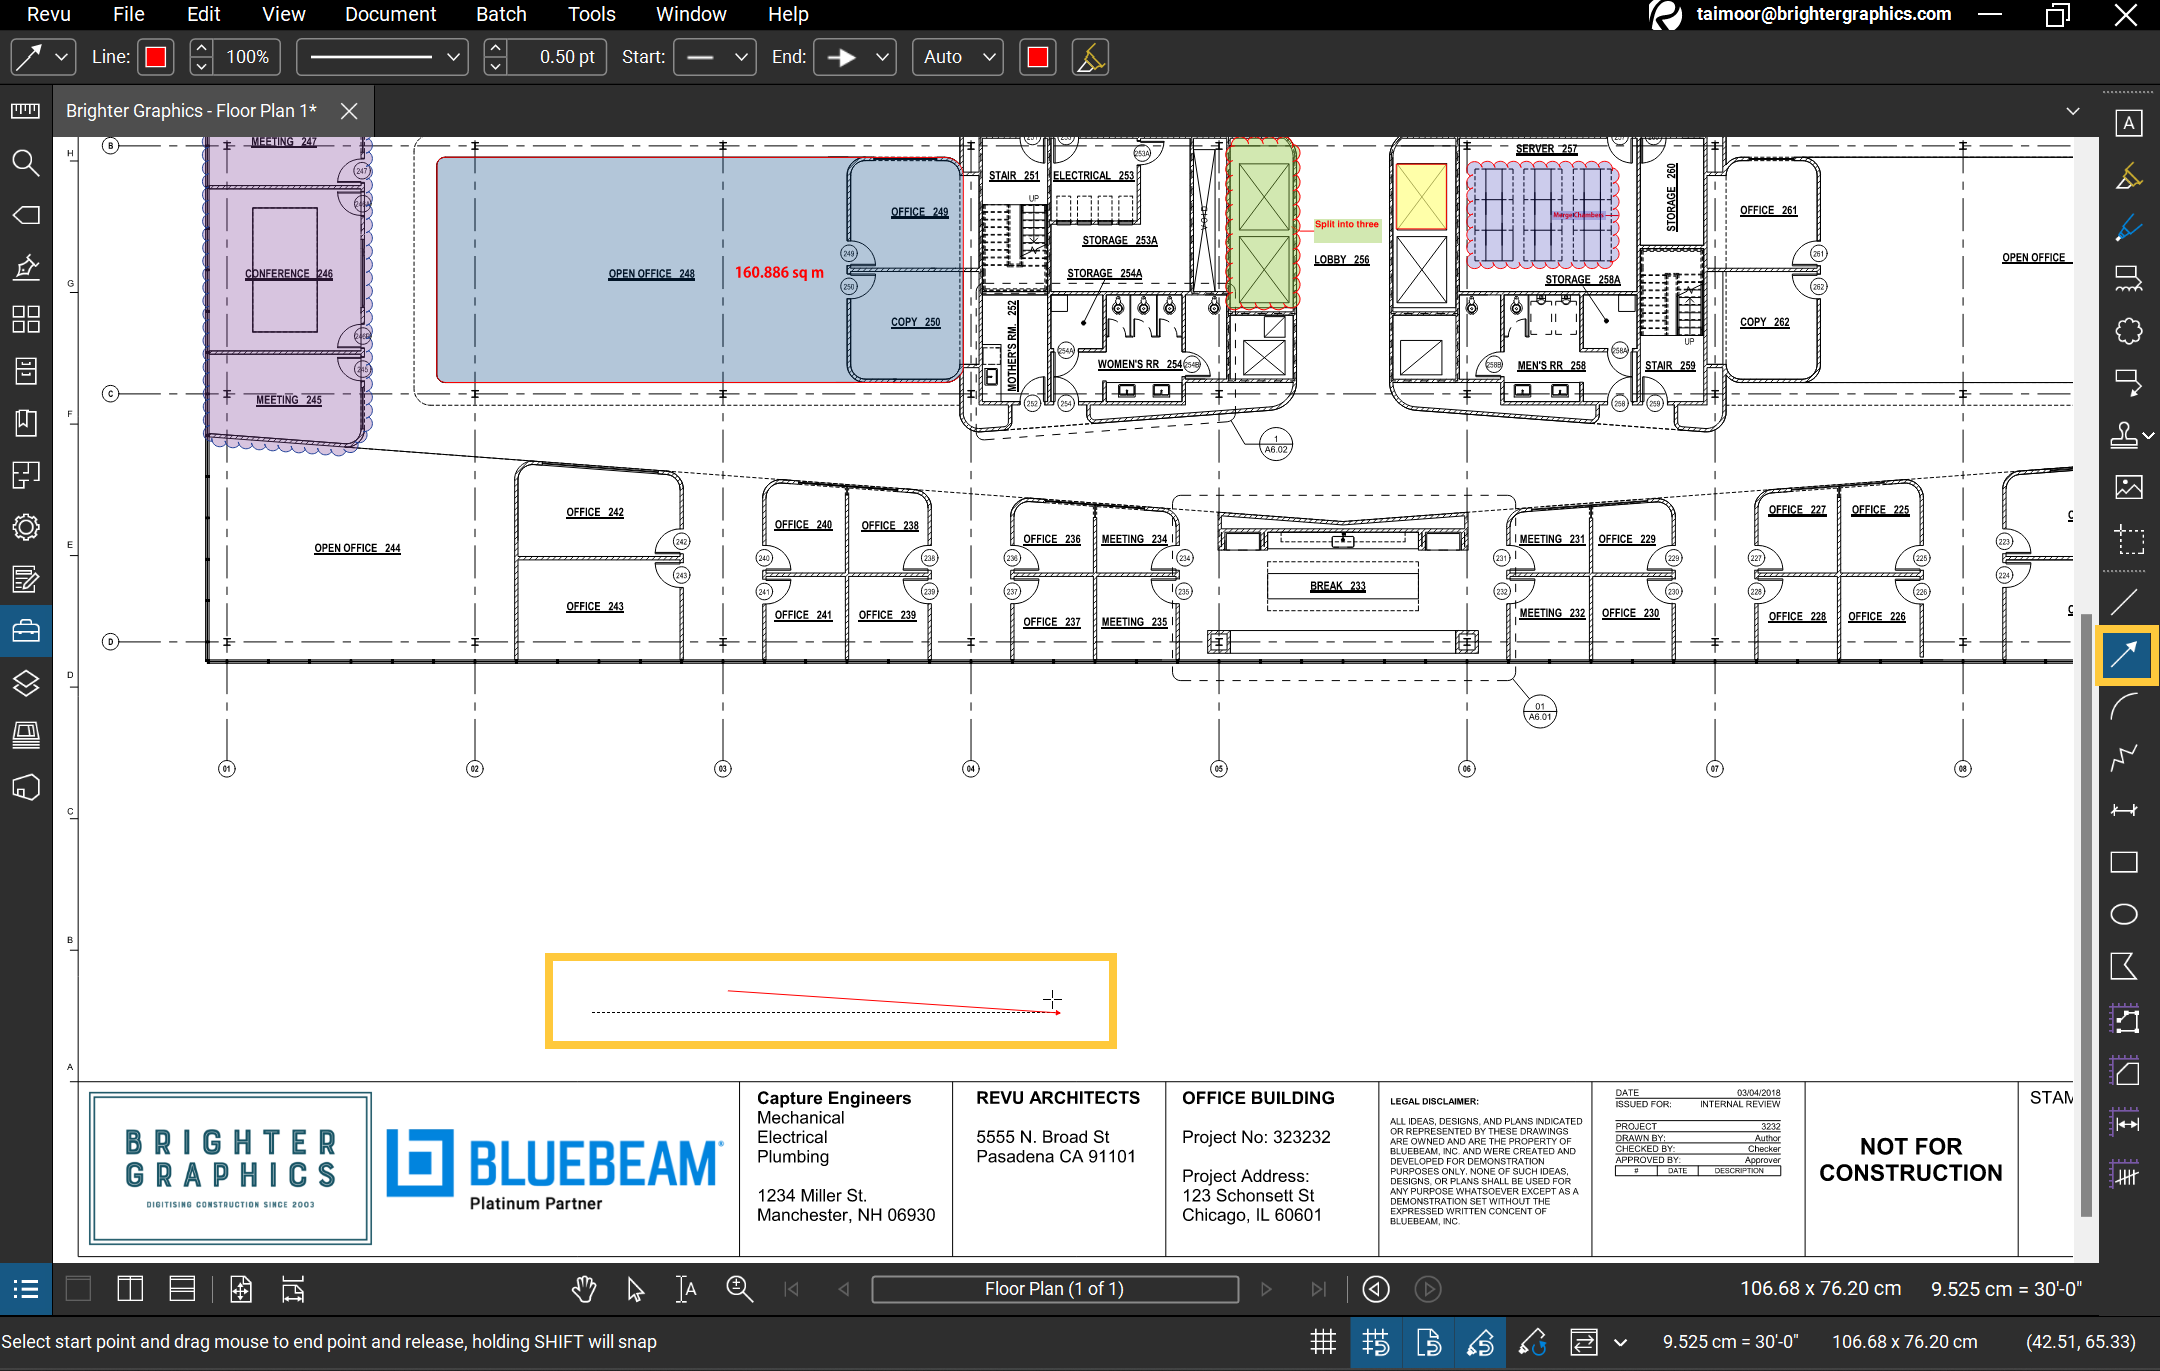
Arrow tool in action
Call-out Markup
The Call-out markup also contains text with a vector.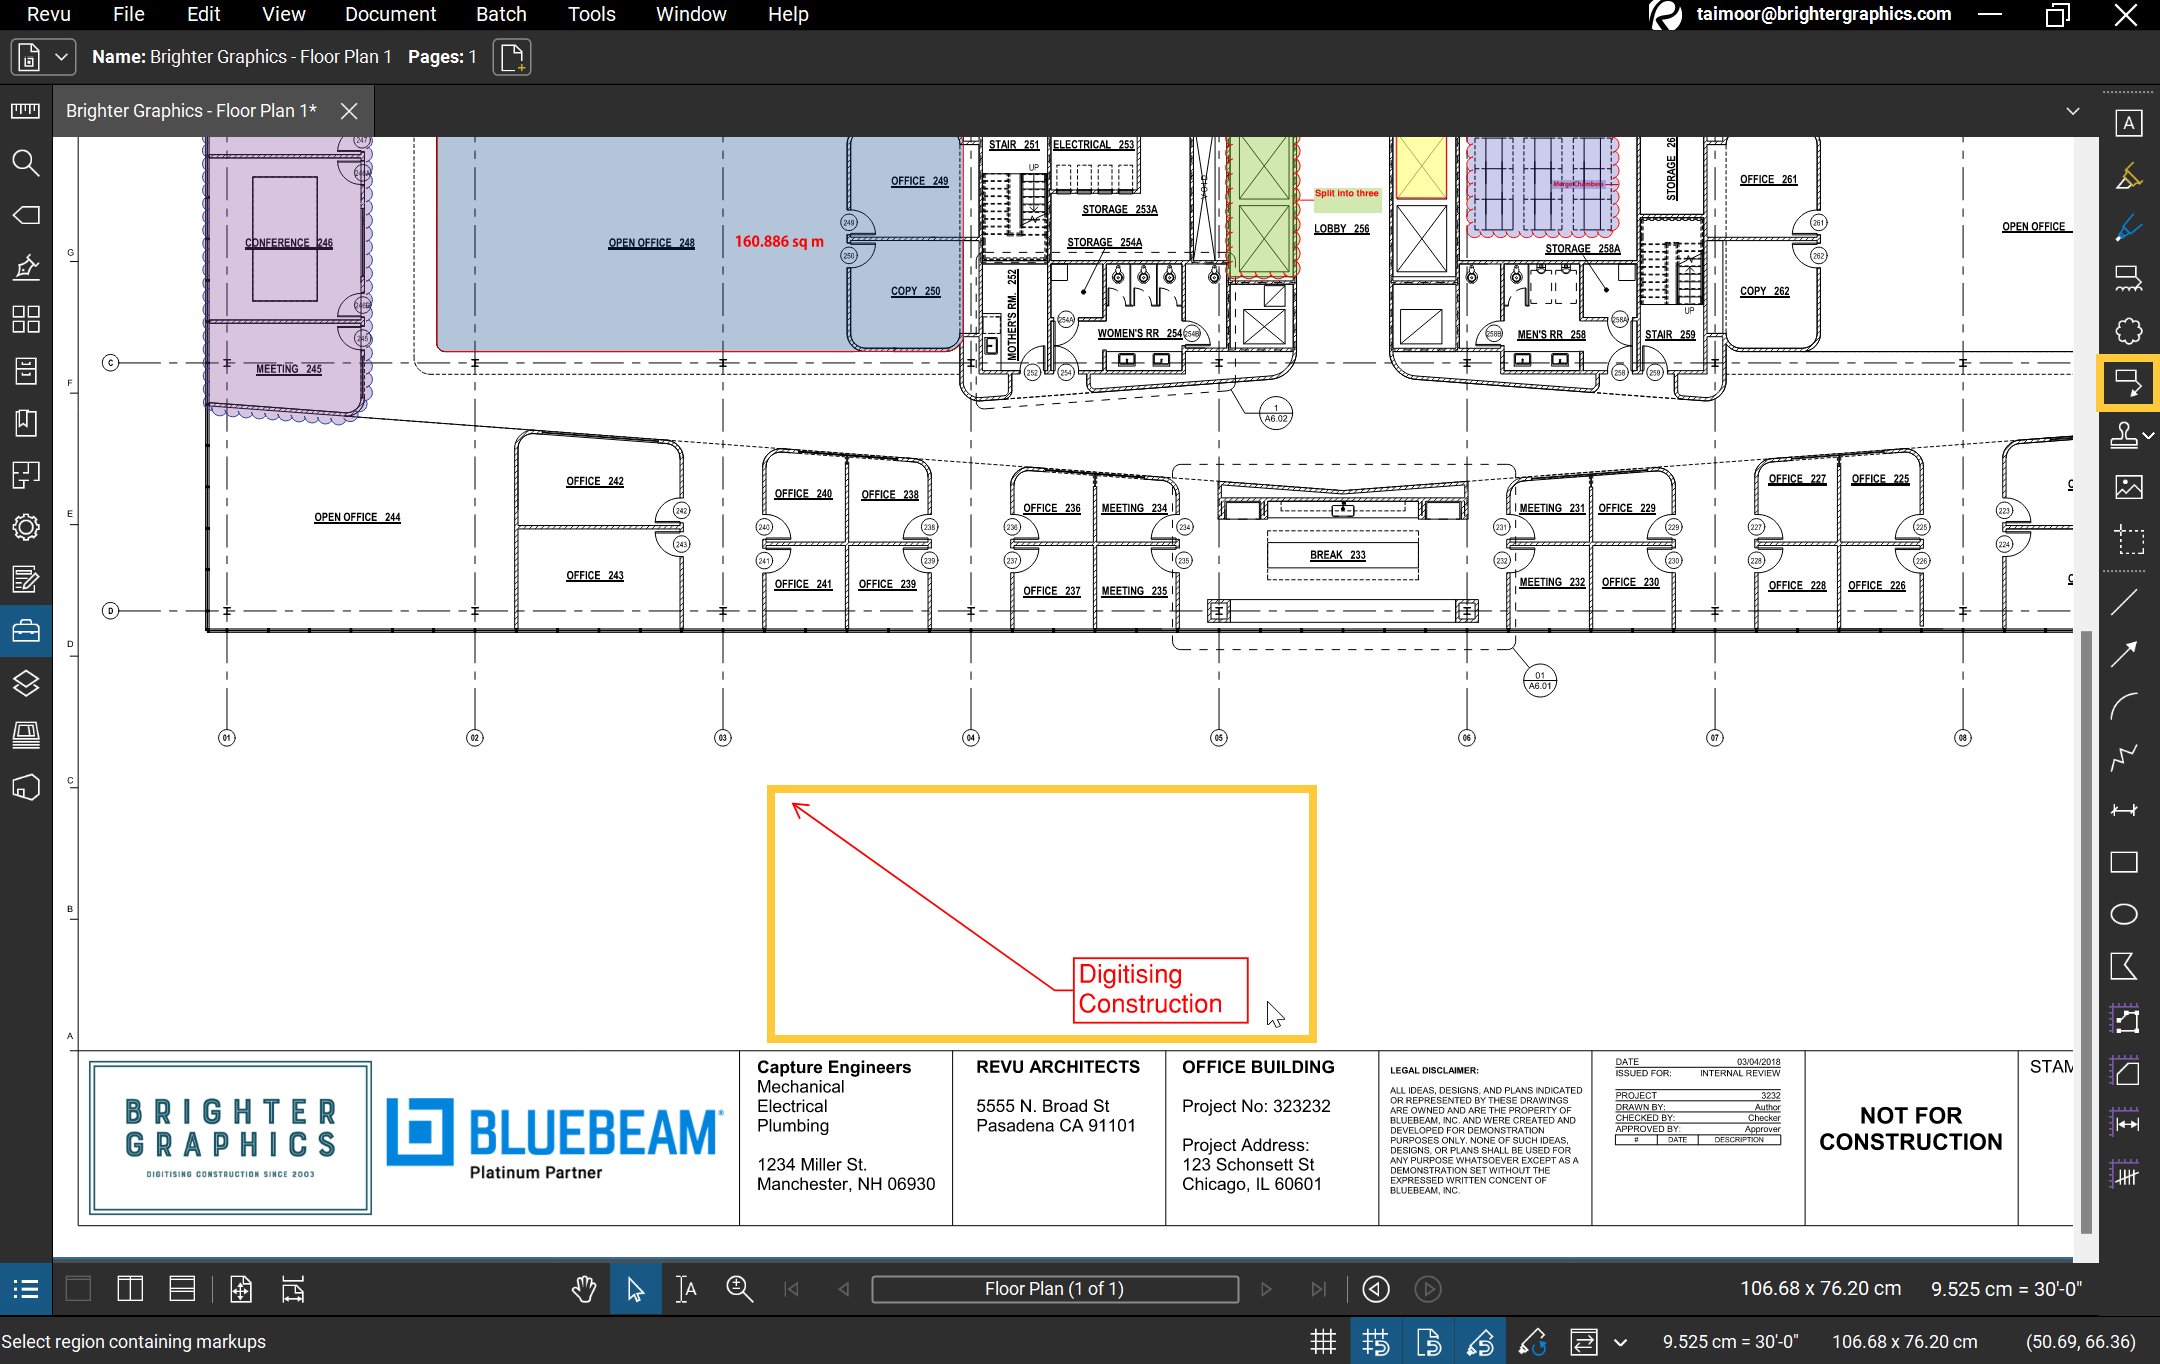
Call-out Markup in Action
Highlighter Markup
For the text in your PDF processed for “Optical Character Recognition” (OCR), the Highlighter tool can automatically be applied by selecting the text that can be stretched across multiple lines. If Bluebeam Cloud doesn’t recognise the text in your PDF, you can manually shade the required text (like Vector Pen) with the Highlighter.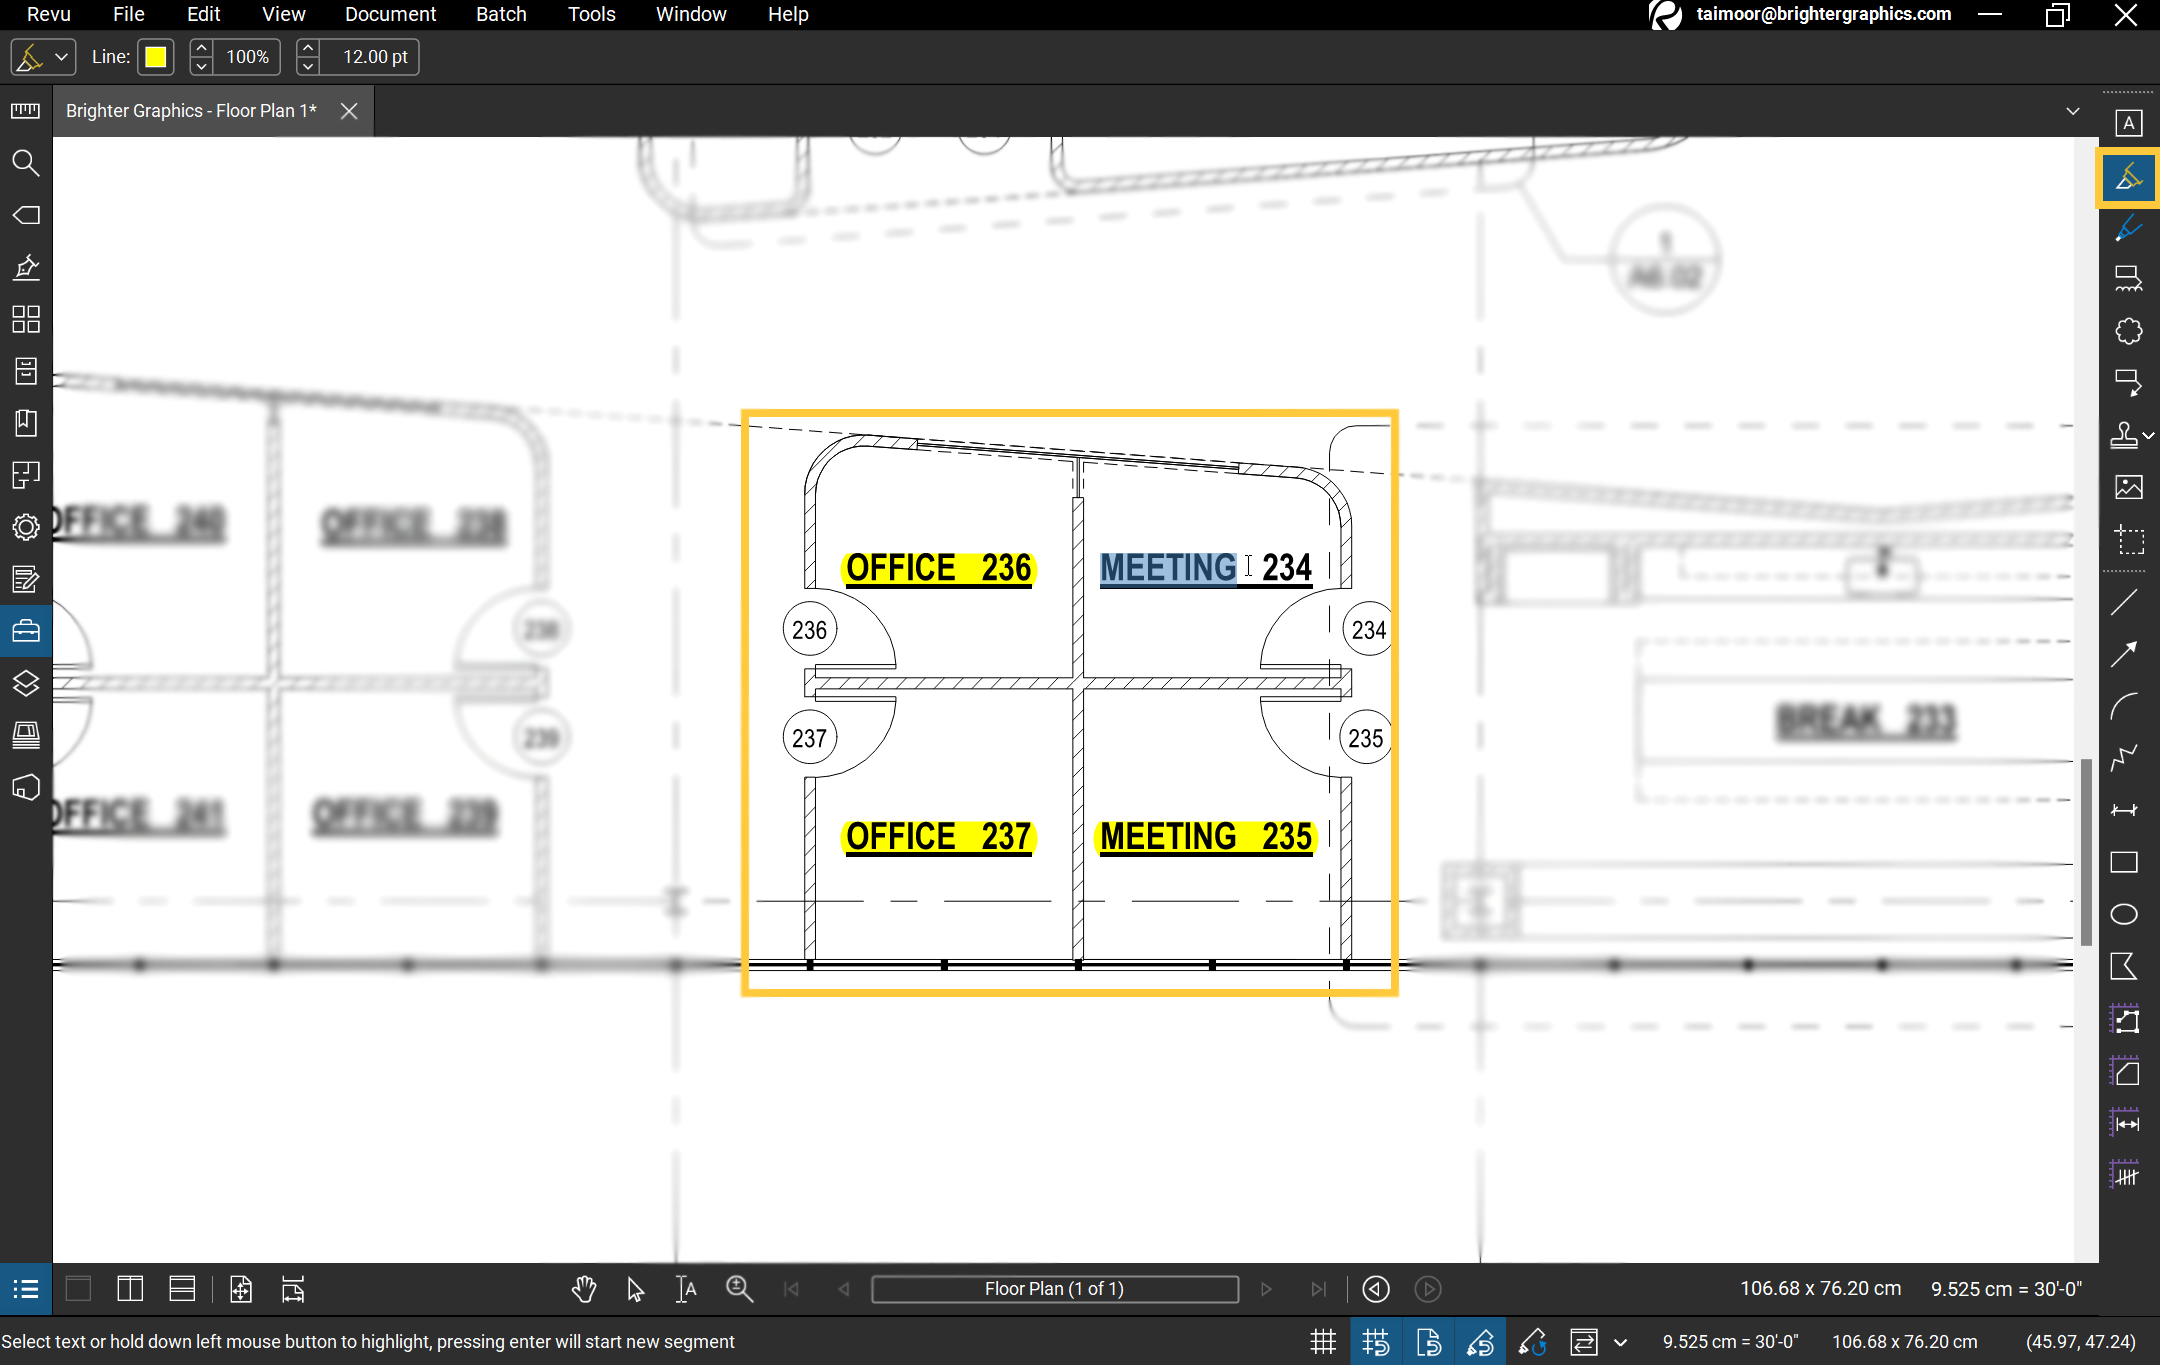
Highlight Markup in Action
Note: If you’d like to use this tool to highlight the text in your PDF, you can run OCR on your document using Revu before uploading it to Bluebeam Cloud.
Image Markup
The Image markup is used to place an image in your PDF.
– Click the Image markup > Choose an image from your device > Click-Drag-&-Release to draw the image > Select the image with the Select tool to alter it.
You can resize the image with anchor points, rotate to align, and then drag it to the desired location on your PDF.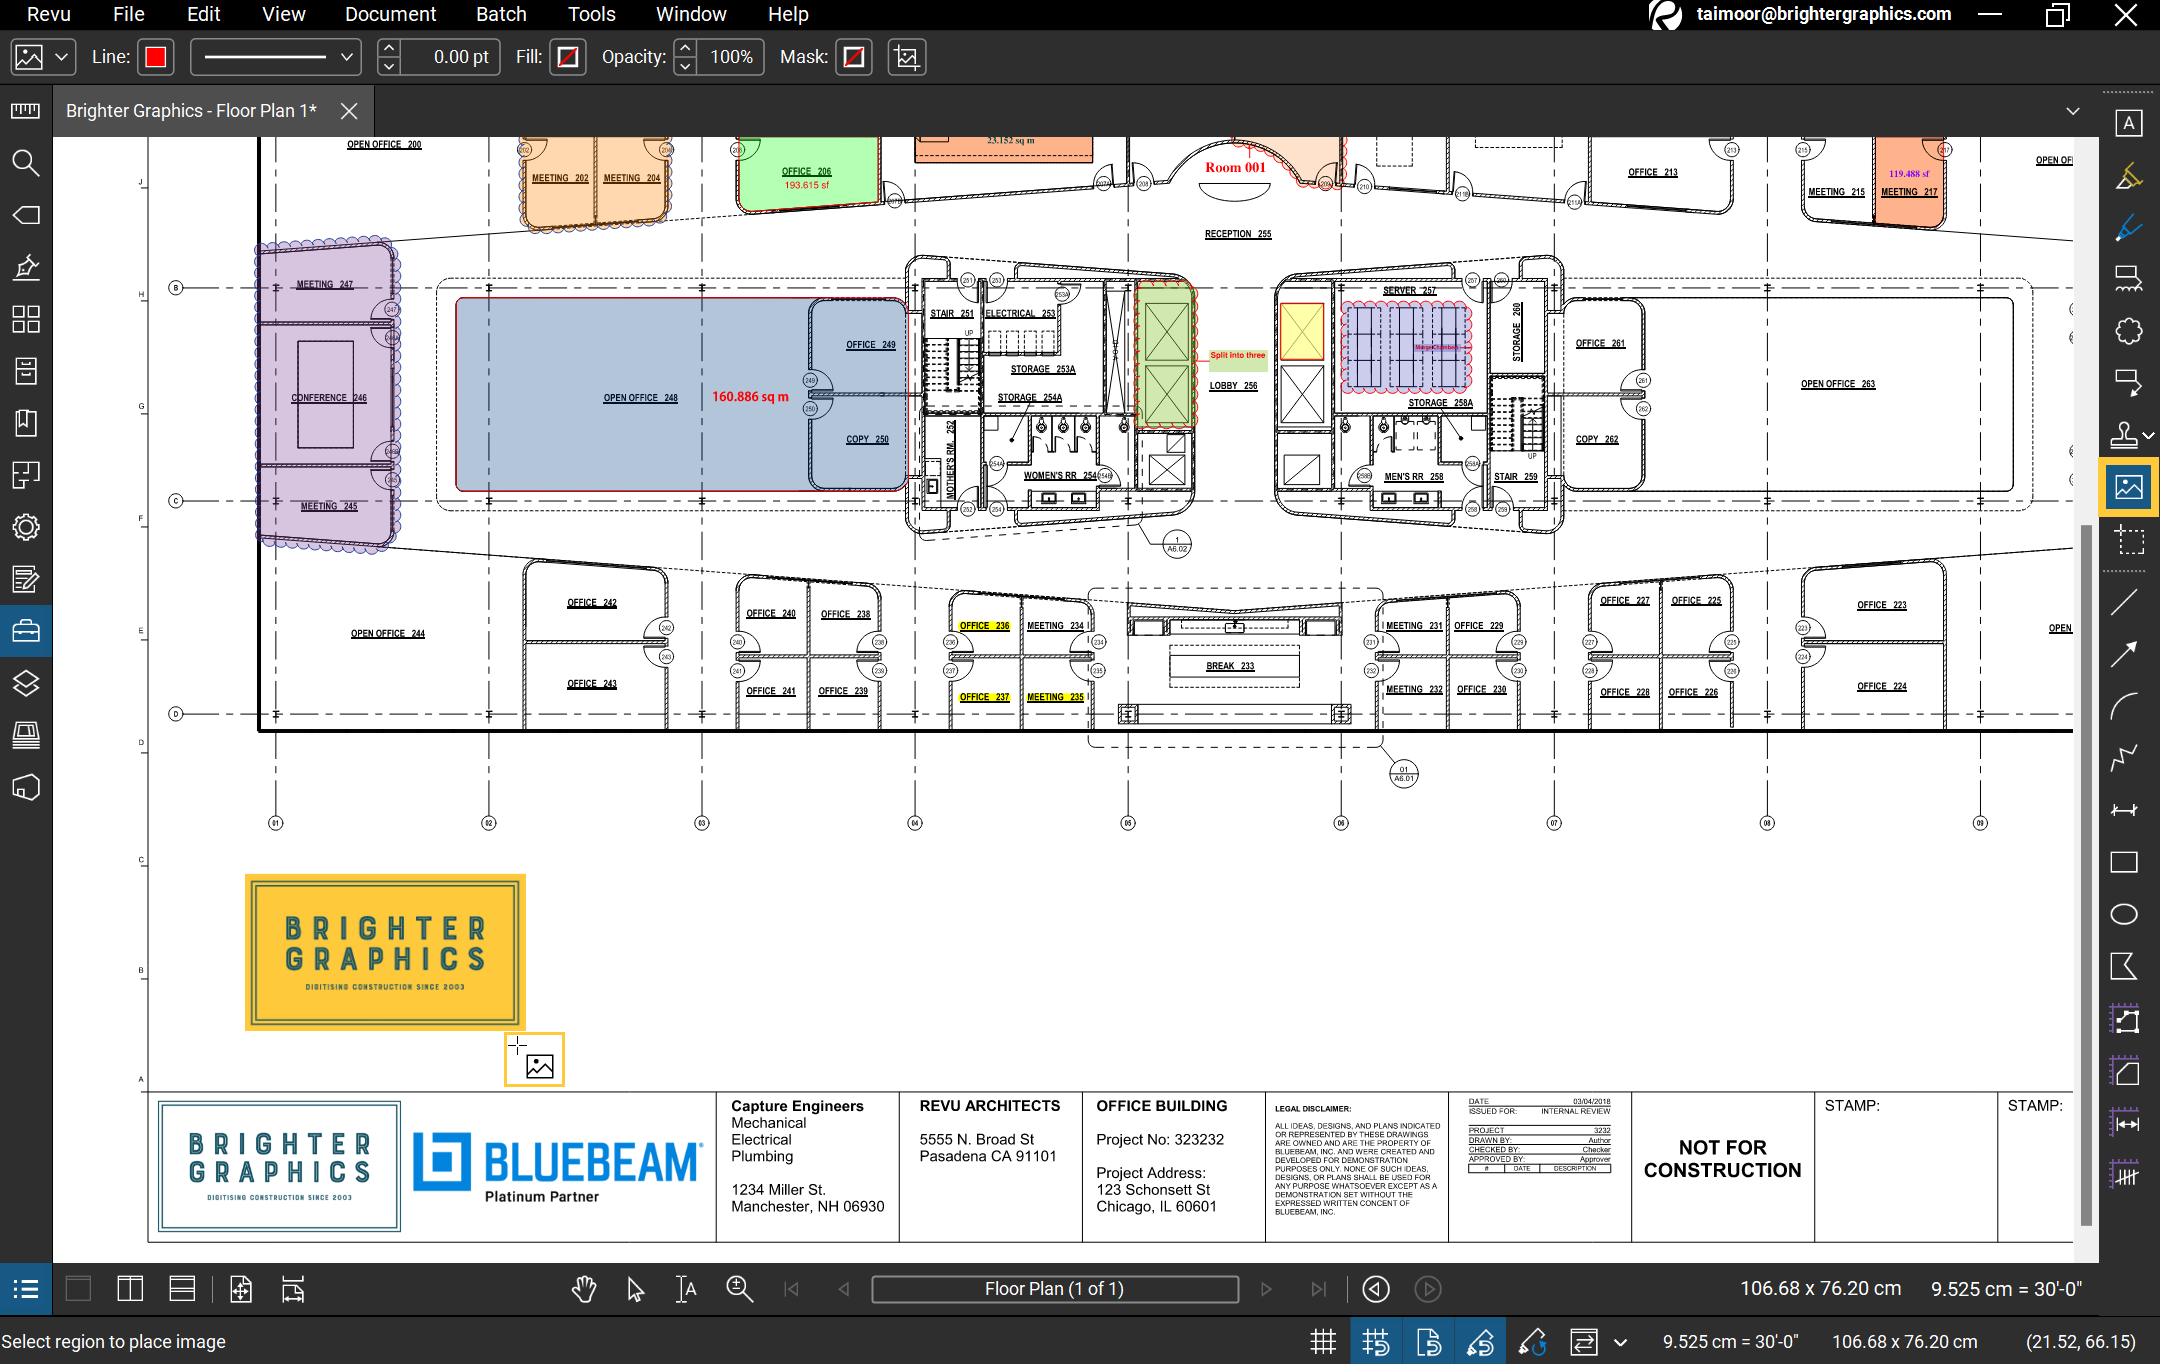
Image Markup in Action
Stamps
You can add built-in stamps to your drawings and create or import your custom stamps in Revu.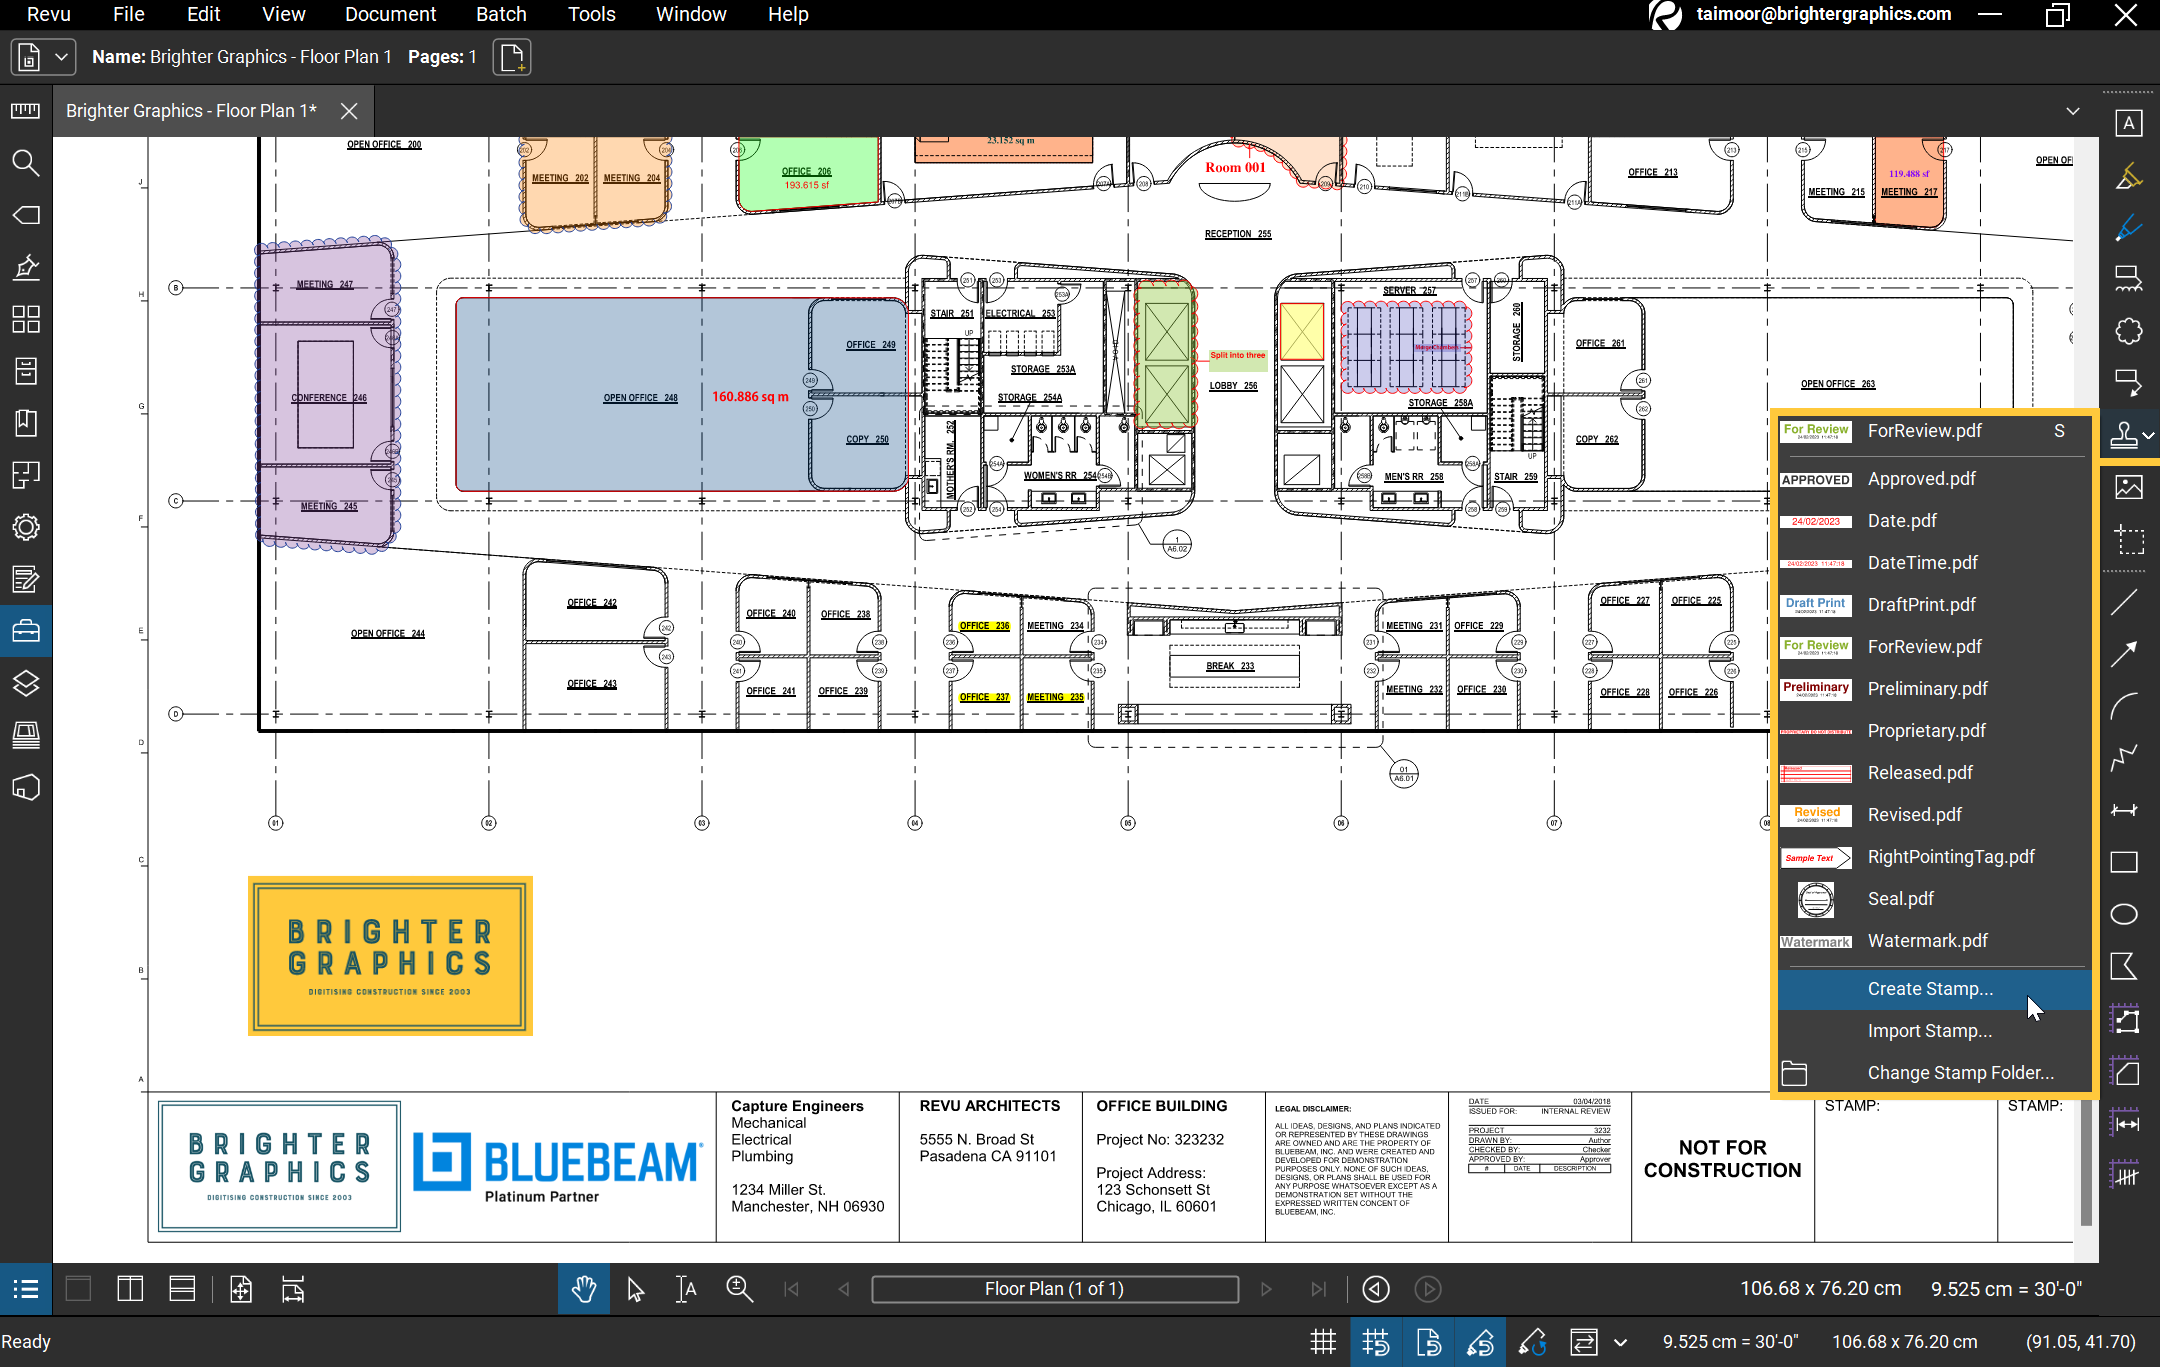
Stamps Markup in Revu 21
In Bluebeam Revu 21, you can add markups to the same PDF document together in real-time using Studio Sessions, or individually at any time while the Session is active. This feature makes it easy to keep track of everyone's ideas & comments and ensures that everyone is on the same page. Learn how to use Studio in Bluebeam.