


If you're tired of manually adjusting your markup vertices, sides, and curves in your drawings while measuring different physical dimensions in Bluebeam Revu, it's time to try out the Snap feature. This exceptional feature allows you to draw markups, measure physical quantities (length, area, & volume), and find angles, accurately and quickly by snapping your measuring tools to the content on your drawings. With Snap, you'll no longer have to make second-guess whether your measurements are accurate or not, saving you time and reducing the risk of costly errors.
This blog post will let you explore different types of Snapping options and refine your measurements to unprecedented accuracy. Let’s discuss this in detail.
Snap Feature in Revu 21 - Introduction
The Snap feature allows your measurements to automatically adjust and align with the underlying PDF content of a document. It means that you enable magnetic attraction or auto-alignment between your PDF content and a cursor crosshair, providing a truly accurate measurement.
Snap Options for Measurements
To access Snap options for Measurements:
Click the “Measurements” dropdown menu in the Measurements panel.
You will have two types of options to snap:
- Snap to Content
- Snap to Orthogonal
Snap to Content ensures accuracy in Measurements. The option remains turned on by default for all measurements.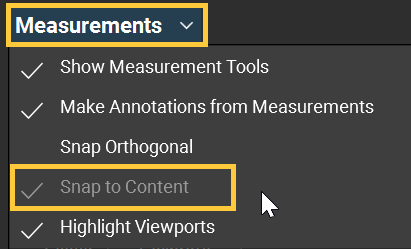
Moreover, Snap to Content can work only with vector-based content. You will not be able to apply Snap to Content on scanned PDFs.
To check whether your drawing is scanned or possesses vector-based content, zoom in on your drawing. If it starts losing definition and becomes pixelated, it is scanned.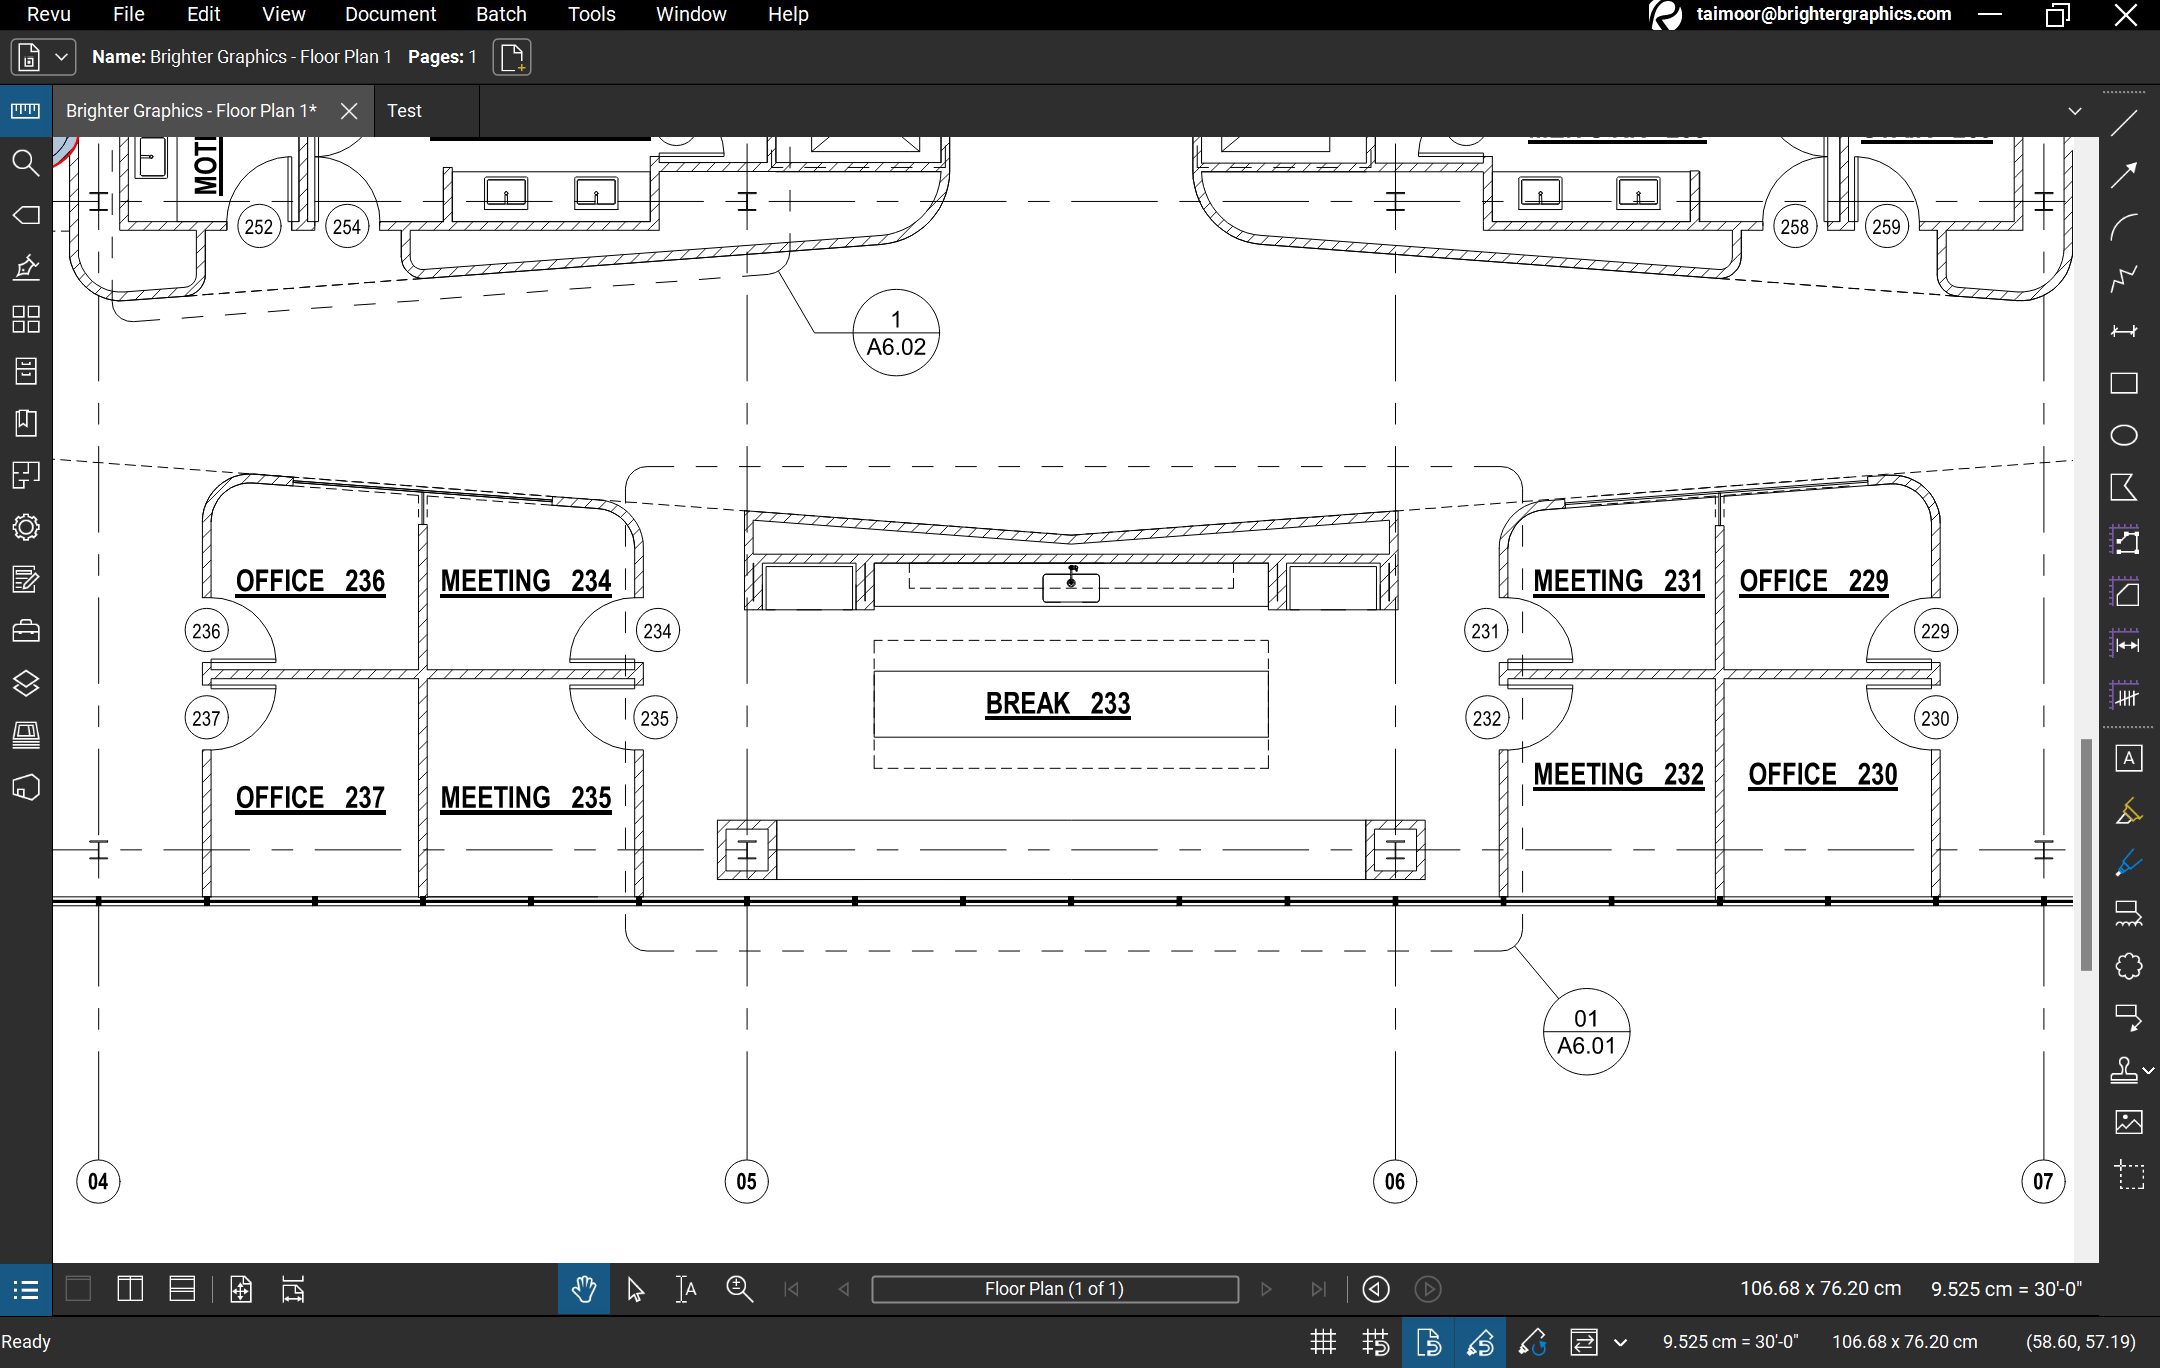
Vector Drawing

Scanned Drawing
Snap to Orthogonal restricts measurements to drag & draw vectors with
- Gradient,m=0,±1,and ±∞
- Angle,θ=f(x)=45x (where x=0,1,2,3,…,n)
You can also enable Snap to Orthogonal by “CLICK + SHIFT + DRAG” while drawing your measurements’ dimensions.
Snap Options for Drawing Content
To enable all Snap attributes for your drawings,
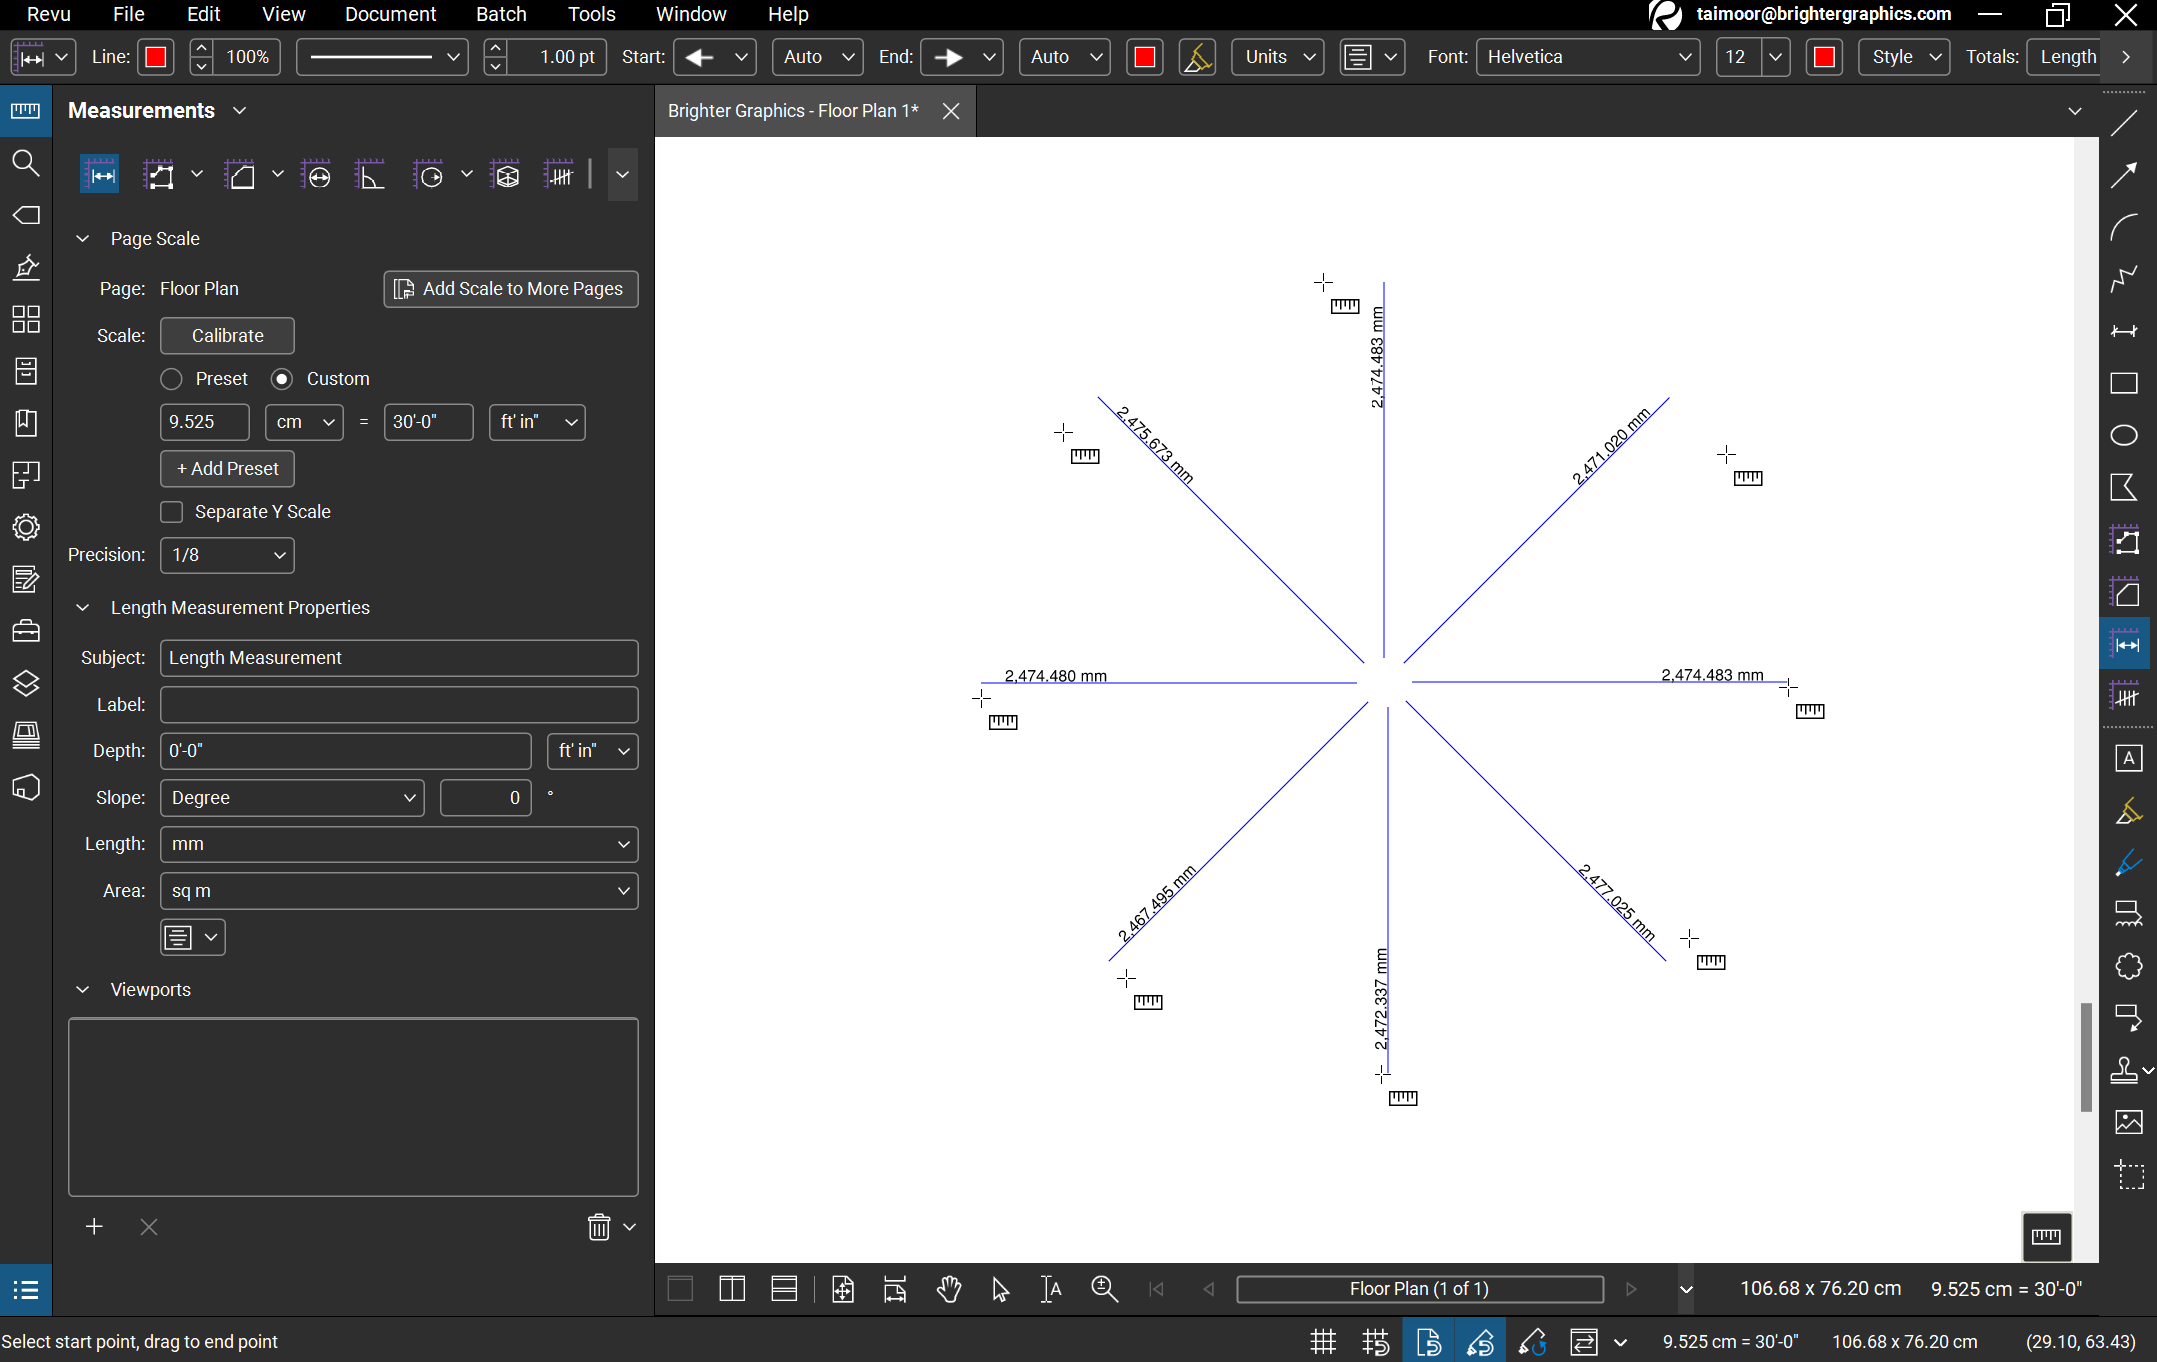
Step 1 - Go to “Revu” in the menu bar > Click “Preferences”.
Step 2 – Go to the “Grid and Snap” tab.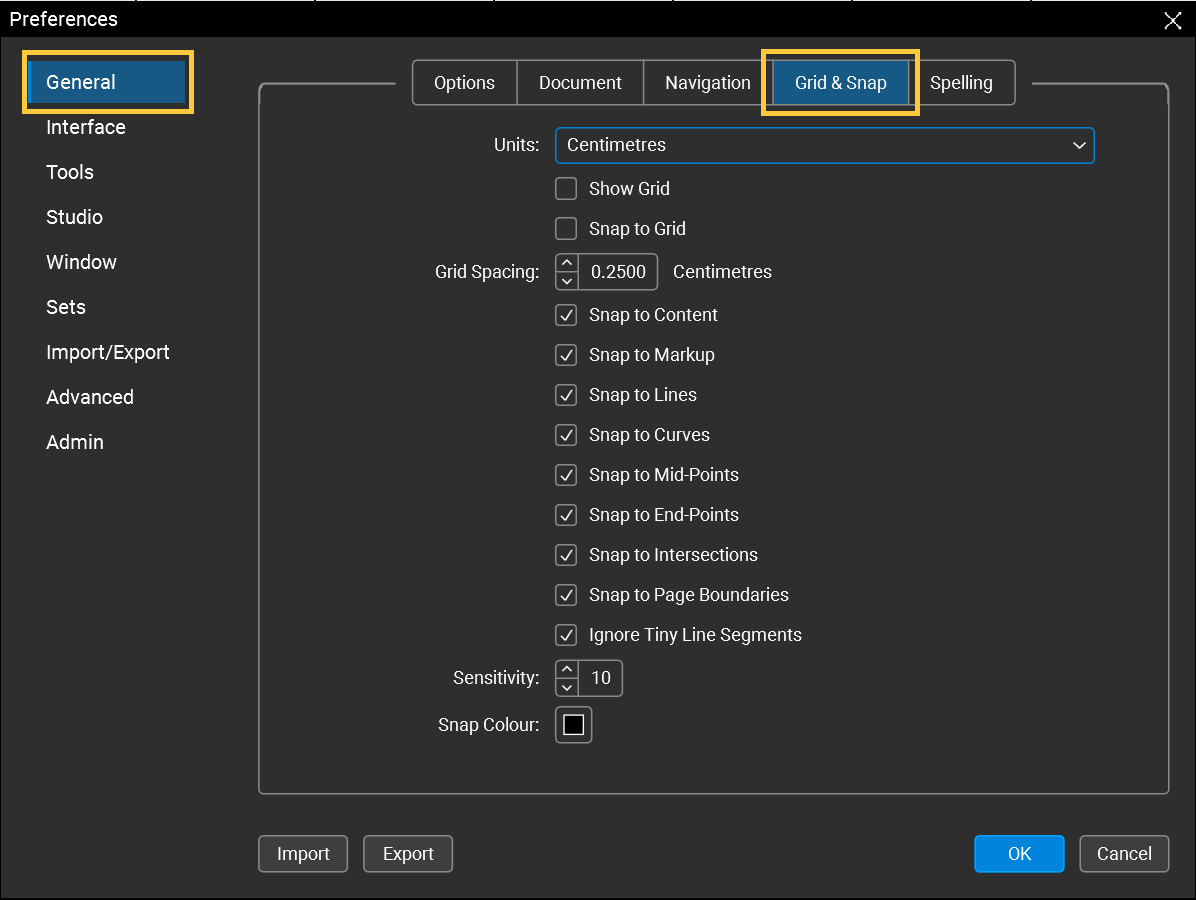
Make sure Snap to Content or any other Snaps options are checked, to enable them while using markups.
Snap Options – Quick Access
In the “View” menu, you can also access the most common Snap options, like
- Snap to Grid – To snap measurements to grid overlay on your content. (Enable Grids by pressing “SHIFT + 9” or clicking “Show Grid” just above the “Snap to Grid” option).
- Snap to Content – To snap measurements to the content of your drawing like vertices, sides, intersections, points, etc.
- Snap to Markup – To snap measurements to markups on your content.

You can directly access these Snap options in the Navigation bar at the bottom of your Revu window.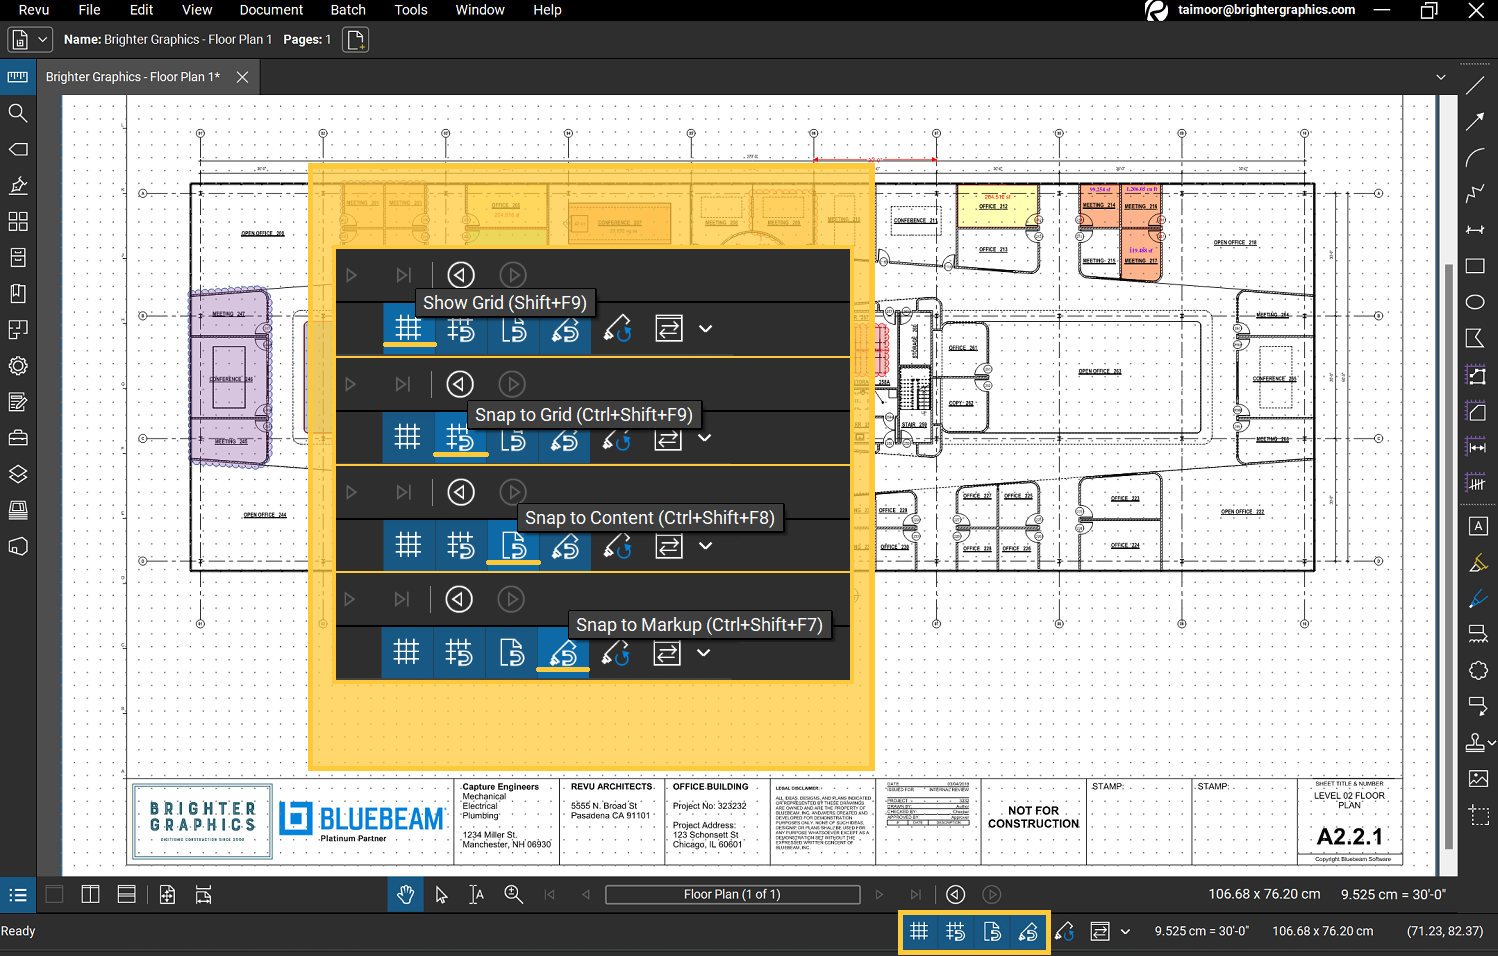
Tip: Enable all your snap attributes for the most accurate measurements and perfect alignment of markups with page content.
Stay connected with Brighter Graphics. We are the largest reseller of Bluebeam in the UK and Europe and your go-to partner for all things Bluebeam.