

You can use the Snapshot tool in Bluebeam Revu to highlight your PDF content as a spotlight, which you can resize anytime. This step-by-step guide will explain to you how.
Create a Snapshot of your PDF Content
To highlight objects in a PDF using the snapshot tool in Bluebeam Revu, first take a snapshot of the PDF. To do this:
Step 1 – Select the Snapshot tool from the toolbar and select a white region to take a snapshot.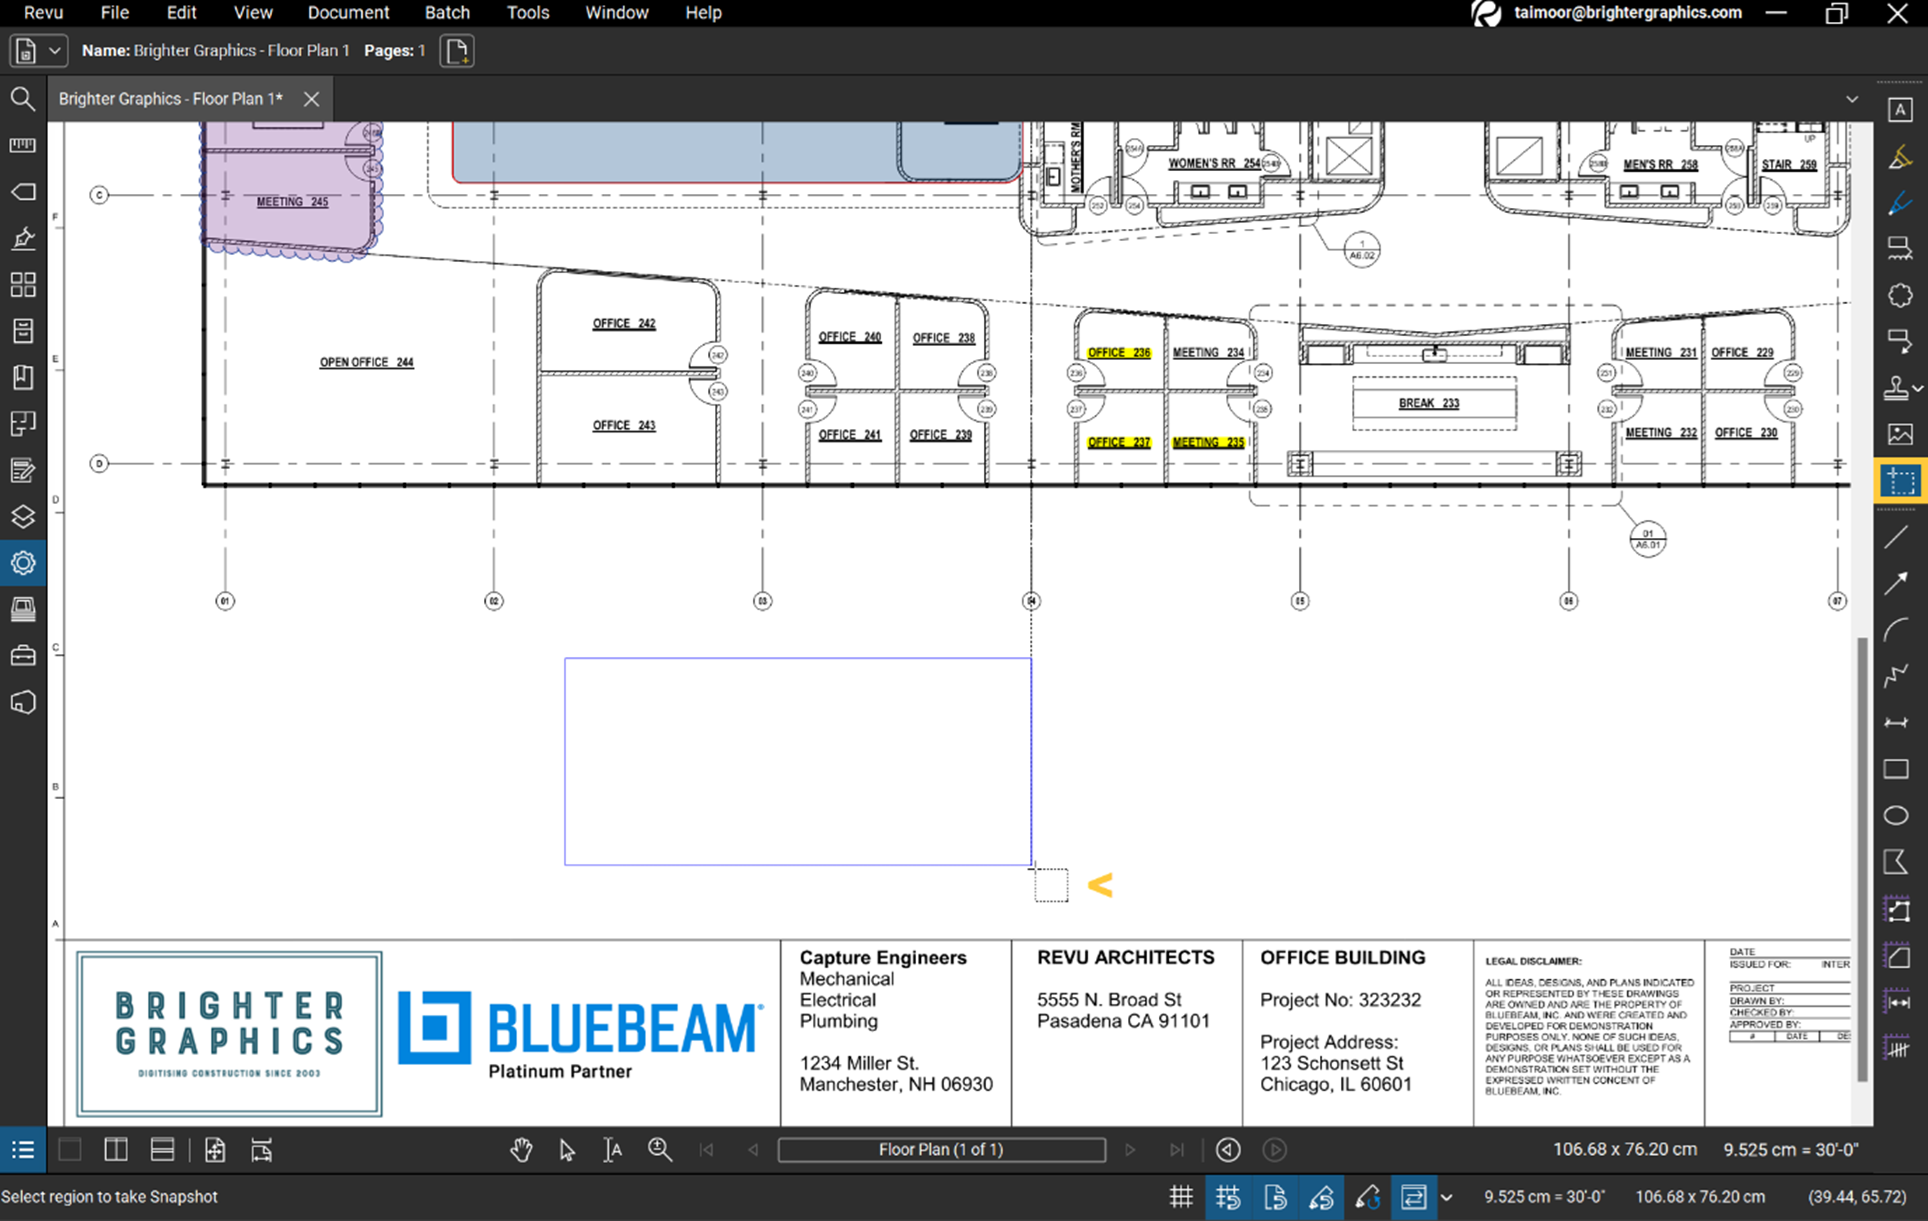
Step 2 – Once you drag-and-release your selection, Right-click > Paste or hold CTRL+V to paste your snapshot.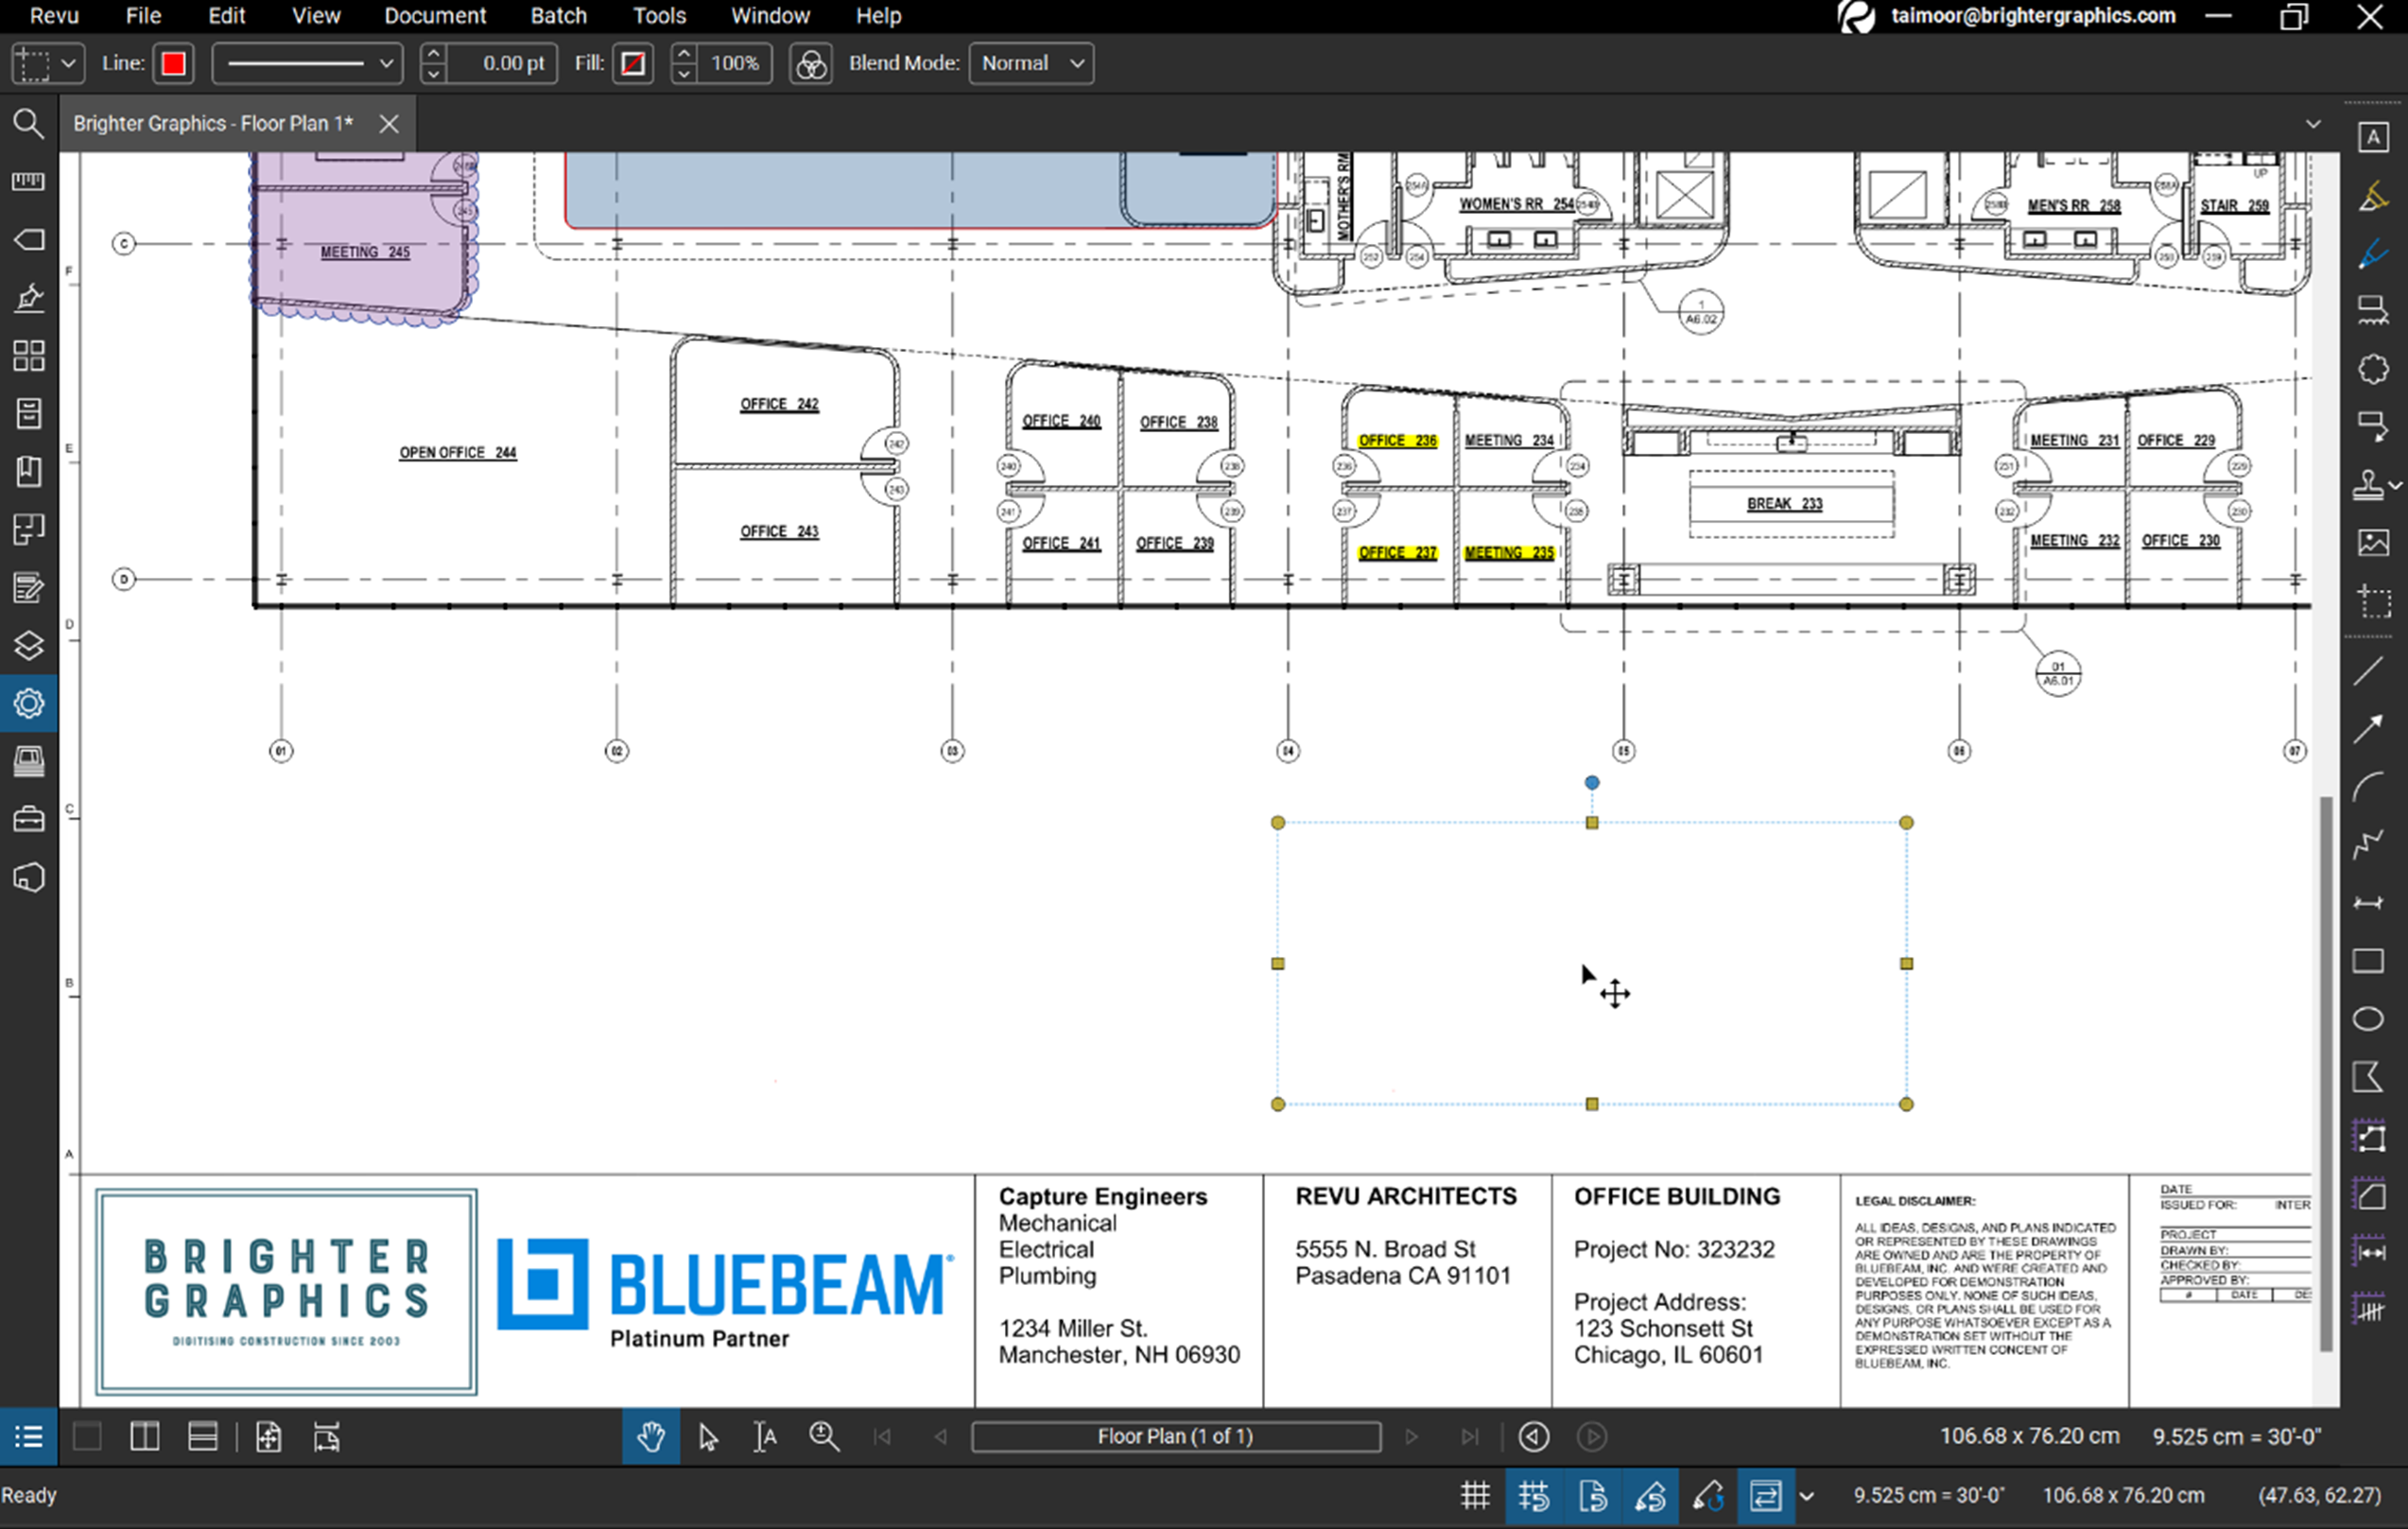
Changing Snapshot Properties
Step 1 – Now select your snapshot, go to the Properties panel, and set the Fill Colour of your choice.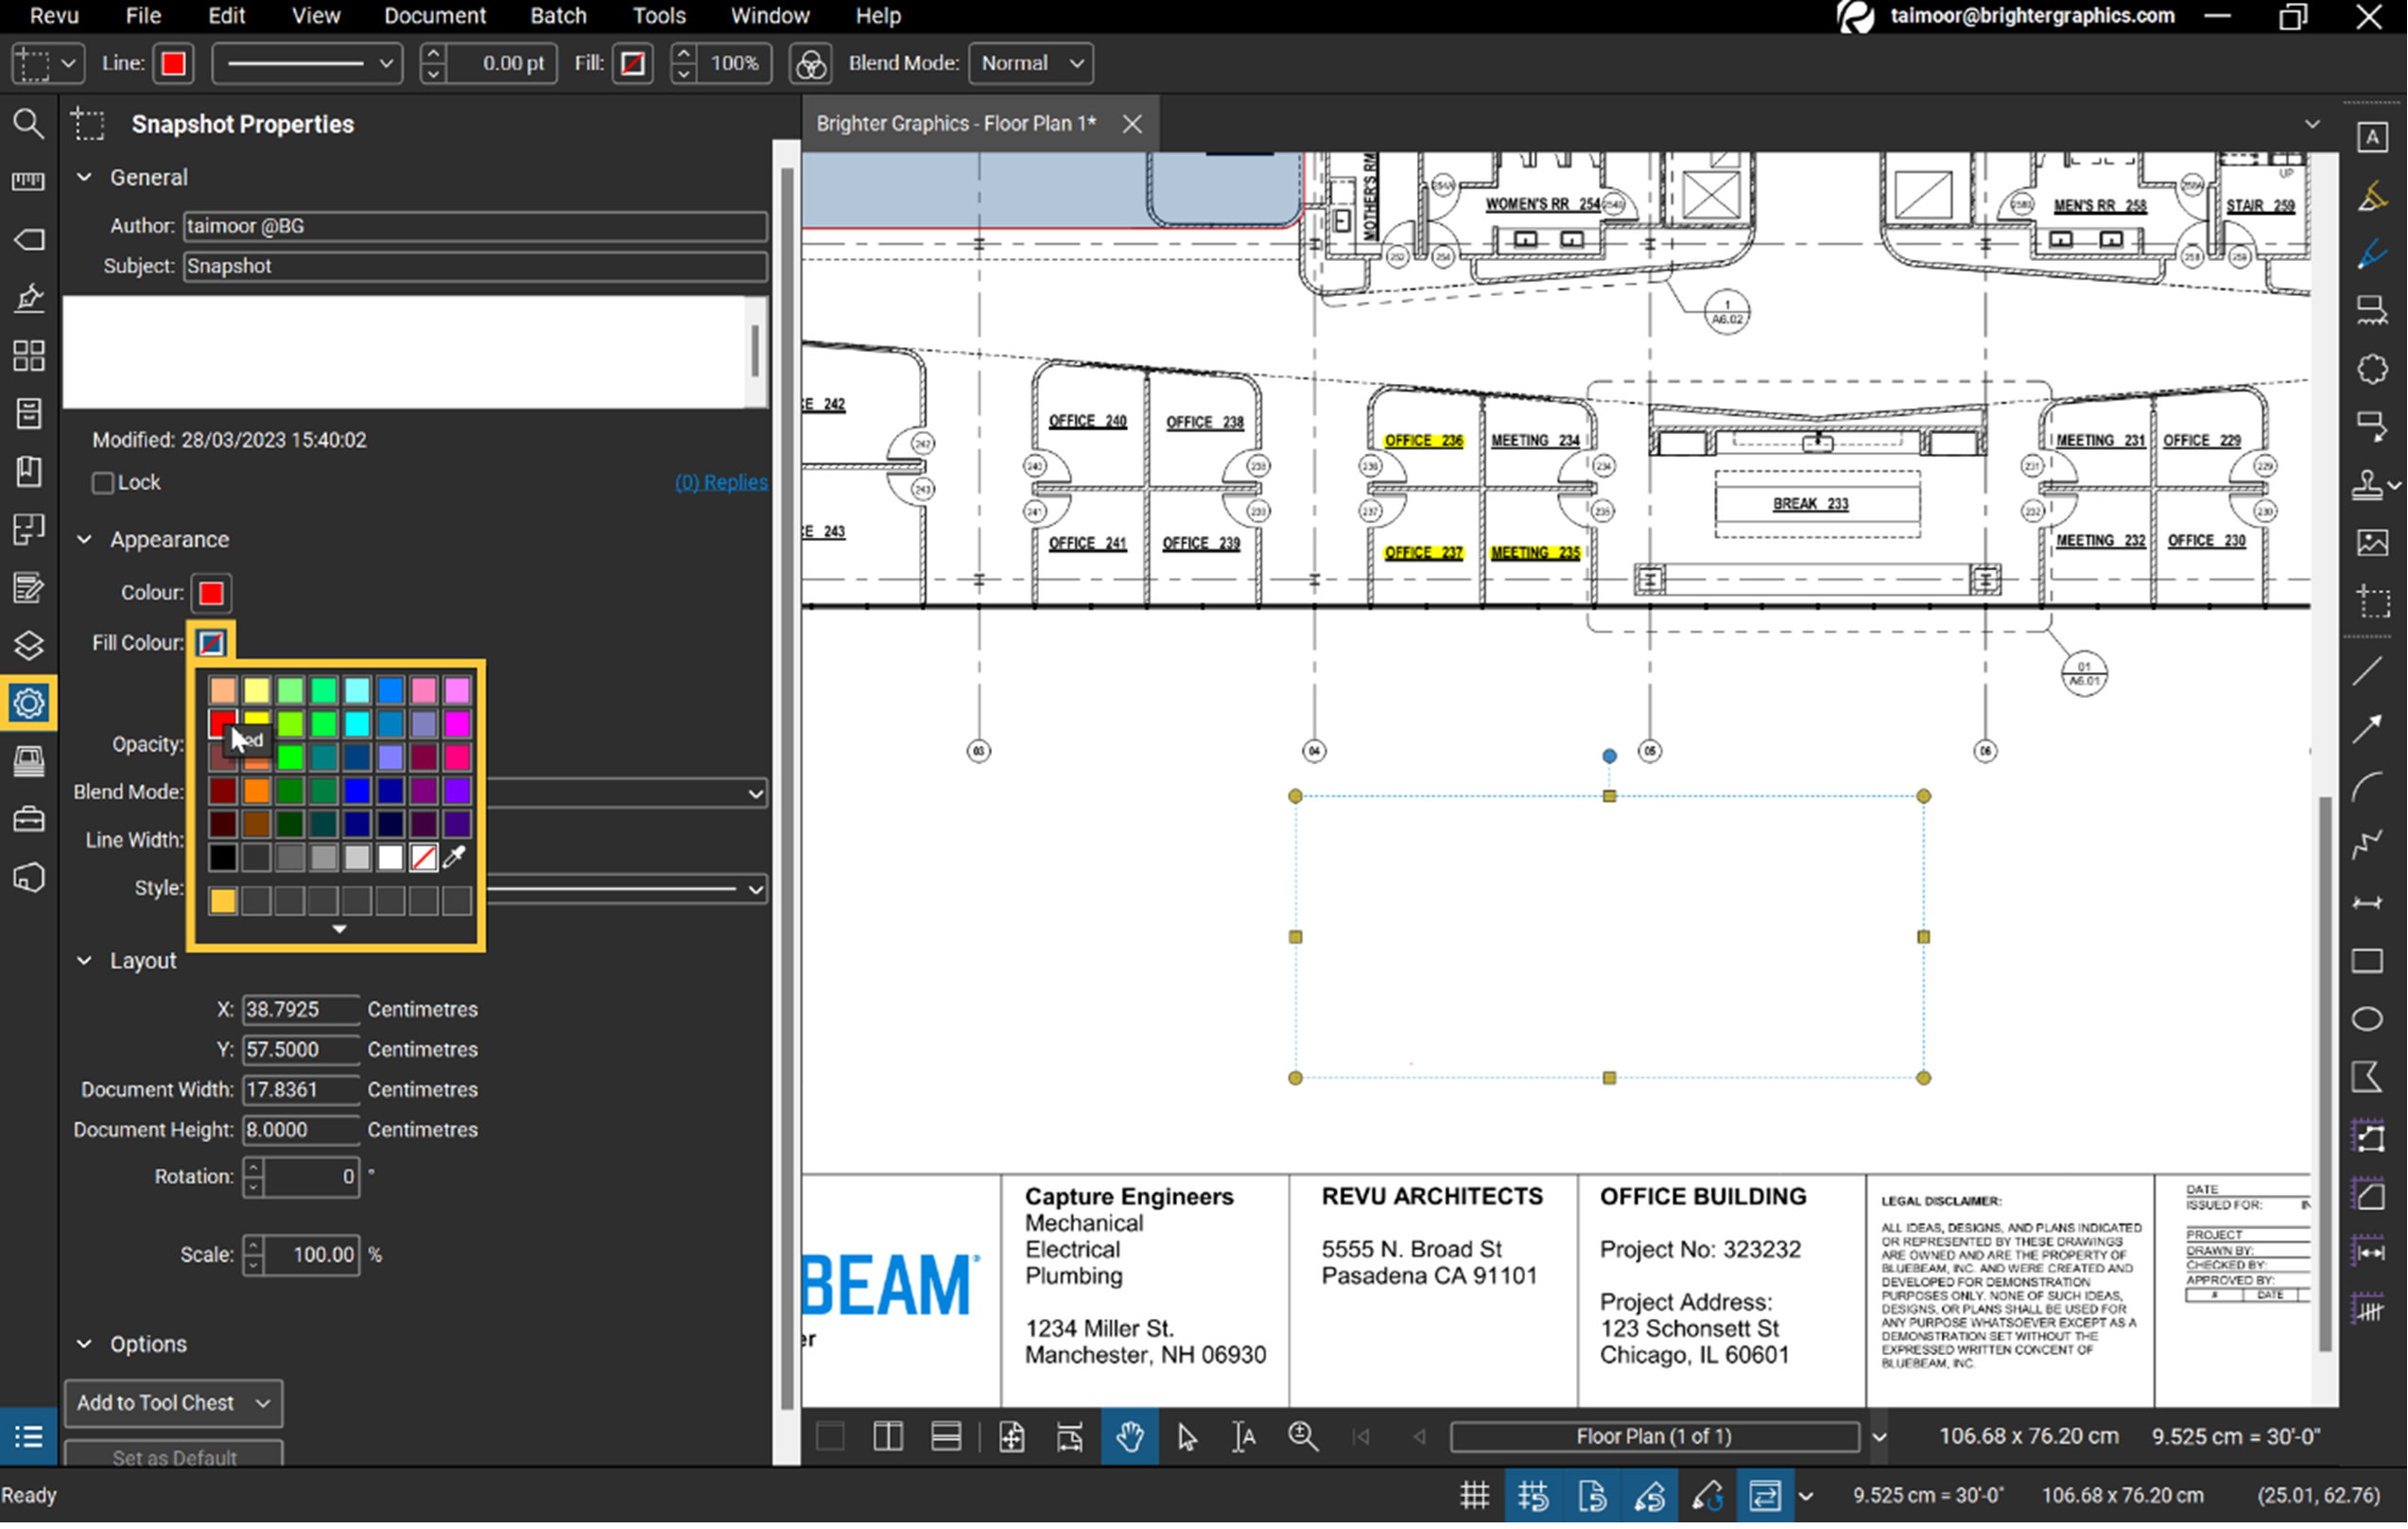
Step 2 – Set Blend Mode to Screen.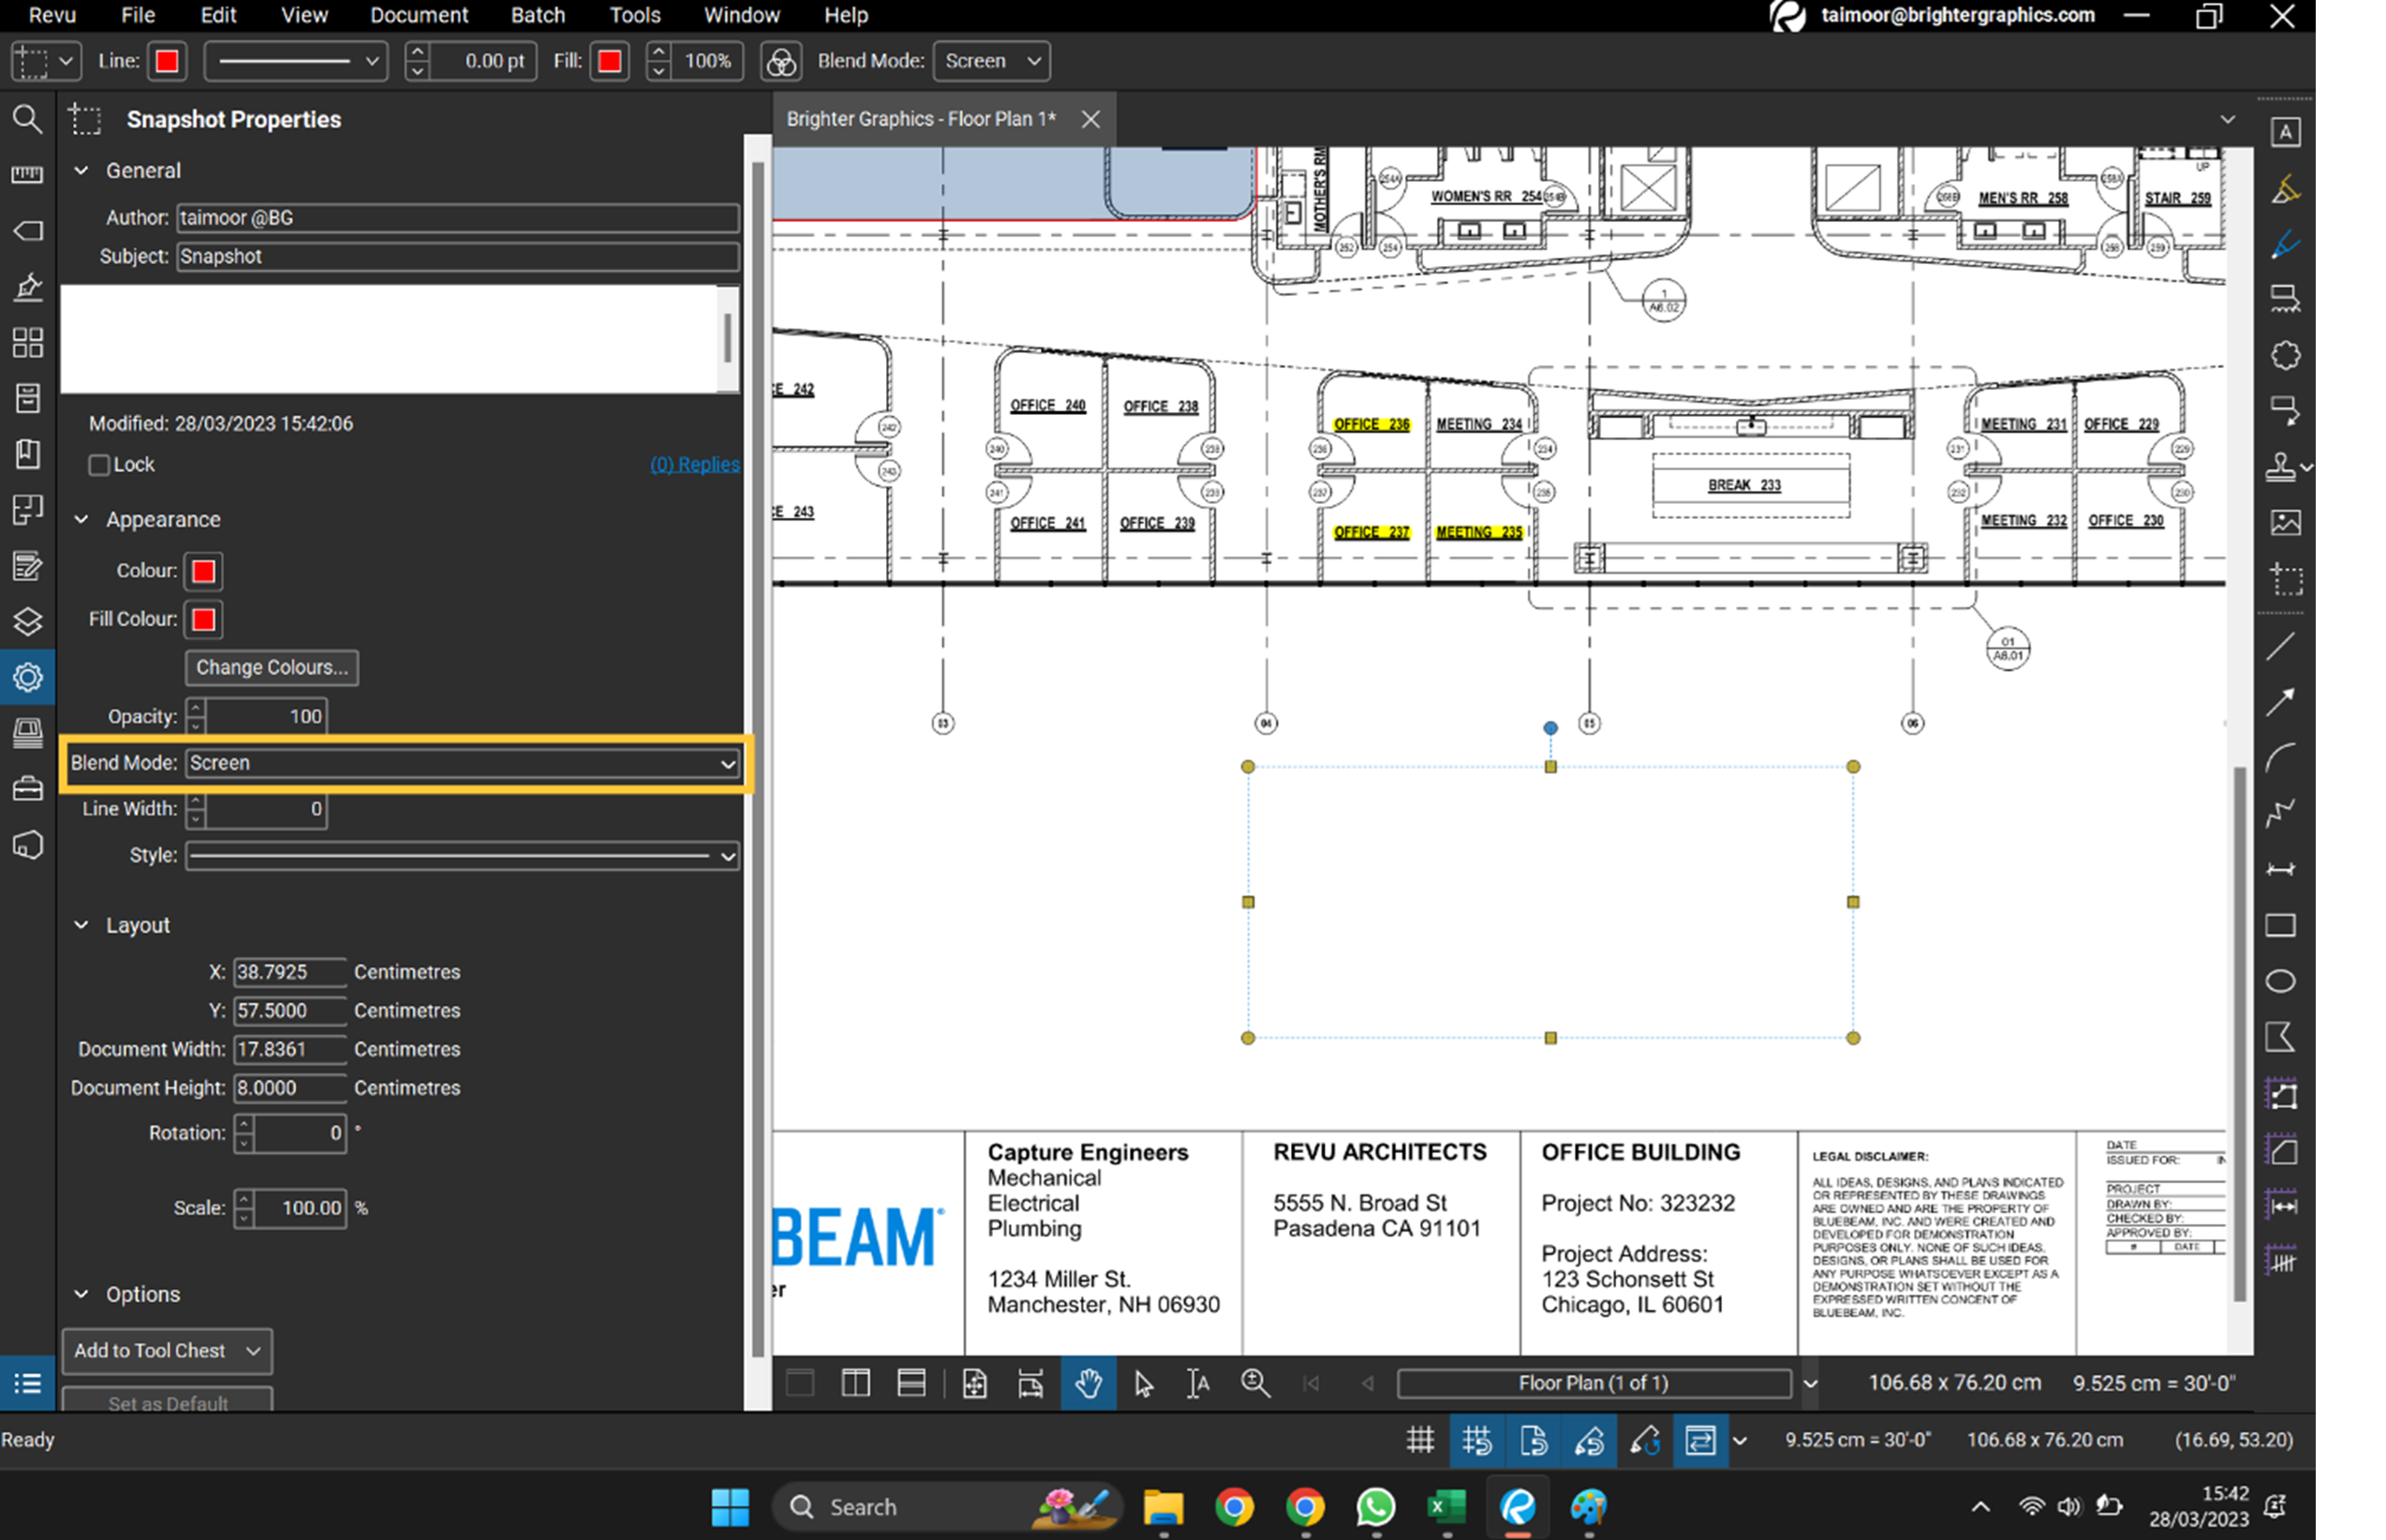
Highlight your PDF Content
Now drag the snap image with the Select tool and hover it over your content. The content under the snap image will turn to the colour you choose as your snap image’s fill colour.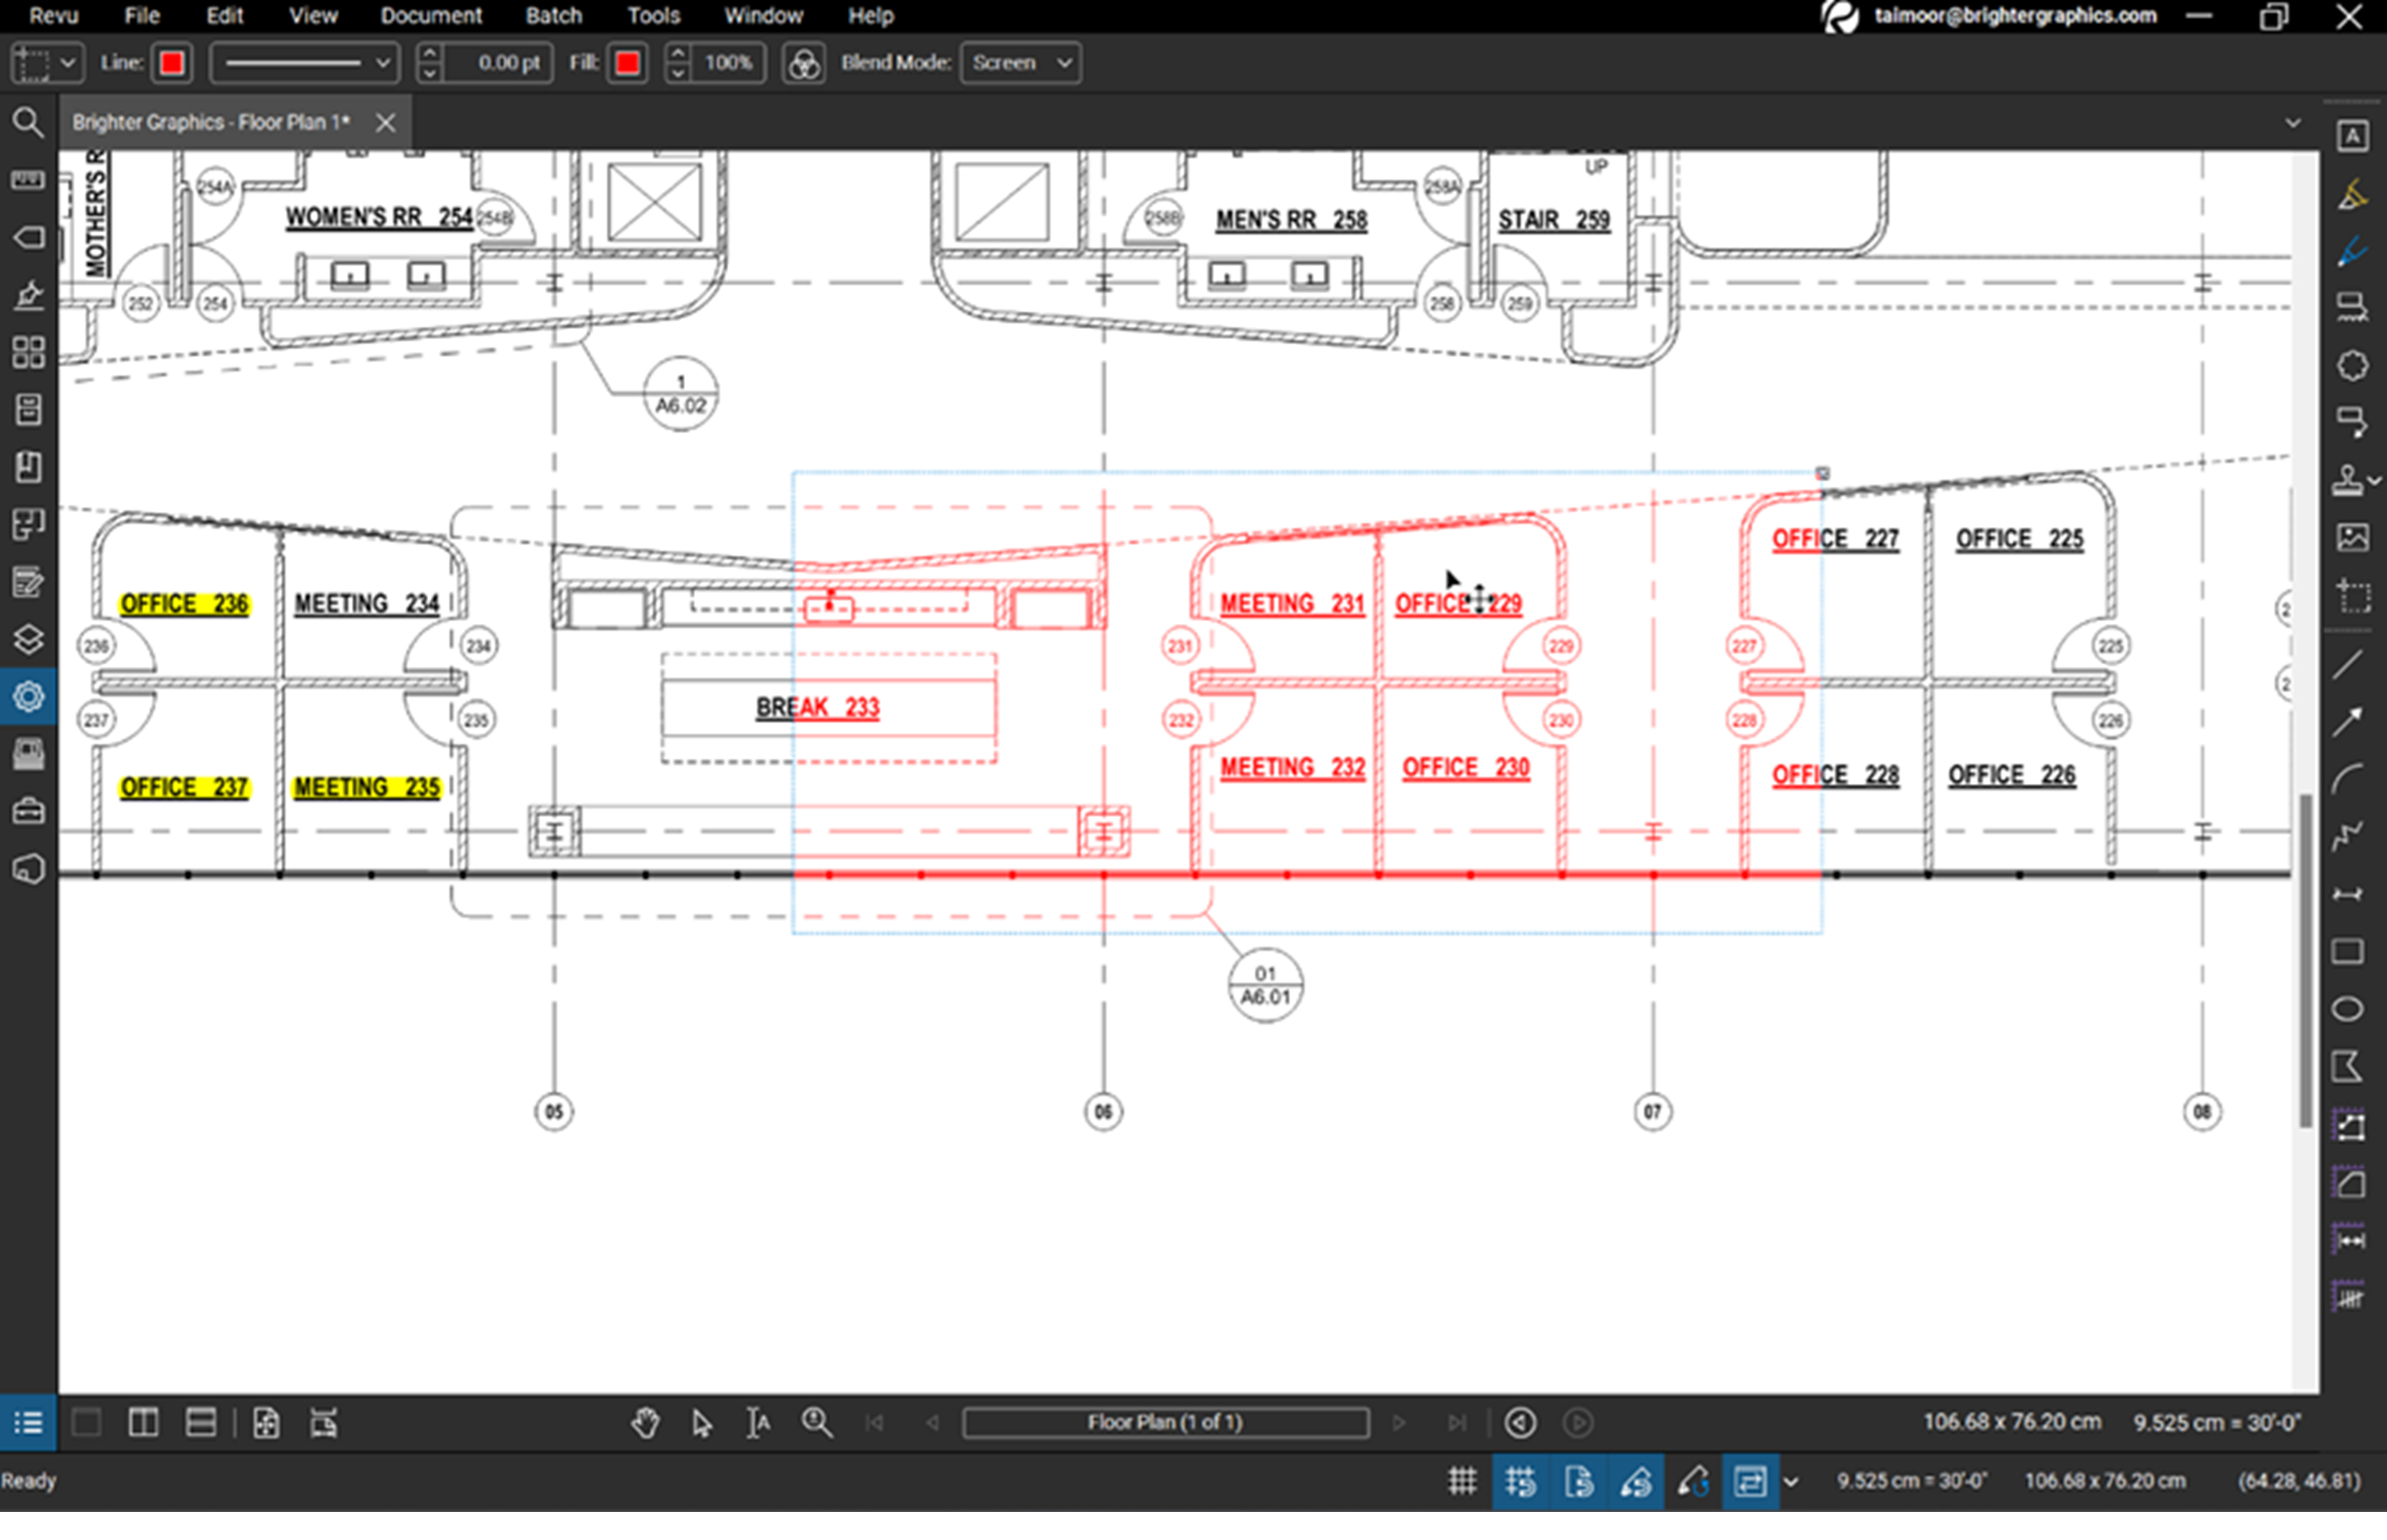
You can resize your custom markup and adjust it accordingly to match your requirements.
Level Up Your Bluebeam Experience
This is how you can use the Snapshot of your PDF in Bluebeam Revu as a highlighter or spotlight, which you can resize and adjust just like any other markup or shape.
To improve your skills in PDF markups and Area/Volume measurements in Revu, explore our other Bluebeam guides.
Stay connected with Brighter Graphics, your go-to Bluebeam partner in the UK, Europe, and the Middle East.
.


