

The Arc Markup Tool in Bluebeam Revu helps you create precise and controlled curved markups. The Arc Tool aids in creating or marking curved boundaries by selecting or annotating circular or elliptical regions.
Arc Tool/Markup in Bluebeam Revu 21
Read this step-by-step guide to see how you can use and customise arcs effectively in your PDFs.
Step 01: Access the Arc Tool in Bluebeam Revu 21
To start creating your first Arc markup to mark curved regions on your PDF drawings:
Step 1A: Open Bluebeam Revu 21 on your desktop.
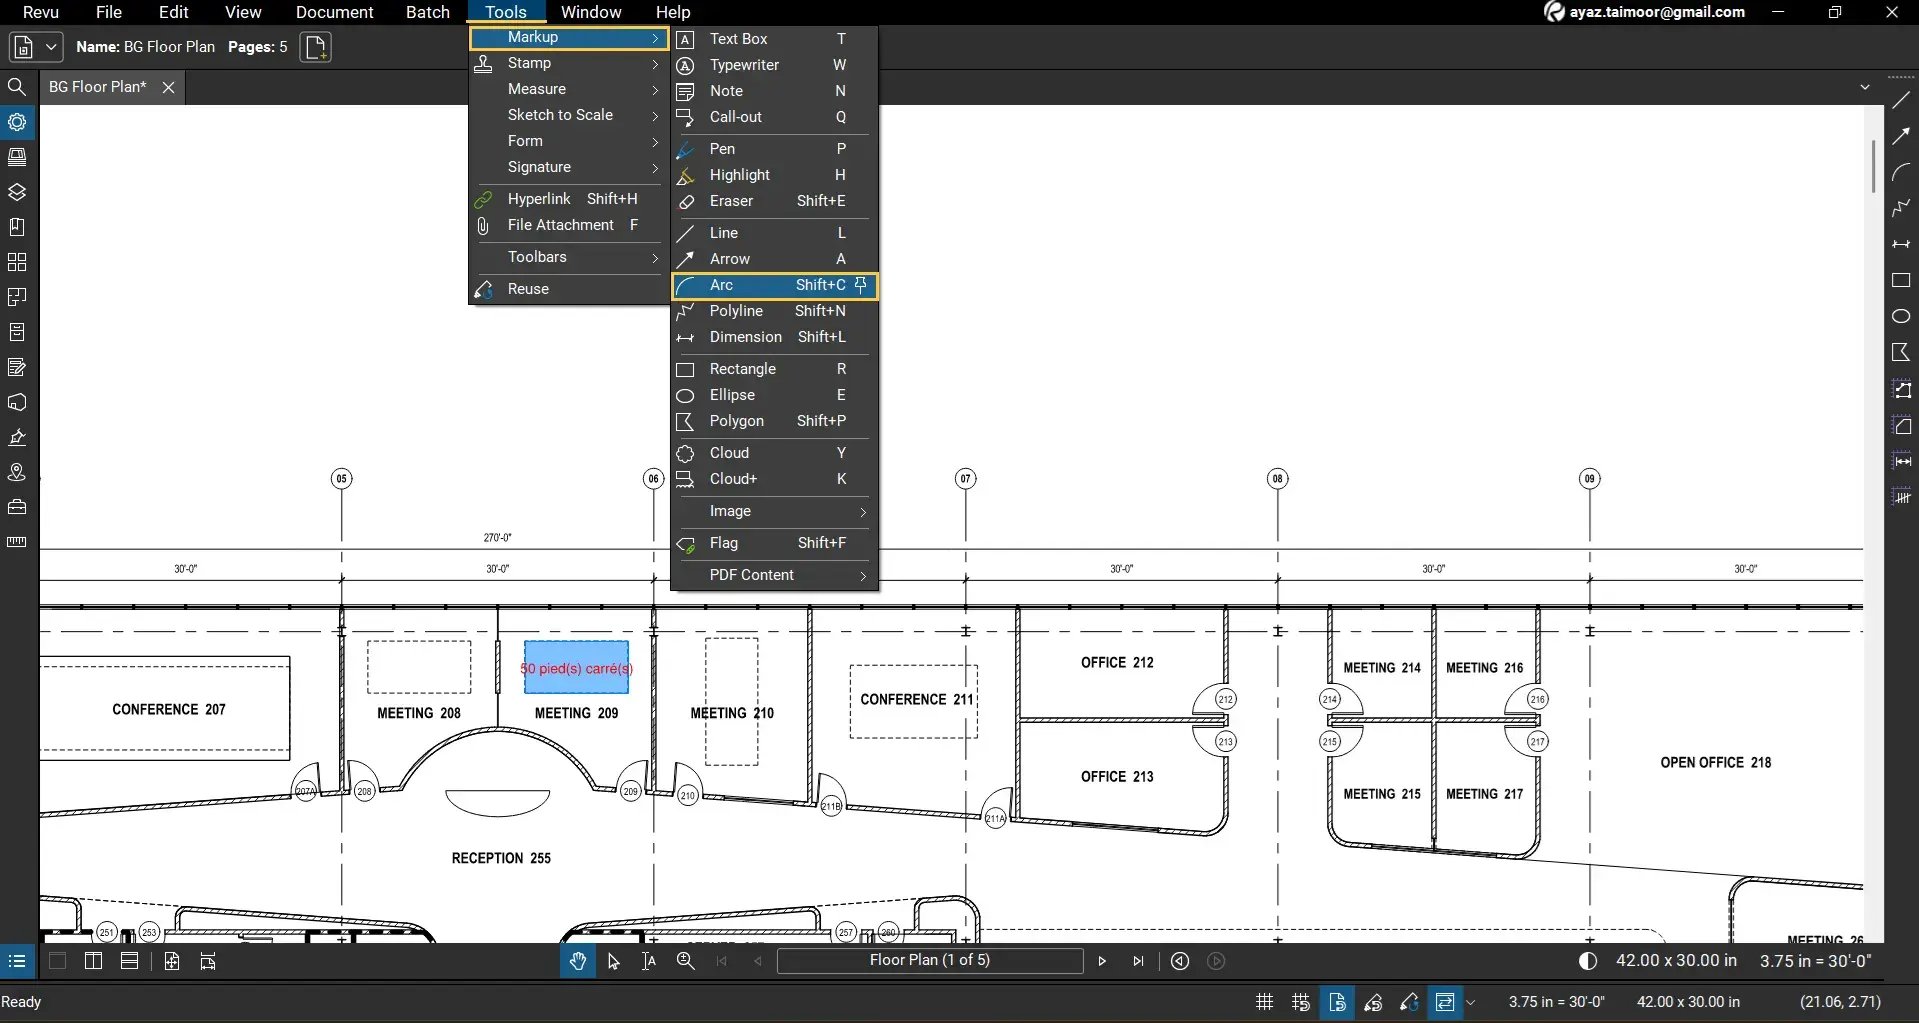
Step 1B: Navigate to the Tools menu.
Step 1C: Go to the Markups option > Select the Arc or use its shortcut keys Shift+C to activate it (turning your cursor to the drawing mode).
Step 02: Draw an Arc on Your PDF
Step 2A: Scroll and zoom to the PDF where you want to apply your arc.
Step 2B: Click to mark the starting point of your arc. Then move your cursor to direct the drawing and click again to mark the terminal point of your arc.
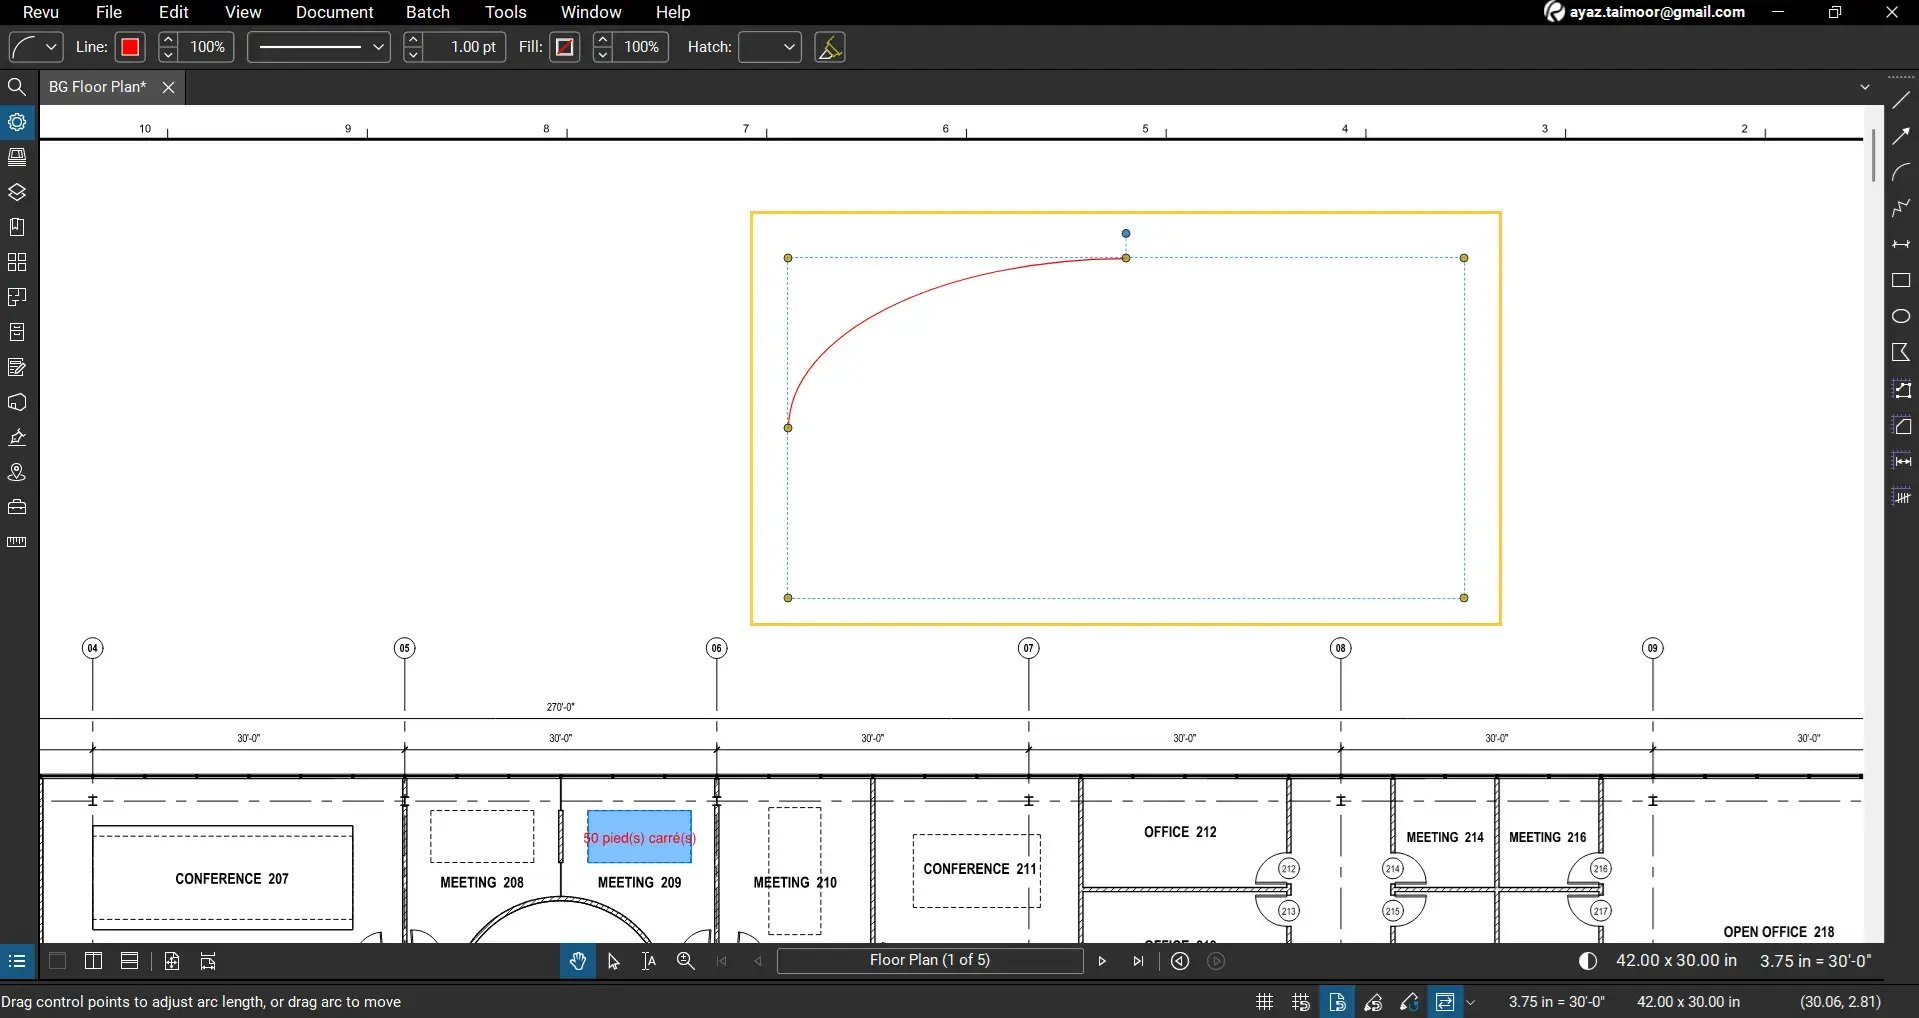
Your arc is now placed and ready for editing or styling.
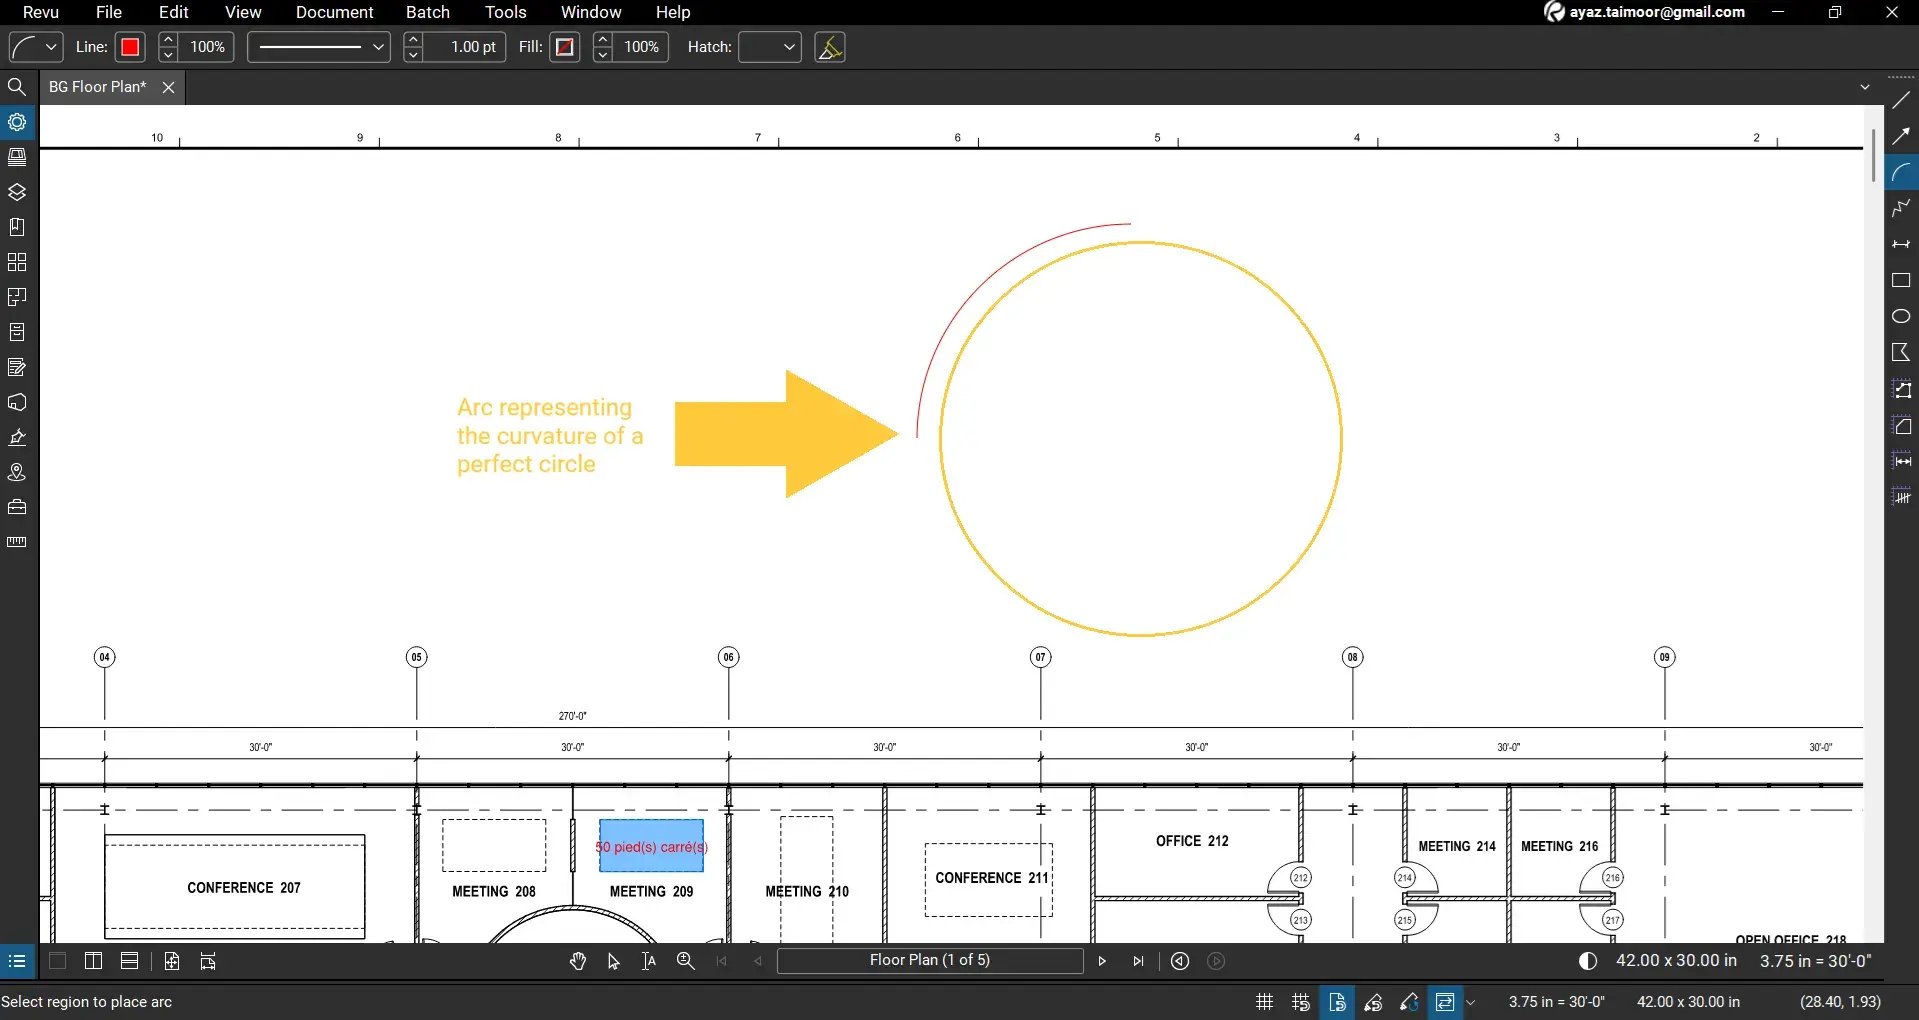
If you hold the shift key while drawing an arc, your arc will represent the curvature of a perfect circle.
Step 03: Modify Arc Position and Shape
After drawing the arc, you can refine its shape:
Step 3A: Select the Select Tool from the toolbar.
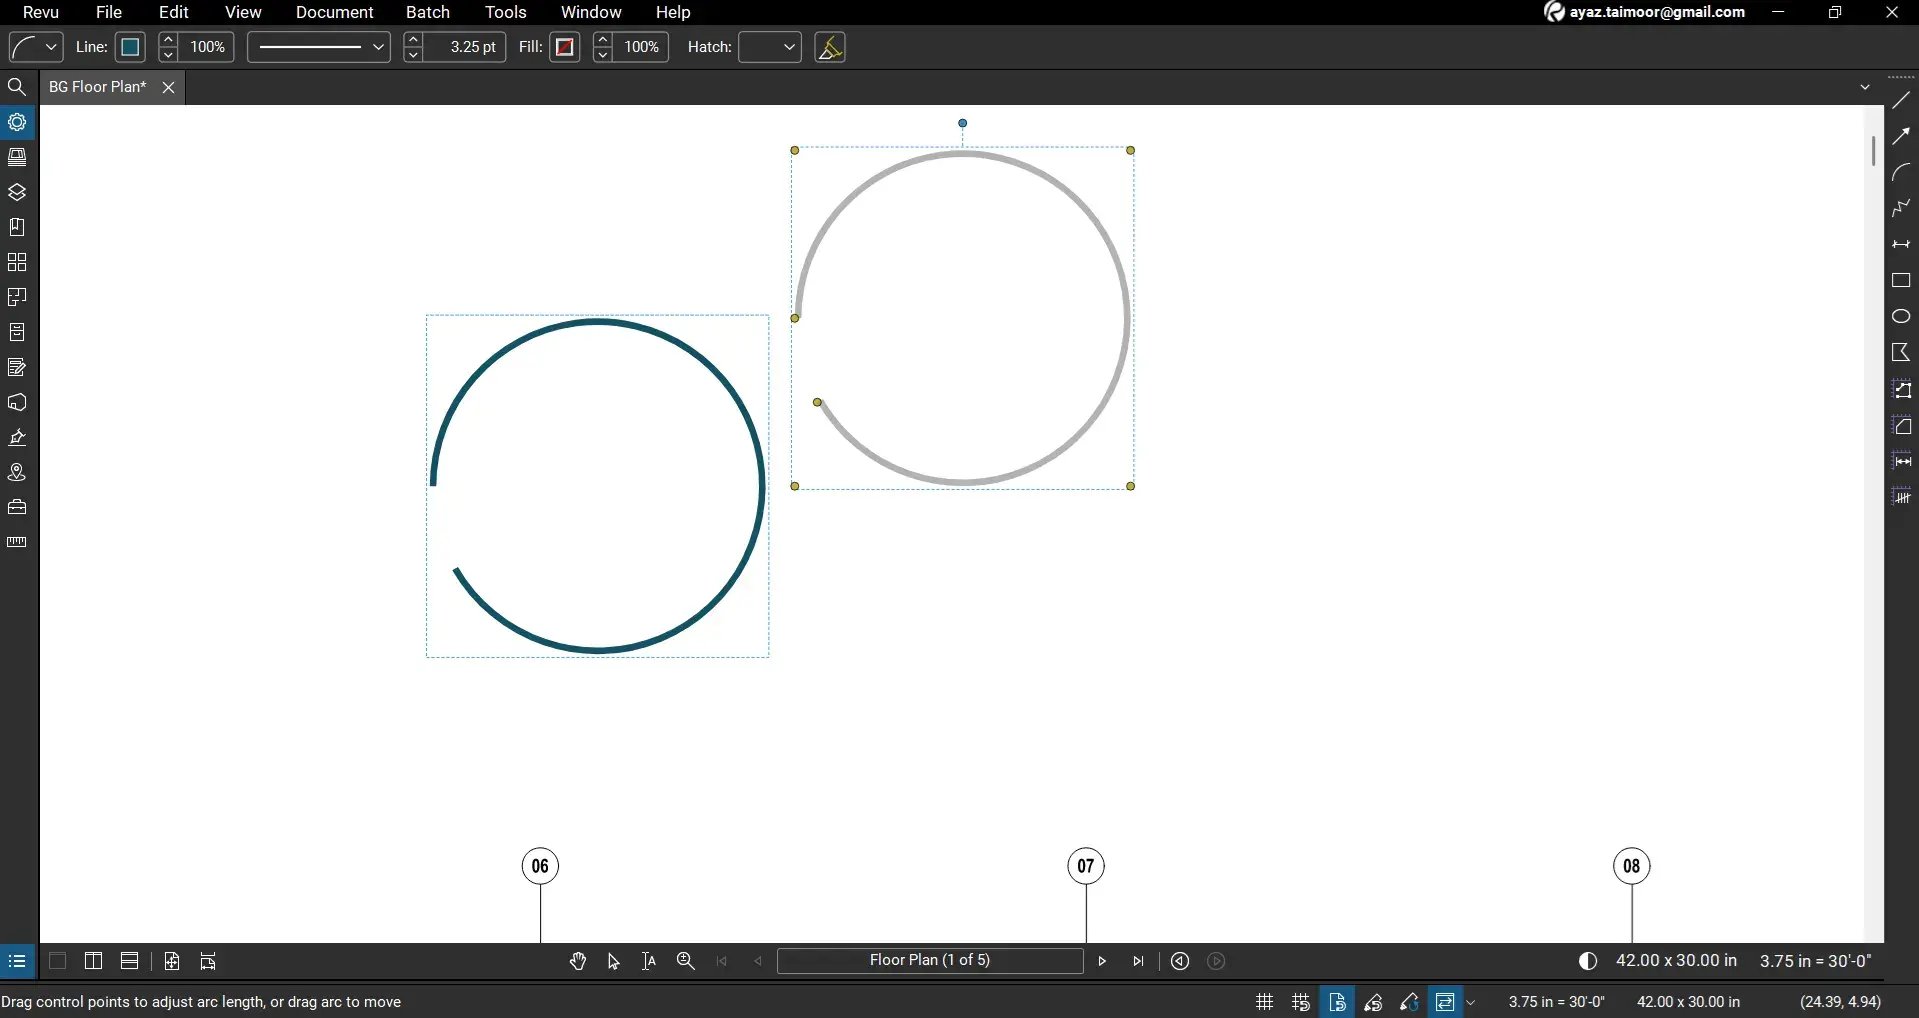
Step 3B: Click the arc to activate its control points.
Step 3C: Click and drag the endpoints (yellow-coloured handles at each end of the curve) to reposition the start and end of the arc.
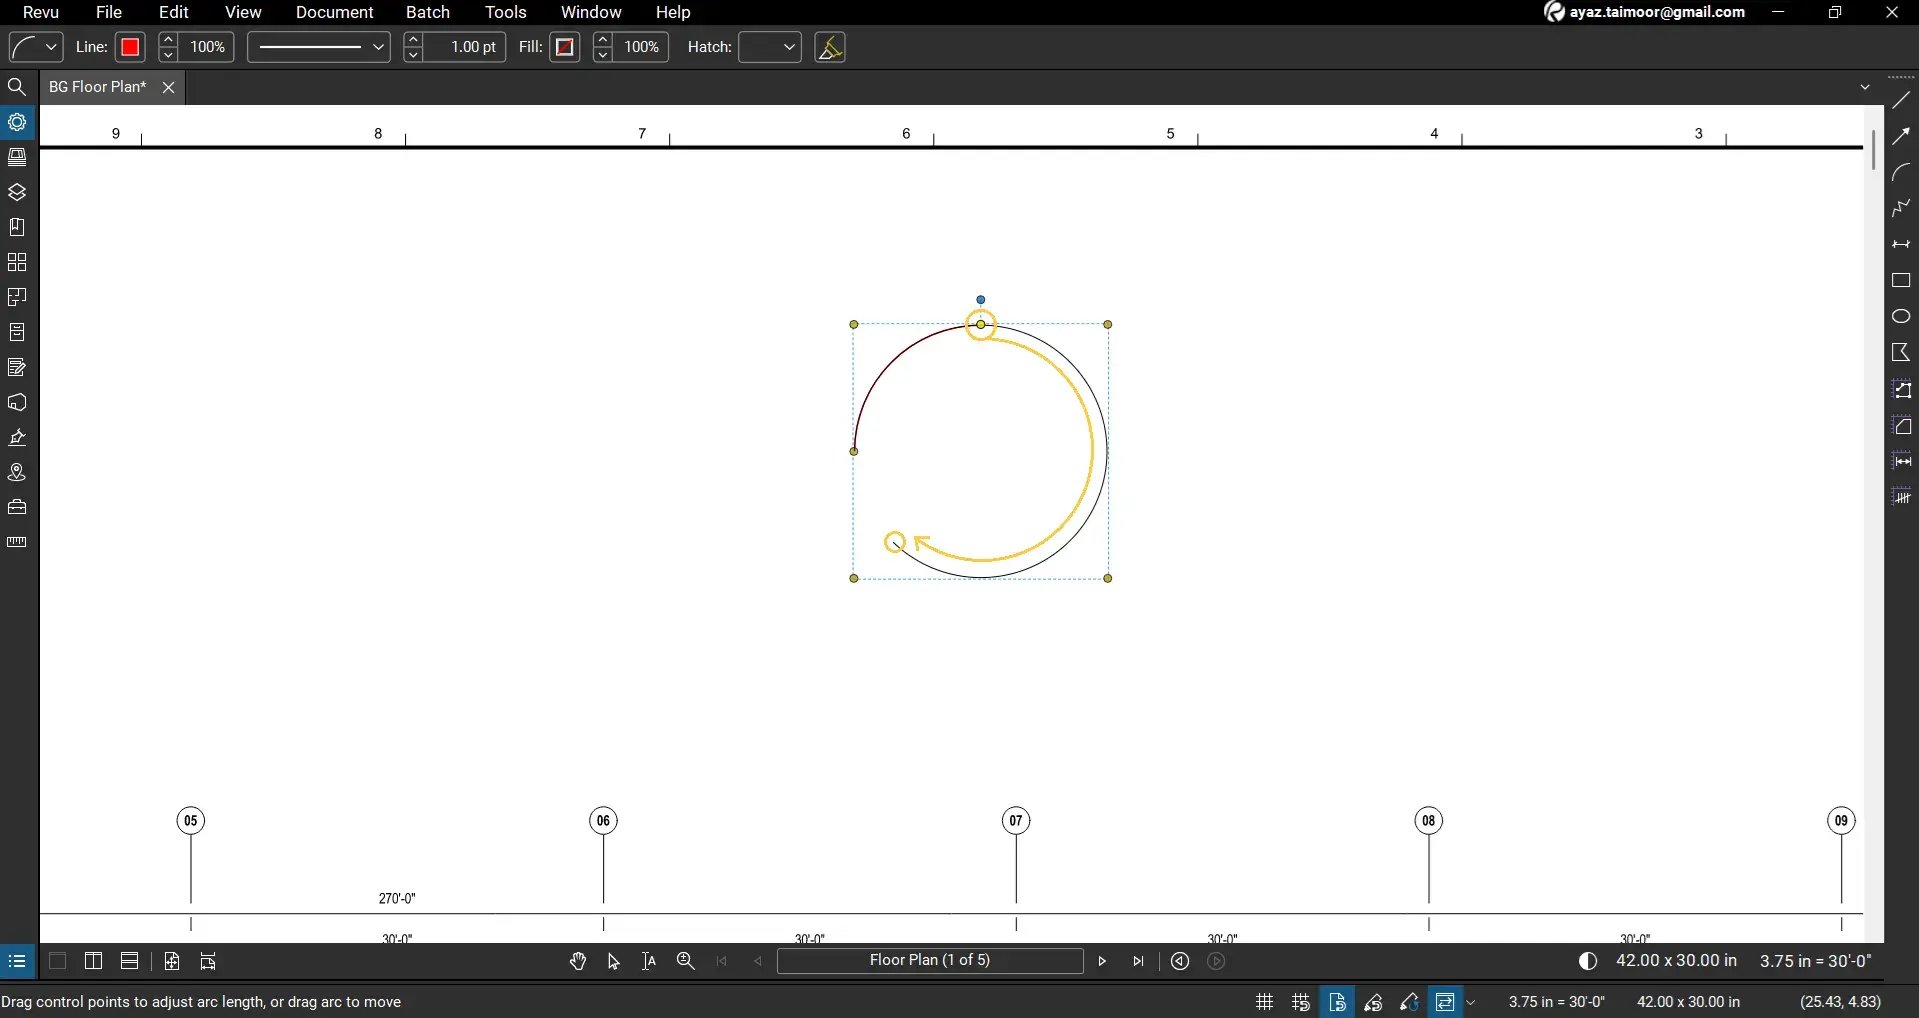
Step 3D: Click and drag the midpoint handle (blue-coloured circle at the top) to rotate the shape.
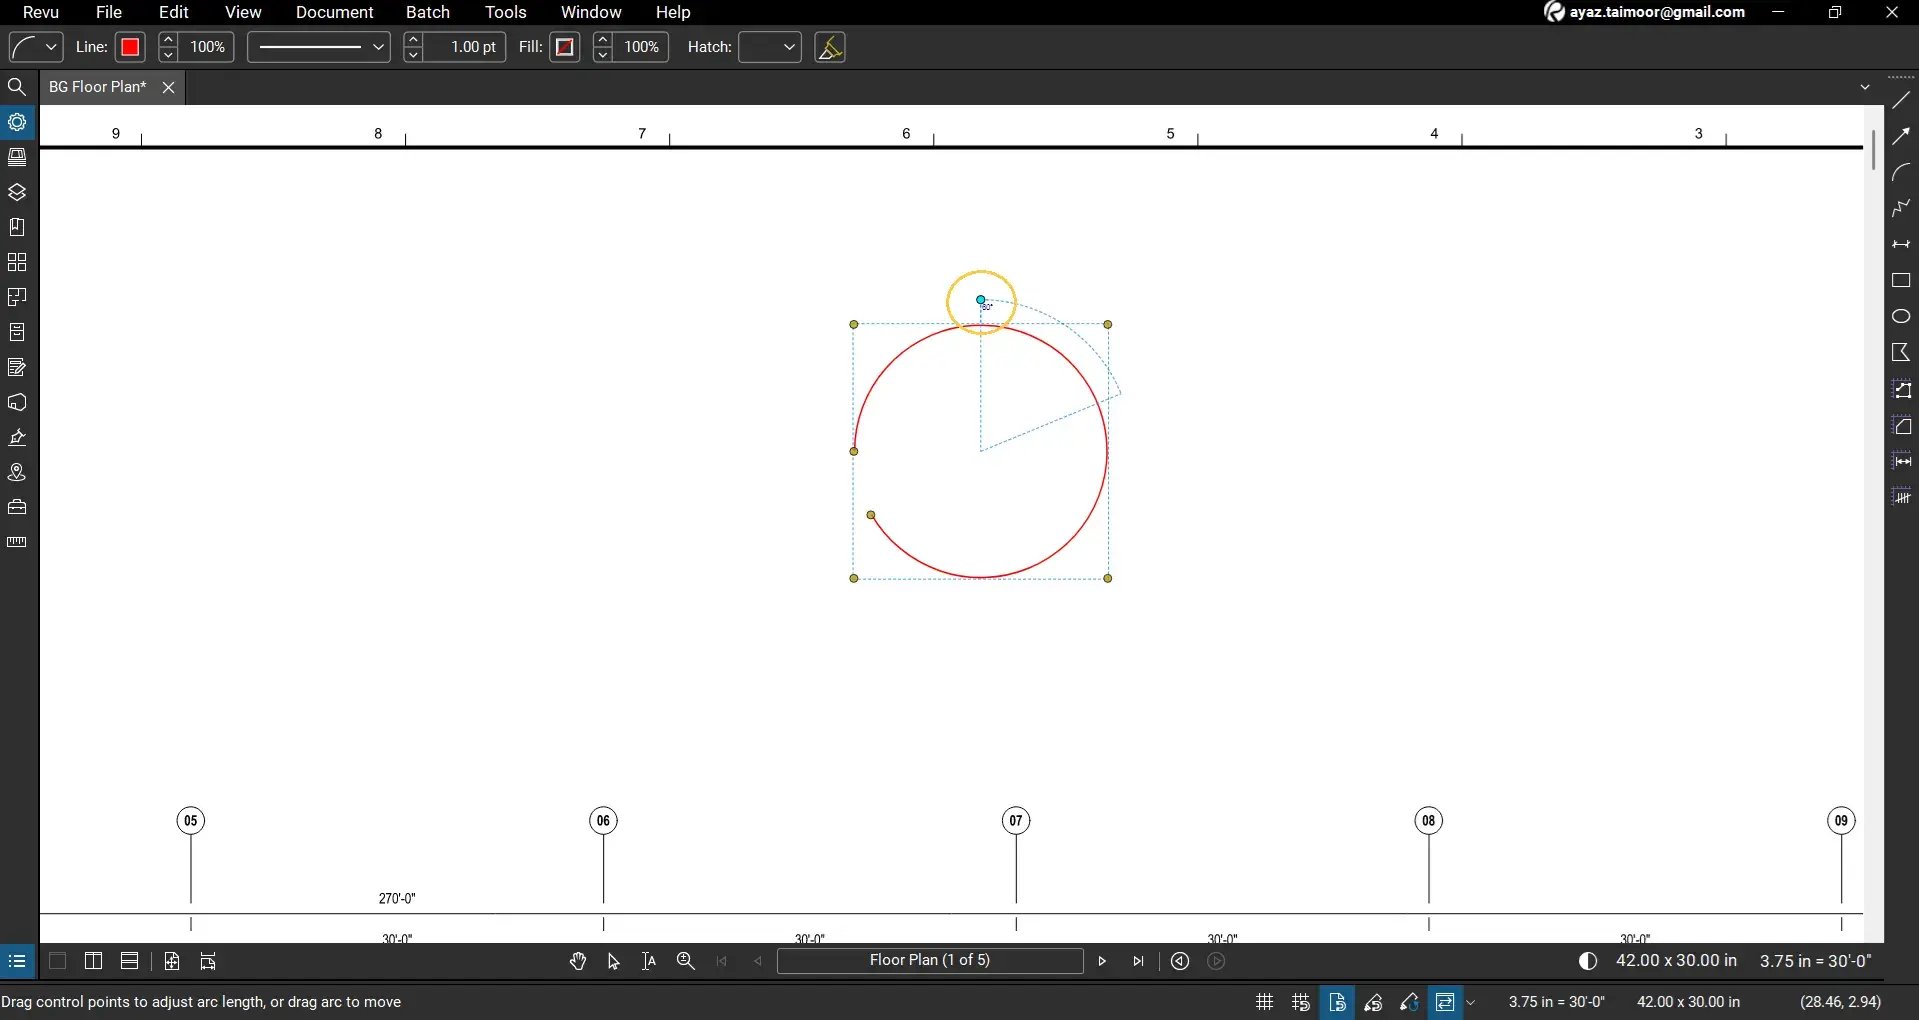
Step 3E: Click and drag the handles along diagonals to resize your arc.
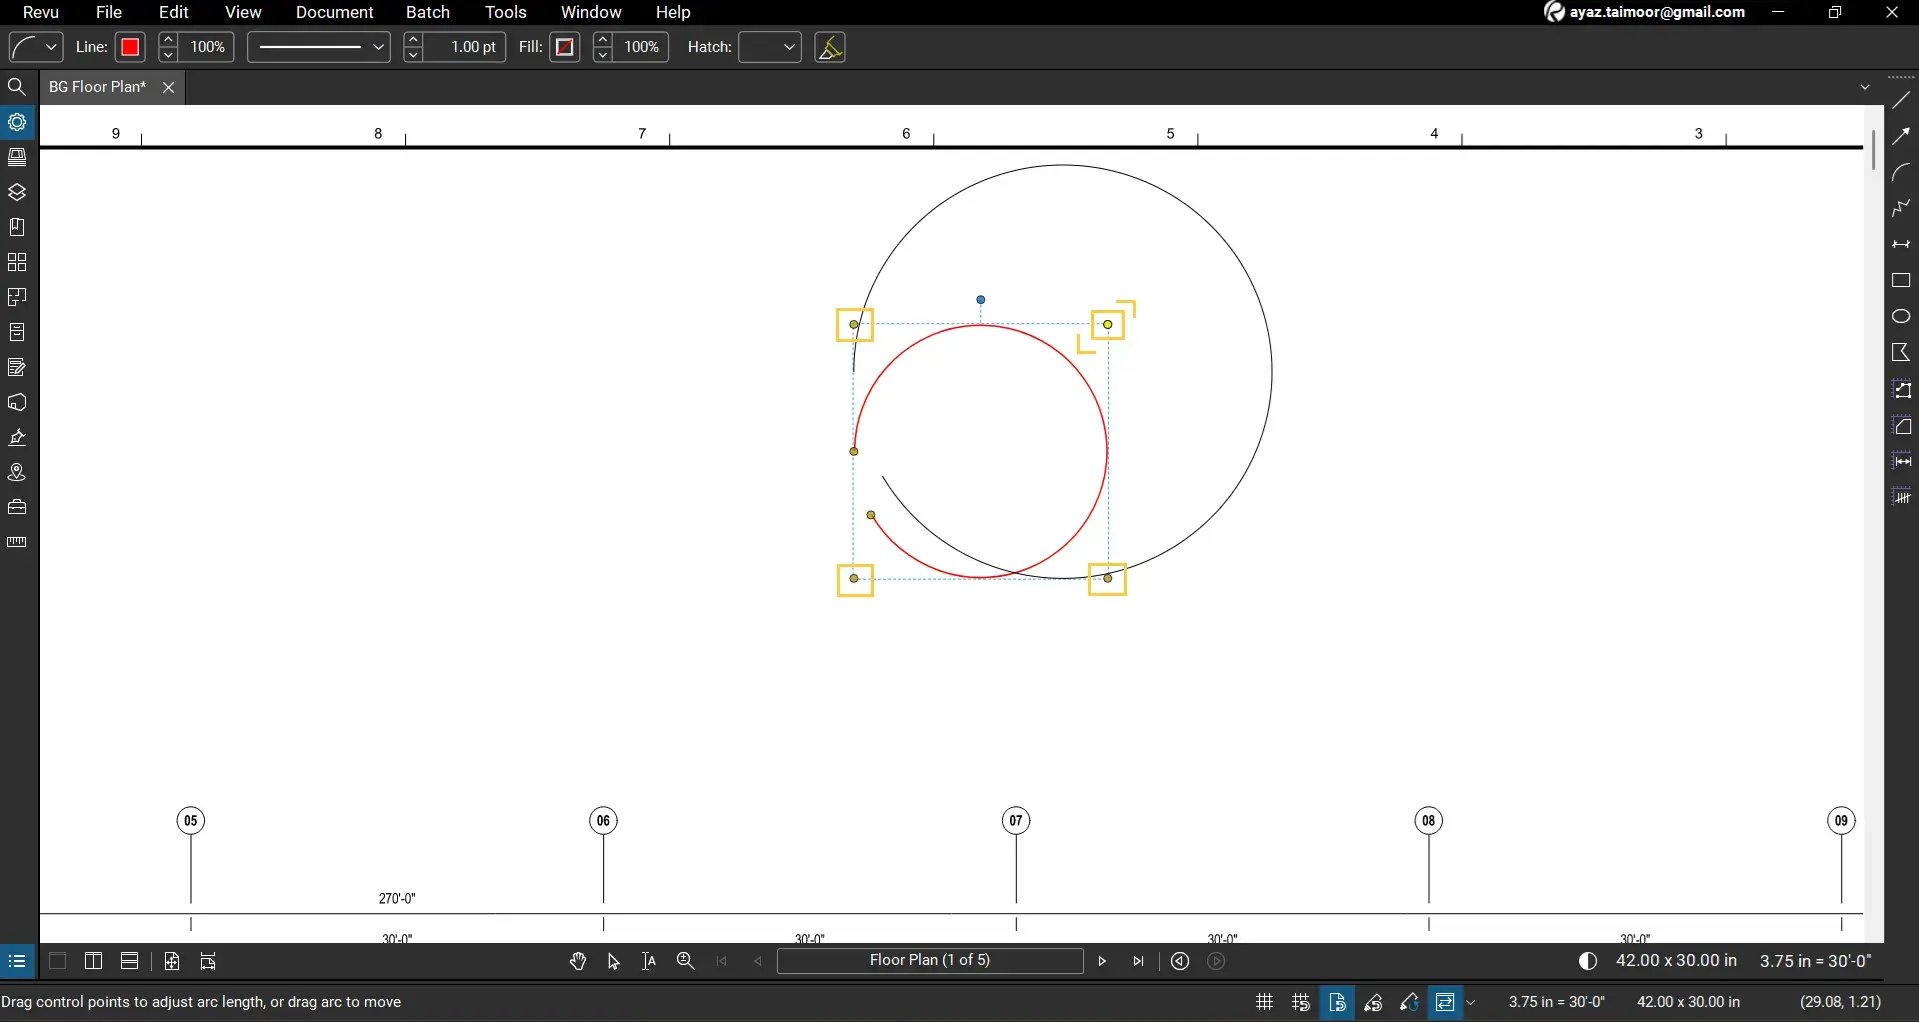
Note: Resize (expand or contract) while holding the shift key to resize as a curvature of a perfect circle.
This allows you to customise the arc exactly as needed.
Step 04: Adjust Line Thickness, Style, and Colour
To change the appearance of the arc:
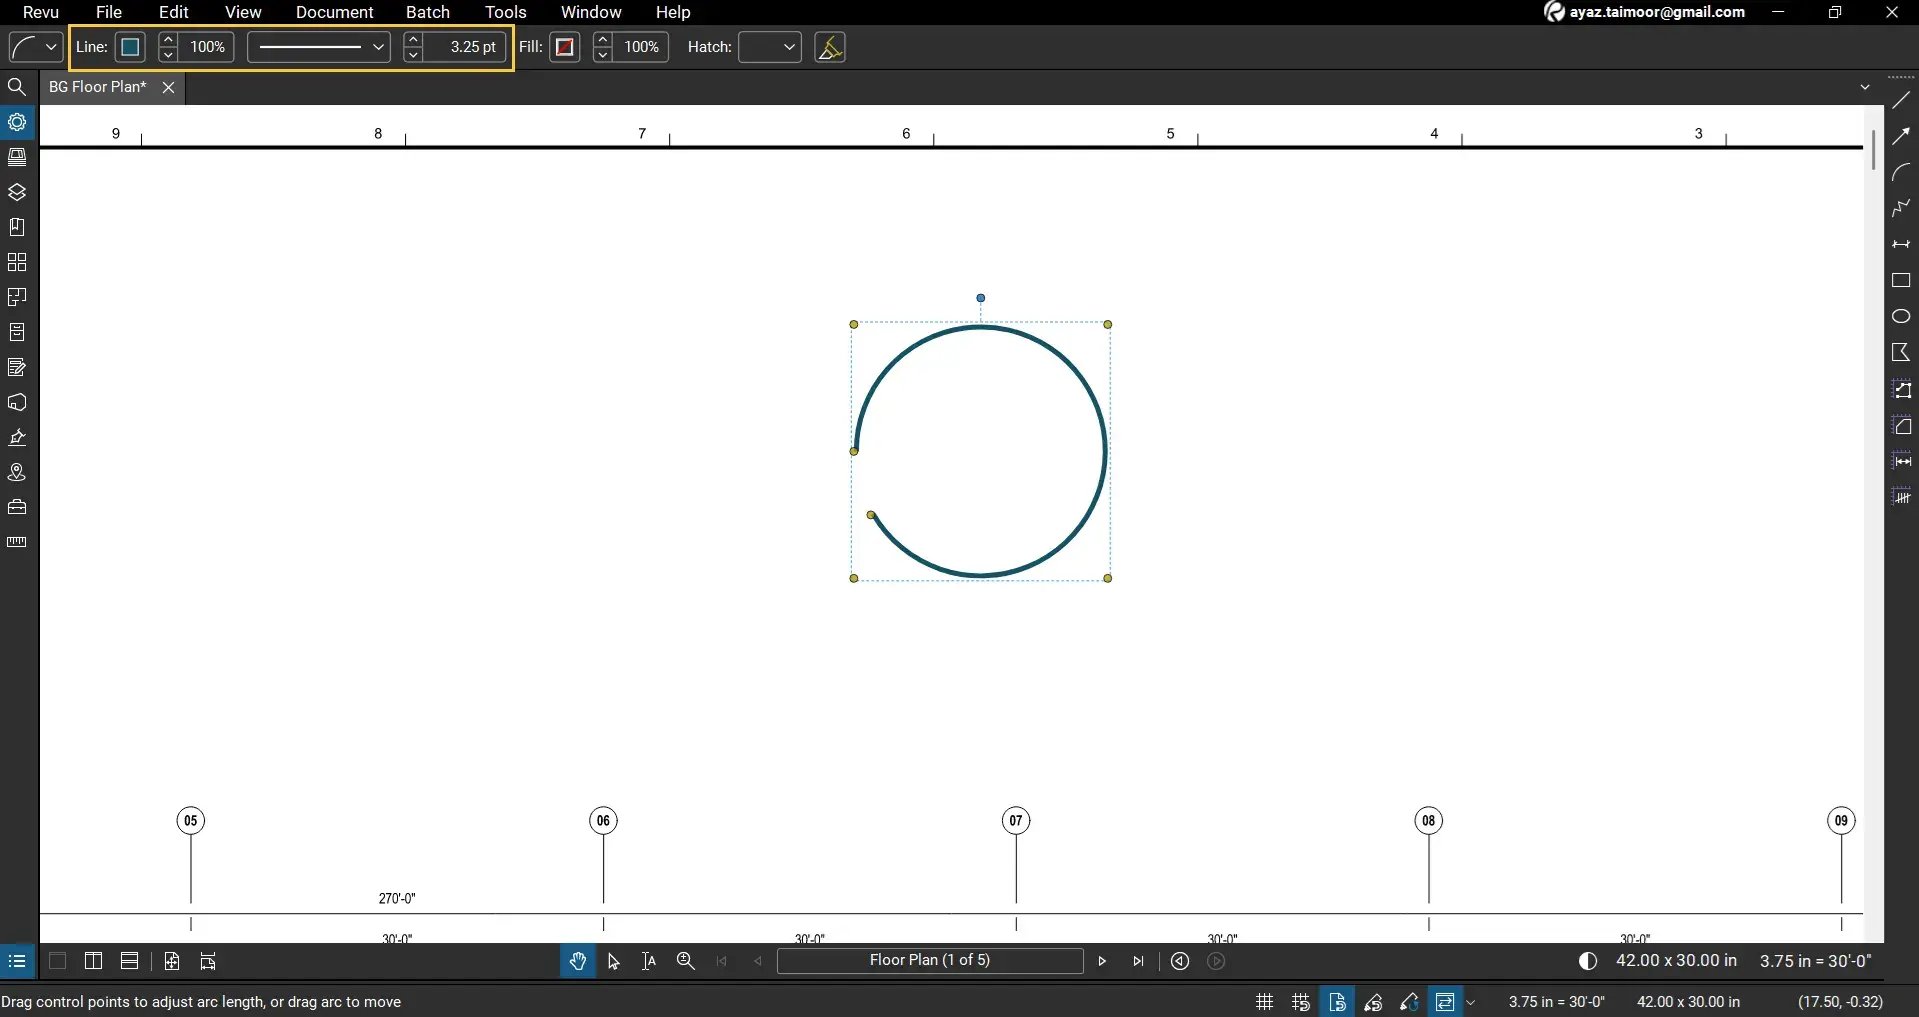
Step 4A: Select the arc markup.
Step 4B: In the Properties panel or markup editor bar, adjust:
- Line Thickness
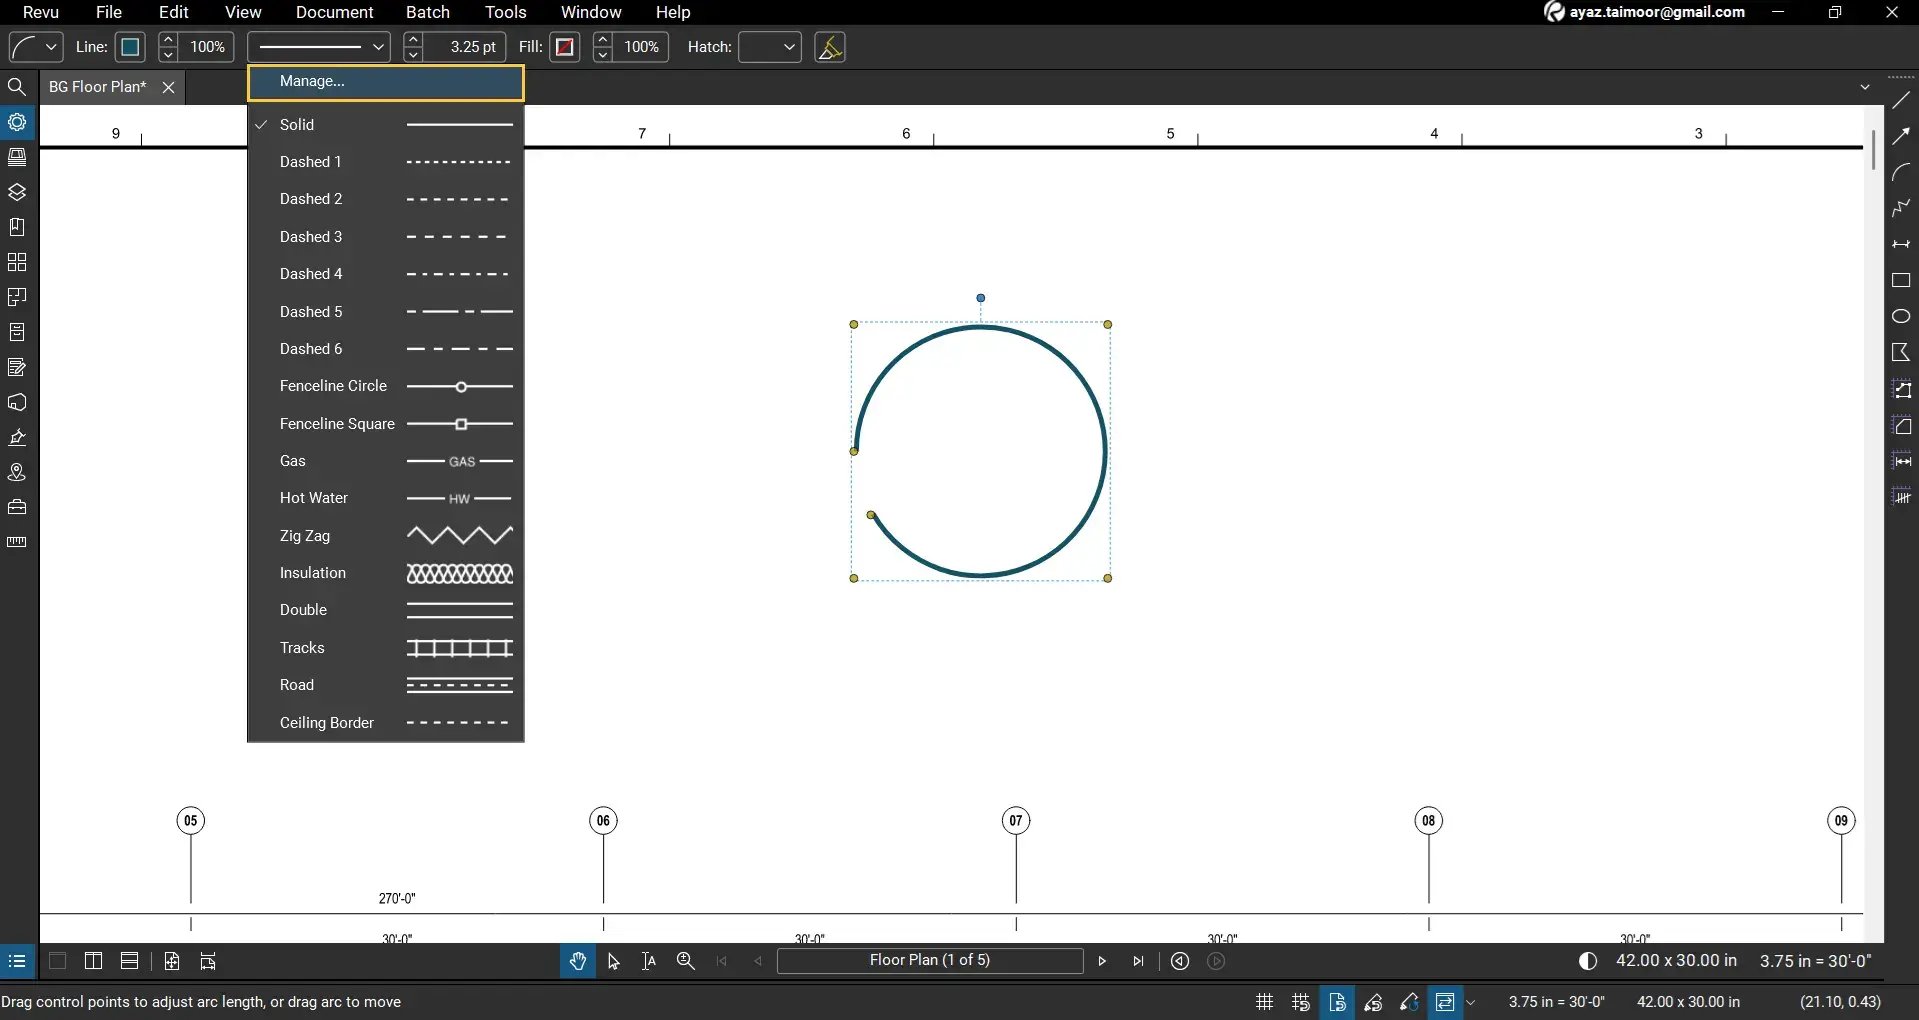
- Line Style (solid, dashed, etc.)
- Line Colour
For advanced line customisation options, click Manage under the Line Style dropdown to create or edit custom line styles.
Step 05: Add a Fill Colour (To Create Closed Arcs or Pie Shapes Only)
If your arc forms a closed shape (e.g., converting it to a pie chart, ellipse, or circle), you can apply fill colour:
Step 5A: Select the arc.
Step 5B: Add a Fill Colour in the Properties panel or markup editor bar.
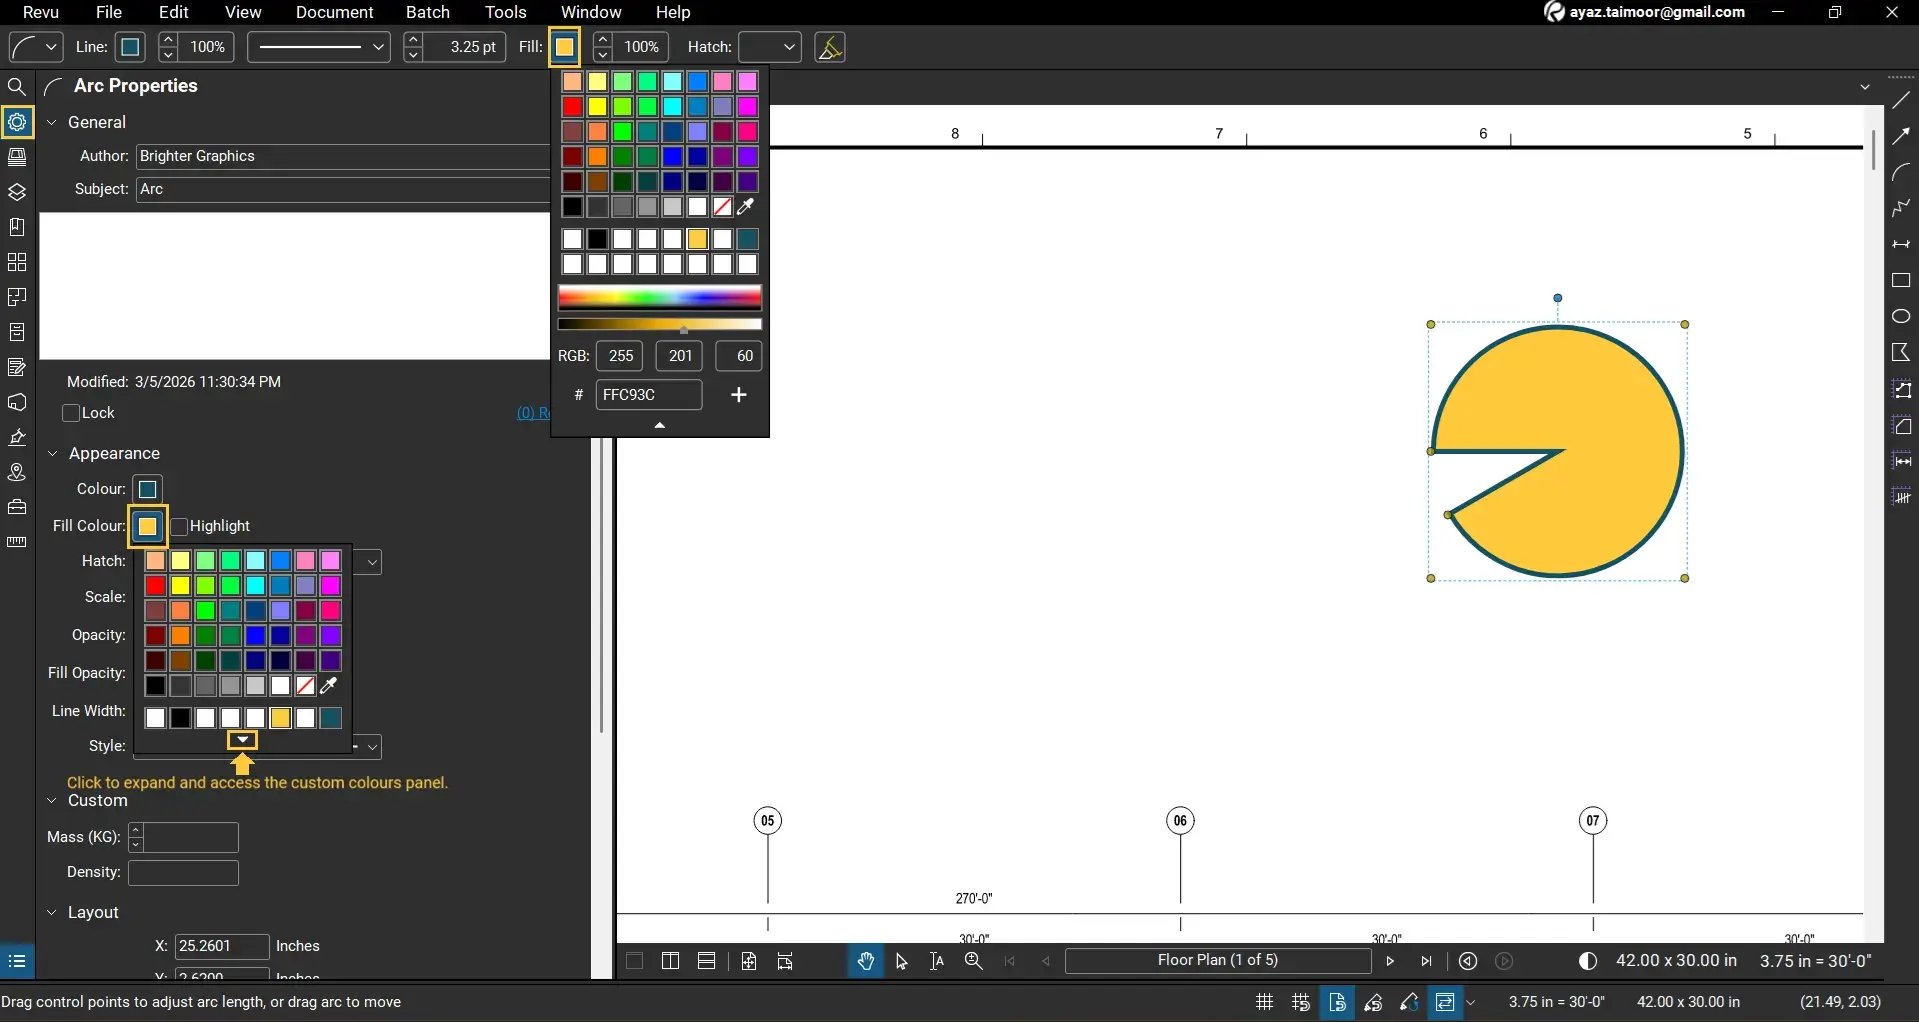
You can access markup editor properties from the⚙️ Properties panel or markup editor bar at the top.
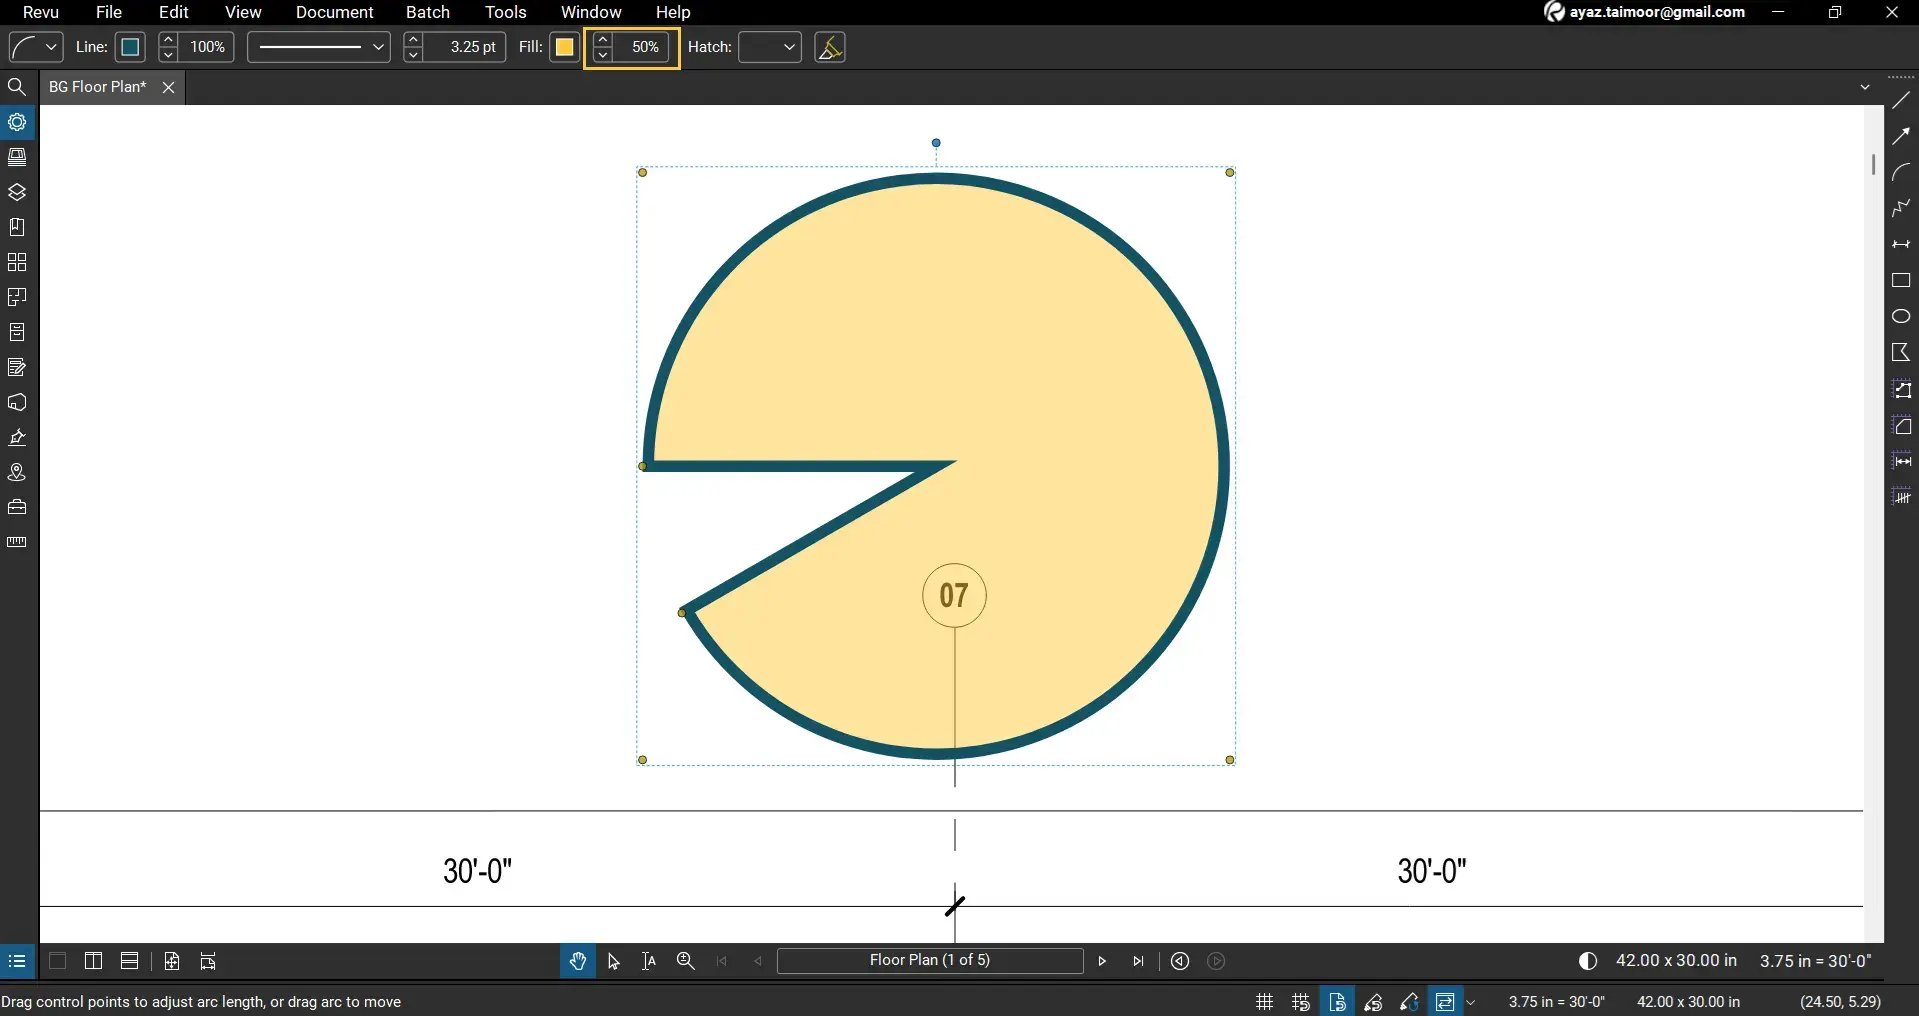
Step 5C: Adjust the fillopacity to control how much background content remains visible.
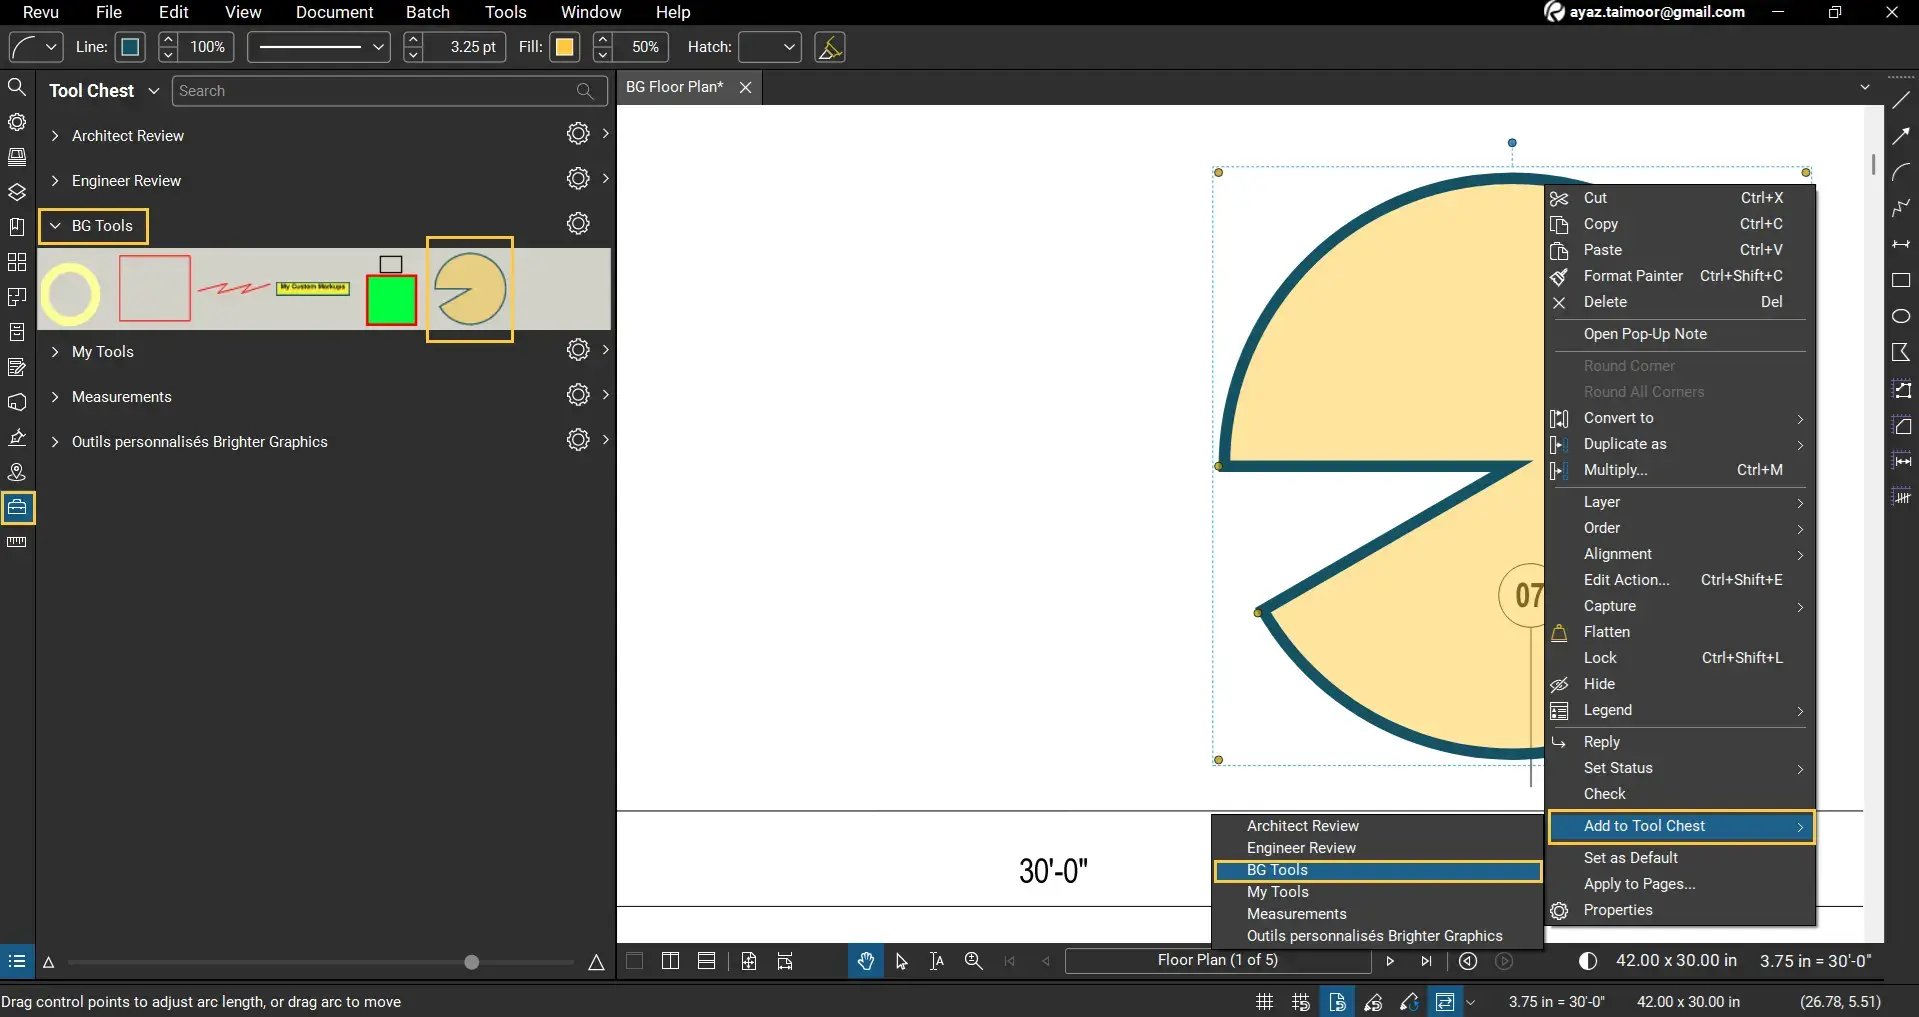
Now you have successfully created a custom arc markup on your PDF that you can add to your Tool Chest (right-click and click the Add to Tool Chest option) to use this markup in the future or share with your team members for standardisation of your design review or annotation walks.
Continue reading to further customise your Arc.
Add Comments or Statuses to Your Arc
To clarify the purpose and intent of your arc markup for better collaboration with your team members, go to the Markups List toadd comments, replies, or statuses to your Arc.
- Double-click under the Subject column to edit the subject of your Arc.

- Double-click under the Comments column to add comments to your Arc.
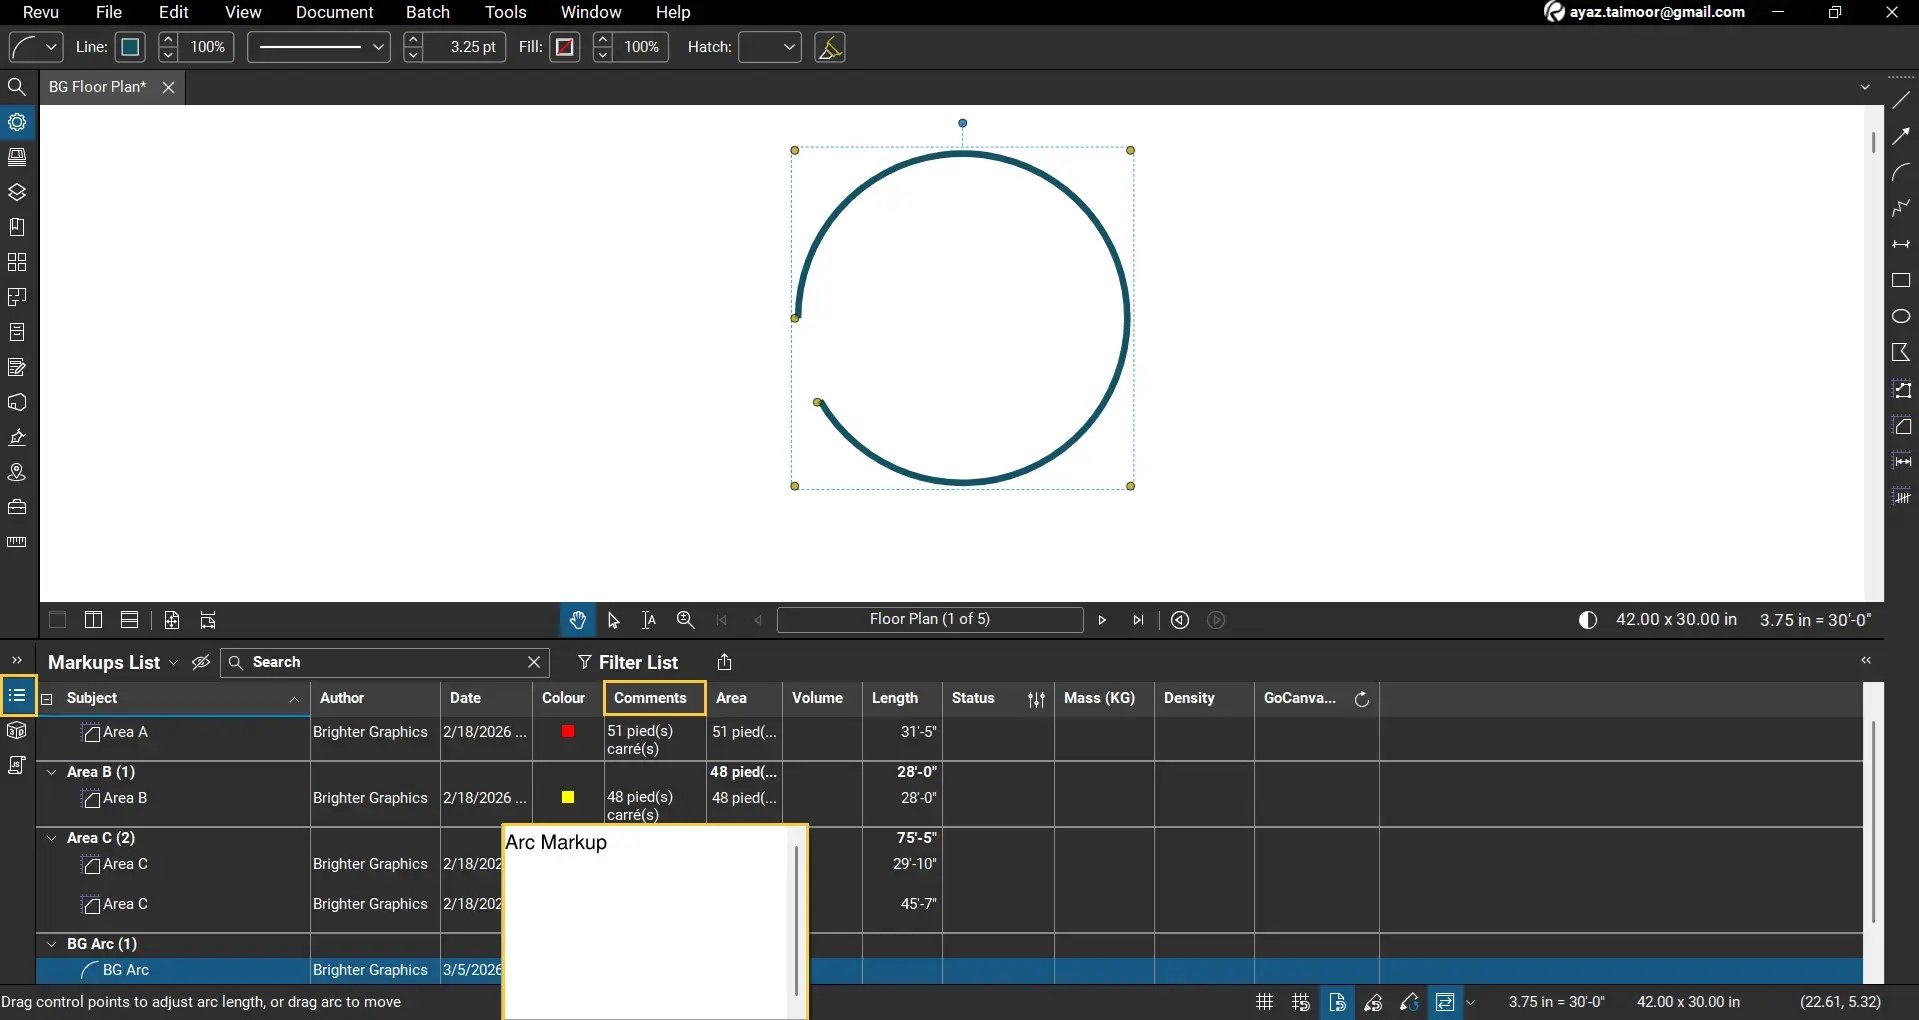
- To add replies to your markup, right-click on your Arc markup in the Markups List and go to the Reply option.

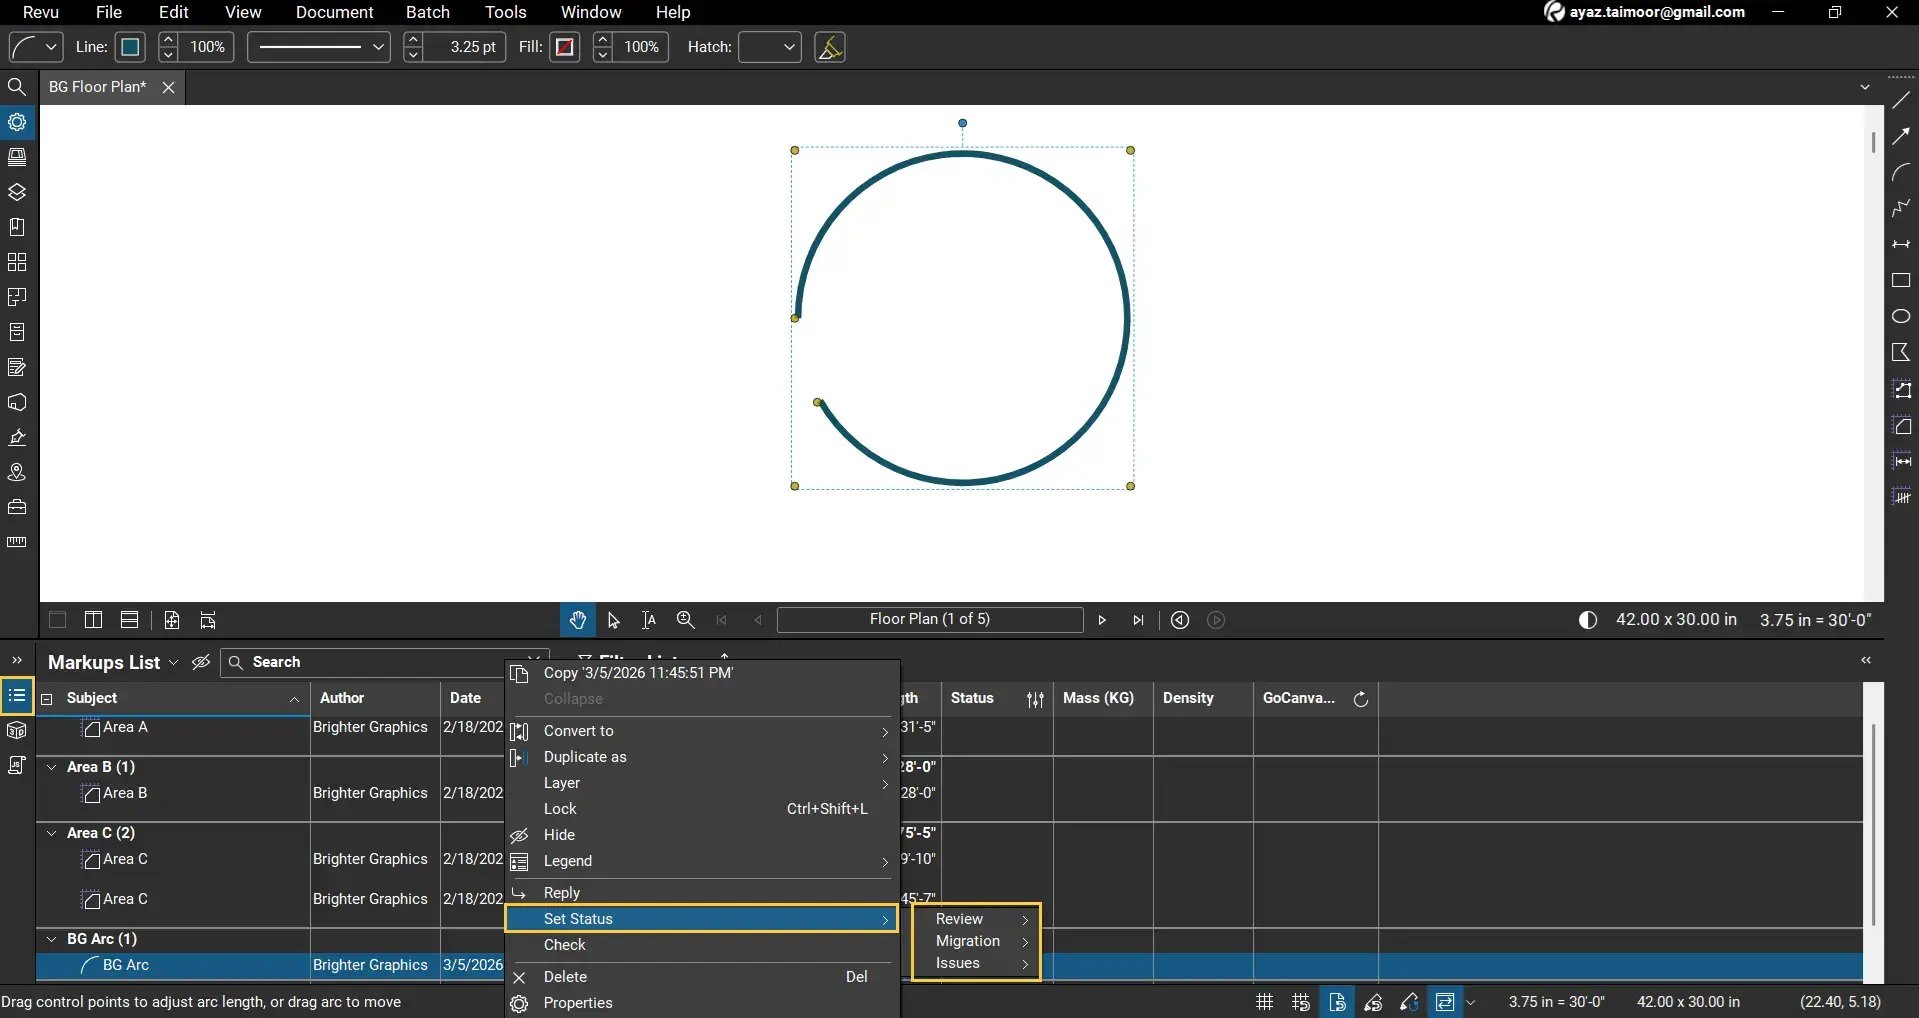
- To add statuses to your markup for improved tracking during annotation or design review walks, right-click on your Arc markup in the Markups List and go to the Set Status option.
Lock or Flatten the Arc
Once your arc markup is final:
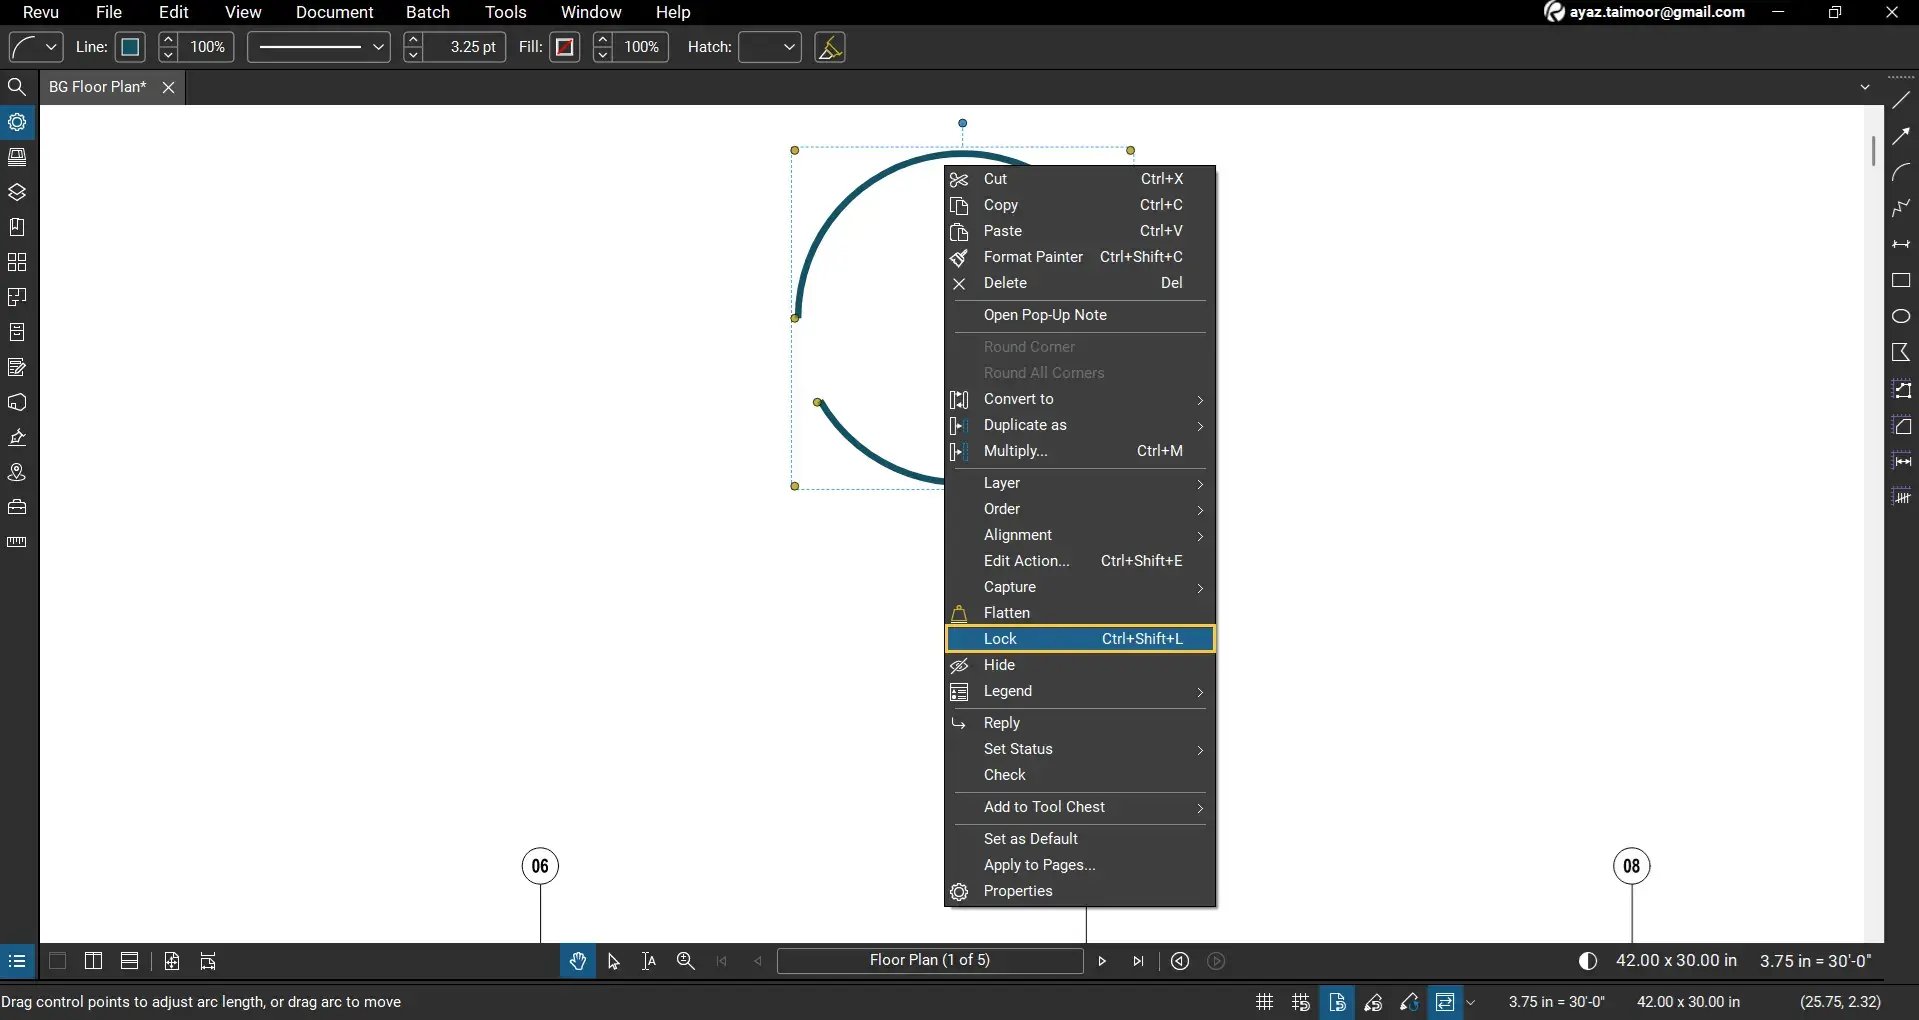
Lock the arc to prevent accidental edits:
- Right-click > Lock (or press Ctrl+Shift+L keys)
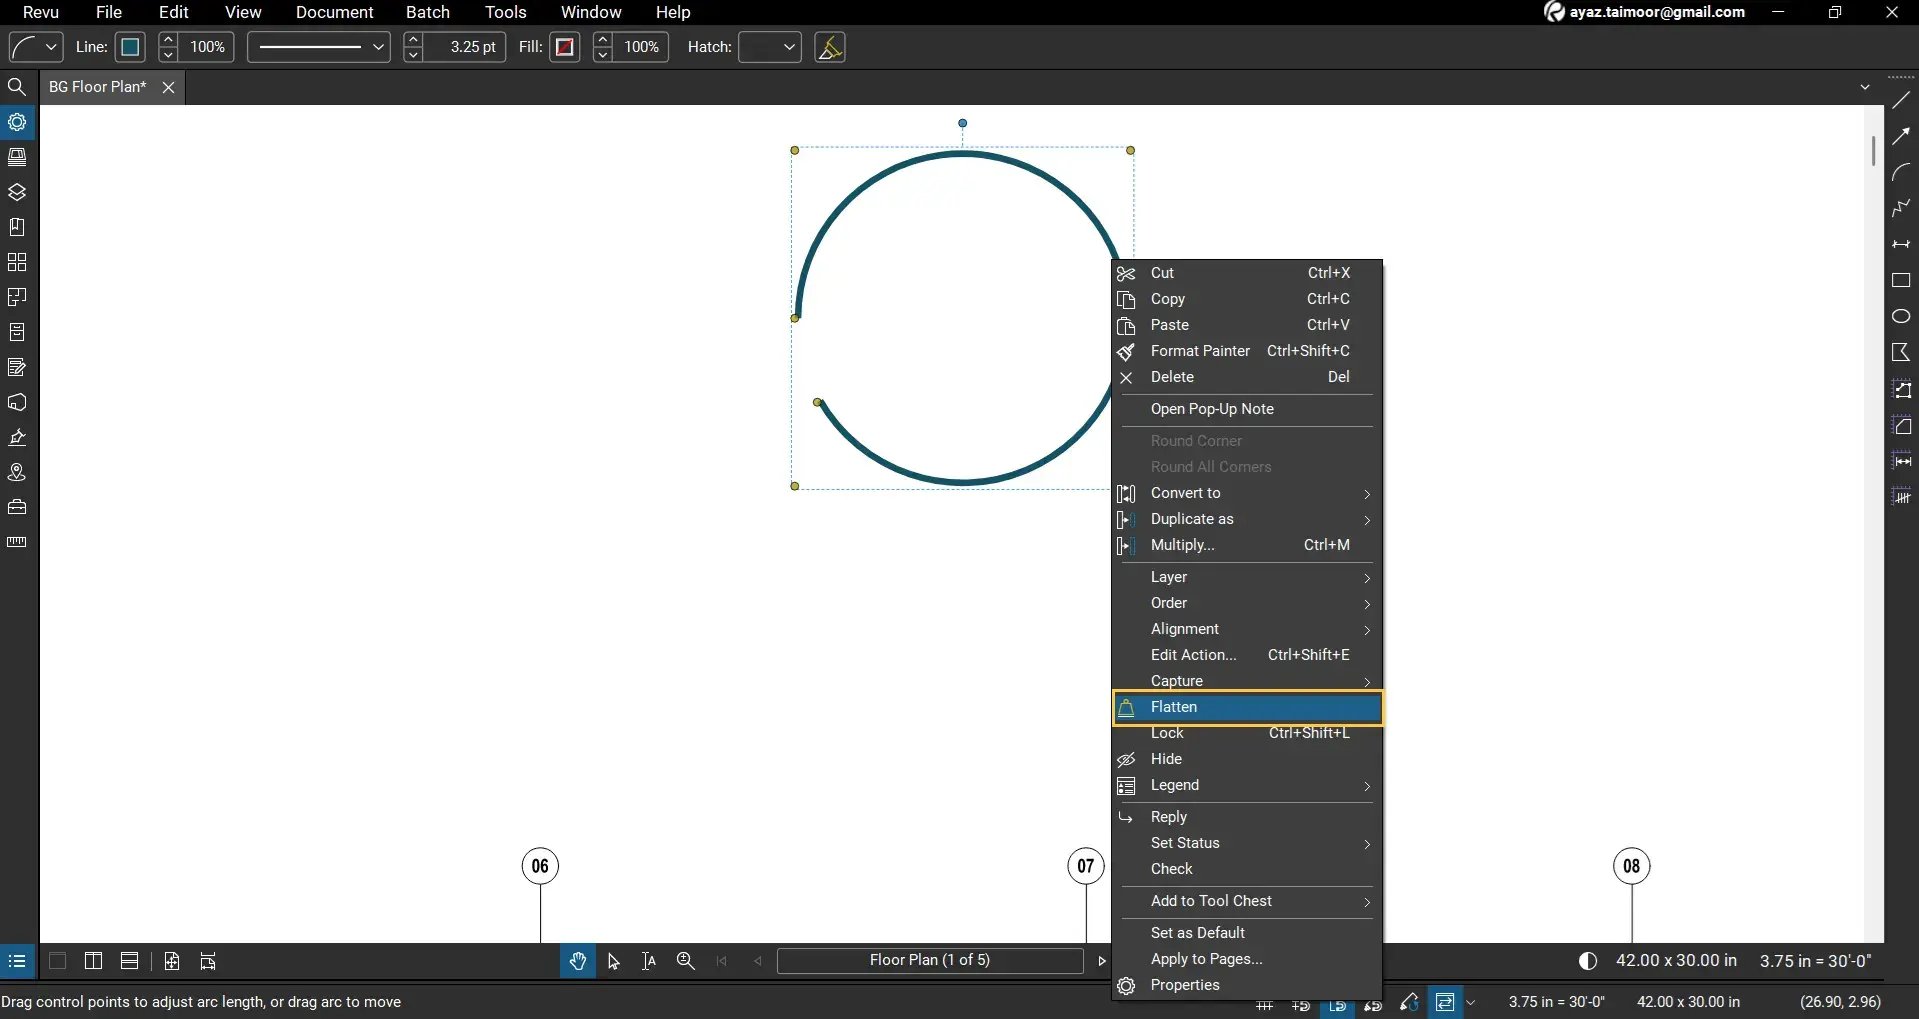
Flatten the arc to make it a permanent part of the PDF:
- Right-click > Flatten
You can also Flatten or Unflatten the entire document by going to the Document menu (but it will apply to all the markups on your PDF).
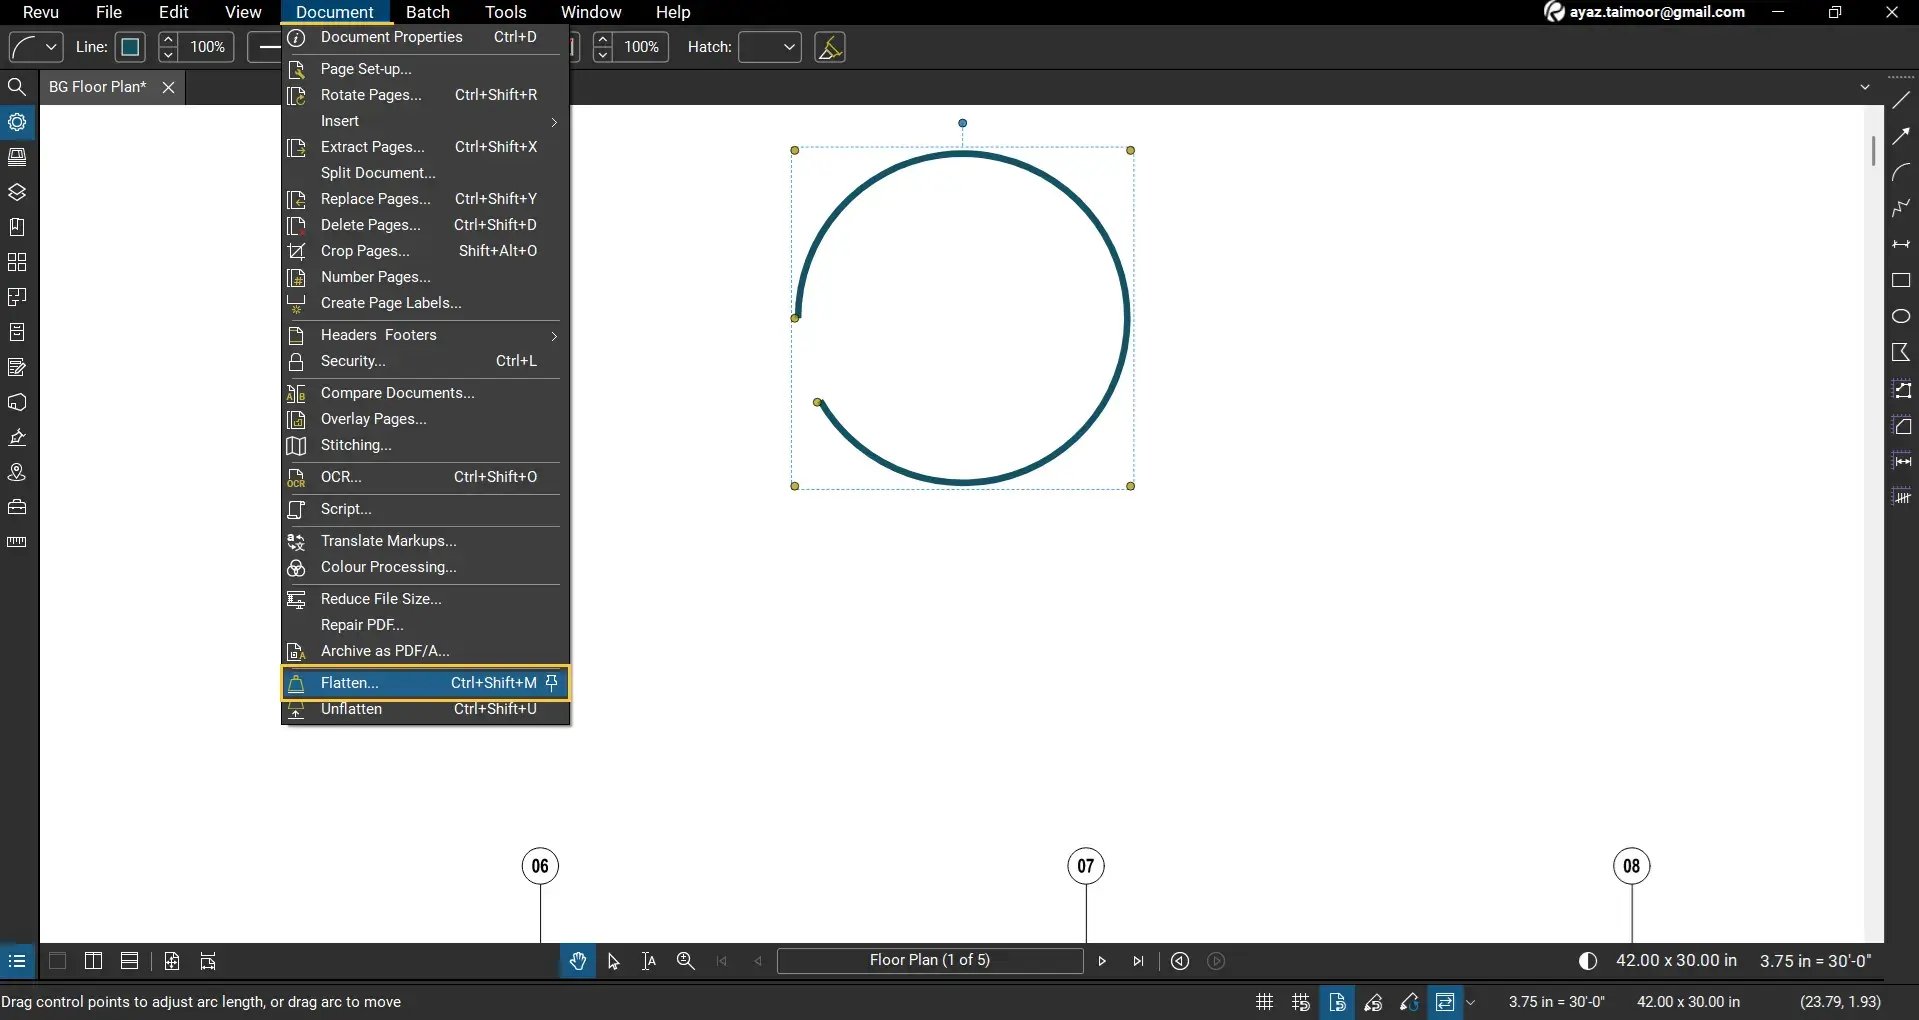
Alternatively, press Ctrl+Shift+M to Flatten or Ctrl+Shift+U to Unflatten the entire document (including all markups and measurements in your PDF).
Note: Flattening is ideal for sharing or a final submission of a drawing, but do not flatten the document if the arcs are used as markups and annotations. Because by flattening the document or a markup, your markups and measurements will disappear from the Markups List and become a permanent part of your PDF content (no longer a markup or measurement; they lose all their metadata).
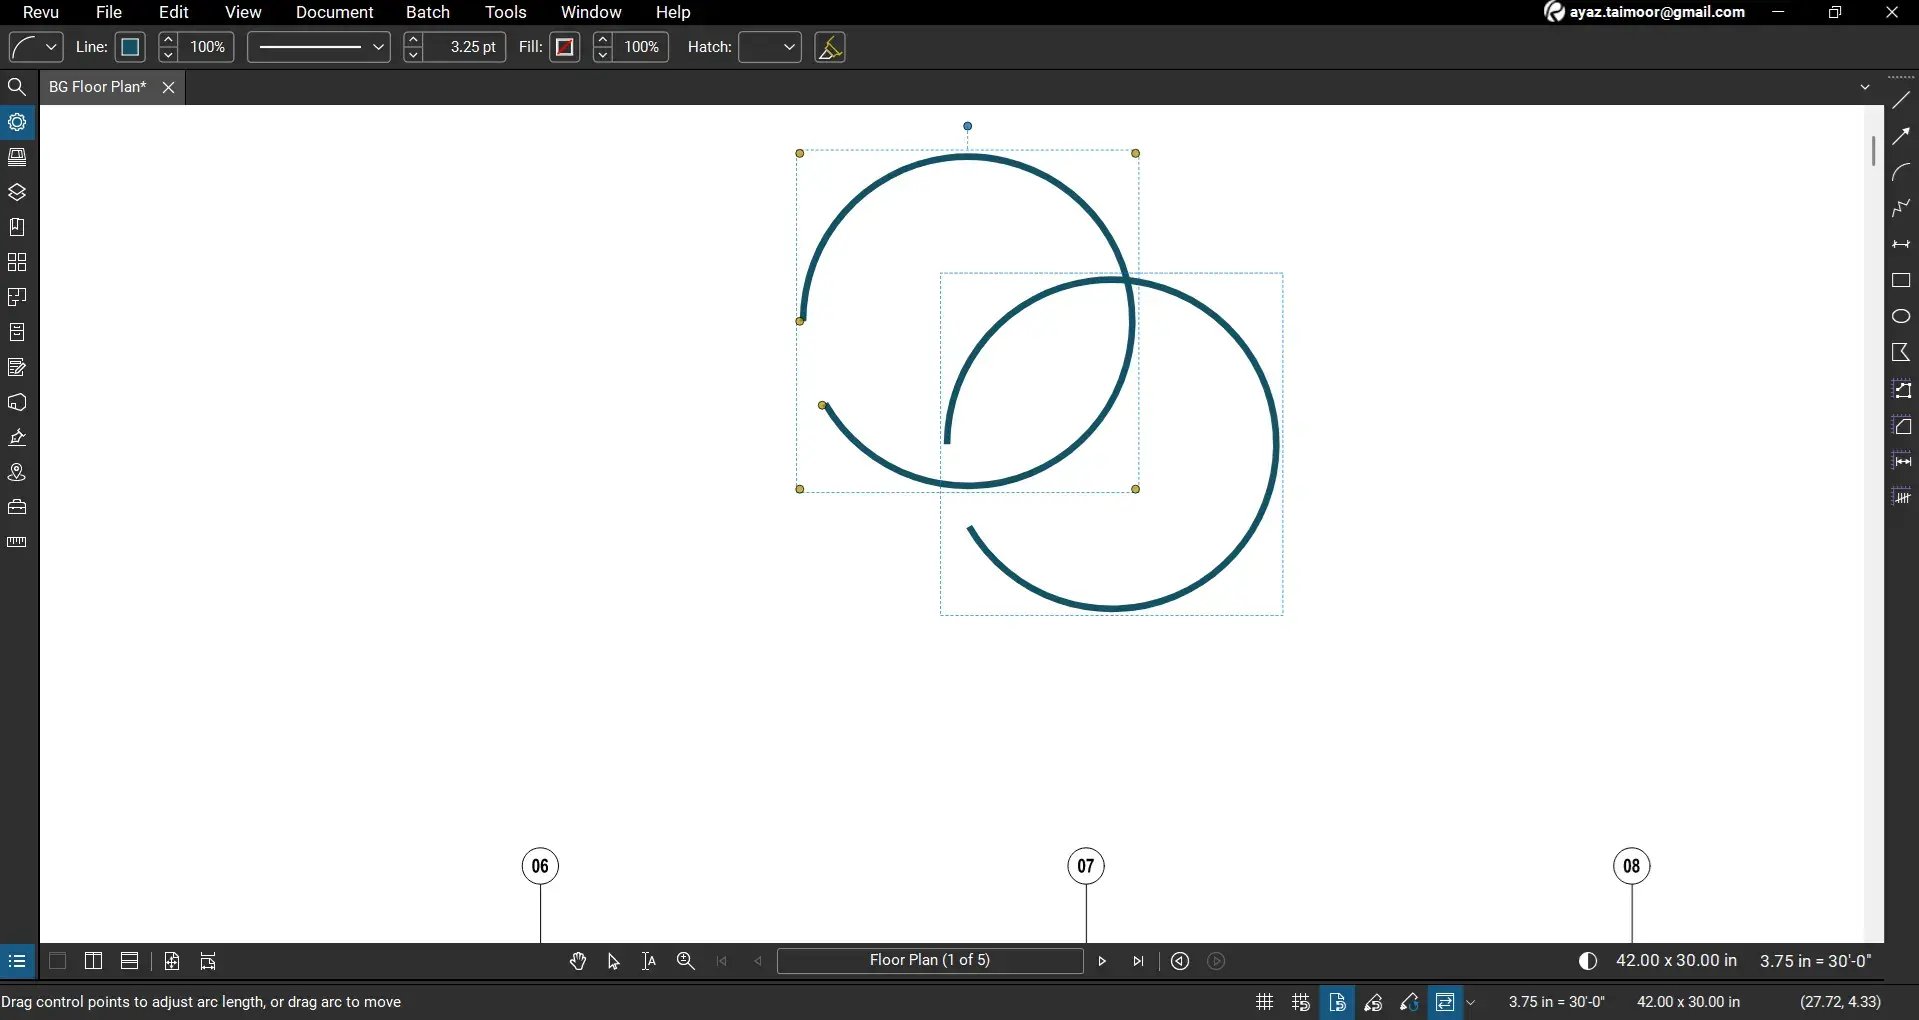
Move, Resize, or Duplicate Your Arc
Move/Reposition:
- Simply click and drag the arc to reposition it on your drawing.
Duplicate:
- Select the Arc.
- Press Ctrl+C,then Ctrl+V, to copy and paste a copy of your arc,or hold Ctrl and drag to create a copy.
Level Up Your Bluebeam Experience
You now know how to use the Arc Tool in Bluebeam Revu 21, including drawing arcs, adjusting curvature, customising line styles, adding labels, and finalising your markup.
To improve your skills in PDF markups, document management, and measurement workflows, explore our other Bluebeam guides.
Stay connected with Brighter Graphics, your go-to Bluebeam partner in the UK, Europe, and the Middle East.


