The Offset Magic Markup tool in Bluebeam Max makes it easy to create accurate inset and outset offsets directly within Revu. However, if you regularly create offsets with specific distances, units, subjects, and appearance settings, manually configuring each one can still take time.
With Claude integration in Bluebeam Max, you can generate offset measurements with simple natural-language prompts. Instead of configuring every property manually, you simply describe the offset you want, and Claude creates it for you.
In this guide, you will learn how to generate Area and Volume offsets using Claude, customise offset properties through prompts, and verify the accuracy of the generated measurements (prompt templates are added at the end of this guide).
Step-by-Step Guide to Creating Offset Measurements in Bluebeam Max with Claude
The Claude integration is available only to Bluebeam Max users. Before using Claude with Bluebeam, ensure Claude is connected to Revu.
You will need:
- Bluebeam Max subscription (Active or Trial)
- Revu upgraded to version 21.9 or later
- Claude Desktop
- Bluebeam MCP connection enabled
If you have not configured Claude yet, refer to our separate guide on connecting Claude with Bluebeam Max.
Open Your PDF Drawing
01 A: Open Bluebeam Revu on your desktop.
01 B: Open the PDF containing the markups or measurements you want to offset.
(For this example, our drawing already contains multiple Area measurements).
Generate an Area Offset with Claude
Step 01: Create an Area Offset
Open Claude Desktop and enter a prompt asking Claude to access the active PDF in Revu.
Your prompt should specify:
- The parent markup.
- Offset direction.
- Offset distance.
- Measurement type.
- Measurement units.
- Subject name.
- Appearance settings.
For this example, we instruct Claude to:
- Use Area Measurement 1 as the parent markup.
- Generate an outward offset.
- Maintain an offset distance of 2 metres.
- Create the offset as an Area measurement.
- Use square metres as the unit of measurement.
- Name the markup Offset Area 1.
- Match the appearance of the parent markup.
- Leave the Comments field untouched.
We are asking Claude not to touch the Comments field to avoid garbage values or unwanted parameters.
After submitting the prompt, Claude automatically generates the new Area measurement.
Step 02: Review the Generated Offset
Once processing is complete:
- A new Area measurement appears.
- The subject is Offset Area 1.
- The appearance matches the original markup.
- Measurement units match the prompt.
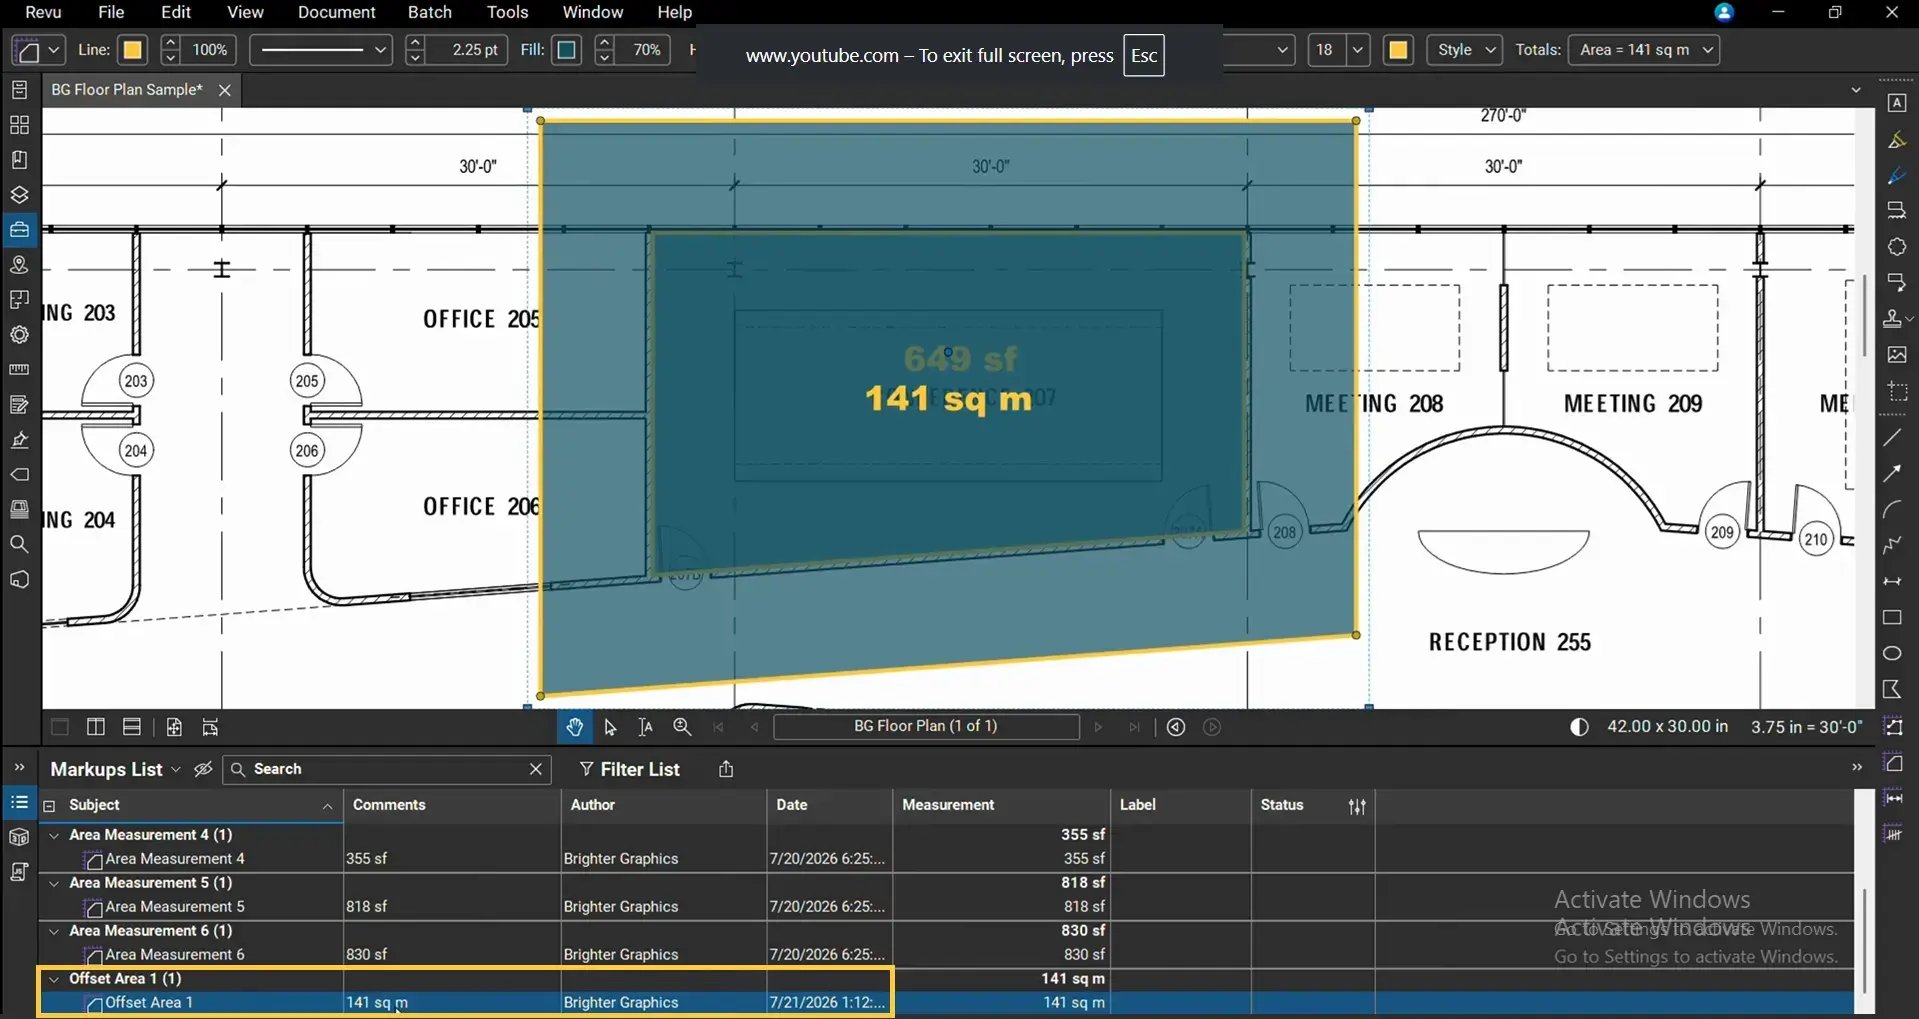
Although the prompt requests an empty Comments field, Revu automatically populates the Comments column with the measurement value for measurement markups. This is expected Revu behaviour.
Step 03: Verify Offset Accuracy
To confirm dimensional accuracy:
03 A: Open the Measurements panel.
03 B: Select the Length tool.
03 C: Measure the perpendicular distance between the original Area measurement and the generated offset.
(Change the measurement unit for your length to metres in the Measurements panel)
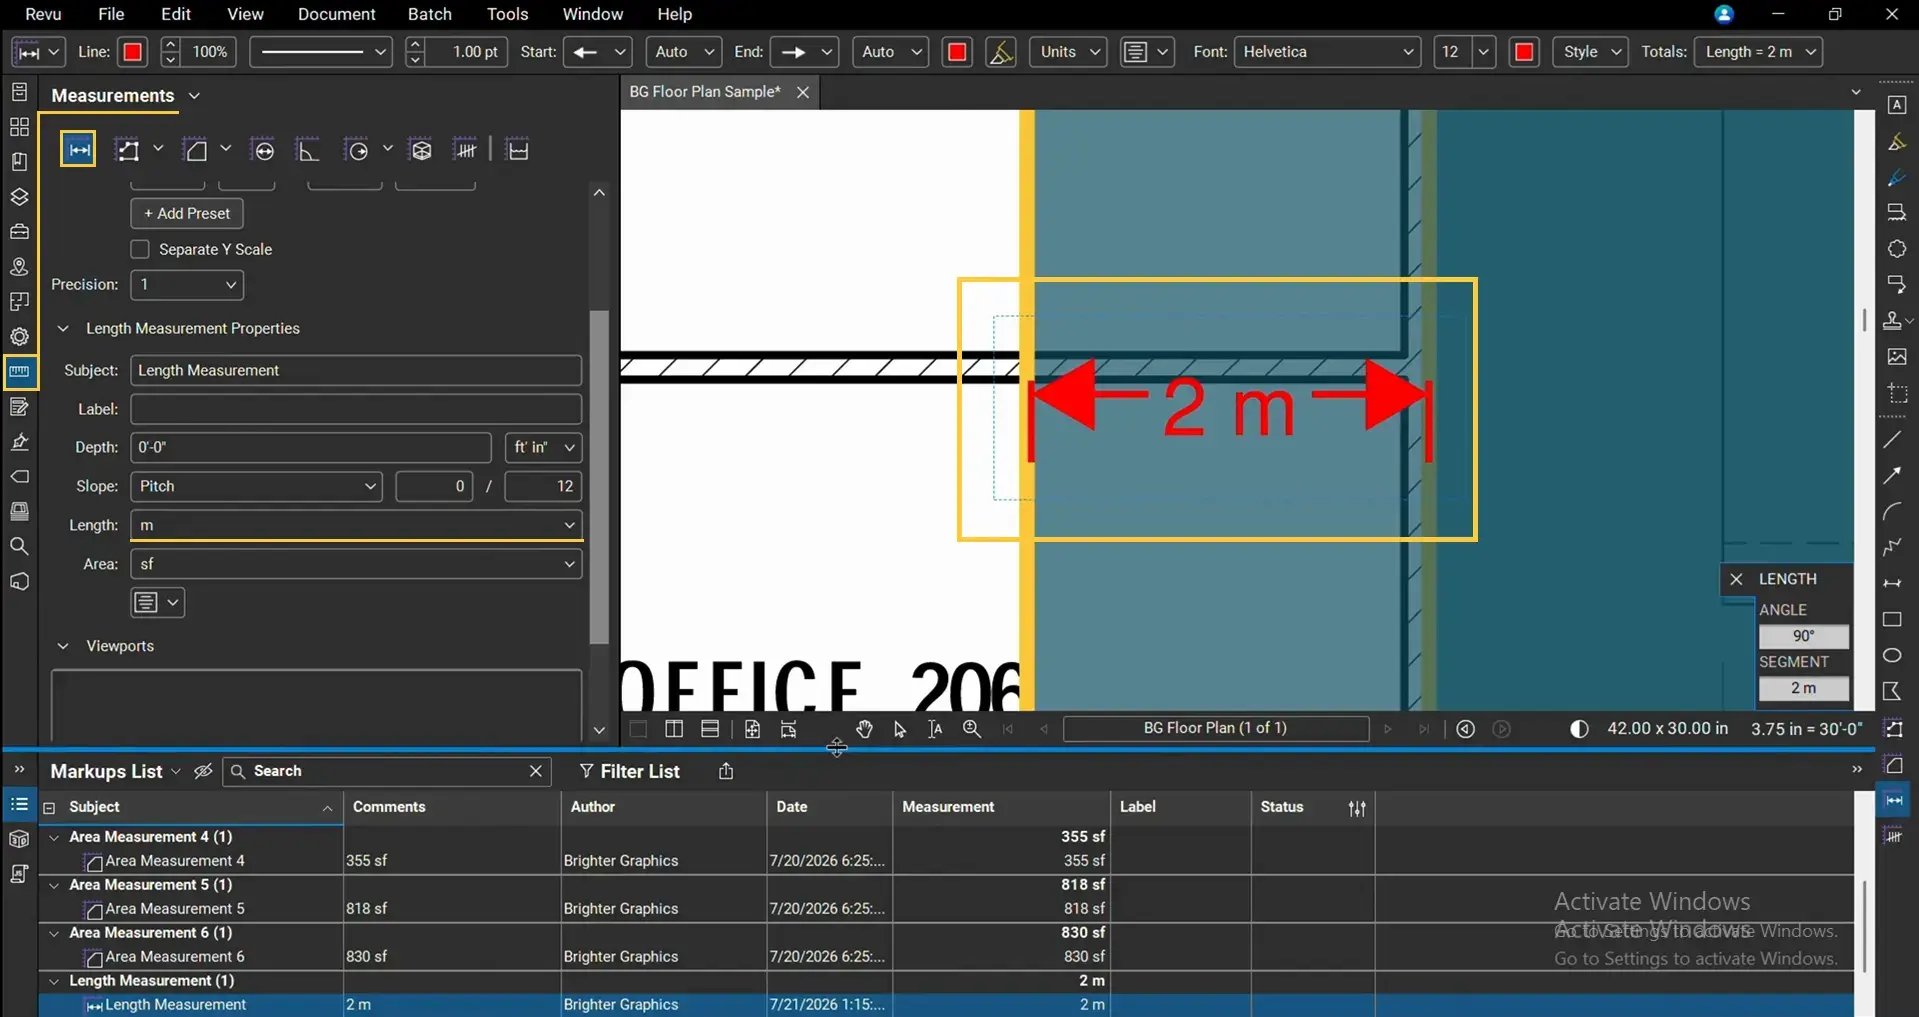
The measured distance should equal the 2 metres specified in the prompt.
Generate a Volume Offset with Claude
Step 01: Create a Volume Offset
Claude can also generate offsets as different measurement types.
For this example, update the prompt to:
Use Area Measurement 2 as the parent markup.

Generate an outward offset.

Use an offset distance of 3 metres.

Create the offset as a Volume measurement.

Use cubic metres as the unit of measurement.

Apply a depth of 2 metres.
>
Match the appearance of the parent markup.
Submit the updated prompt.
Claude automatically generates the new Volume measurement as offset.
Step 02: Verify the Generated Volume
After Claude completes the task:
Review the new markup.
Confirm that:
- The subject is Offset Volume 1.
- The measurement unit is cubic metres.
- The appearance matches the parent markup.
- The Comments column contains the measurement value.
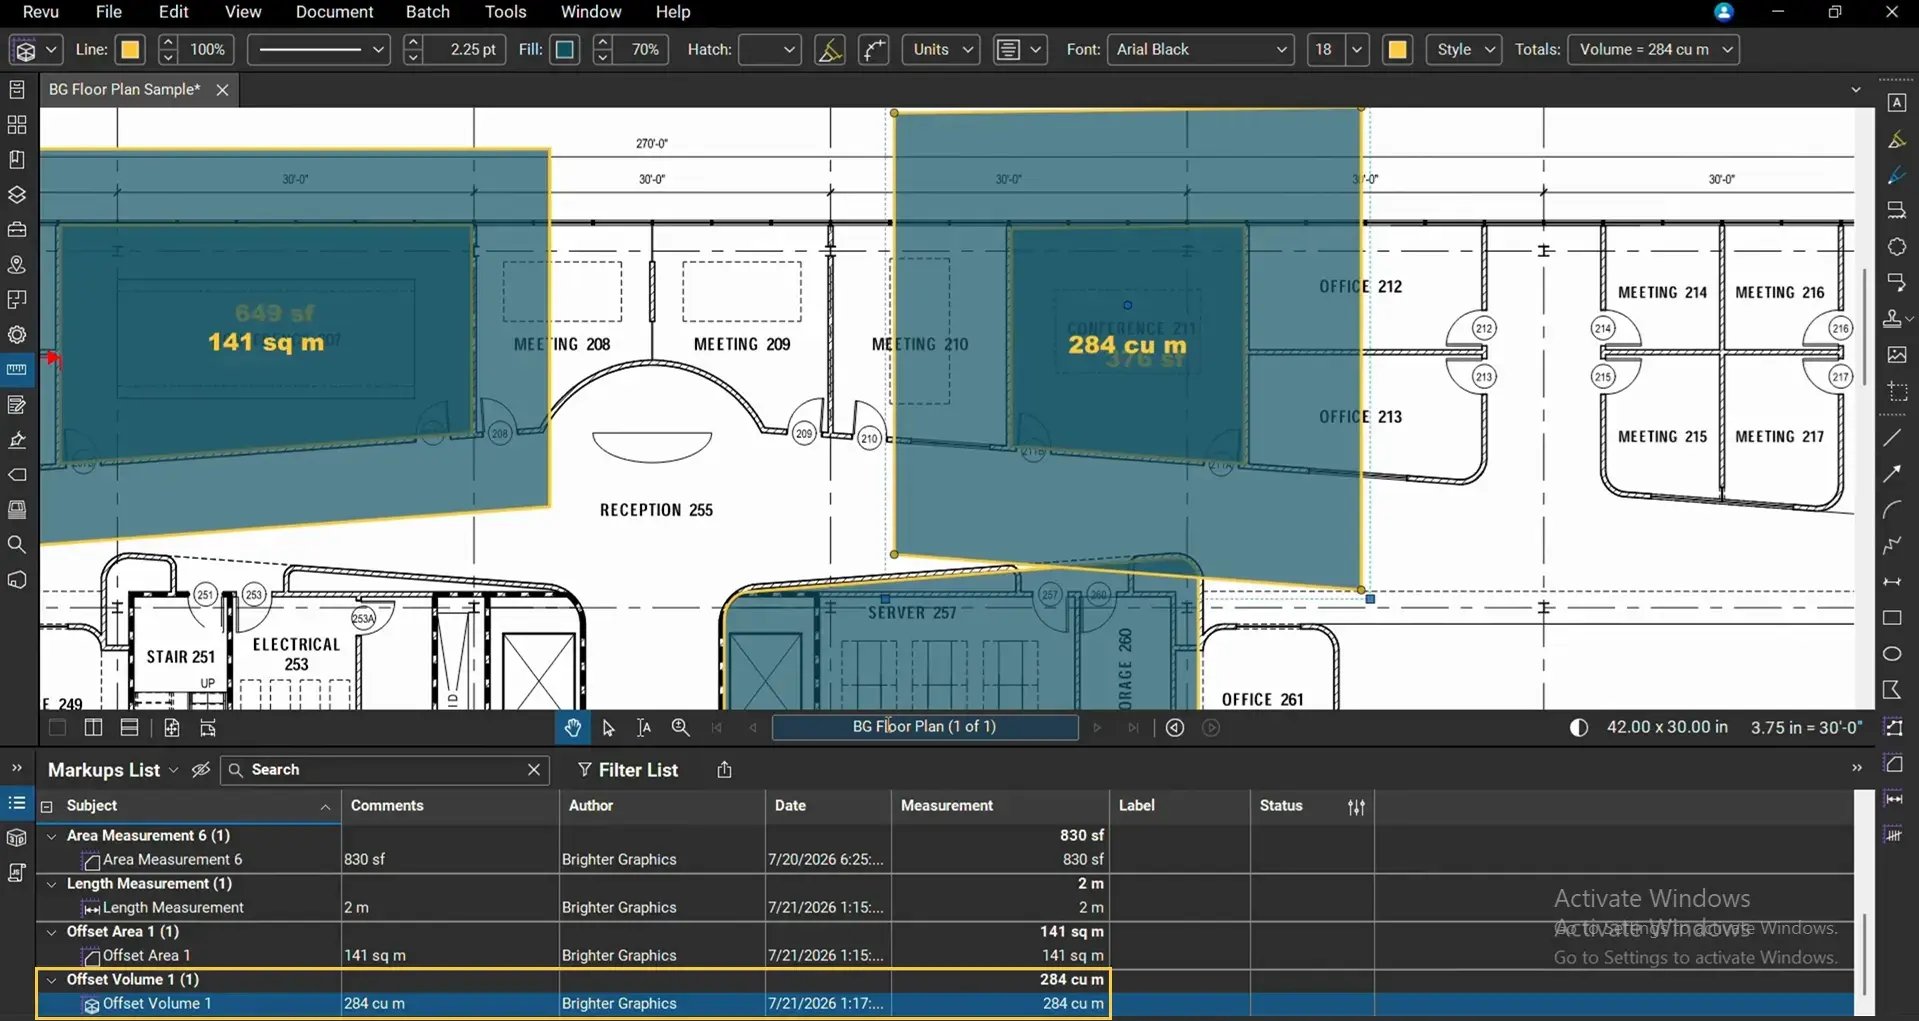
Next, select the Volume measurement and open the Measurements panel.
Verify that the Depth value is 2 metres, exactly as specified in the prompt.
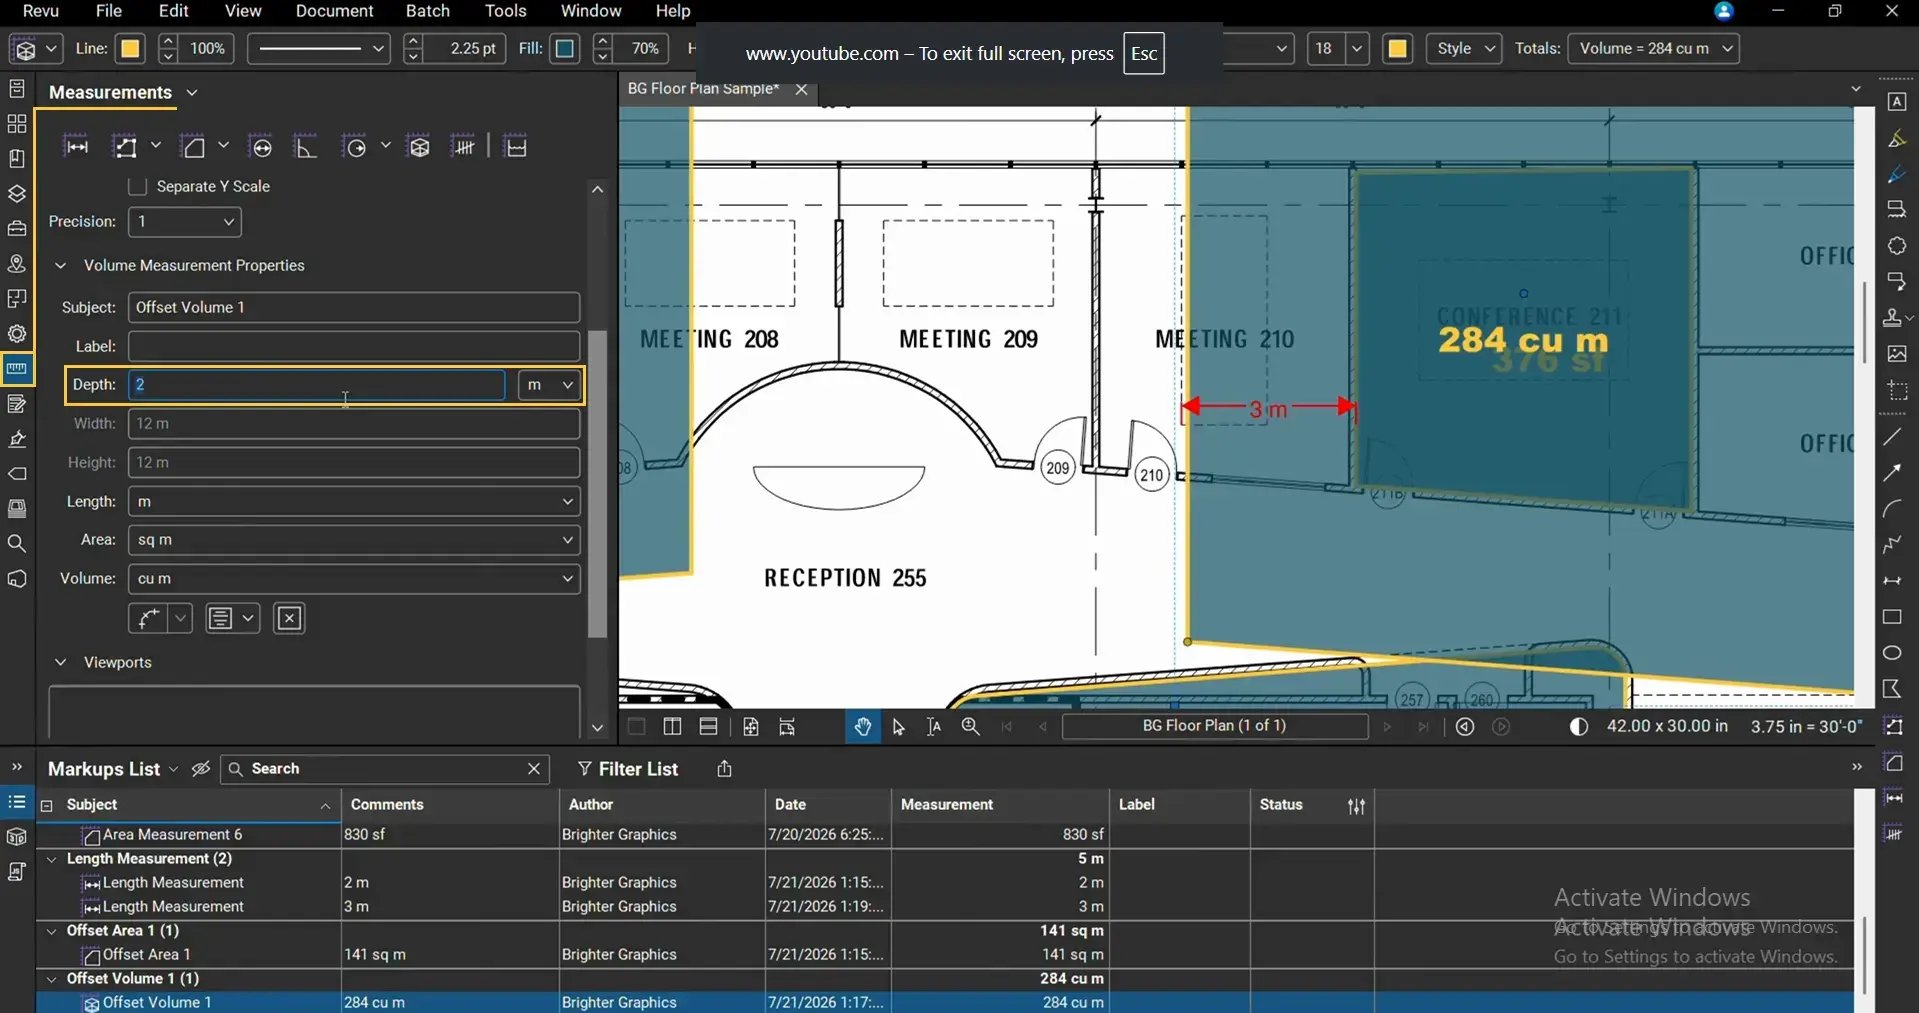
You can manually adjust the depth at any time, or simply ask Claude to update it for you.
Step 03: Verify the Offset Distance
Finally, confirm the geometric accuracy of the offset.
Using the Length tool to measure the perpendicular distance between the original Area measurement and the Volume offset.
(Switch the measurement unit for your length to metres in the Measurements panel).
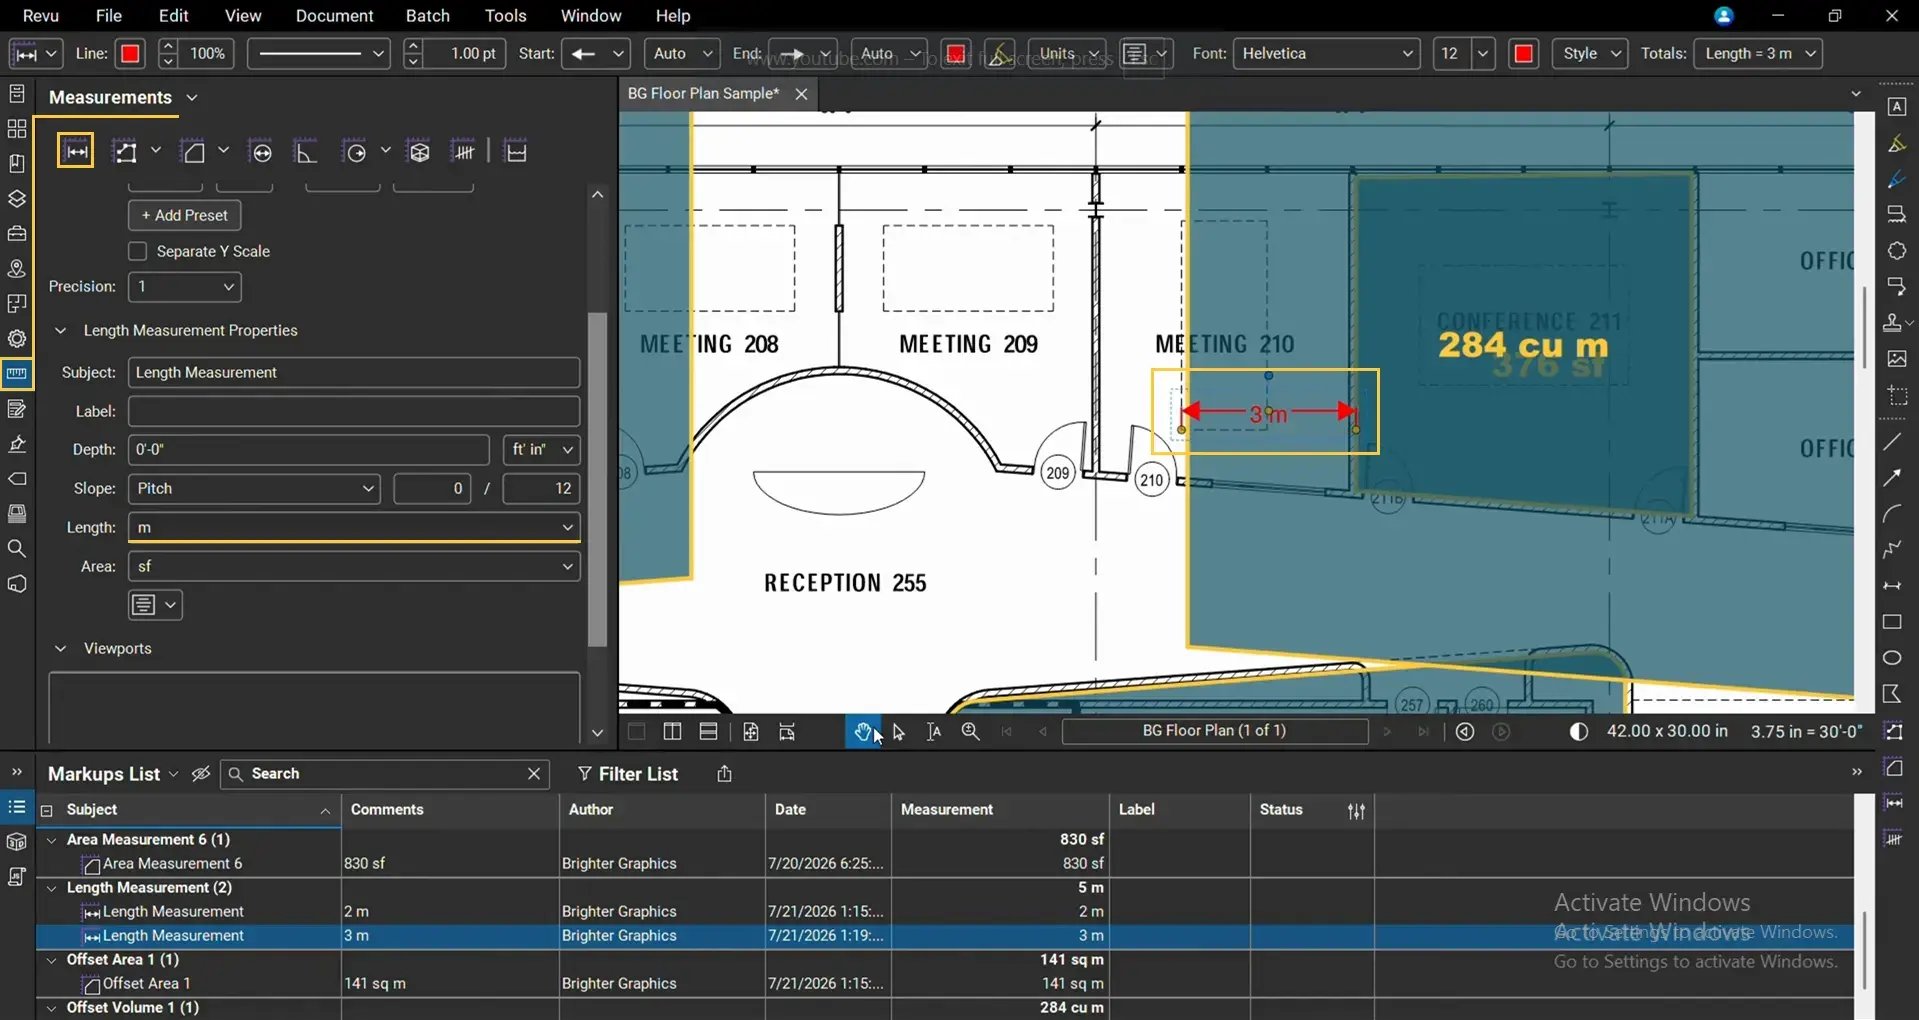
The measured distance should equal the 3 metres defined in the prompt.
Prompt Templates for Generating Offset Measurements in Bluebeam Max with Claude
Claude Prompt Template - Example 01
Area Offset
Access the active PDF currently open in Bluebeam Revu.

Locate the markup whose Subject is "Area Measurement 1".

Create an outward offset Area measurement.

Maintain an offset distance of 2 metres from the parent boundary.

Set the measurement unit to square metres.

Set the Subject to "Offset Area 1".

Match the appearance of the parent markup.

Do not modify or delete the original markup.

Do not add any comments unless required by Bluebeam.
Claude Prompt Template - Example 02
Volume Offset
Access the active PDF currently open in Bluebeam Revu.

Locate the markup whose Subject is "Area Measurement 2".

Create an outward offset Volume measurement.

Maintain an offset distance of 3 metres from the parent boundary.

Set the measurement unit to cubic metres.

Set the depth to 2 metres.

Set the Subject to "Offset Volume 1".

Match the appearance of the parent markup.

Keep the original markup.

Do not add any comments unless required by Bluebeam.
Generic Offset Prompt Template (Annotated)
Access the active PDF currently open in Bluebeam Revu.

Locate the markup whose Subject is "<Parent Markup Name>".

Create an <Inset/Outset> offset.

Maintain an offset distance of <Distance>.

Create the offset as a <Area / Volume / Perimeter / Polylength / Other> measurement.

Set the measurement unit to <Unit>.

Set the depth to <Depth> (Applicable if the output is a Volume)

Set the Subject to "<New Subject Name>".

Match the appearance of the parent markup.

<Keep or Replace> the original markup.

Do not add any comments unless added by Bluebeam by default.
Why Generate Offsets with Claude?
Although Bluebeam Max offers a dedicated offset magic tool, you can use Claude to generate offsets with several advantages, such as:
Generate offsets using natural language.

Eliminate repetitive toolbar configuration.

Create Area or Volume offsets automatically.

Apply depth values for volumes during creation.

Standardise subjects and naming conventions.

Match parent markup appearance automatically.

Produce consistent results across multiple drawings.
Instead of manually configuring every offset, Claude performs the repetitive work for you while maintaining the accuracy needed for complex calculations, quantity takeoffs, and design reviews.
Try Bluebeam Max Free for 14 Days
The Claude AI integration is available exclusively in Bluebeam Max. Request a 14-day free Bluebeam Max trial to explore Magic Markups, Smart Review, Smart Overlay, and other AI-powered capabilities designed to speed up your work in Bluebeam Revu.
Level Up Your Bluebeam Experience
Claude integration extends the Offset Magic Markup tool's capabilities by letting you generate precise offsets with simple prompts. You can turn this into batch prompting and do it in a single go for multiple markups or measurements.
Explore more Bluebeam guides to learn about everything Bluebeam and get more from your Revu subscription. For more Bluebeam tips and tricks, stay connected with Brighter Graphics.