If you have already applied markups and measurements on your construction drawing, you often need to expand and create offset boundaries to account for soffits, wall finishes, cladding gaps, structural clearances, or other construction elements. But manually copying and resizing markups rarely produces accurate, equidistant offsets.
Before Bluebeam Max, this is what Bluebeamers faced. They tended to duplicate measurements and adjust them manually, or redrew the entire markup from scratch. Both methods were time-consuming, difficult to maintain, and lacked CAD-level precision.
Bluebeam Max introduces the Offset feature, one of the three new Magic Markup tools, that lets you generate accurate inset and outset offsets from existing markups and measurements in just a few clicks. You can also convert an offset into a different markup or measurement type.
The Offset feature is available exclusively with a new, AI-supercharged Bluebeam Max plan. If you have not upgraded yet, you can request a 14-day free Bluebeam Max trial to explore all new Magic Markup tools, including Convert To and Duplicate As, along with other AI-powered workflows.
In this guide, we will show you how to create precise offset markups, replace or keep existing measurements, and convert offsets into different measurement or markup types.
Step-by-Step Guide to Using Offset Magic Markup
Follow the steps below to create accurate CAD-style offset markups and measurements in your native Revu environment.
Step 01: Open Your PDF Drawing
01 A: Open Bluebeam Revu 21 on your desktop (ensure you are using version 21.9 or later and have an active or trial Bluebeam Max subscription).
01 B: Go to File > Open
01 C: Open the PDF containing the markups or measurements you want to convert.
For this example, we are using a drawing that already contains several Area measurements.
Step 02: Launch the Offset Tool
To begin creating an offset:
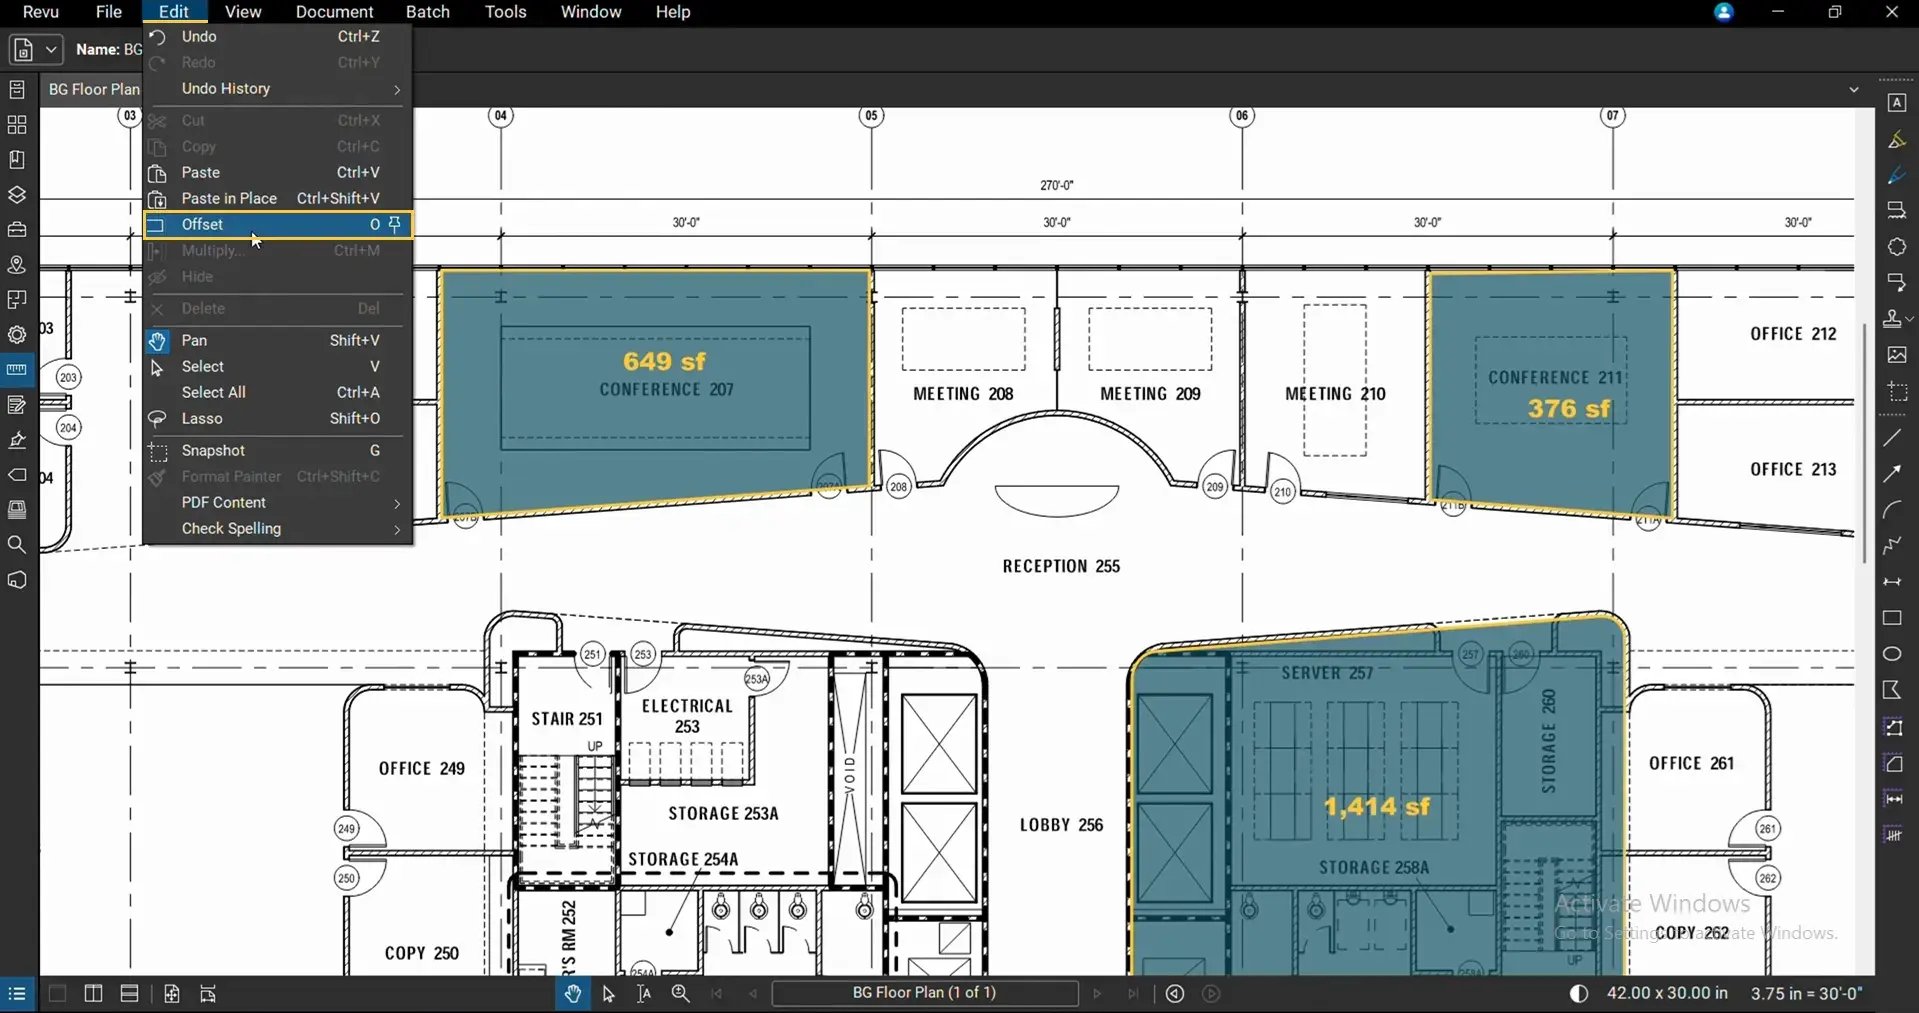
Go to the Edit menu and click Offset (Or press the O shortcut key to enable the feature).
The Offset toolbar appears at the top of your workspace.
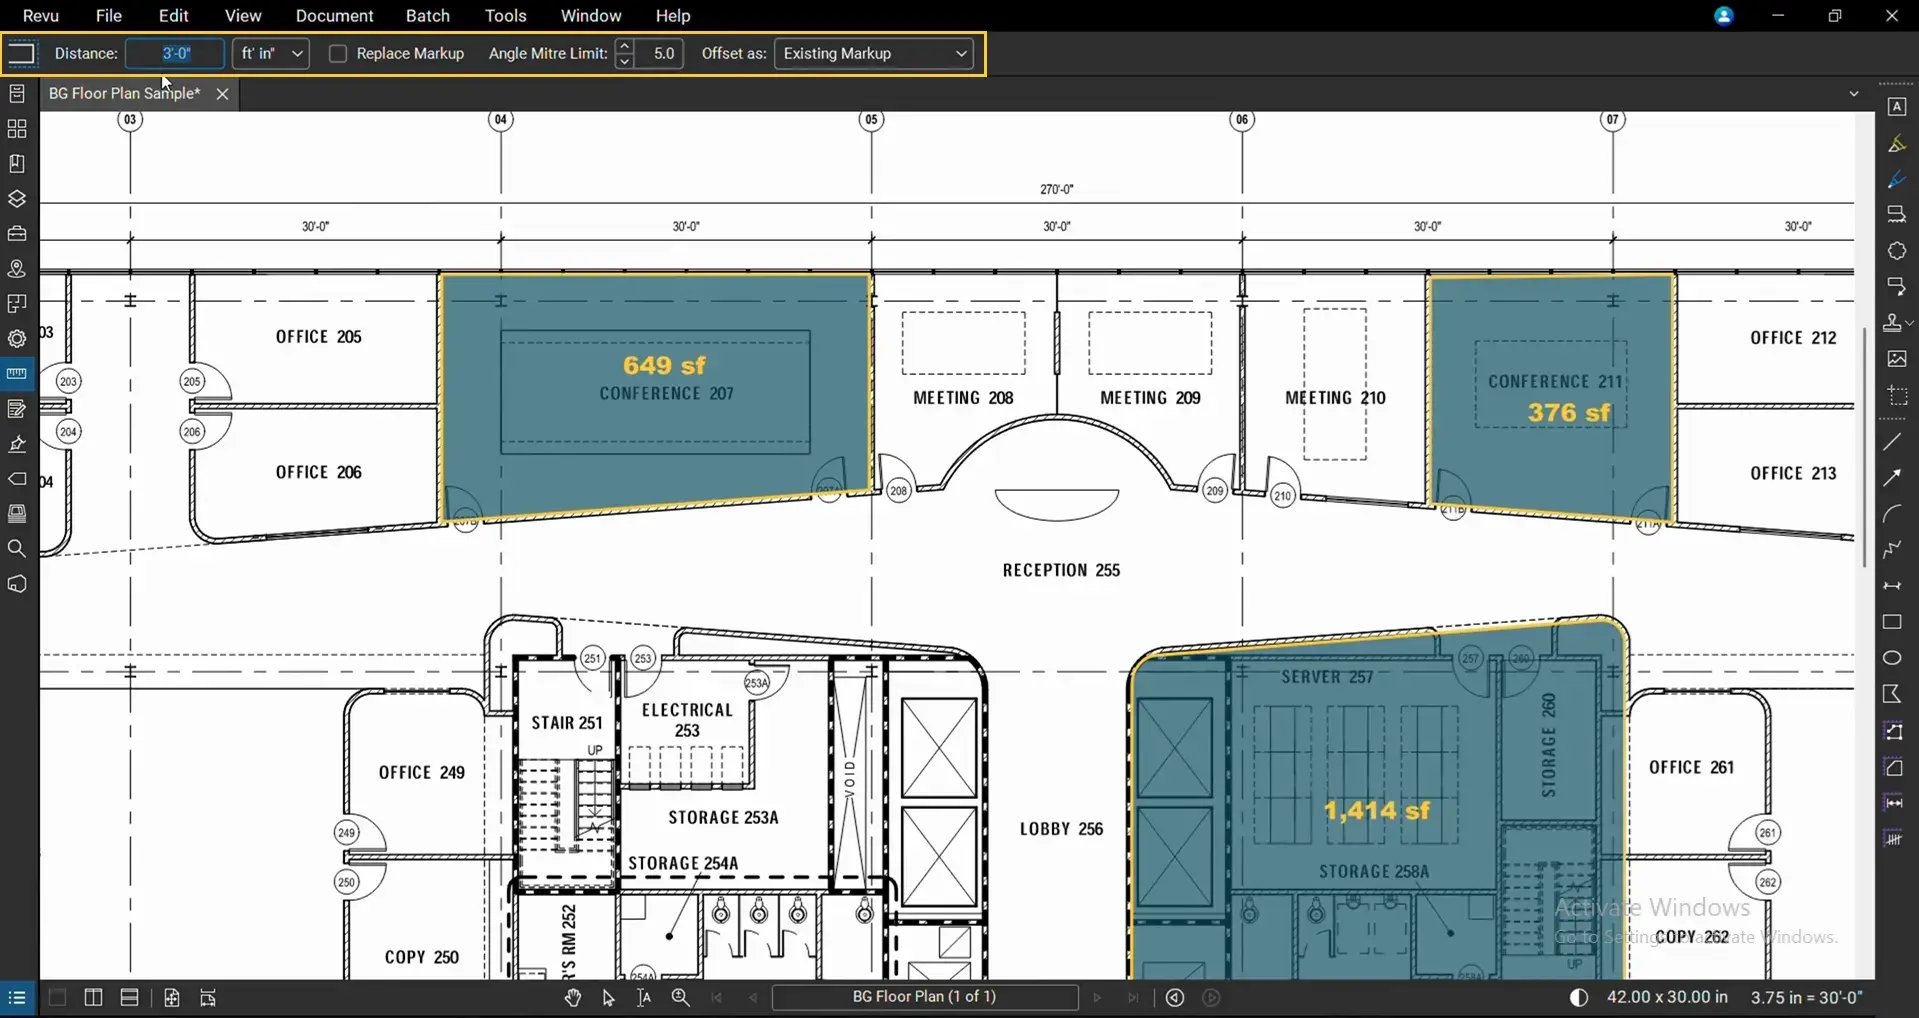
From here you can:
- Specify the offset distance.
- Choose the measurement unit.
- Opt for replacing the original markup if required.
- Select whether the offset should remain the same markup type or convert into another supported markup or measurement.
Step 03: Create a Standard Offset
To create an offset using the same markup/measurement type.
03 A: Enter the required offset distance.
For this example, we will keep the offset boundary at 2 feet from the parent markup.
03 B: Leave Replace unchecked so the original markup remains.
03 C: Keep the offset type to Existing Markup to create a markup or measurement of the same type as your parent markup.
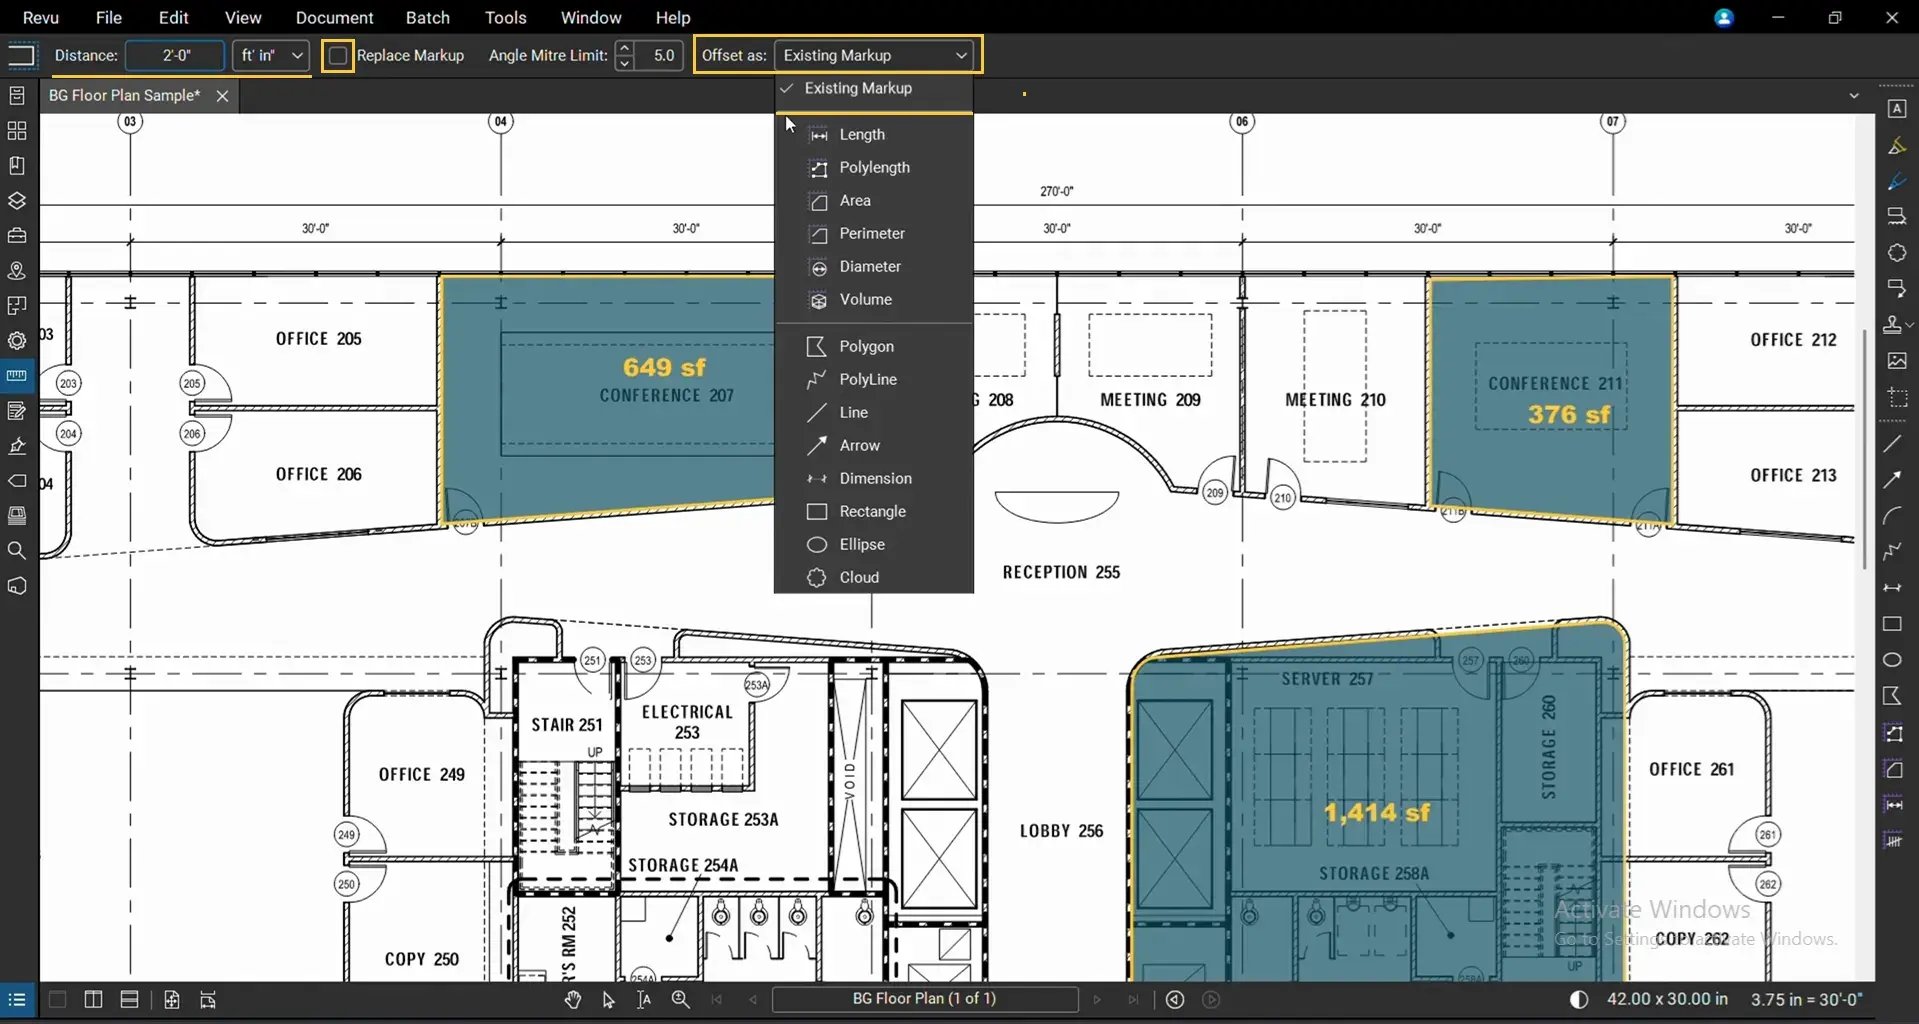
03 D: Hover over the markup or measurement you want to offset.
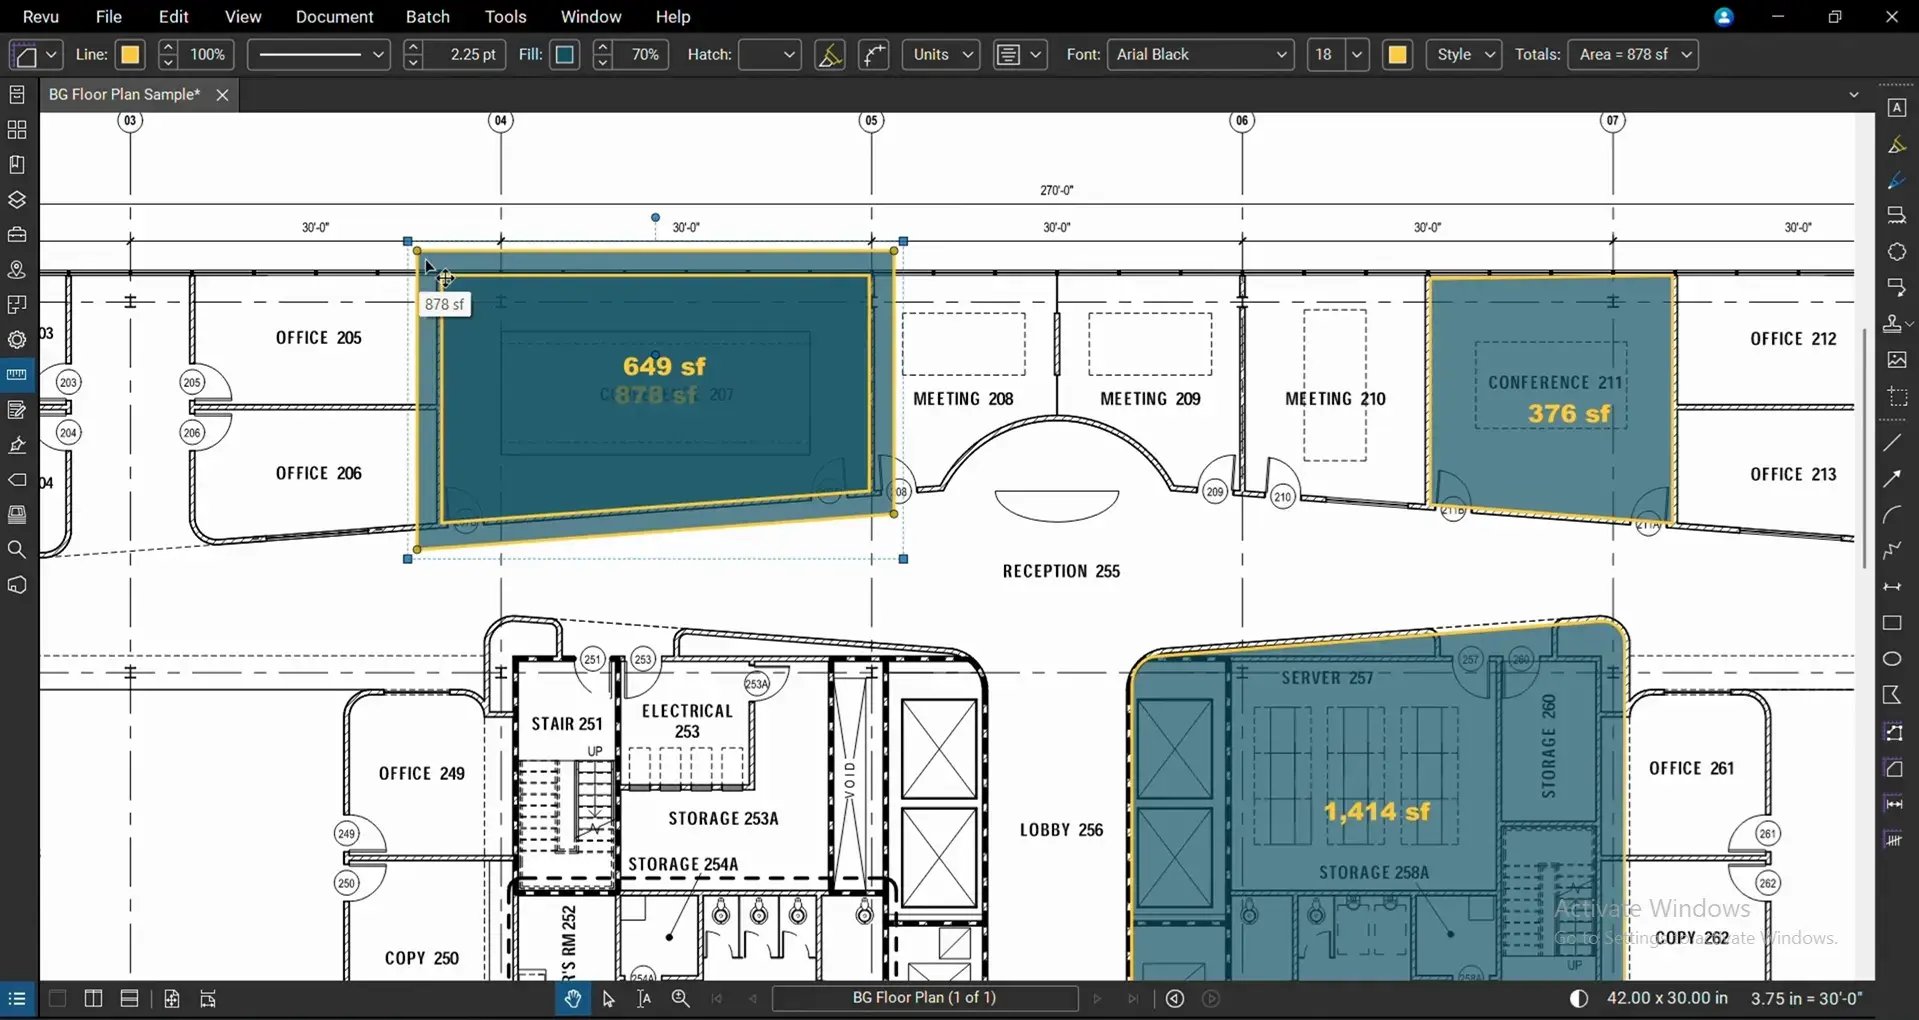
03 E: Click:
- Inside the markup to create an Inset Offset.
- Outside the markup to create an Outset Offset.
Bluebeam will generate a new offset with a uniform distance maintained around the entire boundary.
Step 04: Verify Offset Accuracy
One of the biggest advantages of Offset is its dimensional precision.
To verify the generated offset:
04 A: Open the Measurements panel.
04 B: Select the Length tool.
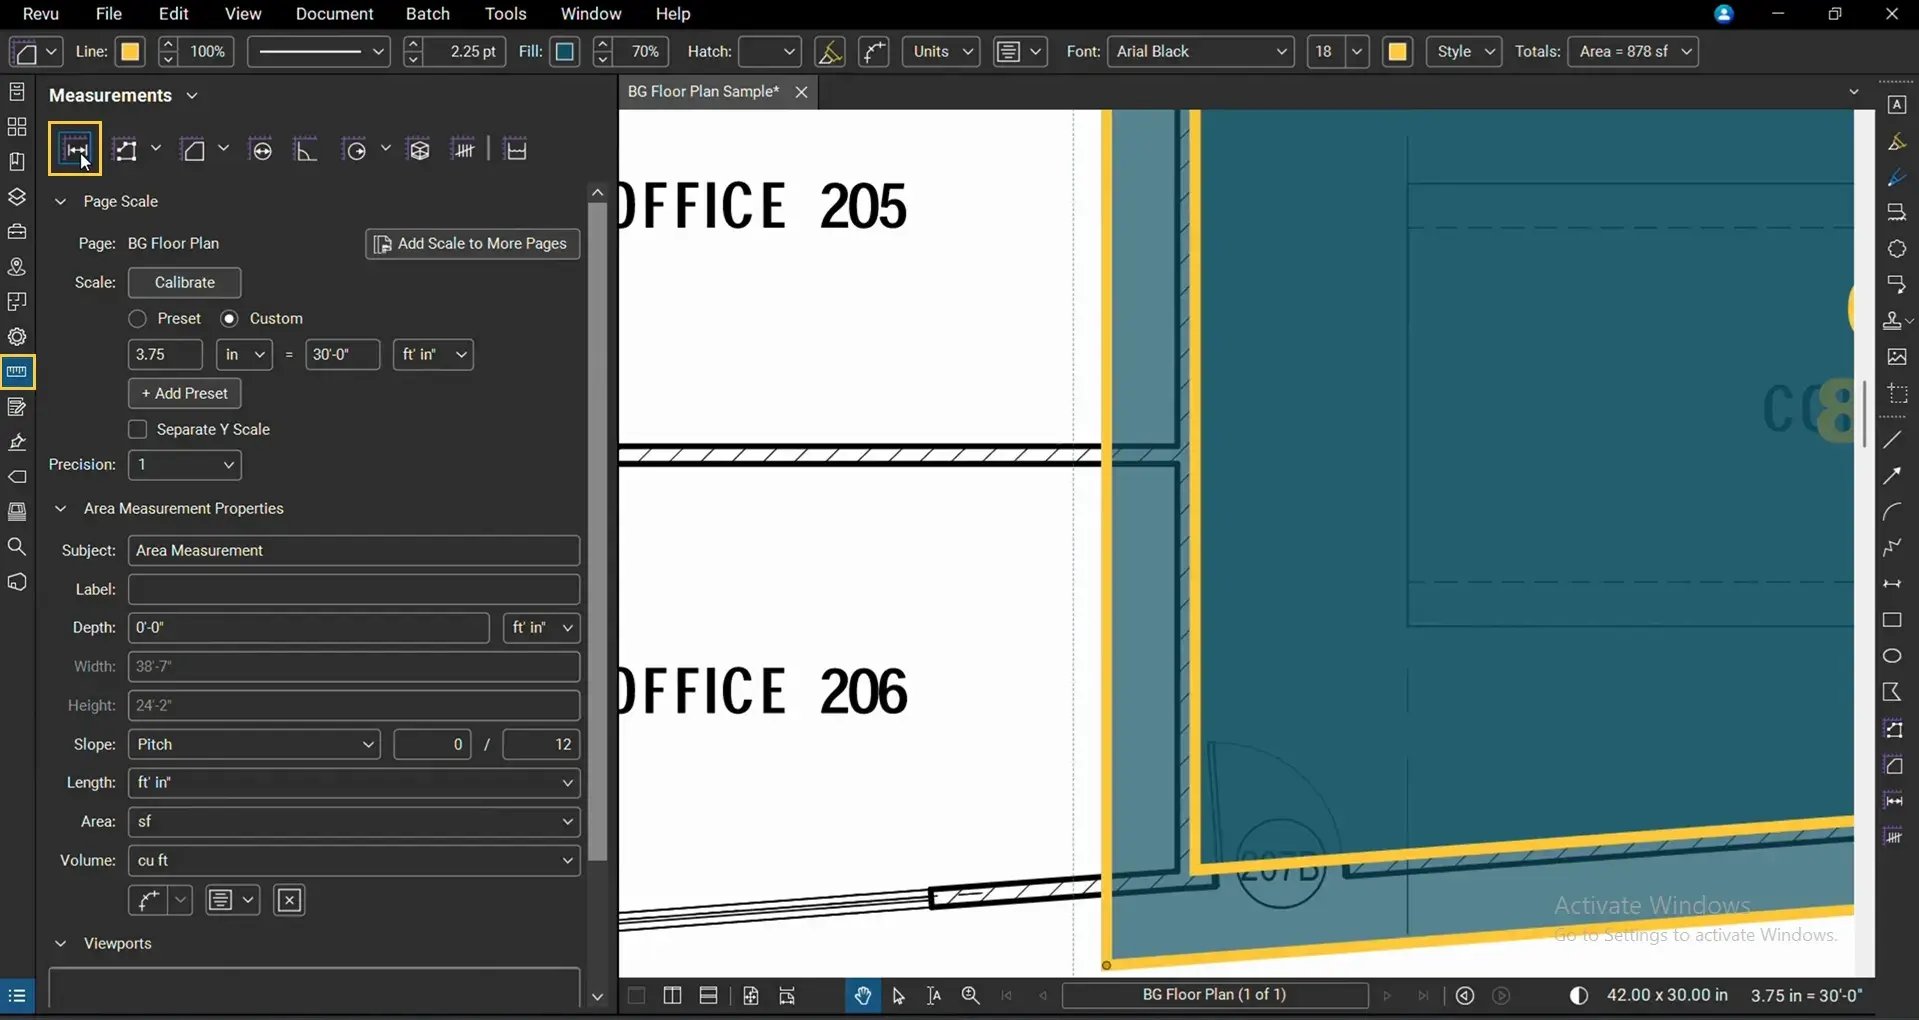
04 C: Measure the perpendicular distance between the parent markup and the offset boundary.
The measured distance should exactly match the value entered in the Offset toolbar (in the previous example, we entered 2 feet).
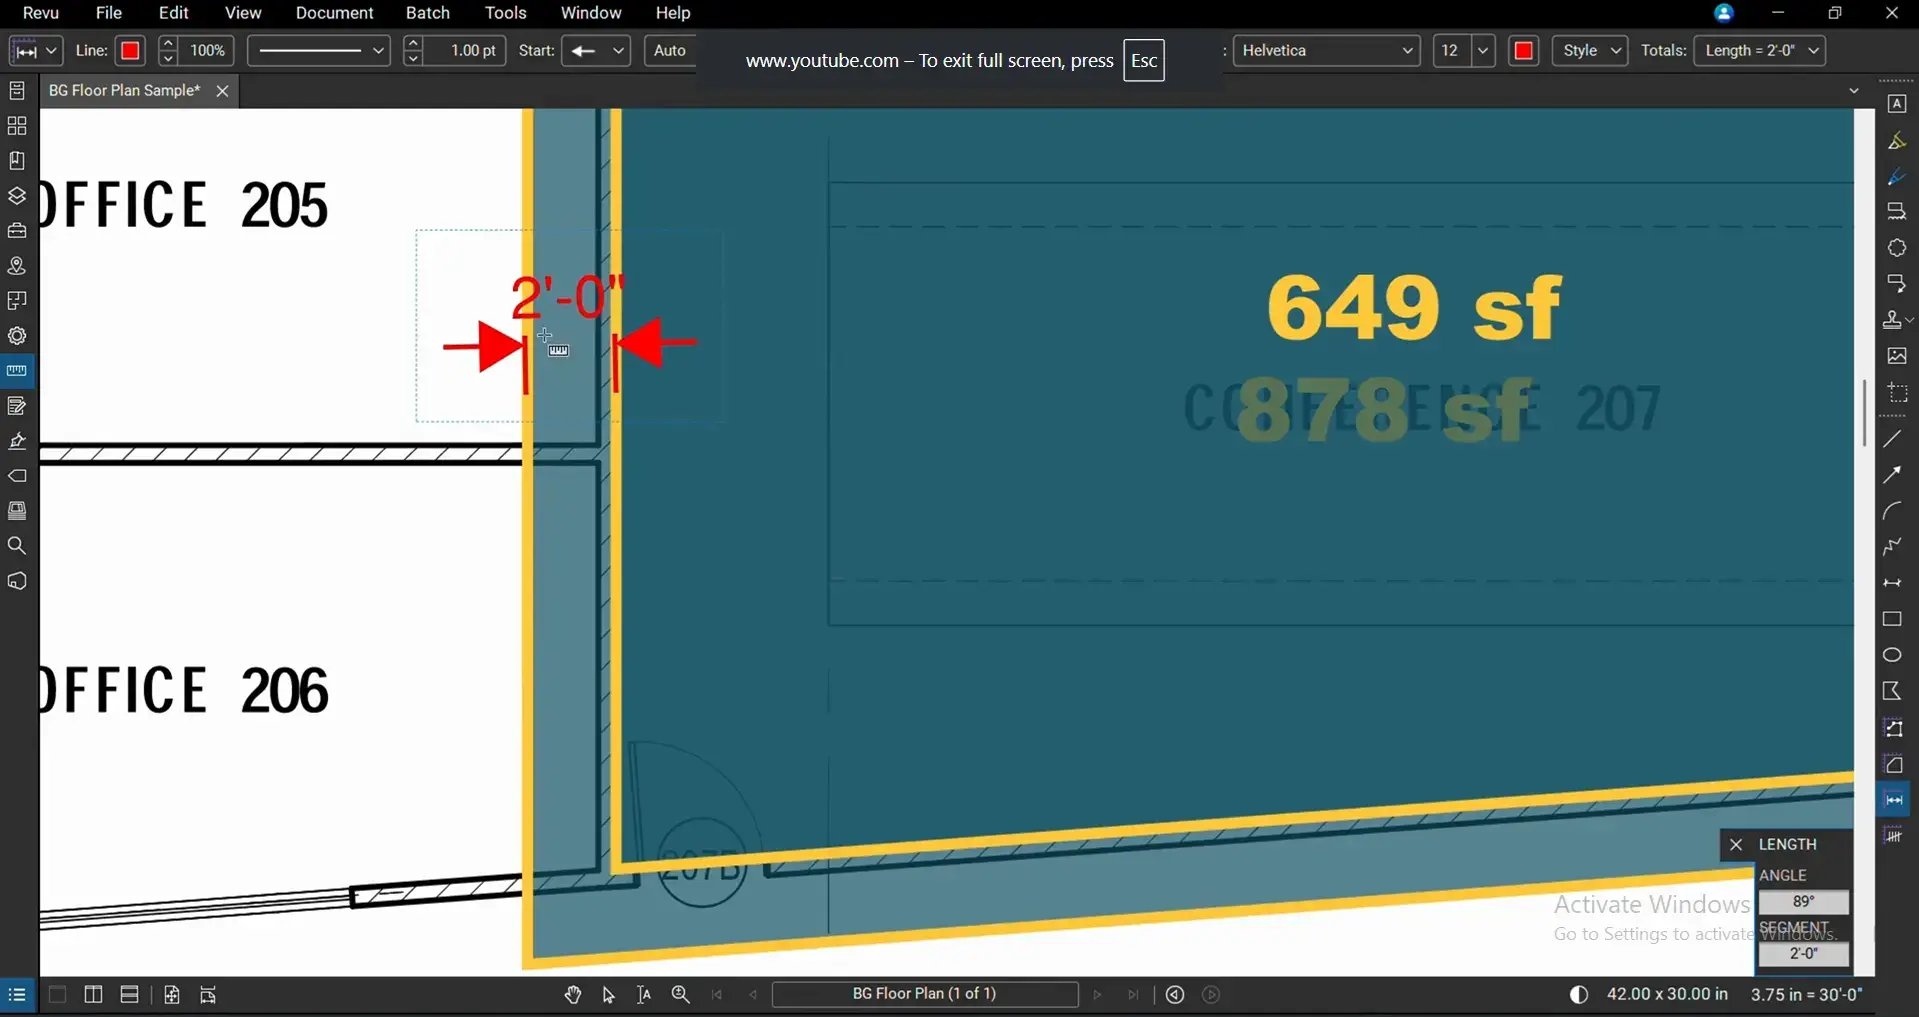
Now you see the level of precision this Offset feature offers, making it perfect for creating boundaries for:
- Soffits
- Structural slabs
- Cladding returns
- Column enclosures
- Clearance zones
- Or similar objects/workflows
Step 05: Replace the Original Markup
You can also replace the original markup during the offset operation.
For this example:
05 A: Launch Offset again.
05 B: Enter the offset distance (for example, 3 metres).
05 C: Enable the Replace option.
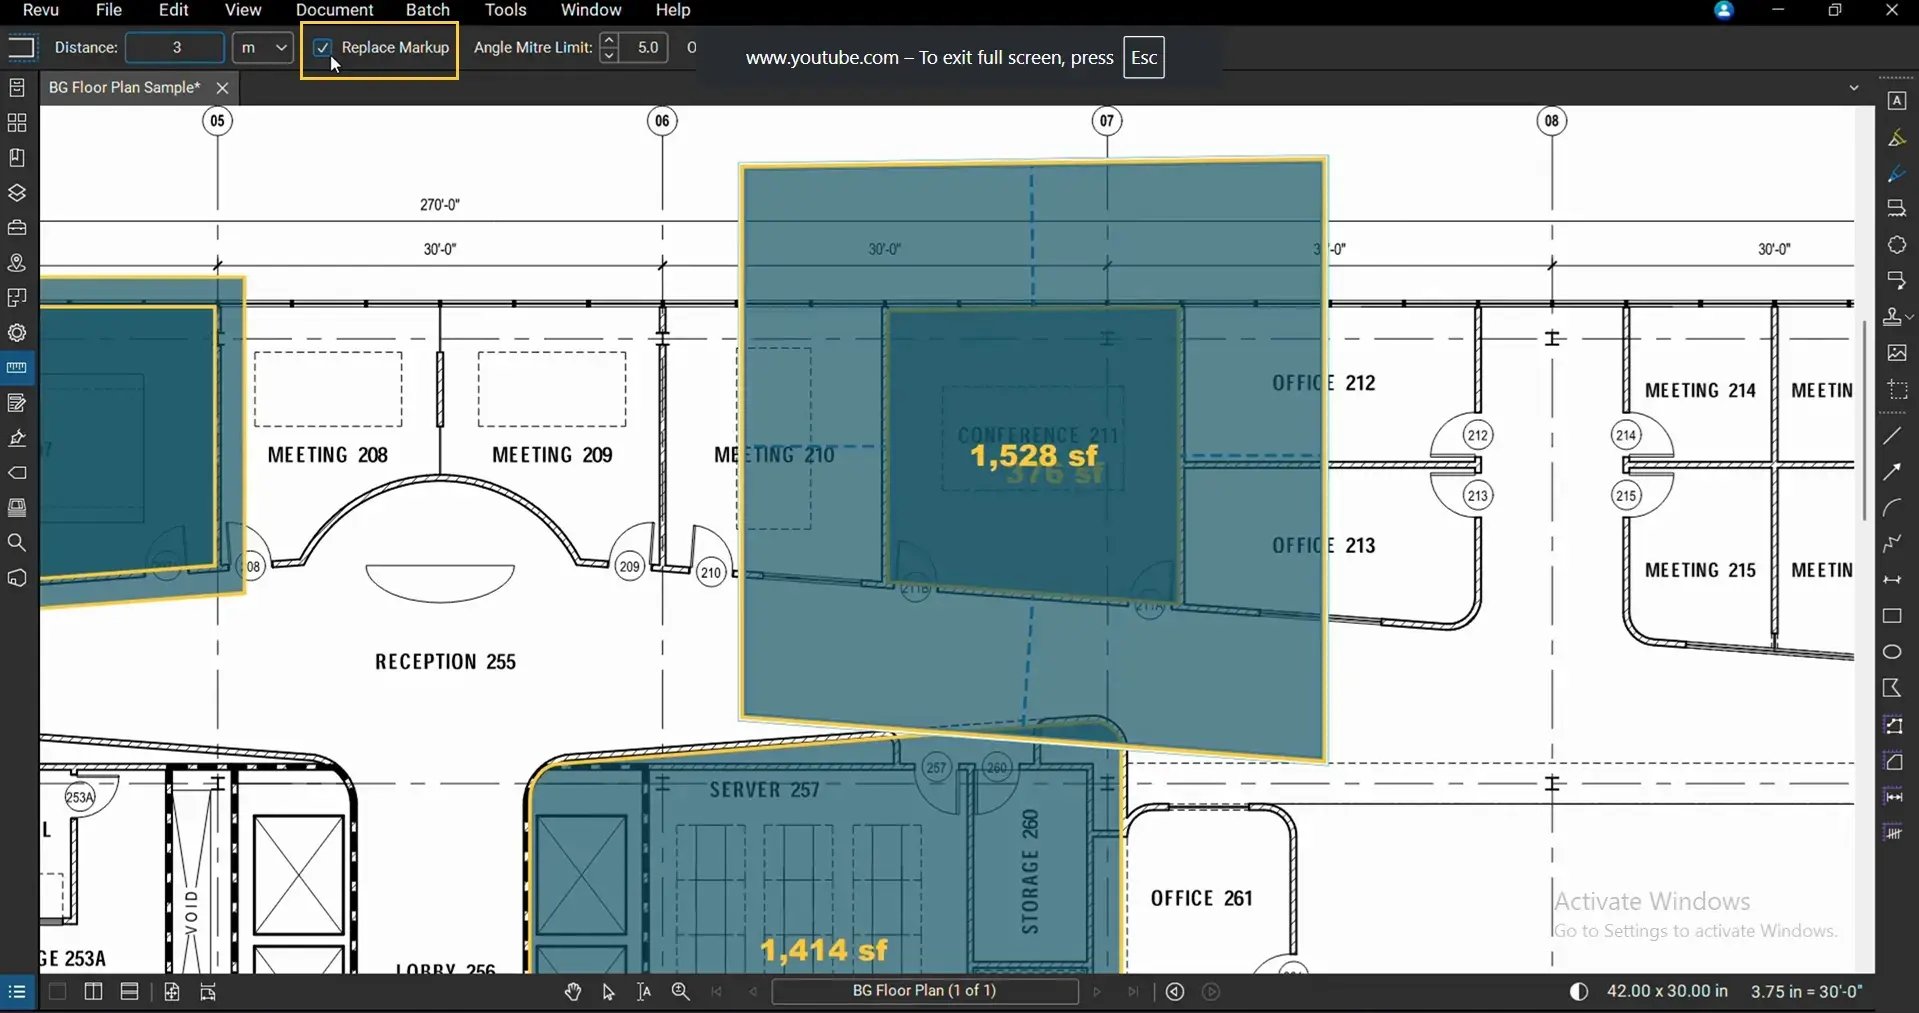
05 D: Click outside or inside the markup to create an Offset.
It will remove the original markup and replace it with the newly generated offset.
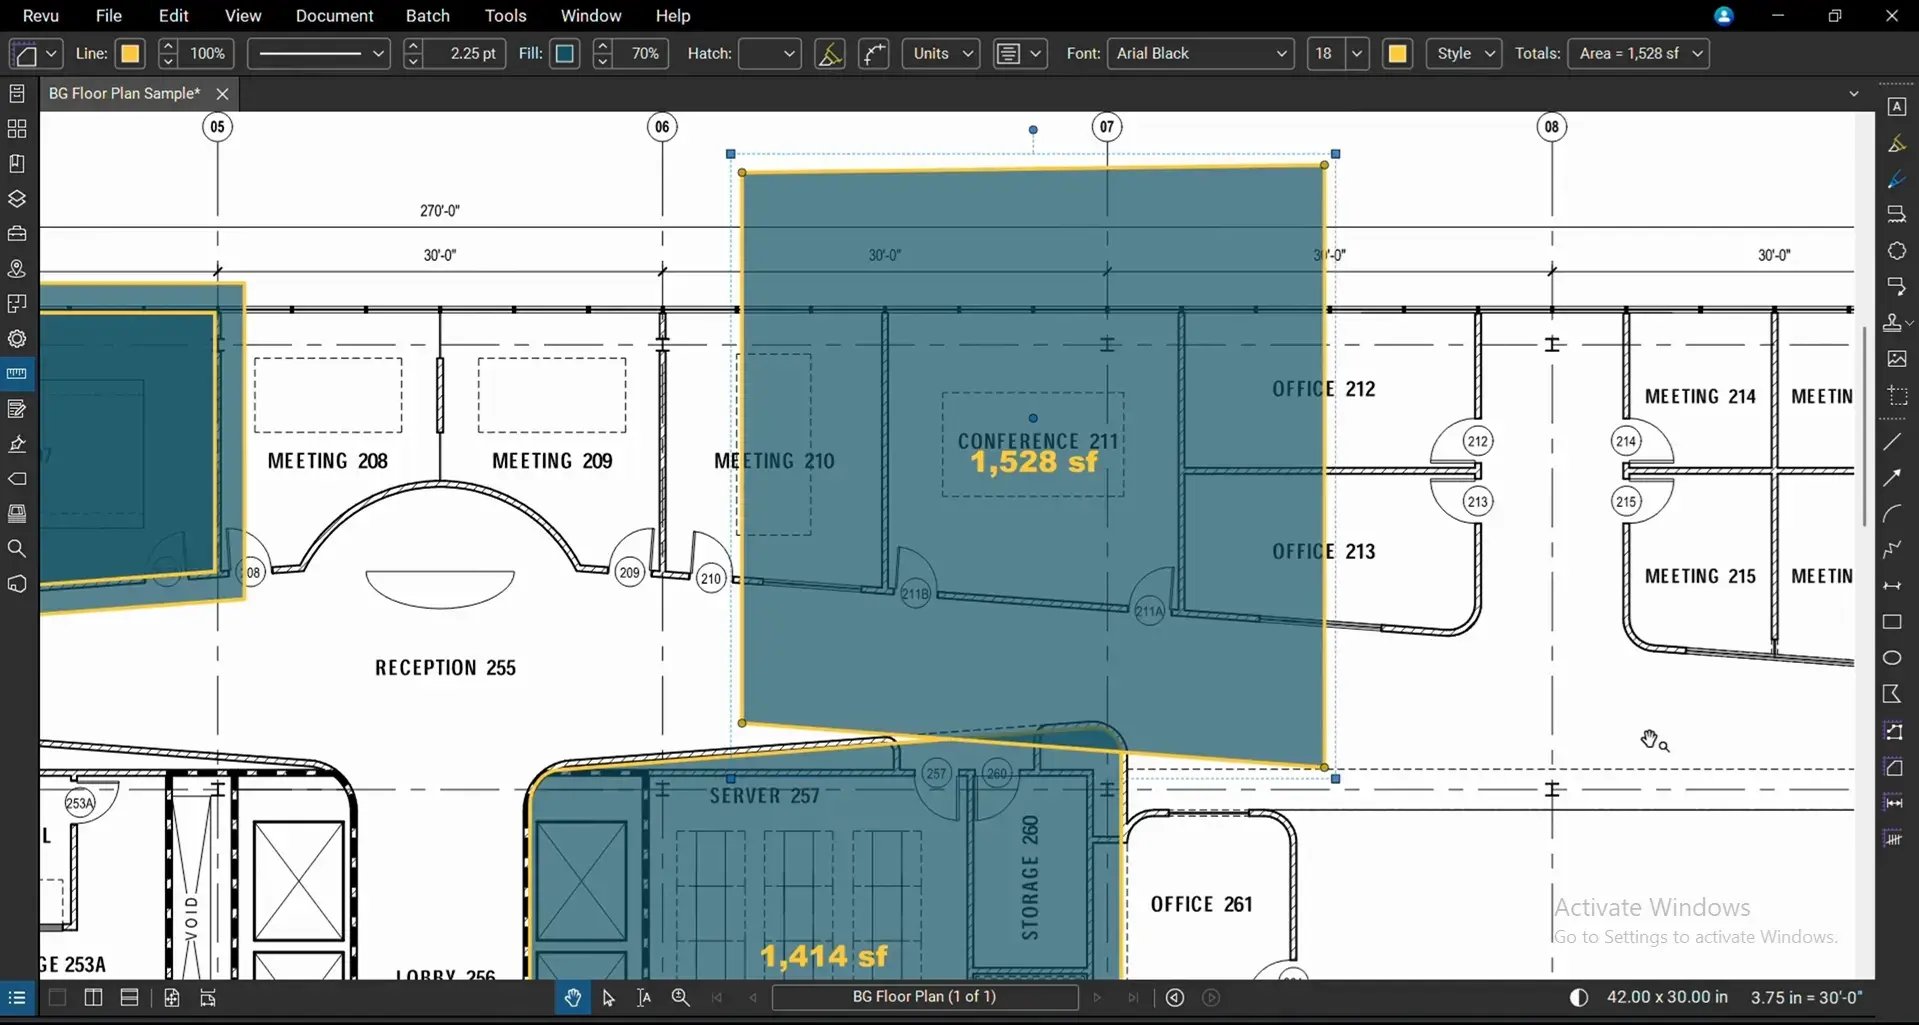
So you can use the Replace option when your offset needs to be the new working geometry.
Step 06: Create Additional Offsets
Offsets can also be generated from previously created offset markups.
For example:
- Go to the Offset option again.
- Select the newly created offset as a parent markup.
- Generate another inset or outset offset using a different distance.
Step 07: Convert an Offset into Another Measurement Type
Offset is not limited to creating the same markup type.
You can also generate a completely different measurement or markup during the offset process.
For example:
07 A: Go to Offset.
07 B: Enter an offset distance.
07 C: Select Volume or any other markups or measurements you want as the output type.
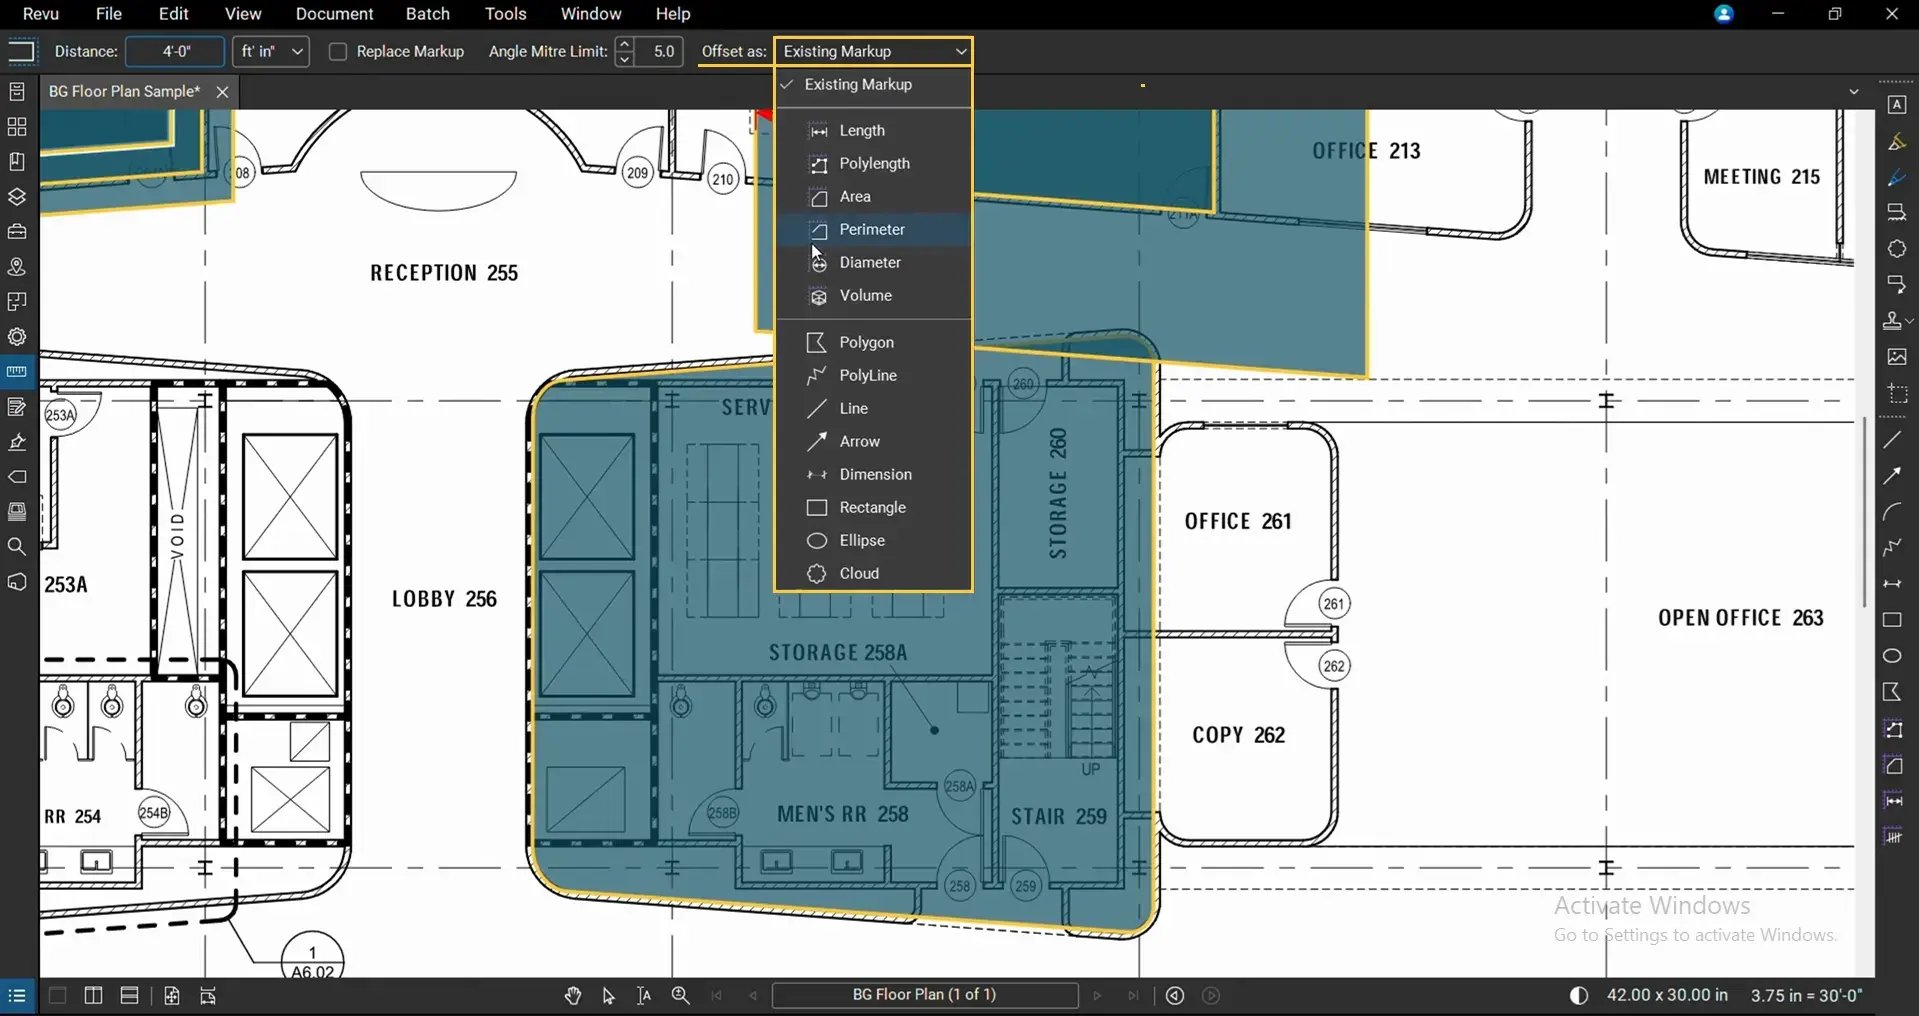
07 D: Click inside or outside the parent markup to generate the offset.
Bluebeam will create the offset as your selected markup or measurement type (Volume measurement in this specific example).
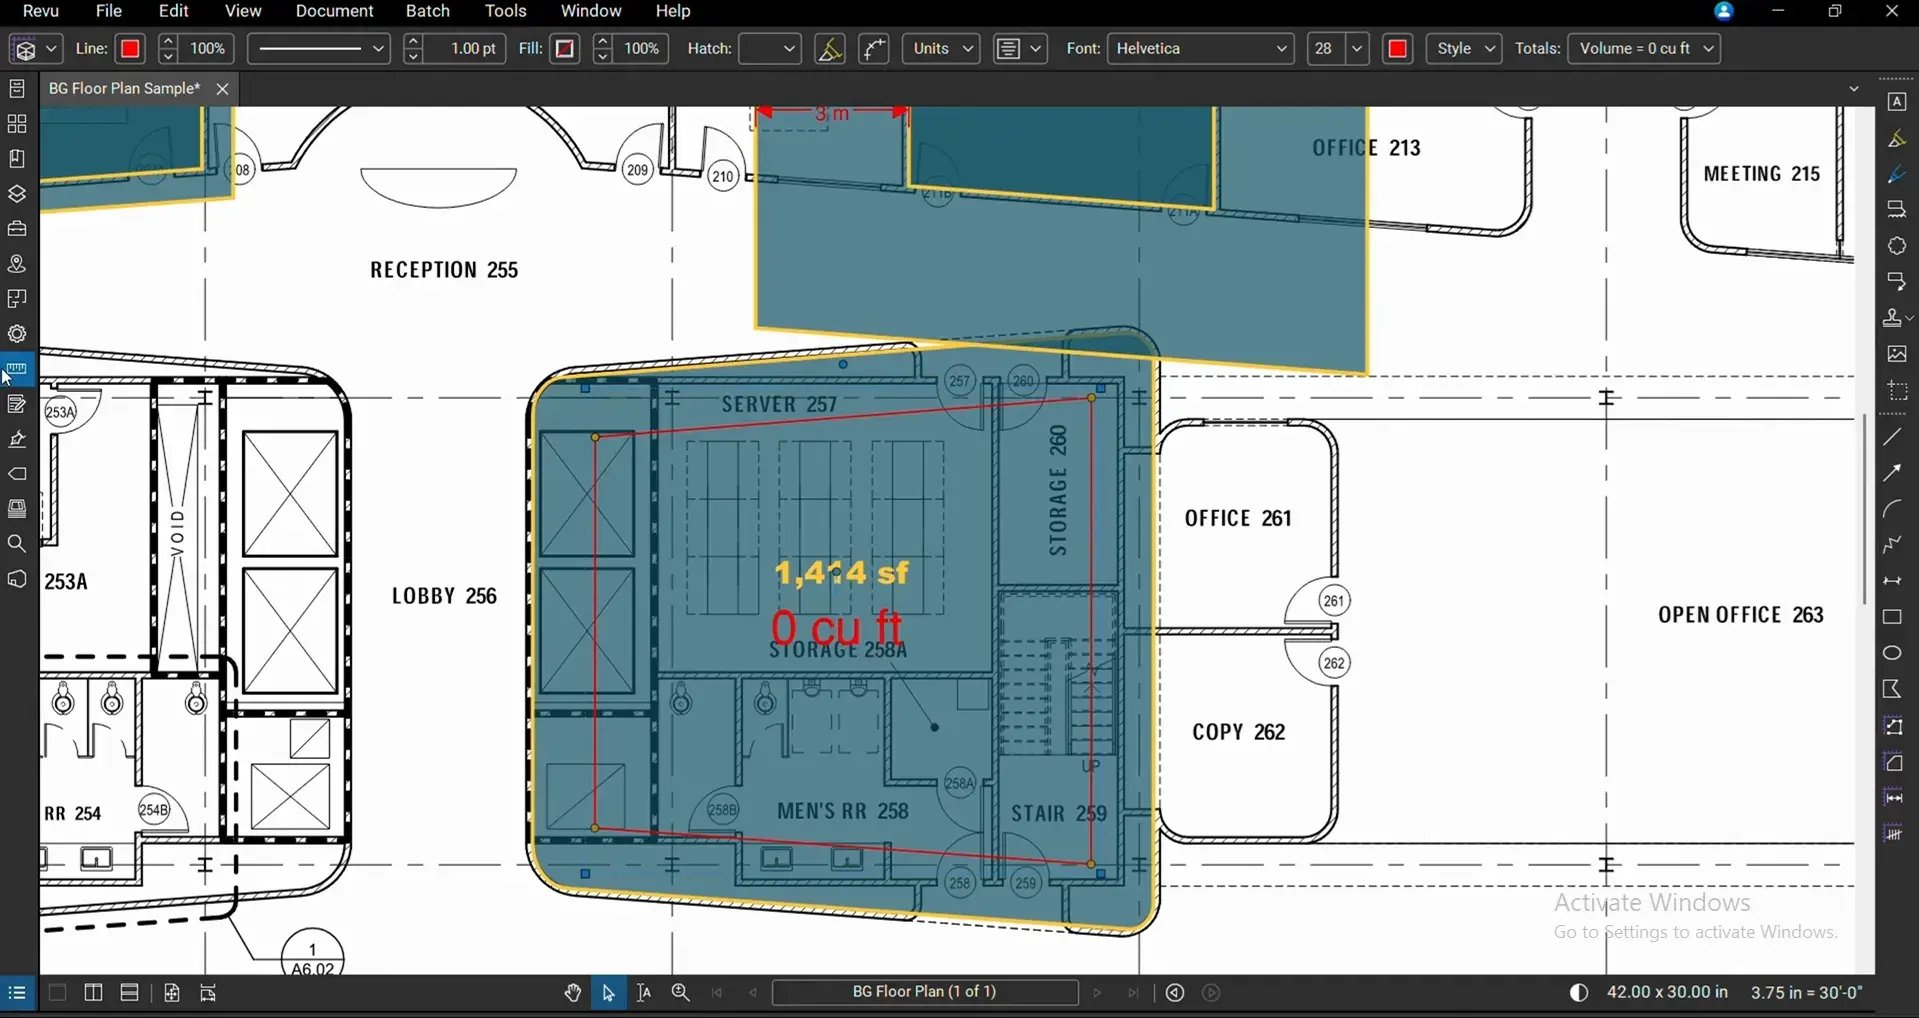
As of now, Bluebeam gives us the options to create Offsets as:
- Existing Markup
- Measurements
- Length
- Polylength
- Area
- Perimeter
- Diameter
- Volume
- Markups
- Polygon
- PolyLine
- Line
- Arrow
- Dimension
- Rectangle
- Ellipse
- Cloud
Remember: Unlike standard offsets, converted offsets do not automatically inherit the original markup's appearance. You can customize the new markup using the Markup Editor just like you do for any other markup or measurement.
Note: If you create a Volume measurement from a polygon or Area, you require a third dimension to get meaningful volume.
To do this:
- Select the offset Volume.
- Open the Measurements panel.
- Enter the required Depth value.
- Press Enter.
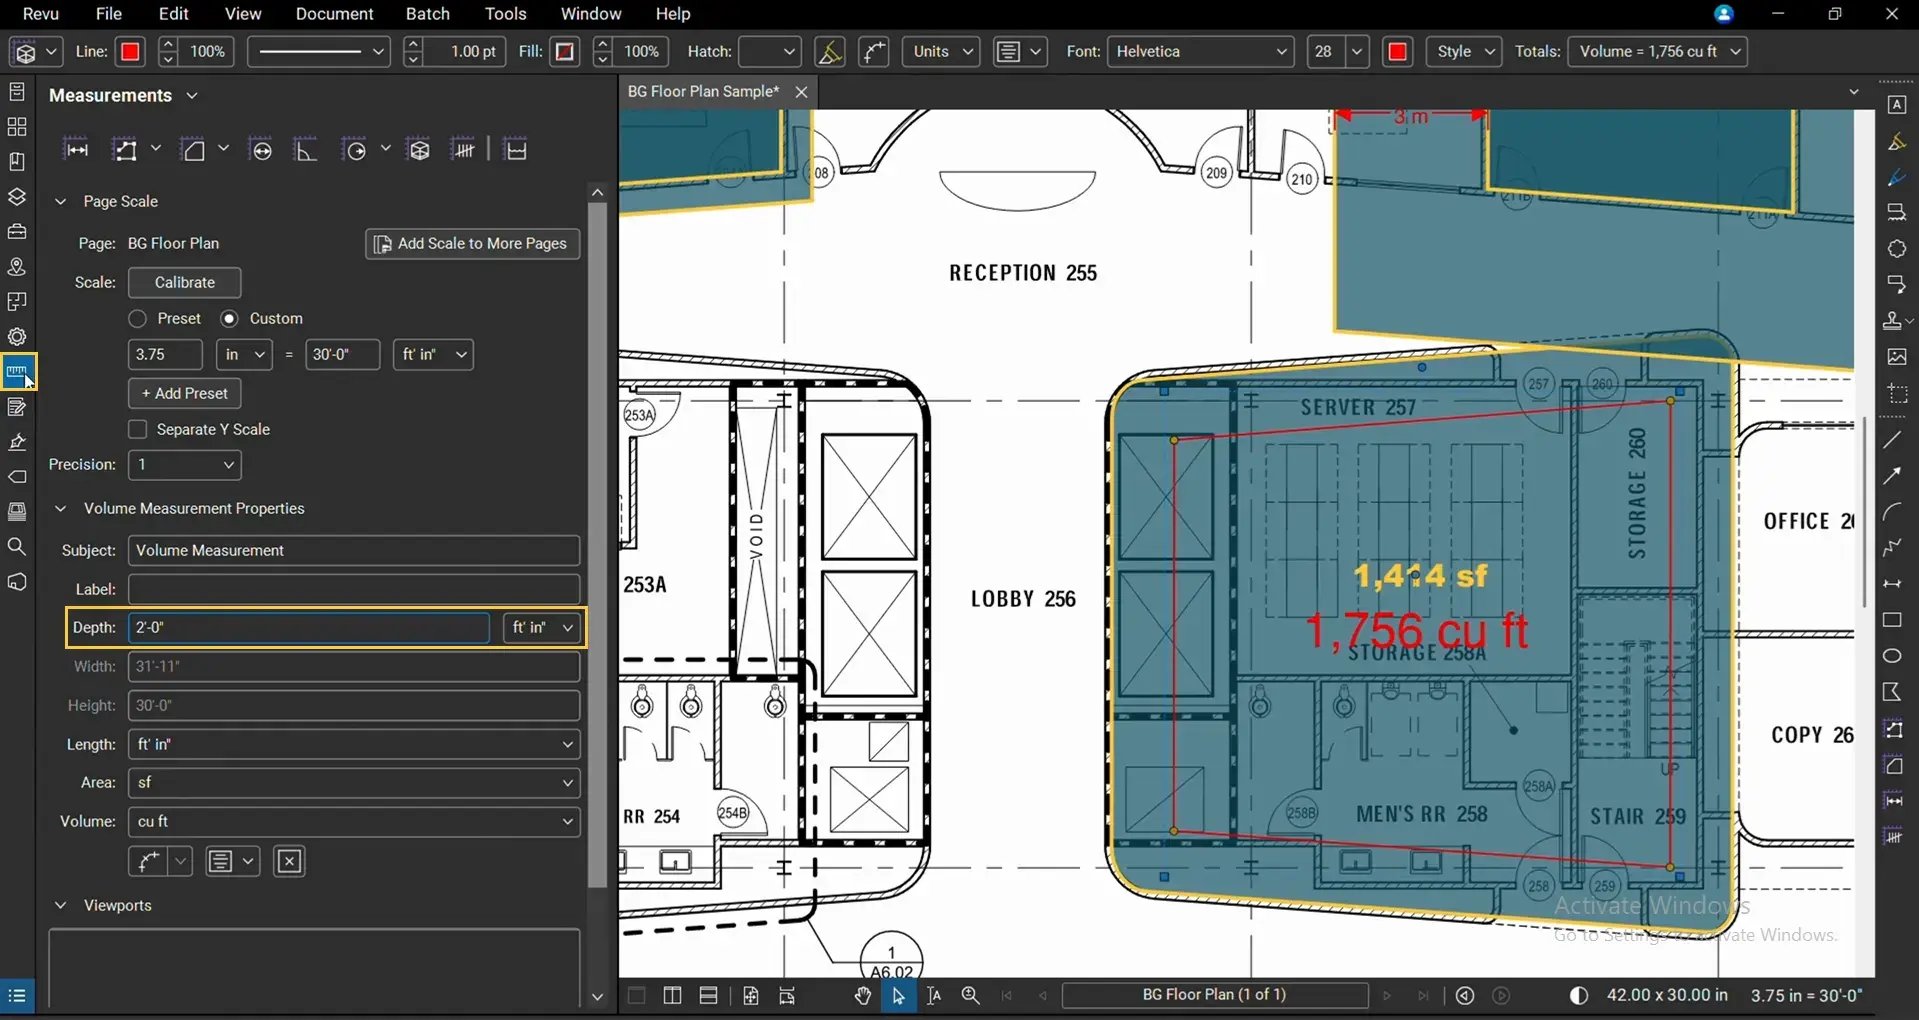
Bluebeam will multiply the Area of your offset region by the depth you enter, and then show the intended volume.
Where Can the Offset Tool Be Used in Construction Workflows?
The Offset Magic Markup tool is useful across a wide range of design and quantity takeoff workflows, including:
- Wall finishes
- Floor finishes
- Soffits
- Cladding zones
- Structural offsets
- Clearance regions
- Design revisions
- Or other construction documentation, reviews, or estimate workflows
Instead of manually redrawing geometry, you can generate precise offset regions in seconds.
Try Bluebeam Max Free for 14 Days
The Offset is one of the three new Magic Markup features available exclusively with Bluebeam Max. Request a 14-day free Bluebeam Max trial to explore other Magic Markups (Covert to and Duplicate As), Smart Review, Smart Overlay, Claude integration, and many more AI-powered workflows designed to speed up your work in Bluebeam Revu.
Level Up Your Bluebeam Experience
The Offset Magic Markup tool brings true CAD-style offset functionality directly into your familiar Revu environment, a feature that was absent and a bottleneck in previous Bluebeam plans. Whenever you need inset or outset boundaries, create an Offset with precise distances. No need to redraw an entire geometry manually.
To discover more Magic Markup tools and Bluebeam Max features, explore our related Bluebeam guides and stay connected with Brighter Graphics, your go-to Bluebeam partner in the UK, Europe, and the Middle East.